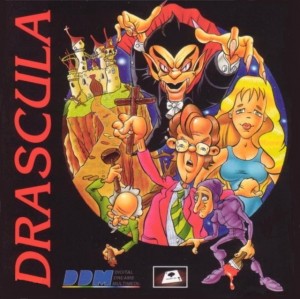
Walkthrough for Drascula: The Vampire Strikes Back
~~~~~~~~~~~~~~~~~~~~~~~~~~~~~~~~~~~~~~
DRASCULA’S CASTLE
~~~~~~~~~~~~~~~~~~~~~~~~~~~~~~~~~~~~~~
INTRO
Watch the intro, as Drascula, with the help of Igor, concocts a devious plan to bring his Frankenstein’s Monster to life.
~~~~~~~~~~~~~~~~~~~~~~~~~~~~~~~~~~~~~~
POSADA BAR
~~~~~~~~~~~~~~~~~~~~~~~~~~~~~~~~~~~~~~
THE BAR
You, John Hacker, arrive at the bar, looking for Count Drascula. You have to finalise some paperwork with Drascula, regarding some land he’s bought. Talk to the Bartender to ask for a room. You also ask about your client, Count Drascula. The Bartender is all too happy to tell you about Drascula’s reputation - he may be a vampire, or he may be an organ dealer. Talk to the Drunkard standing next to the bar, and work through all the dialogue with him. Chat with the Pianist for some small talk.
Now explore the room. Look at yourself. Look at the blackboard on the left side of the bar, to read the menu. Look at the poster on the wall, behind the bar. Look at the bin on the floor, next to the Exit. Look at the skull on top of the piano. When you’re ready, climb up the stairs at the top right. Watch the cut scene.
BILLIE JEAN’S (BJ’S) ROOM
Watch the cut scene. You fall for BJ the moment you see her. She found you unconscious in the corridor, and brought you to her room. But the moment you share a kiss with her… she is kidnapped! By a vampire, no less! You HAVE to save her!
THE BAR
You automatically head back downstairs, to the bar. Chat to the Bartender and tell him about BJ’s kidnapping. He doesn’t really seem bothered by it. Talk to the Drunkard and work through all the dialogue with him. He tells you about Von Braun, who is the only person to have faced Drascula, and survived. Talk to the Pianist and work through all the dialogue. The Pianist is playing the same tune over and over again - it’s the only one he knows, but he hates it, so he wears earplugs so he can’t hear it. Climb the stairs at the back right, up to BJ’s room.
BJ’S ROOM
Explore the room. Look at the mirror on the wall. Look at the bed. Look at the wardrobe. Look at the window. Look at the trunk. Open the trunk to find BJ’s HANDBAG. Go to your Inventory screen (right click), and open the HANDBAG to find a LOT OF MONEY and TWO SHINY COINS. Now leave the room.
THE BAR
Go through the arch on the right, into the Dining Room.
DINING ROOM
Explore the room. Look at the curtain on the wall. Look at the papers on the wall. Look at the cigarette machine on the right. Use a SHINY COIN with the cigarette machine… but nothing comes out. Push the cigarette machine, and take the PACK OF CIGARETTES. At last! When you’re ready, leave the room.
THE BAR
Climb up the stairs on the left to leave the bar.
~~~~~~~~~~~~~~~~~~~~~~~~~~~~~~~~~~~~~~
THE VILLAGE
~~~~~~~~~~~~~~~~~~~~~~~~~~~~~~~~~~~~~~
STREETS
Go up the arch at the top left, to the next street.
Search the bin to find a PACKET OF KLEENIX. Just what you always wanted! Head right, to the centre of town.
Enter Blind Alley on the right.
BLIND ALLEY
Chat to the Blind Man. He will trade you his SICKLE for a LARGE SUM OF MONEY. It just so happens that you have a LOT OF MONEY. Okay then, give him a LOT OF MONEY, and he’ll give you his SICKLE in return. Walk left, to leave Blind Alley.
STREETS
Enter the Suburbs on the left.
SUBURBS
Look at the barrel on the ground, next to the window. Push the barrel to find some BUBBLE GUM. Walk left, to the field.
~~~~~~~~~~~~~~~~~~~~~~~~~~~~~~~~~~~~~~
THE FIELD
~~~~~~~~~~~~~~~~~~~~~~~~~~~~~~~~~~~~~~
FIELD
You’re in a large open field, surrounded by the village, a hut, the cemetery, and a church. Go left to the hut.
~~~~~~~~~~~~~~~~~~~~~~~~~~~~~~~~~~~~~~
PROFESSOR VON BRAUN’S HUT
~~~~~~~~~~~~~~~~~~~~~~~~~~~~~~~~~~~~~~
HUT EXTERIOR
Wow! This is where Professor Von Braun lives - the only person to have faced Count Drascula, and survived. He certainly doesn’t want to be disturbed. However, disturb him you must. Open the door - a voice from inside tells you that Professor Von Braun doesn‘t live here any more. Somehow, I don‘t quite believe that! Now talk to the door and work through the dialogue until he lets you inside.
HUT INTERIOR
Watch the cut scene, as Professor Von Braun tells you that you need to learn special skills in order to defeat Count Drascula. He tests you, by trapping you in a cage, and playing a ‘Nail Scratching The Blackboard’ record. Sadly, you fail the test miserably, and he throws you out.
HUT EXTERIOR
Sneak back into the hut.
HUT INTERIOR
Professor Von Braun is fast asleep in his chair. DON’T talk to him - you don’t want to wake him up, or he will just throw you out again. Look at the SLEEPING BEAUTY BOOK on the shelf, and take the SLEEPING BEAUTY BOOK. Look at the diploma on the wall. Now leave the hut again.
HUT EXTERIOR
Walk left, and return to the open field.
~~~~~~~~~~~~~~~~~~~~~~~~~~~~~~~~~~~~~~
THE FIELD
~~~~~~~~~~~~~~~~~~~~~~~~~~~~~~~~~~~~~~
FIELD
Go to the Cemetery, at the bottom.
~~~~~~~~~~~~~~~~~~~~~~~~~~~~~~~~~~~~~~
CEMETERY
~~~~~~~~~~~~~~~~~~~~~~~~~~~~~~~~~~~~~~
CEMETERY GATES
Look at the gargoyles above the Cemetery gates. Look carefully at the fence on the left, and take the SPIKE from the fence. Look at the pantheon on the left. Look at the plant creeping up the right side of the pantheon, and use your SICKLE to cut the plant, and get some LEAVES. Look at the tombstones and the tomb at the bottom of the screen. Staying inside the cemetery gates, walk right, to the church.
~~~~~~~~~~~~~~~~~~~~~~~~~~~~~~~~~~~~~~
CHURCH
~~~~~~~~~~~~~~~~~~~~~~~~~~~~~~~~~~~~~~
CHURCH EXTERIOR
Look at the church window, to see that it’s boarded up. Use SPIKE with the window to pry the boards off, then climb through the window, into the church.
SMALL ROOM
Explore the room. Look at the candelabrum on the floor. Look at the statue on the shelf. Look at the wardrobe. Open the door in the back wall, and enter the main part of the church.
CHURCH INTERIOR
Look at the CANDLE lying on the ground, next to the chandelier, and take the CANDLE. Look at the altar at the back wall. Go back through the door on the left.
SMALL ROOM
Climb out through the window on the left.
CHURCH EXTERIOR
Walk right, to the cemetery.
~~~~~~~~~~~~~~~~~~~~~~~~~~~~~~~~~~~~~~
CEMETERY
~~~~~~~~~~~~~~~~~~~~~~~~~~~~~~~~~~~~~~
CEMETERY GATES
Head up through the gates, back to the open field.
~~~~~~~~~~~~~~~~~~~~~~~~~~~~~~~~~~~~~~
THE FIELD
~~~~~~~~~~~~~~~~~~~~~~~~~~~~~~~~~~~~~~
FIELD
Walk up to the village.
~~~~~~~~~~~~~~~~~~~~~~~~~~~~~~~~~~~~~~
THE VILLAGE
~~~~~~~~~~~~~~~~~~~~~~~~~~~~~~~~~~~~~~
STREETS
Walk right, so you’re in the centre of town.
Walk up towards the Lodgings, at the top of the screen.
Enter Posada Bar.
~~~~~~~~~~~~~~~~~~~~~~~~~~~~~~~~~~~~~~
POSADA BAR
~~~~~~~~~~~~~~~~~~~~~~~~~~~~~~~~~~~~~~
THE BAR
Give SLEEPING BEAUTY BOOK to the Pianist. He’s extremely relieved that he can finally play some different music, and gives you his EARPLUGS since he won’t need them anymore. Hmm, these EARPLUGS could come in handy, for passing Professor Von Braun’s test. Let’s try it. Climb the stairs on the left to leave the bar.
~~~~~~~~~~~~~~~~~~~~~~~~~~~~~~~~~~~~~~
THE VILLAGE
~~~~~~~~~~~~~~~~~~~~~~~~~~~~~~~~~~~~~~
STREETS
Walk right, to the centre of town.
Go left to the Suburbs.
SUBURBS
Continue left, to the field.
~~~~~~~~~~~~~~~~~~~~~~~~~~~~~~~~~~~~~~
THE FIELD
~~~~~~~~~~~~~~~~~~~~~~~~~~~~~~~~~~~~~~
FIELD
Go to the hut on the left.
~~~~~~~~~~~~~~~~~~~~~~~~~~~~~~~~~~~~~~
PROFESSOR VON BRAUN’S HUT
~~~~~~~~~~~~~~~~~~~~~~~~~~~~~~~~~~~~~~
HUT EXTERIOR
Enter the hut.
HUT INTERIOR
Professor Van Braun is still fast asleep in his chair. Use the EARPLUGS on yourself. Talk to the Professor to wake him up, and use any dialogue option. He tests you again, and this time, thanks to the EARPLUGS, you pass. Professor Von Braun admits you are ready to face Count Drascula, and to come back to him when you want to take on the evil Count. He gives you back a SHINY COIN as a reward. You automatically leave the hut.
HUT EXTERIOR
Enter the hut again.
HUT INTERIOR
Talk to Professor Von Braun to wake him up, and work through all the dialogue. If he throws you out, simply enter the hut again, and continue where you left off. He gives you a CRUCIFIX, to help you defeat Count Drascula. He also tells you about his special Immunising Brew, and tells you the ingredients to make it.
- Garlic
- Wax
- Nicotine
- Bubble gum
- Paper
- Fernan leaves
He already has the garlic, and you should already have the other things, Talk to him again, using the following dialogue option.
- I have all the ingredients of that brew.
Watch the cut scene, as he makes the brew, and tells you about the secret passage leading to Drascula’s castle. Then he gives you the special brew in the form of a SPECIAL BREW CIGAR (yes, really!), and tells you to leave his hut.
HUT EXTERIOR
Okay, you have the SPECIAL BREW CIGAR now, so you’re ready to face Drascula. Walk left, to the field.
~~~~~~~~~~~~~~~~~~~~~~~~~~~~~~~~~~~~~~
THE FIELD
~~~~~~~~~~~~~~~~~~~~~~~~~~~~~~~~~~~~~~
FIELD
Walk down to the cemetery at the bottom of the screen.
~~~~~~~~~~~~~~~~~~~~~~~~~~~~~~~~~~~~~~
CEMETERY
~~~~~~~~~~~~~~~~~~~~~~~~~~~~~~~~~~~~~~
CEMETERY GATES
Inside the cemetery gates, walk right, to the church.
~~~~~~~~~~~~~~~~~~~~~~~~~~~~~~~~~~~~~~
CHURCH
~~~~~~~~~~~~~~~~~~~~~~~~~~~~~~~~~~~~~~
CHURCH EXTERIOR
Climb through the window, into the church.
SMALL ROOM
Open the door in the back wall, and enter the main part of the church.
CHURCH INTERIOR
Go through the door on the right (click on the bottom of the door), so you are back outside again.
WELL
Hmm, there’s a large well here. Didn’t Professor Von Braun mention something about a well? Climb into the well.
~~~~~~~~~~~~~~~~~~~~~~~~~~~~~~~~~~~~~~
UNDERGROUND CAVERN
~~~~~~~~~~~~~~~~~~~~~~~~~~~~~~~~~~~~~~
CAVERN
Who’d have thought there would be an underground cavern hidden under the well? Head right, to the next screen.
Uh-oh… there’s a vampire here. But he’s no match for you. Simply use your WOODEN CRUCIFIX (which has mysteriously appeared in your Inventory) on him, to destroy him. You automatically continue right, to the next screen, and climb out of the well next to Drascula‘s castle.
~~~~~~~~~~~~~~~~~~~~~~~~~~~~~~~~~~~~~~
DRASCULA’S CASTLE
~~~~~~~~~~~~~~~~~~~~~~~~~~~~~~~~~~~~~~
GROUNDS
Look at the well next to you - you just climbed out of that well. Take the ROPE from the well. Look at both doors on the left, and try to open the smaller door - it’s locked. Maybe there’s a key somewhere nearby? Walk up to the tree at the top of the screen.
MAGPIE TREE
There’s a magpie perched on a tree branch - look at the magpie. Try to take the KEY from the nest, but you are afraid the magpie will attack you. You need to distract it. Throw your SHINY COIN at the magpie, then take the KEY from the magpie’s nest. Walk back down to the castle grounds.
GROUNDS
Use KEY to unlock the smaller door on the left. Enter through the smaller door, into the castle.
BALLROOM
You find yourself in the Ballroom. Looks like there’s been a party here. Explore the room if you like, but you can’t do anything here. When you’re ready, open the door on the left, and enter the Grand Hallway.
GRAND HALLWAY
Open the door on the left, and enter the Study.
STUDY
Explore the Study if you like. Talk to Igor and work through all the dialogue. It seems he’s having trouble with his tax return form, because he can’t see very well. He thinks you are the cleaner, and asks you to clean up the Ballroom. Try to take the WIG from the desk, but Igor stops you. When you’re ready, leave the Study.
GRAND HALLWAY
Climb up the stairs, to the Upper Hallway.
UPPER HALLWAY
Look at the giant picture of Drascula on the wall. There is a set of 6 doors here, and then a set of 2 doors further up. From the set of 6 doors, go through Door #2, into the Kitchen.
KITCHEN
Look at the saucepan. Look at the oven. Look at the drawers. Look at the bin. Look at the door on the right. Look at the shield above the door. Open the door on the right, and enter the Pantry.
PANTRY
Look at the green cupboard on the wall. Look at the things on the shelf on the left. Look at the fridge. Look at the still-life picture. You can’t do anything here at the moment, so when you’re ready, leave the Pantry.
KITCHEN
Go through arch on the left, to return to the upper-hallway.
UPPER HALLWAY
From the set of 6 doors, open Door #5. Enter through the door.
LIVING ROOM
It’s pitch black in here. You can’t see a thing. Just leave the room.
UPPER HALLWAY
From the set of 2 doors, go through the door on the left, into the Library.
LIBRARY
Open the cupboard next to the door, to find a STAKE. That will come in handy! Now enter the cupboard, and you find a Secret Lab.
SECRET LAB
Look at the jars of brains on the shelf, and take a BRAIN IN A JAR. Take the LUBRICANT from the top shelf. Take the CLOAK from the coat stand. Now leave the Lab.
LIBRARY
Close the cupboard. Look at the torch on the wall, try to take the torch, and push the torch. A secret doorway is revealed. Go through the secret doorway, into a secret passage.
SECRET PASSAGE
Follow the secret passage right, until you reach the end. Notice the markings on the wall every so often, showing how many kilometres you’ve walked.
Look at the poster, to read the ‘Closed For Repairs’ message. The secret passage to the tower is closed, and you have to use the main entrance now. Aarggh!
Head left, and return to the Library.
LIBRARY
Leave the Library.
UPPER HALLWAY
Turn your attention to the set of 6 doors again. Enter Door #2, into the Kitchen.
KITCHEN
You can’t do anything in the Kitchen. Go through the door on the right, into the Pantry.
PANTRY
If you haven’t done so yet, try to open the green cupboard on the wall. The hinges are all rusty. But that’s not a problem for you now. Use the LUBRICANT you found, on the hinges, to oil them. Now open the green cupboard, to find a BAG OF FLOUR. Leave the Pantry.
KITCHEN
Go through arch on the left, to leave the Kitchen.
UPPER HALLWAY
Now, if you remember, Igor told you to clean up the Ballroom. Let’s head back there, now. Climb down the stairs to the Grand Hallway.
GRAND HALLWAY
Go through door on the right, into the Ballroom.
BALLROOM
Close the door on the right. It can be tricky to find the hotspot, but keep trying, until the door is closed. Now look at the table on the right, and take the DRASKIS. Watch the cut scene, as Igor decides he wants some supper. Head through the arch on the left, back to the Grand Hallway.
GRAND HALLWAY
Go through the door on the left, into the Study.
STUDY
Igor has gone for his supper, so the Study is empty now. Take the WIG from the desk. Unfortunately, Igor comes back, because he forgot to lock the door… so he unwittingly locks you inside! How are you going to escape? Maybe you could disguise yourself as his Master, and trick him into letting you out. Use the CLOAK on yourself, as Igor thinks you are indeed his Master, and lets you out. Phew!
GRAND HALLWAY
Igor has given you the LIVING ROOM KEY, so you can watch cartoons in the morning, without waking him up. Climb up the stairs to the Upper Hallway.
UPPER HALLWAY
Look at the set of 6 doors. Try to open Door #1, but it’s locked. Use LIVING ROOM KEY on Door #1 to unlock it. Now enter through Door #1, into the Living Room.
LIVING ROOM
Explore the room if you like. Take the AXE from the wall, then leave the room.
UPPER HALLWAY
Climb down the stairs, to the Grand Hallway.
GRAND HALLWAY
Go through door on the right, into the Ballroom.
BALLROOM
Open door on the right, and head out to the castle grounds.
GROUNDS
Walk up to the tree at the top of the screen.
MAGPIE TREE
Use AXE with the tree branch, to chop it off. Walk back down to the castle grounds.
GROUNDS
In your Inventory, combine the BRANCH with your ROPE, then use BRANCH & ROPE with the tower at the top right. You use it as a grappling hook, and climb up into the tower.
~~~~~~~~~~~~~~~~~~~~~~~~~~~~~~~~~~~~~~
CASTLE TOWERS
~~~~~~~~~~~~~~~~~~~~~~~~~~~~~~~~~~~~~~
THE TOWERS
Enter Tower 1, at the bottom left.
TOWER 1
Climb down through the trapdoor.
Look at the indifibulator on the left - push the On\Off switch, but there’s no power. Look at Fruskynstein. He’s not moving. Give BRAIN IN A JAR to Fruskynstein. He’s still not moving. There’s nothing else you can do here at the moment, so when you’re ready, climb back up the stairs.
Go through either door, to head back outside.
THE TOWERS
Enter Tower 2, at the bottom right.
TOWER 2
Climb down through the trapdoor.
Look at the skeleton on the wall, talk to the skeleton and work through all the dialogue with him. Take the leg BONE from the skeleton. Look at the wooden door - BJ is trapped behind the door. Work through all the dialogue with BJ - she gives you her HAIRPIN. Use the HAIRPIN with the door lock (not the door itself), to pick the lock. Unfortunately, the HAIRPIN breaks. Aarggh! You’ll have to find another way to get BJ out of there. When you’re ready, climb back up the stairs on the left.
Go through the arch on the left, to go back outside.
THE TOWERS
Enter Tower 3, at the top left.
TOWER 3
You come face to face with a… a werewolf! EEK! But this werewolf turns out to be rather philosophical. Talk to him and work through all the dialogue with him. He claims to be a vegetarian, but you’re not entirely convinced. Let’s test him. Throw the skeleton leg out the window - he instinctively jumps out the window after it. So much for being a vegetarian! Explore the room if you like, and when you’re ready, head through either door to return outside.
THE TOWERS
Enter Tower 4, at the back right.
TOWER 4
Climb down through the trapdoor.
Look at the camera. Look at the detector. Look at the door, and notice how it sets the detector off. Look at the SCREWS to the right of the door - they haven’t been tightened properly. Take the SCREWS. Head back up the stairs.
Leave the room through the door on the right.
THE TOWERS
Enter Tower 1, at the bottom left.
TOWER 1
Climb down through the trapdoor.
Fruskynstein is still not moving. Maybe there’s something missing. Did the original Frankenstein monster not have bolts in his neck? But Fruskynstein doesn’t have any bolts. Well, that’s easily fixed. Use the SCREWS with Fruskynstein. Still nothing. Maybe a jolt of electricity would help. Look at the indifibulator on the left. If you haven’t done so already, plug it into the wall. Now push the On\Off switch. That’s better! He’s alive… ALIVE!!! But he’s gone for a walk-about, crashing through the wall on the left. You automatically follow him.
TOWER 4
You find yourself back in Tower 4. Except this time, you are on the other side of the alarmed door. Walk up, into Drascula’s room.
DRASCULA’S ROOM
So this is where Drascula sleeps? Time to put an end to his evil reign, once and for all. Look at the coffin, open the coffin, and… it’s empty! Damn! It’s a trap!
TORTURE CHAMBER
Watch the cut scene with Drascula, as he tells you his cunning plan. Work through all the dialogue with him. When he grants you a last wish, you use the opportunity to smoke the SPECIAL BREW CIGAR, which will protect you against Drascula’s. Now watch the cut scene, as he tortures you. So much for the SPECIAL BREW CIGAR!!! Eventually, he leaves you tied up on the table, with a pendulum swinging over you, getting lower and lower. Yikes!
But you’re a hero, and you’re not going to take things lying down! Strange as it sounds, you have to take your hands, in order to get HANDCUFFED HANDS. Now use HANDCUFFED HANDS with the swinging pendulum, to cut your shackles and free yourself. Now look at the secret door on the left, and try to open it, but you can’t. Don’t worry, push the torch next to the door instead. Now, simply walk through the door, to find yourself in BJ’s room.
~~~~~~~~~~~~~~~~~~~~~~~~~~~~~~~~~~~~~~
POSADA BAR
~~~~~~~~~~~~~~~~~~~~~~~~~~~~~~~~~~~~~~
BJ’S ROOM
BJ’s here, but she’s handcuffed to the bed. Look at BJ, then watch the cut scene with Professor Von Braun. He tells you that the SPECIAL BREW CIGAR may not work after all, because the alcohol cancels out the effects of the anti-vampire immunisation. So THAT’S why the cigar didn’t work! Well, it’s a bit late now! Climb down the stairs on the left, to leave the room.
THE BAR
Everyone is here, watching the football game - even
Drascula. Try talking to them if you want, but they are so engrossed in the game, they just ignore you. Try to use your CRUCIFIX on Drascula, but again, he’s so engrossed in the football game, he just ignores you completely. Let’s try something else, then. Push the piano (to play it), and the Bartender complains that you’re spoiling the game. Talk to the Bartender, and work through all the dialogue with him. Eventually, he gives you a SCOTCH ON THE ROCKS. Now give SCOTCH ON THE ROCKS to Drascula (remember what Professor Von Braun said about the SPECIAL BREW CIGAR), then use your CRUCIFIX with Drascula. Success! Drascula is gone forever! You automatically head upstairs, to free BJ.
BJ’S ROOM
Watch the cut scene, as you read the Dear John letter. Notice the Fruskynstein-shaped hole in the wardrobe!
Sit back, and enjoy the final cut scene.
The End!
Contributed by
Freaky Hobbit


