


Venator
INTRO
You are Gilbert. You come from a long line of distinguished ghost hunters, otherwise known as Venators. Now you’ve come of age, and it’s time to prove yourself. Uncle Citric has tasked you with hunting a ghost that’s haunting the local cemetery, and sending him back to the Otherworld. The problem is… you’ve never been very good at all that paranormal stuff. How on earth are you gonna deal with THIS ghost? You’ll just have to do the best you can.
FRONT GARDEN
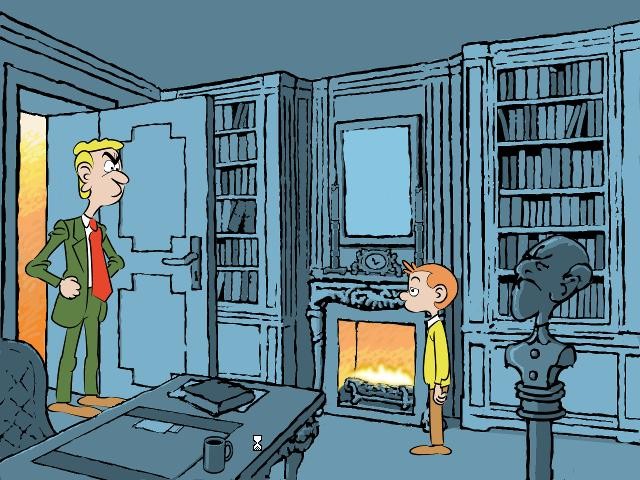
Your father had a special medallion, before he disappeared. Maybe that medallion could help you deal with the ghost. Your father hid it in the library, didn’t he? You just have to get it, without Uncle Citric seeing you.
Look at the lit window to the left of the front door – that’s the lounge. Your Uncle Citric is busy reading a book. Look at hedge to the left of the front door. Notice the BONE peeking out from the hedge? Take the BONE. Search hedge to the right of the front door, and you find your POCKET KNIFE. Look at the window to the right of the front door – it belongs to the library. Maybe you could get back in the house this way? Try to open the window… the latch is broken and rusted. Dang! You need something to help you pry it open. Use your POCKET KNIFE on the library window. Success! You’re in the library.
LIBRARY
Explore the library. Look at the books in the bookcase, and chuckle at the amusing titles. Look at the papers on the desk. Take MATCHBOOK from the desk (it’s right next to the papers). Take the BIG BLUE CUP from the desk. Look at the book on the desk – it’s your dad’s diary. Try to pick up the book. Read the diary to see some amusing entries from your dad. Look at the bookmark to see a reference to Cthulhu. Make sure you look at the cover of the book – you find an old yellowed sheet of PAPER. Intriguing!
Search the desk to find a secret drawer. Examine the drawer to find VOODOO DOLL, and take the VOODOO DOLL. Use your POCKET KNIFE on the VOODOO DOLL. Hmmm, so the VOODOO DOLL controls Uncle Citric? Very interesting! That could be useful! Now use VOODOO DOLL in the fire (hee hee).
Take CANDLE from the candlestick on the mantelpiece above the fire. Use the old yellowed sheet of PAPER with the fire to reveal a hidden message. Unfortunately, the message seems to be in code, and you can’t understand it. In your Inventory, look at the yellowed sheet of PAPER again – the writing looks inverted! Now that’s easy to decode! Use yellowed sheet of PAPER with the mirror above the fire. You can now read the message.
– At midnight, the old soldier will revel the truth by removing his jacket.
What could that mean? Well, if you look at the bust of your great-grandfather, he’s wearing a uniform. Notice the 2 buttons on the bust. The buttons don’t seem to do anything. Hmm, tricky! Look at the clock on the mantelpiece above the fire – it doesn’t keep time anymore. Change the hour on the clock to show 12. Now push both buttons on the bust of your great-grandfather to open up a secret mechanism in the bust. Now search the newly-revealed hiding place in the bust, to find your father’s MEDALLION. Watch the cut scene. Work through all the dialogue with the MEDALLION. Well, THAT was interesting. When you’re ready, walk right to leave the library.
FRONT GARDEN
There’s nothing else to do in the garden. Walk left to the Map Screen.
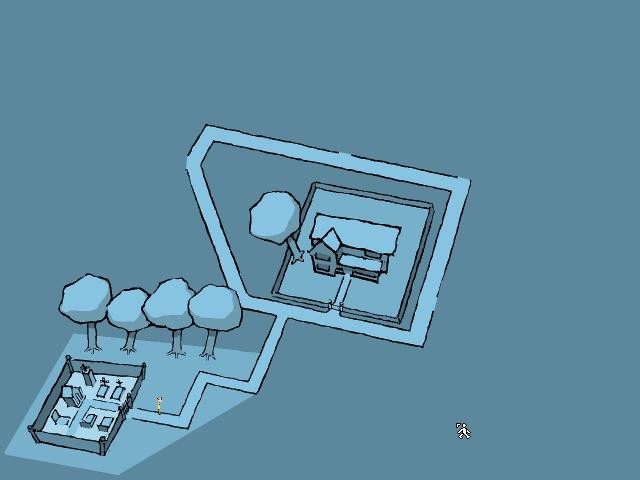
MAP SCREEN
Make your way to the Old Cemetery.
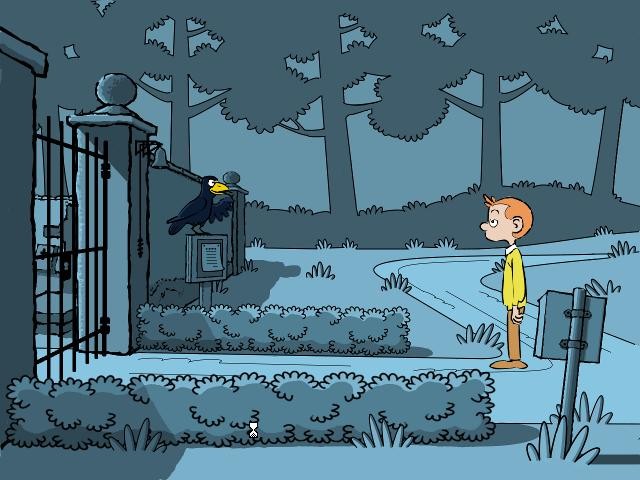
OLD CEMETERY
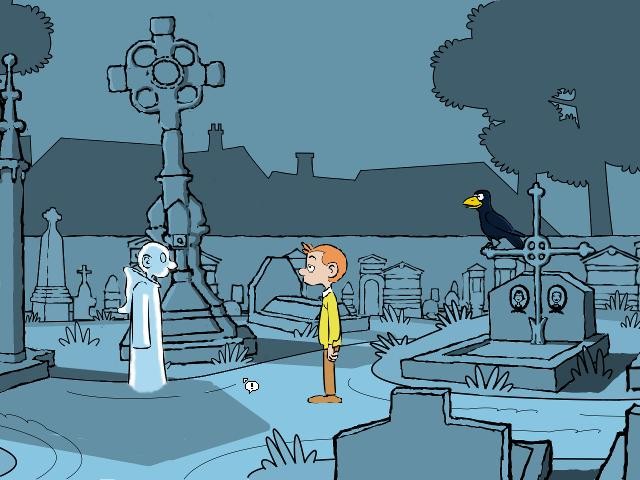
You are greeted by a raven outside the cemetery gates. Work through the dialogue with the raven. He tells you that the key to the cemetery gate is in the mailbox… and the key to the mailbox is in the Gravedigger’s pocket! Well, that’s not very handy! Look at the mailbox – you can see the key through the mail slot. Look at the schedule on the bulletin board to see the opening hours of the cemetery – it’s closed right now! Ring the bell next to the gate – that is LOUD! Now leave the Cemetery.
MAP SCREEN
Immediately return to the Cemetery.
OLD CEMETERY
The raven has moved to the wall now. Take SCHEDULE from the bulletin board. Look at the bell to see that it’s made up of a metal stalk and a hook. Stuff the SCHEDULE into the bell to silence it. Now use the bell to get METAL STALK WITH A HOOK. Use METAL STALK WITH A HOOK with the mailbox to fish out the GATE KEY. Success! Use GATE KEY with the cemetery gate. You automatically enter the cemetery grounds.
Explore the cemetery. Look at all the tombs and the photos for some amusing dialogue. Walk left to the giant cross tomb, and ring the bell in this tomb. The Spirit Guard reluctantly greets you – talk to him and work through all the dialogue with him. He gives you the ability to talk to the dead – very useful for a ghost hunter such as yourself!
Let’s try out your new power, then. Click on Mr & Mrs Thingummy’s photo on their tomb to talk to their, then work through all the dialogue with them. Mr Thingummy laughs so hard at his own joke, that he literally falls to pieces, and Mrs Thingummy has to put him back together again, lol. Talk to Mrs Gussip’s tomb and work through all the dialogue with her.
When you’re ready, return left to the giant cross tomb and ring the bell to summon the Spirit Guard again. Talk to the Spirit Guard and work through all the dialogue. He tells you that there is a restless spirit in the mausoleum, and that you need to find out the name of this restless spirit. Looks like you have no choice then – you MUST enter that spooky-looking mausoleum. When you’re ready, click on the door of the mausoleum, then enter it.
Explore the mausoleum. Look at the coffins and the plates above the coffins to learn that Greedy Skinflint and his father Elias Skinflint rest here. Look at the 3 statues. That’s all you can do here for now, so leave the mausoleum.
Ring the bell on the giant cross tomb to summon the Spirit Guard again. As before, talk to the Spirit Guard and work through all the dialogue. You learn that Greedy Skinflint is the ghost that’s been scaring people. In order to stop him, you need to learn more about his past, which means talking to the people that knew him. Then you need to bind him with a spell. Talk to Mr & Mrs Thingummy again and work through all the dialogue. Talk to Miss Gussip and work through all the dialogue. When you’re ready, leave the cemetery.
Outside the cemetery, walk right to the Map Screen.
MAP SCREEN
A new location has appeared – River House. Go there now.
RIVER HOUSE
Explore the area. Look at the house and look at the window. Now open the door and enter the house.
Look at the wine bottles on the window inside the house, and also on the floor. 1947 must have been an important year for wine. Wait a minute… is that growling you hear? Yikes! That ghost dog doesn’t look very friendly! Offer him the BONE, but he doesn’t want it. Maybe the ghost dog would rather have a ghost bone? But where could you find a ghost bone? Leave the house.
Walk right to the Map Screen.
MAP SCREEN
Go back to the Old Cemetery.
OLD CEMETERY
Walk left through the gates, into the cemetery grounds.
Talk to Mr Thingummy, and ask him to tell a joke. As before, he falls to pieces, and you automatically take his GHOST BONE. Leave the cemetery again.
Walk right to return to the Map Screen.
MAP SCREEN
Go to the River House.
RIVER HOUSE
Head up into the house.
Walk left a few steps, and give GHOST BONE to the ghost dog. The ghost dog takes the bone… and then disappears. Pick up the GHOST BONE again. Now let’s explore the room. Look at the box in the corner, and take NEWSPAPER from the box. Look at NEWSPAPER in your Inventory to learn where Greedy’s new office is located. Look at the chalkboard on the wall, and take PIECE OF CHALK from the chalkboard. Now open door on the left, and go through the door, into the next room.
This must be Greedy Skinflint’s OLD office. Let’s have a look around. Close the door, and you’ll see a coat hanging up on the wall next to the door. Search the coat, and take BOTTLE OF WHISKY from the inside pocket.
Look at window in the back wall. Search the window – it’s too high up for you to see, so you have to feel your way along the window. It’s very dusty, and it makes your hands dirty. But you discover something else up there! Take rag from the window – a RAG DOLL falls down onto the desk. Take the RAG DOLL from the desk.
Look at the various papers on the back wall. Look at the picture on the back wall – could this be Mary, John, and Greedy, when they were teenagers? Take the OLD PICTURE from the wall. Look at OLD PICTURE in your Inventory to learn that it was taken near the Old Oak.
Look at calendar on the wall. Look at the desk, and look at drawers in the desk. Open the large drawer, and look in the large drawer to see the old folders. Now open & close the large drawer a few times, until a sheet of PAPER falls to the floor. Pick up the sheet of PAPER, then look at the sheet of PAPER in your Inventory to learn that it’s a CONTRACT between Greedy Skinflint and his father.
Now look at the safe on the left – you need a key and a code to open it. Take SPANNER from under the safe.
That’s all you can do here at the moment. Leave the old office, and make your way right, back to the Map Screen.
MAP SCREEN
2 new locations have appeared on the Map Screen. Head up to the Old Oak.
OLD OAK
Talk to Max, your neighbour, and work through all the dialogue. You learn more about what a nasty piece of work Greedy Skinflint really is. Now look at the sign in the ground – it’s warning people against defacing the old oak tree, but it’s obviously not very successful, since several people have carved their initials into the tree! Look at the old oak tree – it’s the oldest oak in the region! There’s nothing else to do here at the moment, so return right to the Map Screen.
MAP SCREEN
Go to Elias’ Office.
ELIAS’ OFFICE
Look at the window. Look at the nameplate. Look at the mailbox. Try to open the mailbox, but it’s locked. Try to open the front door, but that’s locked as well. Dang! There’s nothing you can do here at the moment, so just return left to the Map Screen.
MAP SCREEN
Go to the Old Cemetery.
OLD CEMETERY
Walk left through the gate, into the cemetery grounds.
Walk over to Mr Thingummy’s tomb, and talk to him to return his GHOST BONE. It’s nice to be whole again! Walk left a few steps, open door to the vault, and enter the vault.
Inside the vault, walk left a few steps, and look at the HOURGLASS that the statue on the left is holding. Try to take the HOURGLASS, but it’s attached to the statue with a nut. Use your SPANNER with the HOURGLASS to detach it – you automatically take the HOURGLASS and the NUT. Now turn your attention to the middle statue, and place the HOURGLASS in the empty hand of this middle statue. A secret compartment in the back wall opens up. Look at the newly-revealed hole to discover a KEY, and take the KEY. Look at the KEY in your Inventory. You realise it’s a SAFE KEY. Brilliant! Have you seen any locked safes recently? Walk right to leave the vault. Uh-oh… a metallic wall blocks the exit. You need to find a way out of here! Walk back to the middle statue, and place the NUT into the secret hole in the wall. Take the HOURGLASS from the statue to close the secret hole again. Now walk right – that’s better! The exit has opened again! Walk right out of the vault, back to the cemetery.
Head right, and make your way back to the Map Screen.
MAP SCREEN
Go up to the River House.
RIVER HOUSE
Walk up, into the house.
Go left into the old office.
Look at the safe in the old office, look at the cursor dials, and look at the keyhole. Use the cursor dials – it needs a 4-digit code to unlock. Does any 4 digits spring to mind? What about the year on the wine bottles in the next room? Set the cursor dials to 1947. Now use SAFE KEY in the keyhole at bottom of the safe. Now turn the handle. Voila. The safe opens! The safe is empty, except for one thing. Take KEYRING from the safe. Leave the old office, and make your way back to the Map Screen.
MAP SCREEN
Go to Elias’ Office.
ELIAS’ OFFICE
Use KEYRING on the mailbox to unlock it. Take LETTERS from inside the mailbox. There’s also a keypad inside the mailbox. Try to use the keypad if you like. It requires a 4-digit code, but you have no idea what the code is, so it’s best to leave it for now. Use KEYRING to unlock the front door. Now open the front door, and enter the office.
Inside the office, there are 2 armoured shutters on the left, each with their own Control Box. The Control Box on the right has a green light. Use KEYRING on this Control Box to open it. Look at the counter if you like.
Now let’s concentrate on the armoured shutter on the left. Look at the Control Box on the left – there’s no light on this one. Try to use KEYRING on this Control Box, but it doesn’t work. Okay, there must be another way to open it. Look at Greedy Skinflint’s bust on the right. Look at the letters on the pedestal – M, D, C, L, X, I, V. Those are Roman Numerals. You can translate it as follows.
– MD = 1500
– C = 100
– LX = 60
– IV = 4
If you add those numbers together, you get 1664. But what could it mean? Leave the office, and go back outside.
Look at the keypad in the mailbox, and enter 1664> into the keypad. Enter through the door, into the office again.
Notice that the Control Box on the left now has a green light showing. That’s a good sign. Use KEYRING with Control Box on the left to open it, revealing a door. Use KEYRING on the door to open it. Now go through the door, to the new office.
SAVE YOUR GAME HERE. Explore the office. Remember Max, your neighbour, told you about Greedy’s dodgy dealings? Maybe you could find some evidence here. Lift up cushion on the chair, then take the SMALL KEY from under the cushion. Use SMALL KEY in the top drawer in the desk to open it. Take the CASKET from the drawer and place it on the desk. Look at the casket to see that it has some moveable parts. Maybe there’s a hidden compartment. Try to open the casket, to get a close-up view of the lid. Now the aim here, is to get every square highlighted. This is tricky, but here’s how you do it. Click the tiles in the lid in the following order.
– Middle row, tile on the left
– Middle row, tile on the right
– Middle row, tile in the middle
– Top row, tile on the left
– Top row, tile on the right
– Bottom row, tile on the left
– Bottom row, tile on the right
You should here a click. Exit the close-up of the lid, then open the casket. You automatically take the TINY KEY that was locked inside.
Use SMALL KEY in both doors of the cabinet to open them. Search through the files and folders in the cabinet – everything is in order.
Look at the bust on the shelf (you may need to close the cabinet door), and try to move it – you discover a tiny keyhole. Use TINY KEY in the bust. The wall next to you slides open, revealing a secret room. Enter this secret room.
Wow! This is bizarre! Inside the secret room, the walls are covered in papers and newspaper articles. Look at some of the articles pinned to the back wall. He even blackmailed his childhood friends, John & Mary. Greedy Skinflint truly is a nasty piece of work! This makes you more determined than every to stop Greedy from haunting the cemetery. Unfortunately, you don’t know much about Binding Spells. Uncle Citric knows a lot about spells, but you can’t rely on him for help, since he wants you to do this on your own. If only you could ‘persuade’ Uncle Citric to help you? When you’re ready, leave this secret room, and make your way back to the Map Screen.
MAP SCREEN
Return to the Old Cemetery.
OLD CEMETERY
Go through the gates, into the cemetery grounds.
Walk left to the giant cross tomb. Look at the ground near the giant cross. This might be a good spot to ‘persuade’ Uncle Citric to help you. Remember that the VOODOO DOLL controls your Uncle. So place VOODOO DOLL on the ground, then pour BOTTLE OF WHISKY onto the VOODOO DOLL. You automatically repeat this, then you hear the doll ‘Hic’. The doll must be drunk, which means that Uncle Citric is also drunk. Talk to the VOODOO DOLL and ask about hunting a ghost. Work through all the dialogue to learn that there are 4 steps to hunting a ghost.
– Step 1. You need to know the offending ghost’s (in this case, Greedy Skinflint)
past identity, as well as having insight into the places he has lived.
– Step 2. Summoning the ghost to steal his spectral essence.
– Step 3. Find spectral puddles, and cast a spell of evocation on each puddle.
– Step 4. Fight the ghost’s anger by resolving the motives for his anger.
After you’re told all 4 Steps, end conversation, then talk to the VOODOO DOLL again. This time, ask about casting magic spells. Work through all the dialogue. You learn that magic spells are written in magic books, and you need to find the appropriate magic book that will help you hunt the ghost. There just so happens to be a magic book for this, back at your home. The title of the book is ‘Magic Pentacles’. When you’ve exhausted all the dialogue, pick up the VOODOO DOLL and leave the cemetery. Make your way back to the Map Screen.
MAP SCREEN
Go back to your Home.
HOME
Climb through window on the right, into the library.
Look at the bookcase on the right, and look for the single ‘Book’. It’s to the left of the bust’s head. Look at the BOOK to see that it’s titled ‘Magic Pentacles’, then take the MAGIC BOOK. Now you just have to find a place where you can use the book. Leave the library, and make your way back to the Map Screen.
MAP SCREEN
Head up to Druid’s Grave.
DRUID’S GRAVE
Examine the grave, and touch the grave to realise that the rock is all wet and cold. Use MAGIC BOOK on the grave, then watch the cut scene as the book tells you to learn 3 spells. Concentrate on the first spell for now. Ask the book about the ‘Capture A Spectral Essence’ spell. Apparently, you need 3 items in order to cast this spell.
– Stone (CHALK)
– A light (MATCHES)
– A vessel (CUP)
You should already have those items, so answer ‘Yes, I do’ when prompted. The book also tells you how to cast the spell, and that the spell must be cast close to the body you wish to bind. Ignore the others spells for now, since you’re not prepared for them. When you’re ready, walk left toleave the area, and go back to the Map Screen.
MAP SCREEN
Go to the Old Cemetery.
OLD CEMETERY
Go left through the gate, into the cemetery grounds.
Walk left to the vault. Open the door, and enter the vault.
This is the place you can cast the Binding Spell. Greedy Skinflint’s coffin is the one on the right. Use PIECE OF CHALK on the ground in front of the coffin to draw a pentacle. Place BIG BLUE CUP inside the pentacle. Place CANDLE inside the pentacle. Light the CANDLE with the MATCHBOOK, then talk to the pentacle to activate the spell, and summon Greedy‘s ghost. Watch the cut scene as you capture Greedy’s SPECTRAL ESSENCE in the BIG BLUE CUP. Leave the vault, and make your way right, all the way back to the Map Screen.
MAP SCREEN
Go to Druid’s Grave.
DRUID’S GRAVE
As before, use MAGIC BOOK on the grave. Ask the book about the ‘Evoke The Past’ spell. You need 4 items for this spell.
– Essence Of The Soul (SPECTRAL ESSENCE IN THE CUP)
– Stone that marks the passage of time (HOURGLASS)
– Light to enlighten the mind (MATCHES)
– Object that was present at each spectral puddle (RAG DOLL, CONTRACT,
PICTURE)
You should already have those items, so answer ‘Yes, I do’ when prompted. The book tells you how to cast the spell. When you’re ready, leave the Druid’s Grave and return to the Map Screen.
MAP SCREEN
Go to the River House.
RIVER HOUSE
Look at the Spectral Essence puddle. Something significant must have happened to Greedy Skinflint here. Talk to the puddle, and command it to turn into a pentacle of evocation. Place RAG DOLL inside the pentacle. Place HOURGLASS inside the pentacle. Place CANDLE inside the pentacle. Light the CANDLE with the MATCHBOOK, then talk to the pentacle to activate the spell. Watch the cut scene with a young Greedy, John, and Mary. They were all best friends back then. What could have happened, to turn Greedy into the mean-spirited ghost you know today? Pick up CANDLE. Pick up HOURGLASS. Pick up RAG DOLL. Walk right to the Map Screen.
MAP SCREEN
Go to the Old Oak.
OLD OAK
Walk left to the old oak tree. Look at the Spectral Essence puddle. Another significant moment in Greedy’s life must have happened here. Talk to the puddle, and command it to turn into a pentacle of evocation. Place OLD PICTURE inside the pentacle. Place HOURGLASS inside the pentacle. Place CANDLE inside the pentacle. Light the CANDLE with the MATCHBOOK, then talk to the pentacle to activate the spell. Watch the cut scene as adult John and Mary declare their love for each other. Greedy overhears them, and feels betrayed. So THAT’S why he became so bitter! Pick up CANDLE. Pick up HOURGLASS. Pick up OLD PICTURE. Walk right to the Map Screen.
MAP SCREEN
Go to Elias’ Office.
ELIAS’ OFFICE
Enter the building.
Look at the Spectral Essence puddle. Another significant moment in Greedy’s life must have happened here. Talk to the puddle, and command it to turn into a pentacle of evocation. Place CONTRACT inside the pentacle. Place HOURGLASS inside the pentacle. Place CANDLE inside the pentacle. Light the CANDLE with the MATCHBOOK, then talk to the pentacle to activate the spell. Watch the cut scene as adult Greedy plots his revenge on everyone, including his friends John & Mary. Pick up CANDLE. Pick up HOURGLASS. Pick up CONTRACT. Leave the building.
That’s all 3 Spectral Essence puddles dealt with now. Walk left to the Map Screen.
MAP SCREEN
Return to Druid’s Grave.
DRUID’S GRAVE
Use MAGIC BOOK on the grave. Ask the book about the ‘Fight A Summoned Ghost’ spell. You need 2 items for this spell.
– Heart Of The Spectral Essence (BIG BLUE CUP)
– Light to enlighten the mind (CANDLE)
You should already have those items, so answer ‘Yes, I do’ when prompted. The book tells you how to cast the spell. It must be cast near the body. Walk left to the Map Screen.
MAP SCREEN
Head back to the Old Cemetery.
OLD CEMETERY
Walk left through the gate, into the cemetery grounds.
Walk left to the vault. Open the door, and enter the vault.
Inside the vault, place the HEART (it came from your BIG BLUE CUP) on the ground. Talk to the HEART, and command it to turn into a pentacle of summoning. Place CANDLE inside the pentacle. Light the CANDLE with the MATCHBOOK, then talk to the pentacle to summon Greedy Skinflint. Talk to Greedy using the following dialogue options.
– You had friends when you were young
– John and Mary
– You were not Mary’s lover
– Mary was accused of theft
– John lost his job at the factory
– You intentionally tried to ruin everyone
Don’t worry if you say the wrong thing. Just send him back to the Beyond, and try again.
He finally realises how cruel and vindictive he was, and his ghost reverts back to a child-state, before he was consumed with so much anger. He leaves, promising not to haunt anyone again.
Now sit back and enjoy the ending. You proved yourself as a worthy Venator. Congratulations!
The End!


Top Adventure Games
More