Walkthrough for Slice of Sea
Slice of Sea
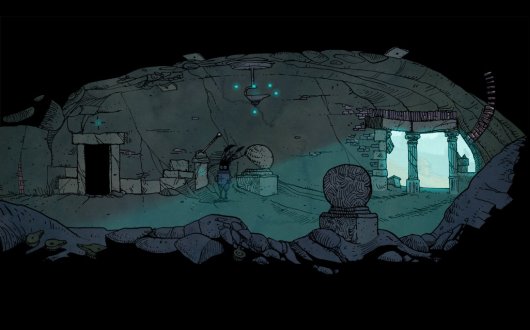
Algae, in an unfortunate turn of events, finds itself on land far from its native sea. Our task is to explore the abandoned city in which the game takes place and bring Algae back home.
Control (keyboard)
- Jump - W key;
- Go left - key A;
- Enter the door - key S;
- Go right - key D;
- Jump - space bar;
Control (mouse)
- Interaction - left mouse button (LMB);
- Open / close inventory, remove an item from inventory - right mouse button (RMB).
Menu
- The menu is opened with the Esc key and has a set of standard options.
Inventory
- The inventory is opened with the Tab / I keys. In the game you can find a lot of unnecessary items. Their location is randomly generated.
Preservation
- The progress made in the game is saved automatically when you exit the game.
Part one
Four puzzle tiles
We go two screens to the left, activate the teleportation port , marked with the symbol I.
We go four screens to the right, jump down, enter the building.
We go a screen to the left, pay attention to the hole in the wall. Go right a screen.
We turn the lever, we go into the opened door.
We pick up from the pedestal CRANE INDUCTOR . We leave out of the building, we pass on the screen to the right.

We place the inductor in the device at the top, we pass under the raised block to the right.

We turn the handle of the bridge control mechanism, lower the bridge. We go to the right.
We descend into the chasm.

Take the SHIELD WITH ORNAMENT, jump to the pressure plate. We go to the opened gate on the right.

We take the HALEBERD. We place the shield in the niche at the top, pull the chain down, pull the lever. We go to the door that opens on the right.

We lower the chain down - we open the passage to the door on the right. We remove the lock from the door, open it and go through the door.

We jump onto the pressure plate, try to go into the opened passage, but the grate drops again as soon as we leave the plate. We jump onto the stove, install the halberd under the grate, calmly go inside.
Activate the teleportation port , with a symbol in the form of X, go two screens to the right.
From the fragment of the column we take the CRUSHED NOTE (the picture is randomly generated). We go two screens to the right.
Take the VALVE , go a screen to the left.
We place the valve on the axis and rotate. We pass through the opened door.

From the box at the top we get the HANDLE FROM THE TOWER. Pull down the lever at the bottom right, go outside. Go right a screen.

We place the handle from the tower in a niche on the left tower. We turn and go through the opened door. We are on the central platform. We jump on the pressure plate. We turn the handle on the tower on the right, we pass through the opened door. Exit the bottom right tower and head right a screen.

We check with the found pattern, set the levers to the desired position. We pass through the opened door.

We open the closet on the third level, the cupboard on the second level, the drawer of the locker on the first level and take out the basket standing next to it. We remove the boards supporting the door from the back side, go to the left. We open the buffet doors. We move aside the objects that prevent us from opening the locker on the left, we check it. Find two PUZZLE TILES.
We go a screen to the left.

We examine the cabinet on the right, the hanging sideboard in the center and the sideboard on the left. We find 2 more PUZZLE TILES. We install the assembled tiles on the panel, go out through the opened door.
Part two
Malachite stone
Go right a screen.
We take out the BATTERY from the device , go four screens to the right.

We stand to the left so that the lights of the photocells light up, turn the lever, go right two screens.

We place the BATTERY in the pipe, lower the lever. We pick up the BATTERY, we enter the car.
We stand on the pressure plate, press the button. We go to the opened door on the left .
We activate the teleportation port , which has a symbol resembling a key. We follow deep into the screen between the two trains.
We enter the third car .
We move the boxes, clear the passage, exit through the door on the left.
We go a screen to the left.
We activate the teleportation port , which has a symbol in the form of a cross with a circle on top. We pick up the FUEL TANK of the FURNACE , we go into the car.
We pay attention to the drawing on the panel , we go back.
We enter the teleportation port, move to the port marked with an X.
We enter the door on the left.
Place the FUEL TANK in the niche on the left .
We leave the door on the left, from the opened furnace we take away the CRANE ARROW FOR THE TRAIN .
We enter the door on the right, go to the right to the port, move to the port marked with a cross with a circle on the top bar.
We go to the right, we pass deep into between the trains .

We see an inscription on the car, the same as that seen inside the car before. Remember the location of the illuminated windows (randomly generated). We go to the right.

We stand on the pressure plate. We bounce on the plate, push down the lever. Go left two screens.
We pass deep behind the composition on the right.
We go into the car.
We remove garbage, we leave into the door to the left.
We jump onto the platform on the path closest to us, on the right.
We stand on the pressure plate, activate the mechanism with the blades. We return to the wagon.
We leave the door on the right.
Go right two screens.
We activate the next teleportation port , which has a symbol in the form of a cross with two crossbars and a circle on top. We enter the port, move to the port marked with a key symbol.
We go deeper between the trains.
We go into the third car.
Exit the door on the left.
We go to the right.
We jump onto the pressure plate - activate the mechanism with the blades and open the door to the car. I'm going to the wagon.
We install the battery in the pipe , we leave the car.

We install and turn the crane boom, remove the CRANK from the hook. We enter the car, pick up the BATTERY. We get out of the car.
We go to the right.

We interact with the levers, light the fires, as the windows in the car, which we paid attention to, shone.
We go two screens to the left, we go deeper behind the composition on the right.
We go two screens to the right.
We activate the teleportation port , which has a symbol in the form of a line with a circle on top, crossed out by two lines (a cross with two crossbars). We go to the right.
We open the door, we enter the distant car .

We place the crank in the device on the right, lower both cranks down. We interact with the lever. We leave the car - the door to the next car is open.
We go to the left.
We enter the port, we move to the port marked with a symbol with a cross with a circle.
We enter the car.
Pick up FIRST CLASS TICKET . We get out of the car.
We enter the port, move to the port marked with a key symbol.
We go deeper between the trains.
We follow to the right.
We go into the next car.
We use the ticket for the composter , go through the opened door.
In the compartment we pick up the PYRAMIDAL SYMBOL . We leave the compartment, leave the car.
Go left two screens.
We enter the port, move to the port, marked with a symbol in the form of a cross with a circle on top and two crossbars.

We install the pyramidal symbol in a niche, go to the door that has opened in the pyramid.
We go down the stairs to the left.
We go to the right.
We pick up from the bag on the floor SECOND CLASS TICKET .
We go to the right.
We pick up MALACHITE STONE . We go left two screens, go up the stairs.
We go outside, enter the port. We move to the port with a symbol in the form of a key.
We go deeper between the trains.
We move to the right, we enter the car closest to us.
We pass to the right, compost the ticket . I'm going to the second class compartment.
Exit through the gap on the left.
We press the button on the horned rack on the left. We go to the right.
Activate the teleport port , which has a symbol in the form of two lines with circles at one end. We go to the right.

We make the light on the rack light up by moving between the photocells. We go to the right.
We place the malachite stone on the forehead of the statue.
Part three
antique vases
We pass to the right. We examine the tablet , remember the location of the characters (randomly generated). We go deeper between the two columns on the left.
Activate the teleportation port with a symbol in the form of two lines with a circle at one end, crossed out by a line.
We go to the left, we move to the right.

We place the symbols at the top according to the hint we saw - a light lights up on the counter on the right. We go to the right.
We become on the pressure plate - we light a light on the counter on the right and two lights on the wall. We go to the right.
We pick up the ANTIQUE VASE . We turn the lever, we light the light on the rack.
We go to the left.
We see that all the lights are burning on the wall. We turn the handle, we go into the opened passage .
We light the top button on the triangle at the top, go to the right.
We go to the left.

We lower down the big lever, we pass by the lowered photocell - it lights up. We go to the left.
We stand on the pressure plate. We press the button, we light the lamp on the horned rack. Activate the teleport port , which has a symbol in the form of two lines with a circle at one end, crossed out by two lines. We go two screens to the left.

We press the button on the horned stand at the top. We enter the far left opening.
We pick up ANTIQUE VASE , go outside.
We go to the right five screens. We put the symbols in the reverse order, from the opened niche we pick up ANTIQUE VASE . We go to the arch on the right.
We go to the left.
We pick up the GEAR from the niche in the wall . We lower the lever on the panel down - we extinguish one of the three rays. We go to the left.

We light the lower left button on the triangle below. We interact with the lever, we light the photocell on the lowered barrier with our approach. Activate the teleport port , which has a symbol in the form of three lines with a circle at one end. We go deep into the screen.
Press the button on the horned stand , light the fire. We go to the left.

Open the drawers; take the SLIDER HANDLE. We pass to the left, jump up to light up the photocell on the column of the building.
We go three screens to the right. We install the slider handle on the panel, move it down - turn off the second beam. We go to the right.
We leave through the archway, we go on the screen to the left.

We install the gear in the mechanism. We remove the grate, we pass inside.
We take the SLIDER HANDLE , we leave the dark room.
Go right two screens. We follow to the left.
We install the slider handle on the panel, lower it down - turn off the third beam. We go to the right.
We stand on the pressure plate, go to the opened door on the left .
We pick up the ANTIQUE VASE . We stand on the pressure plate, activate the mechanism with the blades. We leave the room.
We turn the handle on the wall, go to the door on the right.

We place the collected vases on pedestals in the required order by years - a green light is lit on the panel.
Part four
Vacuum tubes
We go into the opening on the left.
Move left three screens. We pull the lever above the door to the right, we pass through the opened door .

We pull the ring up - we go down on the platform to the left.
We throw back the latch on the metal door below, we leave the room.
We light the lower right button on the triangle at the top. We press the button on the horned stand. Go left two screens.
Activate the teleport port , which has a line and a circle symbol.

We lower down the lever on the wall to the left, we go into the opened door.
Take the VACUUM PIPE 1 , leave the room.
We go to the right three screens, then - deep into the screen.
We press the button - we light the light on the horned rack . We go two screens to the right.
Activate the teleportation port , which has a symbol in the form of two lines. We go to the arch on the right.
We go along the roof to the right.
We press the button on the horned stand.
We pass deep into the arch in the center .
At the top we see circles with dark sectors.
Note . The location of the dark sectors in the circle is set randomly.
We leave the room, go two screens to the left. We enter the teleportation port.
Circle locations:
1 - port with a symbol in the form of a line and a circle (in the lower right corner );
2 - on the screen, to the left of the port with a symbol in the form of two lines with circles at one end, crossed out by two lines (on the wall in the center );
3 - two screens to the left of the port with a symbol in the form of two lines with circles at one end, crossed out by two lines ( on the wall );
4 - on the screen deep from the port with a symbol in the form of a key (on the first car );
5 - into the arch from the port with a symbol in the form of two lines, and three screens to the right ( below );
6 - two screens to the left of the port with a symbol in the form of two lines (on the wall on the left ).

We rotate the circles, place the dark sectors on them in the order seen. Take the VACUUM TUBE from the opened cache.
We go outside, go into the archway on the left.
We pull the rope on the block with the lever , we follow to the left two screens.
Take the VACUUM PIPE from the box that has dropped down .
We go to the right, we enter the teleport port. We move to the port with a symbol in the form of a symbol, from two lines with a circle at one end, crossed out with one line.
Go right a screen.
We place the assembled vacuum tubes in the grooves of the device on the right.
Part Five
Power supply
We stand on the pressure plate, pull the lever, open the door. We go a screen to the left.
We enter the teleportation port, move to the port with a symbol in the form of two lines with a circle at one end, crossed out by two lines.
We go a screen to the left.
We insert the battery into the pipe, look at the monitor screen. Remember the location of the squares. Open the shield, take the POLYMER TRANSISTOR .
We go to the right, we enter the teleportation port. we move to the port, which has a symbol in the form of a line and a circle.
Go right three screens.

Open the drawer, take out the SMALL WALL BUTTON. We place it on the panel on the wall of the building on the left. We press all the buttons. We pass to the right, jump up to the photocell so that the light lights up and the door opens. We go to the opened door.
We pick up from the table TICKET TO THE PLATESKART . We leave the room, we follow to the left on three screens.
We enter the teleportation port. We move to the port with a symbol resembling a key.
We go deeper between the two trains.
We go to the right.
We go into the next car.
We go right two screens, use the ticket for the composter on the left. We pass through the opened door.
We pick up the POLYMER TRANSISTOR , exit the compartment.
We go left four screens, enter the teleport port. We move to the port with a symbol in the form of a symbol, from two lines with a circle at one end, crossed out with one line.
We move to the right.
We enter the previously opened door.
We place both transistors in the grooves under the monitor on the left. Pull down the lever at the door.
Exit the room, go a screen to the left. We enter the teleportation port, move to the port with a symbol in the form of two lines.
We move two screens to the left, we pass deep into the screen through the opened passage in the arch.
We go to the right past the mill.
Press the button on the horned stand , go to the right.

We move to the right to light all three photocells. We go to the opened door.

We press the button, lower the column down. We stand on the lowered column, press the button again, rise along with the column. We pass through the door above.
We jump on the pressure plate - we activate the mechanism with the blades. We pass to the right.
We press the button on the horned stand .
We go to the right.

We remove the support, lower the dome. We enter the window that opens.
We activate the teleportation port with a symbol resembling the Roman numeral IX.
Take the LEVER HANDLE from the safe on the right. We pass to the right four screens. We press the button on the horned stand . We go to the right.
We enter the building.
From the floor we pick up BAG OF GRAIN , go outside.
We go to the left, we return to the mill.

We place the bag in the loading hatch of the mill, go through the opened door.
We take away the HANDLE , we leave.
Move to the left four screens.

We install the handles in the grooves, interact with the handles, activate all the cables.
Part six
Drum Rhythm Parts
Go right two screens.
We go twice deep into the screen.
Move two screens to the right. We rotate the valve, we take away the PART OF THE DRUM RHYTHM .
We go to the right.
We enter the house.
We stand on the column, press the button, rise. We leave through the door above.
We leave the door on the right.
We pass to the right.
We rise to the roof, enter the window.
We enter the teleportation port, move to the port with a symbol in the form of two lines with a circle at the end, crossed out by two lines. We go to the left.
We insert the battery into the pipe, look at the monitor . Remember the location of the squares (generated randomly). We return to the port, move to the port with the symbol IX.
We set the squares on the panel at the top left to the desired position. From the opened box on the lower right we take out the BRUSH FOR PAINTING THE WALLS . We enter the teleportation portal, move to the port with a symbol in the form of two lines.
Take the WHITE PAINT from the bench . We return to the port with the symbol IX.
We move five screens to the right - the bell prevents us from passing further. We enter the building.
We pass through the door on the left.

We remove the stoppers from under the wheels on the left and right. We stand on the pressure plate on the left, pull down the lever in the ceiling. We do the same for the lever on the right.
We return to the first room, turn the lever - raise the bell. We go outside.
Go right a screen.
We use a brush on the tower, go to the opened door.
Take the DRUM RHYTHM PIECE from the drawer at the top .
We go outside, go a screen to the right.
From the crater we pick up the RUNE TABLET - with its help we can now teleport to any port.
Go right two screens.
Activate the teleportation port with a symbol in the form of a line and a key. We go a screen to the left.
We pass deep into the screen between the ship and the plane .
Go right two screens

Activate the monolith on the left. We open the runic tablet, we move to the port with the key symbol.

Activate the monolith on the left. We stand on the pressure plate and leave it, guessing the moment when the pendulum stops in the center and the symbol below lights up.
We open the runic tablet, move to the port with a symbol in the form of a line and a key.
We move to the left, we pass deep into the screen, we go to the right.

Interact with the monolith on the right, collect the DRUM RHYTHM PIECE.
We go twice to the left, we pass to the right.
We enter the teleportation port, move to the port with a symbol in the form of two lines with circles at the end crossed out with one line.
Go left a screen, then right three screens.
We expose the necessary symbols from the scrolls on a large scroll in the order suggested by the dots above them. From the parted column we take out the PART OF THE DRUM RHYTHM.
Scroll Locations:

- From the portal with the symbol X go to the left four screens ( three dots above the symbol );
- From the portal with the symbol of a line with a circle at the end, crossed out by two lines, go a screen to the left ( two dots above the symbol );
- Next to a large scroll ( four dots );
- One screen to the left, enter the passage in the depths and go two screens to the right ( one dot );
- From the portal with the symbol IX one screen to the right ( five dots ).
Part seven
Portal Symbol
We open the runic tablet, move to the port with a symbol in the form of a Roman numeral X.
Go right a screen.

Interact with the drums according to the collected parts of the rhythm (the puzzle is randomly generated). Get GATE SYMBOL.
We open the runic tablet, teleport to the port marked with a symbol in the form of a line and a circle.
We go two screens to the right.
We go into the room, pick up the STONE WEIGHT .
We open the runic tablet, teleport to the port marked with two lines with a circle at the end, crossed out with a double line.
We turn the lever on the panel, we pass through the opened door .

We attach the weight to the hook, remove the box from the path. We jump up to activate the photocell. We pass through the door on the right.
We jump up to activate the second photocell. We go to the right, we find ourselves in a room.
We pick up the ORNAMENT WITH GRAPE LEAVES . We notice that there is no leaf in one picture. We leave the room.
We place the shield in the niche below , on the left - a door opens under the niche. We go to the left doors, we go down.
We pass to the screen to the right, we enter the opened door.
From the shelf we take WOOD JUICE . We leave the room.
We pass to the left, we enter the teleport. We teleport to the port with the symbol in the form of H.

Use the juice on the tree trunk; take the TREE LEAF. We enter the teleportation port, move to the port marked with a symbol in the form of two lines with a circle at the end, crossed out by two lines.
We enter the door, head to the room where we saw an empty picture.
We place the sheet on the picture, select the SCROLL OF THE PYRAMID (the location and name of the necessary symbols in the scroll is randomly generated).
We open the rune tablet, move to the port with a symbol in the form of a line with a circle at the end, crossed out by two lines.
We enter the pyramid, go down the stairs, go a screen to the right.
Note . We need to install four characters in a niche. As noted, which characters to set is randomly generated.
Symbol Location:
- SYMBOL OF CHAOS - From the port with the symbol in the form of a line and a key, go a screen to the right, enter the grotto and pick up the symbol .
- OBJECTIVE SYMBOL - From the port with the IX symbol, go right two screens and pick up the symbol .
- SYMBOL OF HARMONY - from the port with the symbol I, go to the right seven screens and pick up the symbol at the location with the cleft .
- SYMBOL OF NATURE - from the port with a symbol in the form of a line with a circle crossed out by two lines, we go to the left two screens. We go into the car, go out the left door. We take the symbol .
- SYMBOL OF COURAGE - from the port with a symbol in the form of two lines, we move two screens to the left, we go deep into the screen. Move two screens to the right, pick up the symbol .
- BALANCE SYMBOL - from the port with a symbol in the form of a line and a key, we pass three screens to the right. Activate the port with a symbol in the form of a line and a cross with a circle on top. We go two screens to the right, we take away the symbol .

We check with the scroll of the pyramid, we place the symbols in the recesses. We pass to the right.
We enter the opened door. Remove the cover of the sarcophagus, take the PORTAL SYMBOL .
We teleport to the port marked with the symbol I. We go four screens to the right, we go down, we enter the room.
We go two screens to the left, insert the gate symbol into the hole - activate the gate .
We teleport to the port marked with the X symbol. We go to the right two screens, we enter the virtual gate .
We pass on the screen to the right.

We rotate the valve, jump onto the arrived platform. Cross over to the other side, go right.
Set the portal symbol to the recess .
Part eight
virtuality
We enter the opened portal.

We install the battery in the pipe, turn the handle. From the opened compartment we pick up the NAVIGATOR OF THE STAPLE CRANE.
We pass to the right three screens.
We take away the LICENSE OF THE CRANE OPERATOR , we go to the right.
We press the button on the horned stand. We use the license for the scanner , we pass through the opened door.
We lower the lever down, go to the opened door.
We install the slipway crane navigator in the groove on the left. From the box on the left we take out the ARROW OF THE STRAPEL CRANE, place it in the groove of the device below.

Turn all the levers, take the RIGHT EYE. We leave the cabin, we go down to the ground.
We go to the right seven screens.
Open the chest, take out the LEFT EYE.
We go to the left three screens, we go deep between the ship and the plane .
We place the eyes in the eye sockets of the skull, we select the rolled-out PRINT ON THE VIKING CHEST .
Move one screen to the left and one screen to the right.
We apply the seal on the chest, we take away the STATUE OF BUDDHA .
We enter the teleportation port, move to the port with the symbol X.
We go to the right two screens, we enter the virtual gate.
We follow the screen to the left, we cross over to the other side. We pass to the right, we enter the portal.
We enter the portal again to be on the upper platform. We go to the right.
We place the Buddha figurine in a niche, we take away from the hands of the statue LIGHT WIRE .
Part nine
Semicircular door lights
Open the runic tablet, teleport to the port with the symbol IX.
We go five screens to the right.
From the roof of the building we remove the SEMI-ROUND DOOR LIGHT 1 .
We open the runic tablet, teleport to the port with a symbol in the form of two lines with a circle at one end, crossed out by two lines.
We enter the open door.
We go to the right, jump down. We activate the two remaining photocells, we pass through the opened door .

We rake up a pile of garbage, take out a SEMI-ROUND DOOR LIGHT 2.jpg" width="255" height="auto" />
We open the runic tablet, teleport to the port with a symbol in the form of two lines.
We go two screens to the left, we go deeper.
We follow two screens to the right, we enter the building.
We rise on the column up, we leave into the upper door.
We go to the right.

We press the lever, we jump onto the pressure plate, we press the lever again - we lower both barriers down. We activate the photocells on the barriers. From the niche that opens at the bottom we pick up the SEMI-ROUND DOOR LIGHT 3.
Part ten
Gears, heat seal and heat lamp
We go to the door on the left.

From the niche at the top we get the GEAR 1. Open the box on the mezzanine on the right, take the HEAT-RESISTANT SEAL.
We open the runic tablet, teleport to the port with a symbol in the form of two lines.
We pass on the screen to the left, from the niche at the top we take the GEAR 2 .
We go a screen to the right, enter the archway. We go two screens to the right, we enter the arch in the center.
Take the HEAT LAMP from the toolbox on the top shelf on the left .
We open the rune tablet, teleport to the port with a symbol in the form of three lines with circles on the tops.
We pass deep into the screen.
We place a semicircular lamp in a niche above the door on the left , we enter the opened door.
From the niche at the top we take the GEAR 3 .
Part Eleven
Ship
We open the runic tablet, move to the portal with a symbol in the form of a line and a key.
We go two screens to the right, we pass deep into between the ships.
We go into the snail shell, take the TOWING LEVER from the cabinet.
We go two screens to the left.

We install the lever on the axis on the ship on the left, rotate it - we activate the mechanism with the blades.
Go right three screens.
We stand on the pressure plate - we activate the mechanism with the blades.
We go a screen to the left, we penetrate the ship through the hole.

We turn the valve - we activate the mechanism with the blades. We lower down the lever near the door, we go into the opened door.

We turn the red tap on the pipe on the left. We pass to the right, we stand on the pressure plate. When the barrier goes down with the left side, run to the left, activate the photocell on the barrier on the left. We stand near the lowered photocell on the barrier on the right, activate it. We turn the lever near the door, we go into the opened door.
Once on the top platform of the same screen, we go to the right.

We install a light wire in a niche. We turn the two red taps on the pipes. We interact with two monitors, place the same combination on them. We pass through the opened door on the right.

We turn the red tap on the pipe, put the three gears in place. We go to the right.

We turn two valves. We stand on the pressure plate, activate the lowered photocell. We turn the lever near the door, we go into the opened door.
We pass to the left.
We turn the red tap on the pipe, we pass to the right.

We turn the red tap on the mechanism above the door. From the locker we get the GEAR.
We go two screens to the right.
We activate the teleportation port with a symbol in the form of a straight line and a line with a circle at the end, crossed out with two lines. We install the gear in the mechanism, we pass through the opened door.

We turn the red tap on the pipe on the right, take the SOLAR PANEL. We leave the room.
We enter the port, move to the port with a symbol in the form of a straight line and a line with a circle at the end, crossed out with one line.

Install the solar panel. We enter the teleportation port, move to the port with a symbol in the form of a straight line and a line with a circle at the end, crossed out by two lines.
We go two screens to the left, turn the valve. We go to the right.
From the box raised from the hold we take STAR GLOBE . We go to the right.
We turn the two red taps on the pipes, lower the lever near the door. We pass through the opened door.
We place the star globe in the recess on the central device, through the opened door on the right we go to the bridge.

Lower down two levers. We pick up the VIP-TICKET FOR THE TRAIN from the table. We go back.
We take out the TANKER VALVE from the hole at the bottom right. Through the opened door on the left we go down into the engine room.
We install the valve on the axis on the wall at the top , rotate it.
Part twelve
Spark plug
We open the runic tablet, move to the port with a symbol in the form of two lines with a circle at the end, crossed out by two lines.
We go to the right.

We lower the lever down, go through the opened door, above which there is a triangle with burning buttons.
We remove the lock from the door on the left, turn the lever on the wall on the left. We go outside.
We go to the opened door on the right.
We lower down the lever on the wall on the right, we leave the room.
We remove the constipation from the next door, open the door.
We manipulate with the lights, light them.
From the room on the left, turn the lever on the right, take the TANKER 2 ENGINE SPARK PLUG.
We open the runic tablet, teleport to the port with a symbol in the form of three lines with circles at the end. We go deep.
We place semicircular lamps in niches above the central door and the door on the right. We go to the left door.
We insert the battery into the pipe . We leave and go to the central door.

We install a heat lamp in the nest, we sink the lever into the wall. Exit and go through the door on the right.

We place a heat-resistant seal in the nest, push the cylinder into the wall. We leave and go to the door in the center.
Pick up the TANKER ENGINE PLUG 3 .
We open the runic tablet, teleport to the port with a symbol in the form of two lines with a circle at the end.
We go to the left, we enter the breach. Exit the compartment, move four screens to the left. We enter the car, exit through the door on the right. We follow to the left one screen.

From the locomotive we take the PLUG FOR IGNITION OF THE ENGINE OF THE TANKER 4.
We open the runic tablet, teleport to the port with a symbol in the form of a straight line and a line with a circle on top, crossed out by two lines.
We enter the door, go to the door on the right to the bridge. We pass through the door on the right.
From the counter on the right we take the TANKER ENGINE IGNITION PLUG 5 .

We go to the engine room, install candles.
Part thirteen
Return
We open the runic tablet, teleport to the port with a symbol in the form of a line with a circle at the end.
We pass deep between the trains, we go to the right.
We enter the next car.
We place the ticket in the composter near the left door, we pass into the compartment.
We pick up the CODE COMBINATION from the table (the picture is randomly generated).
We open the rune tablet, teleport to the port with a symbol in the form of a straight line of an illine with a circle at the end, crossed out by two lines.
Go left three screens, pick up the SHIP CRANE INDUCTOR . We go to the right.
We pass through the door, move three screens to the left.
We insert the inductor into the socket, push both inductors into the sockets. We go to the right.
We consider the code combination, remember the location of the arrows. We look closer to the safe that has fallen down enter the code. Collect the TANKER 1 ENGINE SPARK PLUG.
We go to the right door. Once at the bottom, go right two screens.
Open the runic tablet, teleport to the port with the symbol in the form of I.
We go to the right, we enter the cave. From the sideboard we get the SCREW OF THE RUDDER CONTROL.
We open the runic tablet, teleport to the port with a symbol in the form of a straight line and a line with a circle on top, crossed out by two lines.
We pass into the engine room, go down, go right two screens.

We place the screw in the hole, rotate all three screws so that green lights appear.

We go to the right, we watch the finale.
Game completed.
Lenin 17


