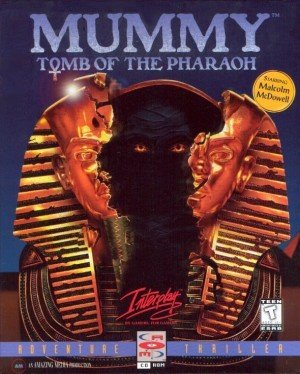
Walkthrough for Mummy: Tomb of the Pharaoh
MUMMY: TOMB OF THE PHARAOH
Adventure by INTERPLAY
Solution by Lu Richardson
-------------------------
Number one advice is to turn up the brightness control so you can
actually see what's going on.
The first part of the adventure is explained in the manual (though
it does not tell you, for instance, that in hut 08 you have to turn
on the fan to get rid of the scorpion and turn off the heater to
immobilize the cobra, and so read the messages, not that it's all
that important); so I will start from the next stage of the game,
i.e., when you wake up.
(You should know by now to turn on the spot and sweep the cursor
around to see what gives. So I will leave you to explore every
single location you come to. At the start, your steps will be
dogged by Davenport, who will turn up when you least expect it and
bore you to death. Some times, he has some good information to
impart; but one could only wish he kept his flawed personality to
himself. I won't mention all the times he appears, let that be a
surprise for you.) Anyway, here we go from the real start of the
game. You've just woken up, right?
The camp
--------
Read the note by the candles, leave the trailer and turn right.
Lorrie tells you about the catastrophe which has just taken place.
Guiding yourself by the map in the manual, go to the Mining site,
use the card in your knapsack on the guard and advance. Keep going
till you meet Davenport, who will speak to you. Turn left and
advance till you see the body. Have a close look at it, pick up the
dagger and click on the trouser pockets to get some keys. Turn
around and head for the entrance. Before you turn right at the
first opportunity, look at the Emergency Power unit (if you were to
explore the mines further you'd find it's too dark for safety).
Leave (you meet Davenport, ugh) and go to Daveport's office, where
you meet him yet again.
When he leaves, have a look at the satellite dish, then go into his
office through the window. Have a look around; fill the cantine in
your knapsack with the water from the dispenser. Note the book on
the bookcase. Turn to the desk. If you click on the calendar you
will uncover a safe for which you need numbers you do not yet have.
Click on the desk. Open the drawer, get the keys and read the
note. Read also Chris's report on the desk. Try the telephone. If
you attempt to use the computer, you find you are missing a disk.
Leave by clicking on the window, over the desk.
Armed with so many keys, you can explore at random, no need to
follow a particular pattern. This is what I did, though.
Go to the Infirmary, enter, get the smelling salts from the sink.
Go to the Garage, get the can, turn left, place it on the table, get
the filling handle from the pump and stick it in the can, throw the
lever, pull the trigger on the handle. When the can is full, return
the filling handle to the pump and collect the can. Get the wire
stripper. Turn right twice and advance to get some wire cutters.
Leave.
OK, check the warehouses you can get into. In the first one you will
see a fork-lift truck. Move the two cases onto the fork, enter the
truck, press the green button, pull the lever on the right, go up,
use the knife on the rope and go up again. Turn left and get the
grapnel, then go down and right out.
The other warehouse which will open will yield some insulating tape.
Go to the Generator, home in on the panel, use the wire stripper on
all the ends of the wires, join them by colours, use the insulating
tape on the joined ends, take off the cap on the left, use the can
on it, close the cap, press the green button. Electricity has been
restored to the mines, but note the keyhole for the fan control.
Leave.
You might as well have a good explore around right now. Let's try
hut 02. Go in, click on the bed to uncover a trap, open it, pull
the lever you can just see inside the stairs to turn the light on,
follow the corridor till you come to a padlocked door, use the wire
cutters on it; inside, turn right to the table, open drawer, get
the handle. Turn left, advance to the Nazi flag; lifting the bottom
left hand corner will reveal a switch, use the handle on it, pull
the handle and turn right. Go in, advance, look around, get the
book and gun, read the message. Out. Note the brand of beer
you-know-who drinks. Leave.
Go to hut 05 and enter through window. Looking around inside you
will find a necklace; I found no use for it, but may be you are
meant to have it on you. Leave.
Now go to Segel's trailer. Look at his desk and you will find a
disk. If you use this on the computer you will find it has been
wiped out. Turn left and click on the chest at the foot of the
bed. Use the cutters on the padlock to open it, click on the panel
to the left, press the button. Pick up the Sonar Maps disk on the
right and read the diary. Leave.
Go to Davenport's trailer. Inside, click on the bed, get the code
from the wallet. Go to Davenport's office. Click on the safe,
consult the code, move the square on each set of numbers and use the
wheel to change them to the ones you saw on the code. Click on the
handle to open the safe, get the disk. Use the computer, place the
Maps disk in it; when asked if you want any additional disks, put in
the Sonar Maps disk. Select "Print" and turn to the printer to get
the Sonar Maps hardcopy. You are more or less set.
Now let's go to Lorrie's trailer. You will find her out for the
count on her bed. Use the smelling salts on her and she will come
around long enough to tell you to get the key off the table on
the right and to visit the Tower. Do just that.
However, when you get there, Davenport will fob you off with some
more of his pat chatter. Have a look around, then leave. Time to
check out the Hangers. Attempting to go in the regular way will
yield no results. Work your way around the back and you will find
and open window at the top. Use the grapnel on that and climb in.
You will find a toolbox which contains a spanner. Get it. You can
leave now.
The mine
--------
It's time to tackle the mine. Ouch! This is a real pain.
Basically, you need to get to Level 6. If you use the lifts, by the
time you get to Level 4 you'll find sabotage has wrecked the lift.
Using the map, get to the entrances of the railway system in this
level and find the cart. Once inside the cart, you can travel with
it all the way down to Level 6, crashing through the "Danger" sign.
By the way, always keep right to go up and left to go down.
In Level 6, if you look around you will find an interesting blood
stain in a cul-de-sac. But really, you are after a digger; when you
get to it, enter it and get the keys from the control panel - don't
be tempted to use it yet. Leave it and find the fan shaft, but
don't touch the lamp at the bottom. If you go up the ladder you
will find you cannot look out because the fan is going. Go back to
the cart, travel all the way up to Level 1, don't touch the moving
parts of the conveyor; leave the mine and go to the Generator. Use
the key on the Fan Control panel to open it and turn the fans to
"Off". Back to the mine.
Go in the regular way, using your card on the guard. Don't go into
the mine yet. Have a look at the exhaust fans to the left and
right of the entrance. Go around with the spanner opening them all
(just click with it on the left of the grills). After you open
them, nip in and go down. The one with the lamp at the bottom is
the one for Level 6. Take the lamp and go up the ladder to get
out. Remember the position of this exhaust fan, you'll be coming
back here (oh, all right, it's the second on the right if you are
facing the mine entrance, next to the truck).
Now enter the mine and go to the conveyor. With great care, get to
the cart and go all the way down to Level 6. Find the digger, put
the keys in, press the blue button, then the green button and push
the lever forward. Watch.
Get back to the cart and go to Level 1. When you try to get out,
you find that the entrance has caved in. Go back to the conveyor
room. Find the tank with the black hose and cut this with the
knife; now you can use the conveyor to get out without getting
killed.
Outside, go to the Tower and talk to Davenport. You don't get much
joy out of him. Back to the mine. Enter the exhaust fan for Level
6 and go in. Search this level till you come to another cul-de-sac
with some rocks on the floor. Turn to your left and you will see a
hole in the wall. Use the lamp on it and go through.
The tombs
---------
Inside, you might like to save your game and attempt to go through,
so that you get artistically killed. If you'd rather not, turn
right around and pick up a rock from the hole. Now you can go
through the door and click with the rock on the next door. Danger
over, proceed forward.
Again, in this room you could save your game and attempt to get
through the next door and see what happens. What you should really
do, before attempting to click on the new door, is to turn right
around and get the vase on the right of the door you just came
through. Turn to your right and place the vase on the floor. Use
the rope on it and tie the other end to the hoop on the floor. Turn
right to face the new door and click on it. Water starts to get
in. Turn to the other door (clicking on it will reveal that it's
locked) and enter the other vase. Just watch.
Now you can go through the next door. Unfortunately, the stairs are
a bit slippery and you can't go up them. Back inside the room, find
the mat and place it on the steps to climb them.
When you come to the next room, look down and use the rope on the
statue. Go down. Have a good look around. If you click on the
tiny white spikes under the statue with an arm sticking out, they
pop up. If you click on the arm, it comes over them. Look up and
there is the exit. Move to the statue on the right which is holding
an ankh. If you pull that, the spikes of the other statue will
retract. Stick with this one and look up. Keep going up and click
on its head, which will roll off. Go back to the statue with the
spikes and push the head onto them. Click on the spikes to make
them come up and click on the arm. It is now safe to climb up,
click on the mouth of the statue to open it and go through.
Now you will go through a lot of doors and be told a story as you
are about it. At the end, you will come upon a mummy; don't take
any nonsense. Get out your gun and shoot it. Look at it. It isn't
a mummy, it's a daddy (sorry). Turn to your left and pick up the
artefact the skeleton is holding. Turn right and examine the two
columns either side of the locked door. On the wall to the right of
this door you will spy a crack. Go through it and up and you'll
come out at the entrance of the mine. Guess who is here also?
When Davenport leaves, go straight to Lorrie in her trailer. She
will wake up and explain what to do with the artefact. Go back to
the mine and straight down (you will have to use the lamp) to the
room with the locked door. Just place the pieces of the artefact in
the correct sockets and the door will open. Go in. You will meet a
chatty ghost. He also tells you not to muck about with the obelisks.
Actually, if you turn to your right and look at the wall behind you
you will see a switch in the shape of an obelisk; press it three
times to bring down all the obelisks and then take their crystals in
this order: centre, left and right. The will automatically rise
after that.
Turn around and go back to the chamber with the crack in the wall.
Use it to get out of the mine, go to the Warehouse with the chest,
look at the chest and use your cantine to pour water in the round
indentation on the lid. The chest will open and you can take the
scroll. Take it back to the room with the obelisks.
The ghost will appear and will ask you to follow him. Do so and
turn right at the first opportunity to enter his tomb. Just watch.
Click with the scroll on the sarcophagus and watch some more. At
the end, the priest leaves and again asks you to follow him. Before
you do so, search around and find two dog statuettes. Go out and
walk about till you find the next, now open, tomb.
Again, just watch what happens. When you are able to move again,
look around the room till you find a bit of dodgy wall. Click on it
and go through. It doesn't matter which way you go, you will come
upon Chris. Someone sneaks up behind you and knocks you out.
When you wake up, Davenport is there to gloat before he leaves you
to your death. When you are alone, advance, look at the rope bridge
and use the knife to cut the rope. You go down with it. Turn to
your right. Examine the skeleton and get a bone. Climb up. If you
try to go through the door to the right, the ghost of a dog gives
you grief. Go on, Paddy Whack, give the dog a bone. He disappears
and you can go through.
In the next tomb you meet another ghost. After he has done talking,
look at the walls and spot the painting of the guy holding a
scepter. Wait a bit and you will see a bony hand coming through the
wall. Place one of the dog statuettes in it. It will retract and
another hand will appear. Give it the other statuette. Wait a bit
and you will get the scepter.
Time to leave through the other door. The ghost will appear again
and wish you luck. Advance into this chamber and go to the stand
with the beam of light. Use one of the crystals on the support. If
another stand does not appear in a bit, turn the wheel under the
support. When the next stand appears, go to it and place another
crystal on it. Again, another stand should appear, turn the wheel
if not. Place the last crystal on the new support and turn the
wheel till a new door appears. Go through and you'll find your
playmates.
When talking ends and you are attacked, grab the scepter quickly and
use it on the priest. Watch. Take the crystal and turn left. Go
through the door.
The Finale
----------
Find the solitary crate, pick it up and turn left to place it in the
river. You get in and float to another place. Turn to your right
and advance till you find a cell. Open the door and go in. Pick up
the mask in the box (obviously, the one the skeleton is wearing
didn't work) and pick up the gas bomb. Leave holding the bomb
gingerly in front of you till you are challenged by Chris; click on
him with the bomb.
Watch what happens. When Davenport appears and asks for the
crystal, just give it to him.
That's it. Watch the finale.


