
Down in Bermuda
The walkthrough is relevant for all versions of the game
About Down in Bermuda
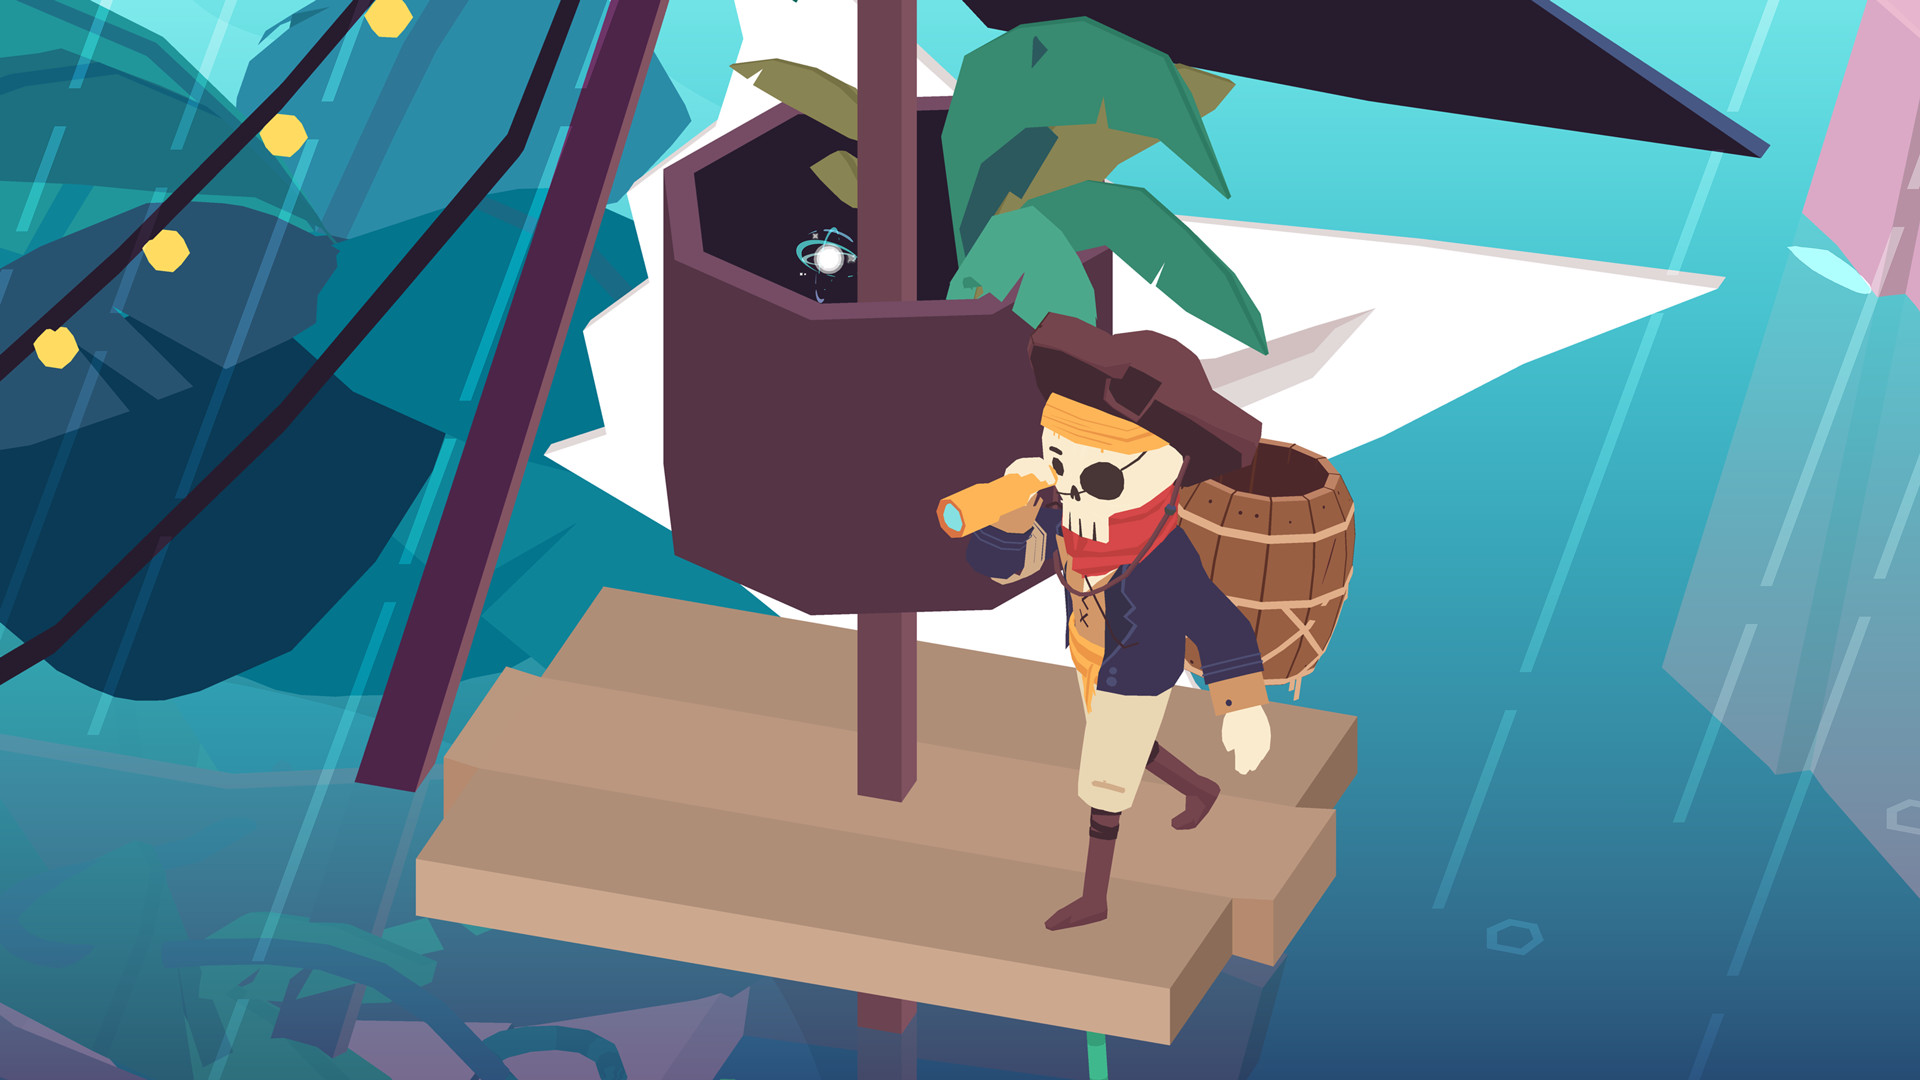
The brave pilot Milton is in distress in the Bermuda region. Thirty years later, we find a puzzled pilot on an island who cannot get off of it in any way. Now we have help him and move from island to island, solving puzzles and getting keys, so that, in the end, we can go home with Milton.
Gameplay features
Control (keyboard)
- WASD keys – move the camera (↑ ← → ↓);
- Enter key – interaction;
- Keys “-“ and “=” – to scale the screen;
- Keys “<“ and “>” – rotate the camera;
- Arrow keys – move the pointer;
- Esc key – pause menu.
Control (mouse)
- Left mouse button (LMB) – shift: LMB click and drag;
- Right mouse button (RMB) – turn: right-click and drag;
- Mouse wheel – change scale.
Menu
Is opened by clicking LMB on the icon in the upper left corner or by pressing the Esc key. You’ll find a simplified set of settings.
Inventory
Inventory is not used in the game.
Save
The progress made in the game is saved automatically.
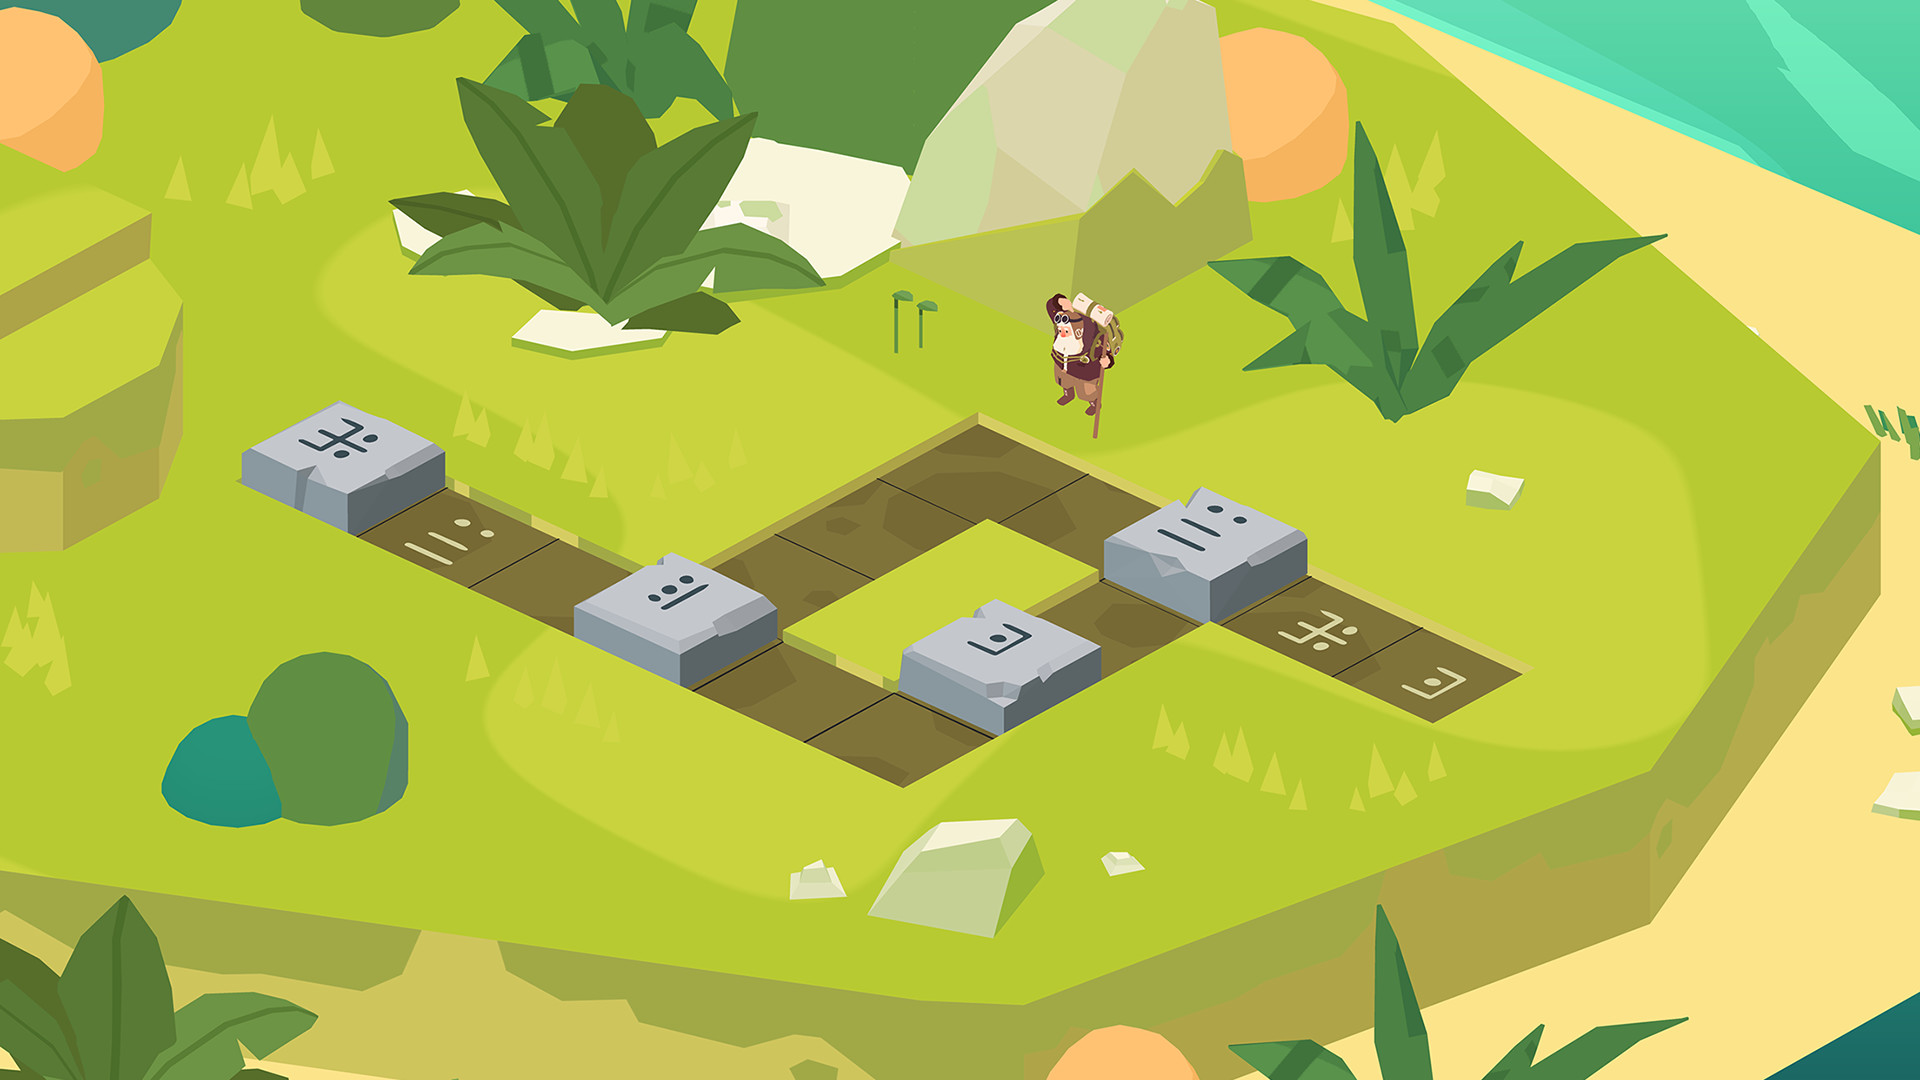
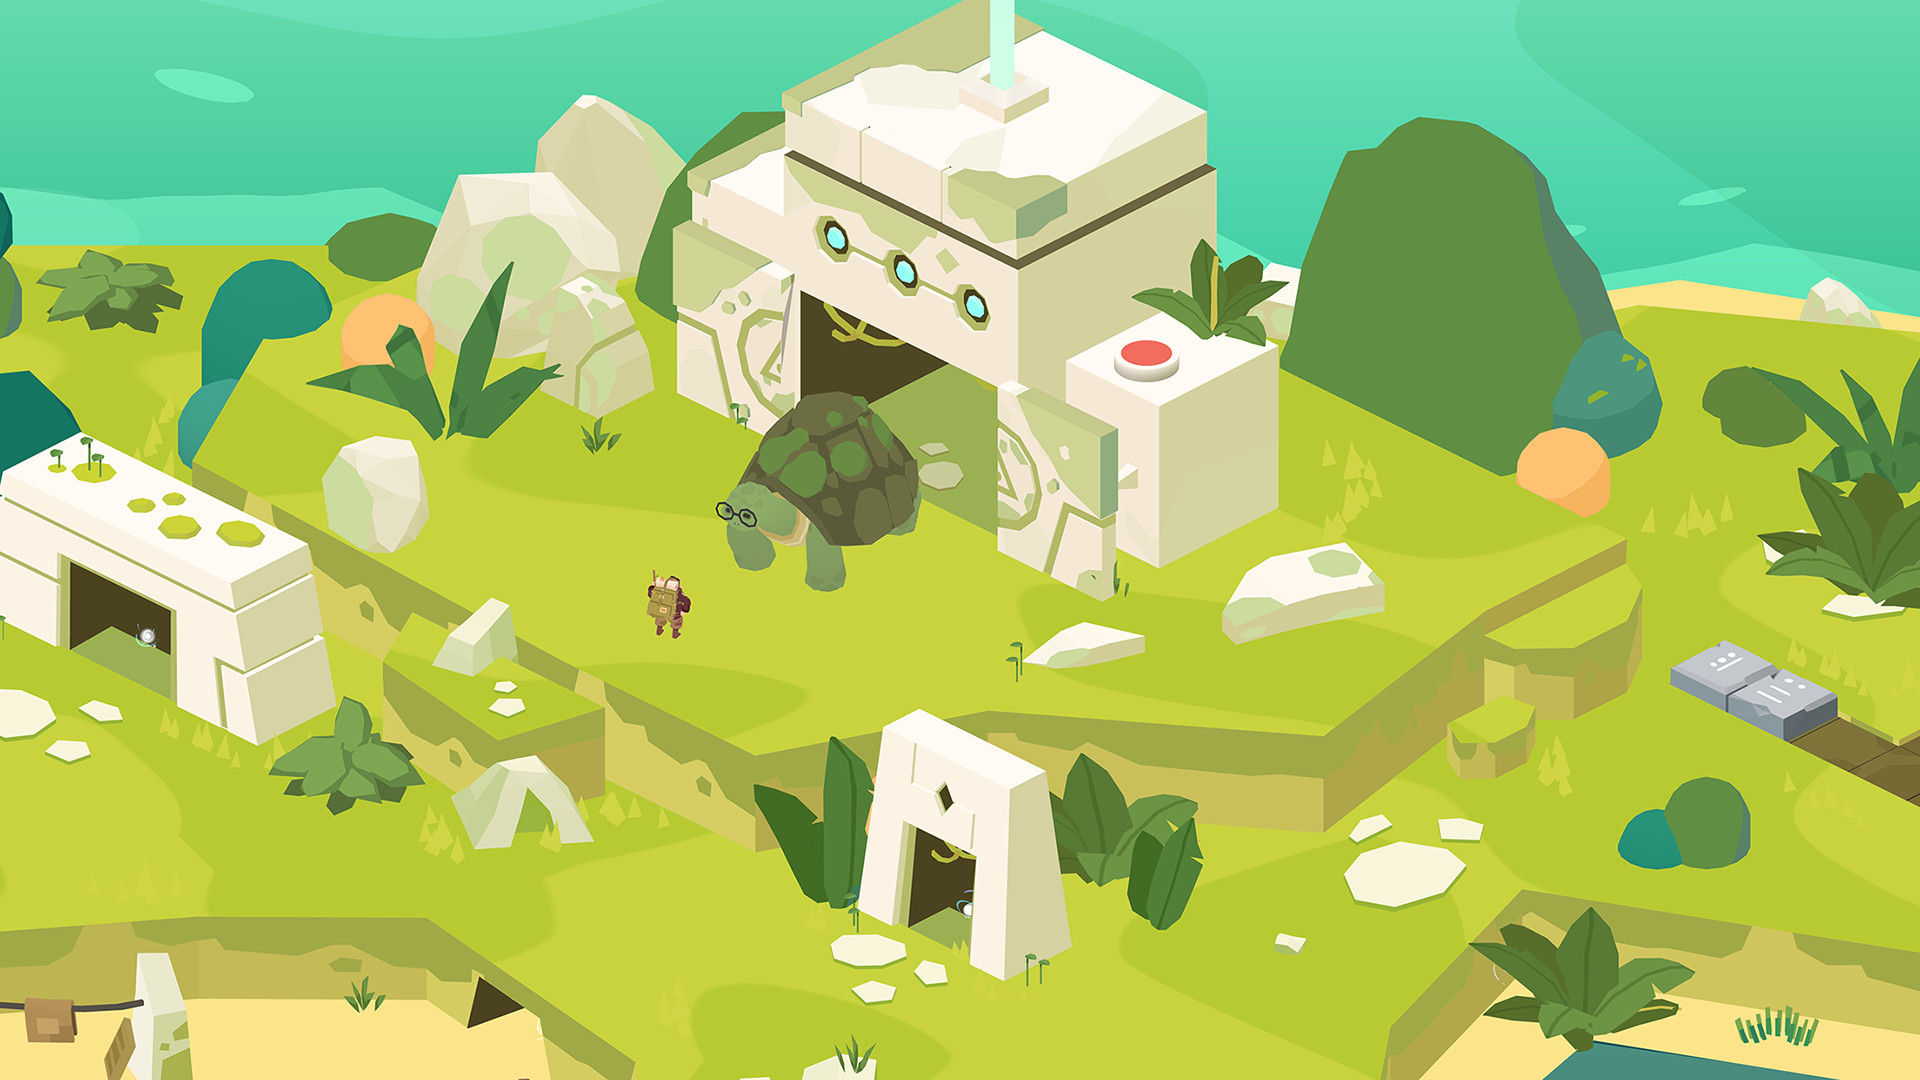
What to do on Turtle island
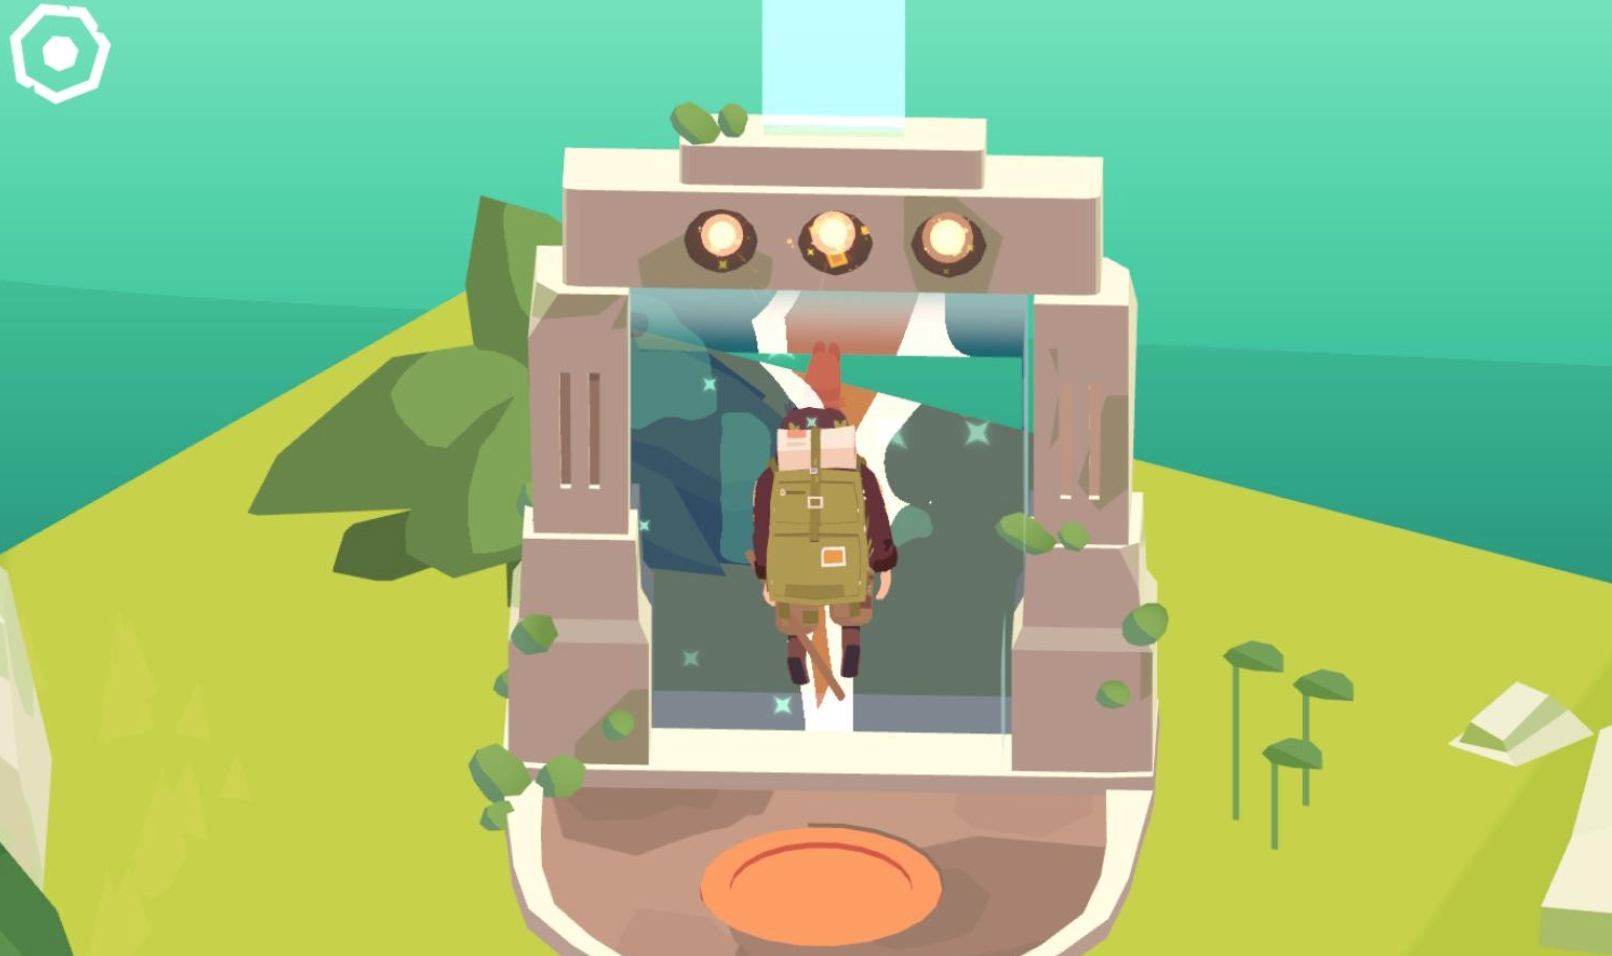
Pilot Milton’s plane crashes over Bermuda. Thirty years later, we find a puzzled pilot on a desert island – he doesn’t know how to solve the puzzle.
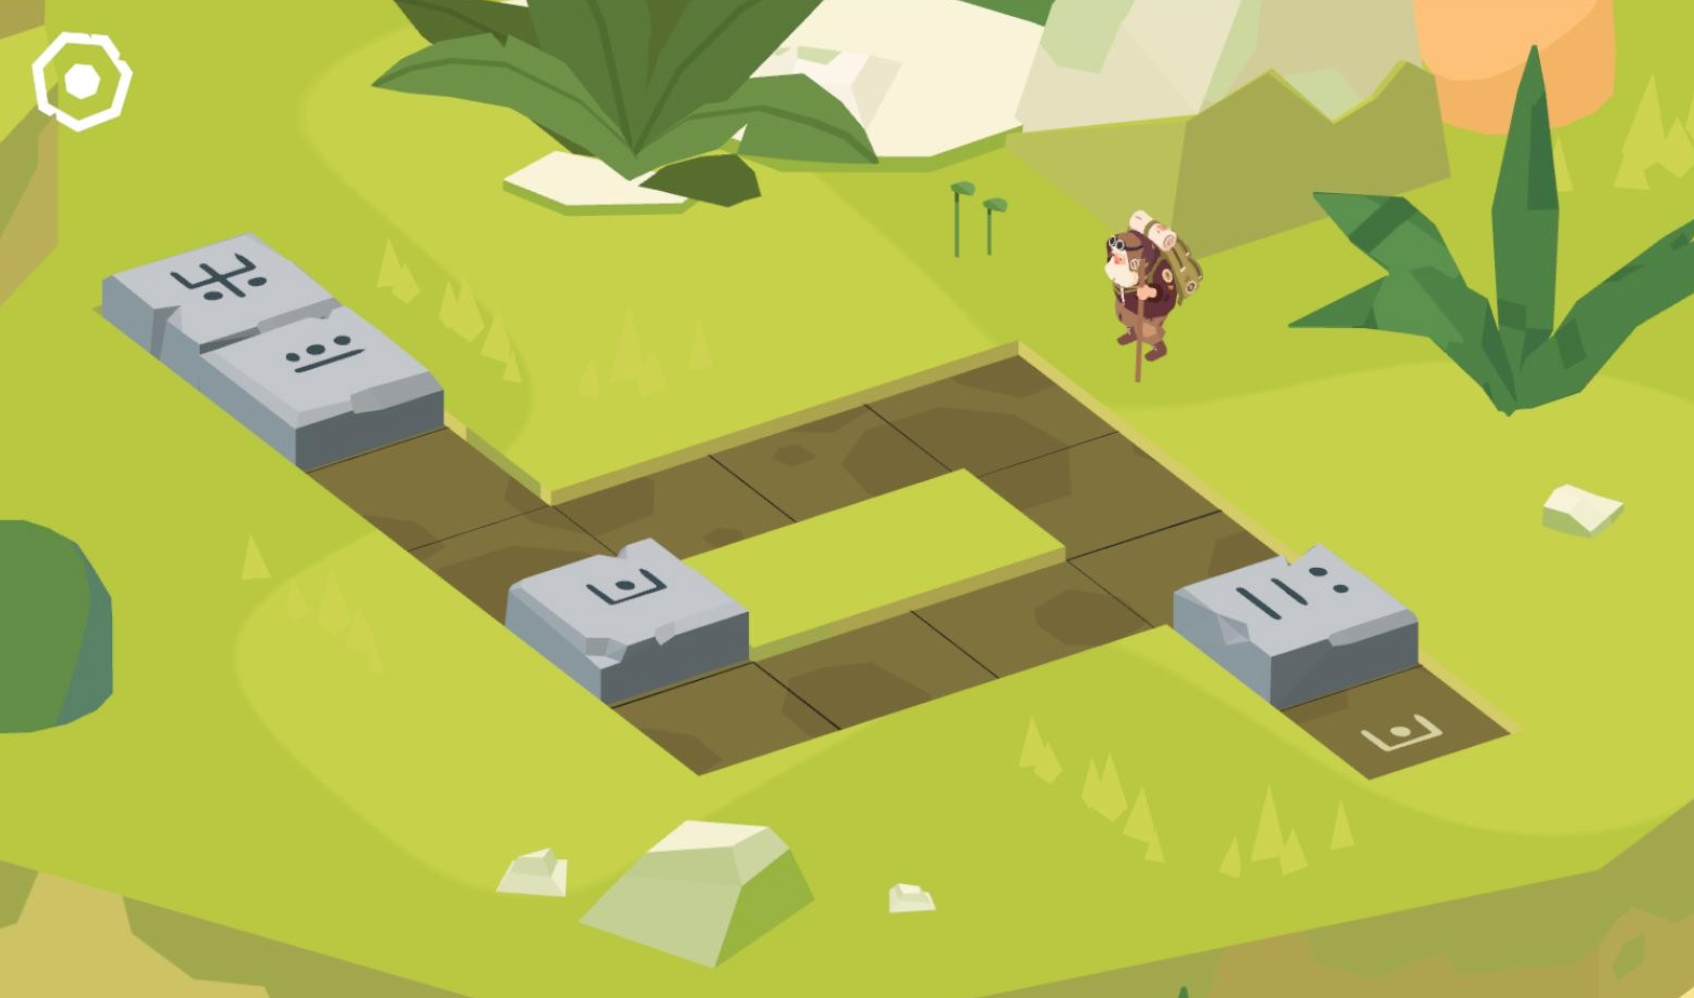
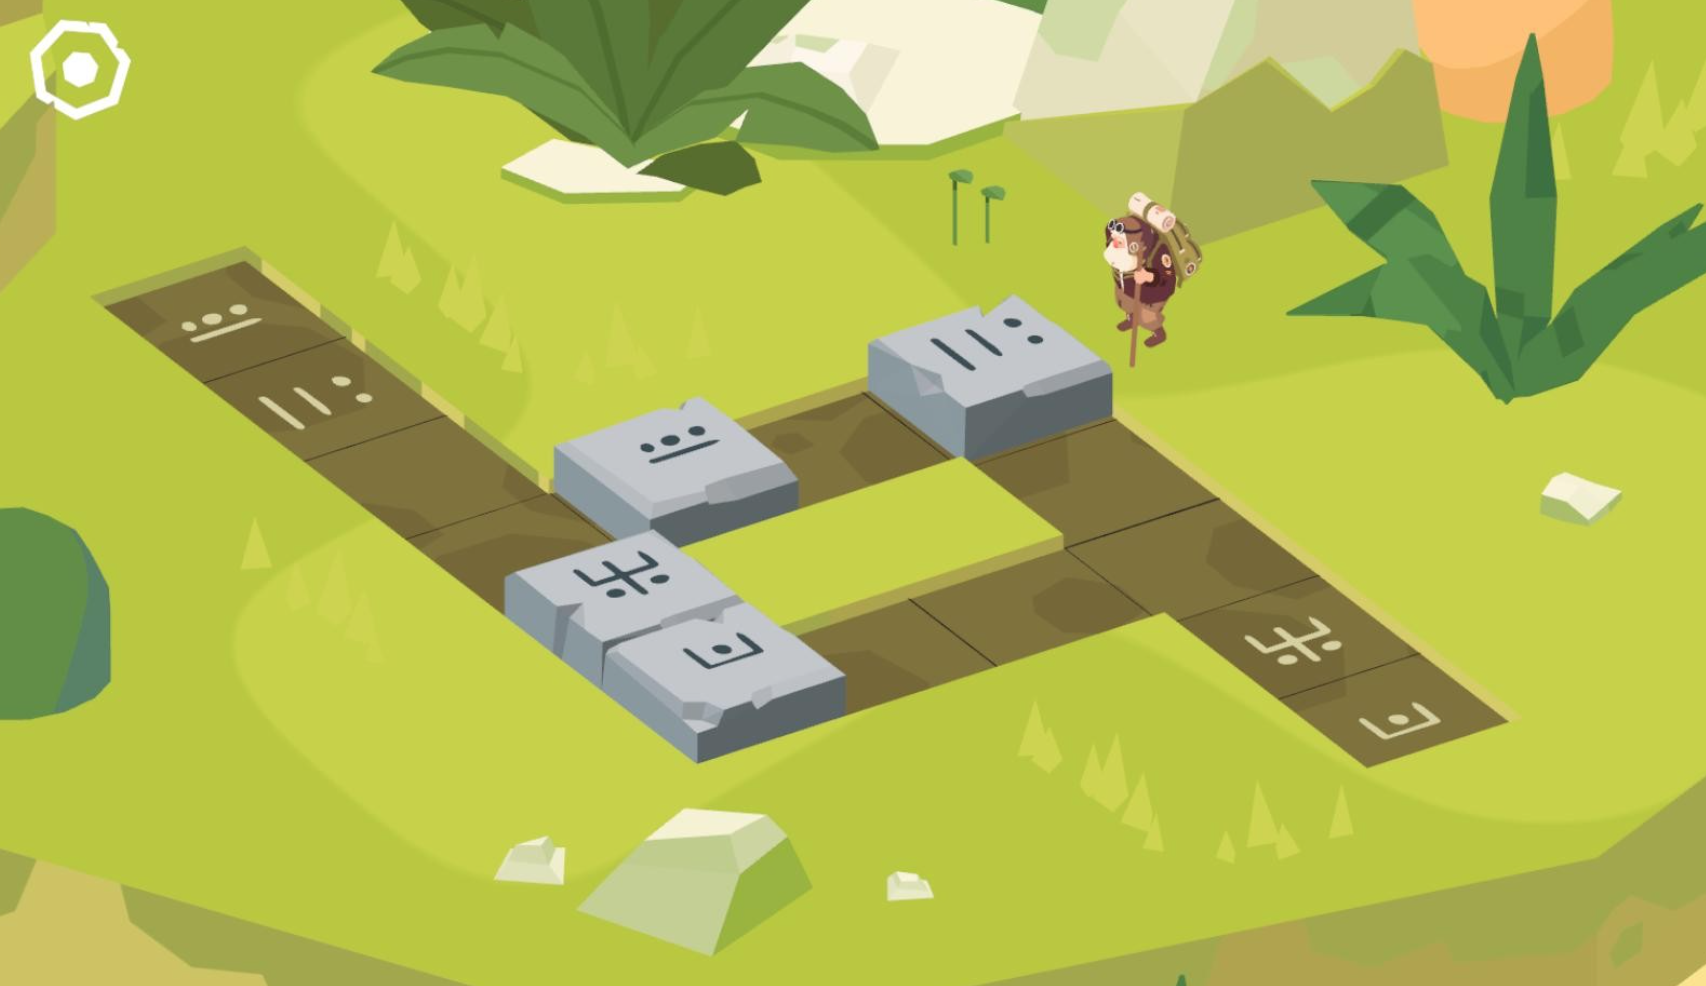
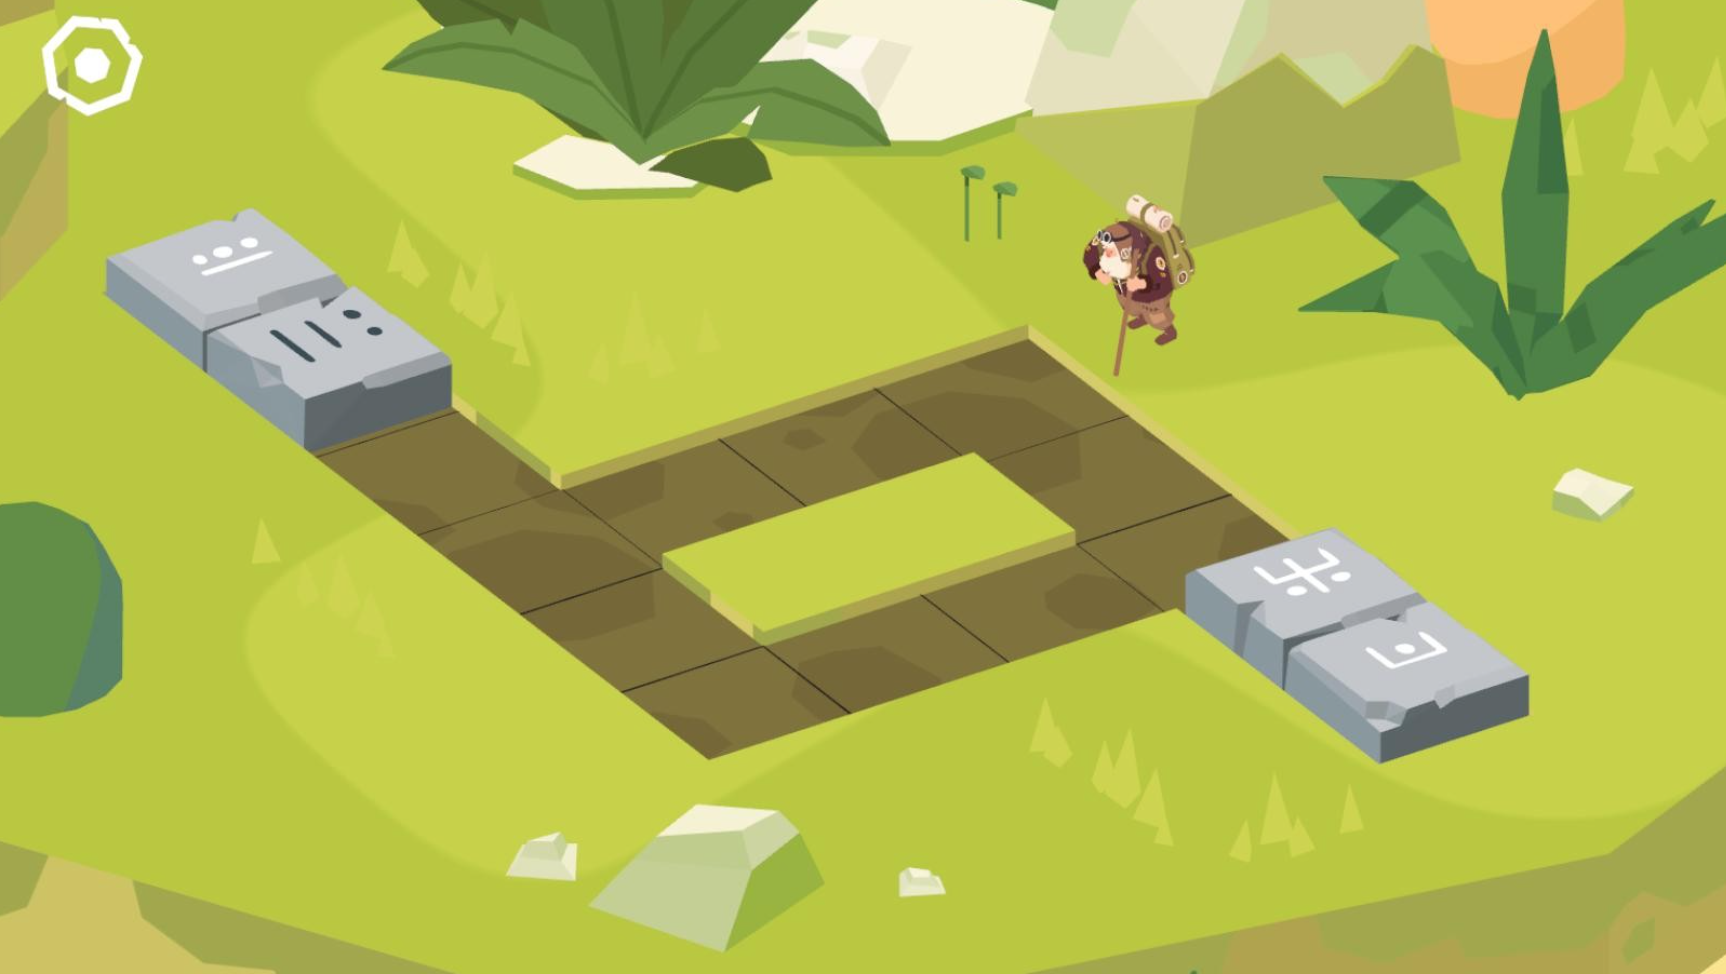
We move the slabs with the symbols, to ultimately place them in the places marked with the same symbols – move the cursor over the slab, hold down the LMB and drag the slab to the side.
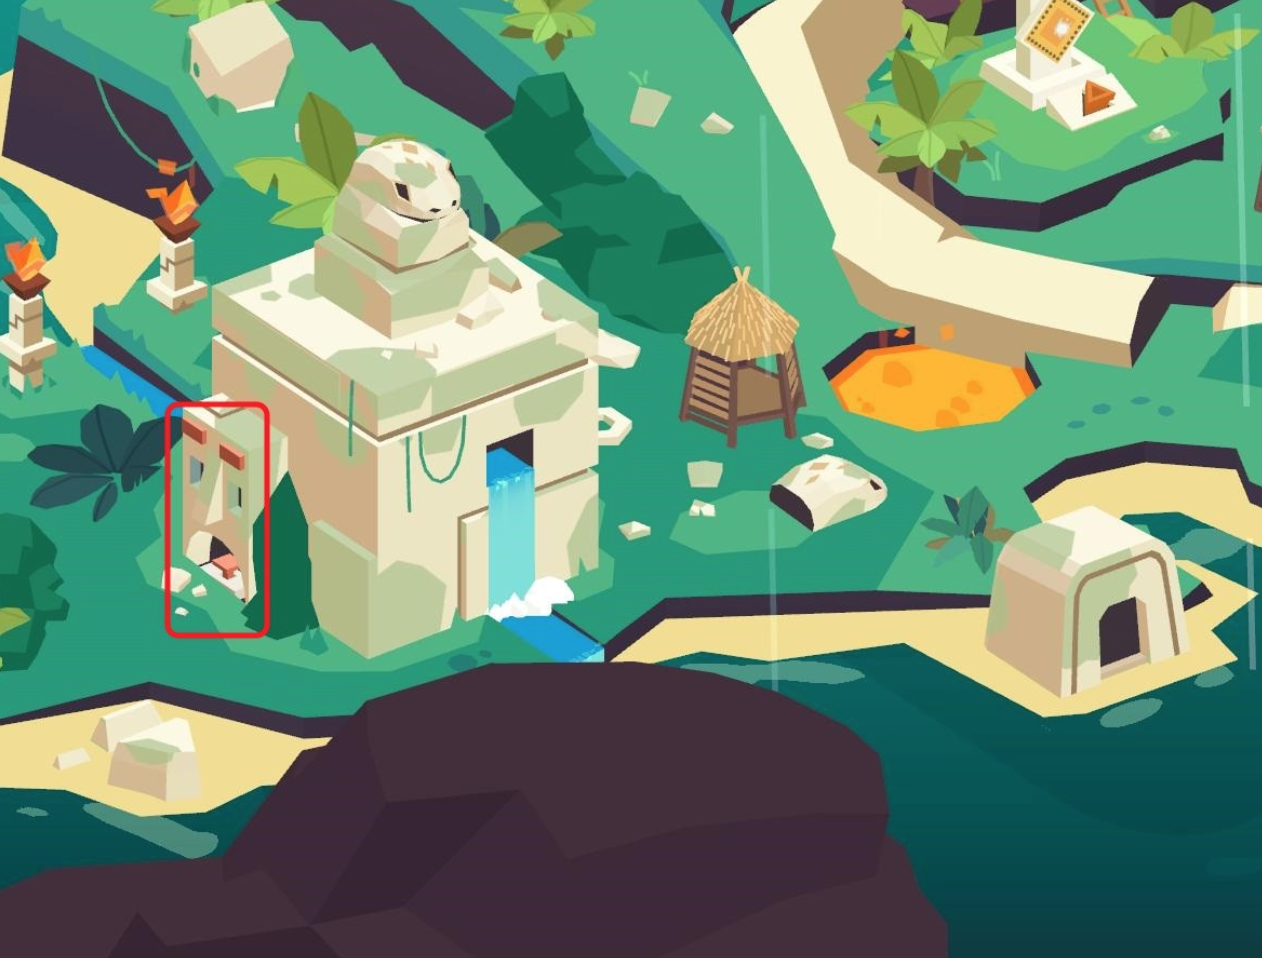
On the left side, a structure is emerging out from under the ground.
Move your view to the left – press the A key, or hold down the LMB and drag the mouse to the side.
Press the red button, move the slider that appears on the right. Look at the back of the structure – hold down the RMB and pull the mouse to the side.
We lower the lever, and automatically return to the main facade. Move the slider to the right, press both buttons at the top.
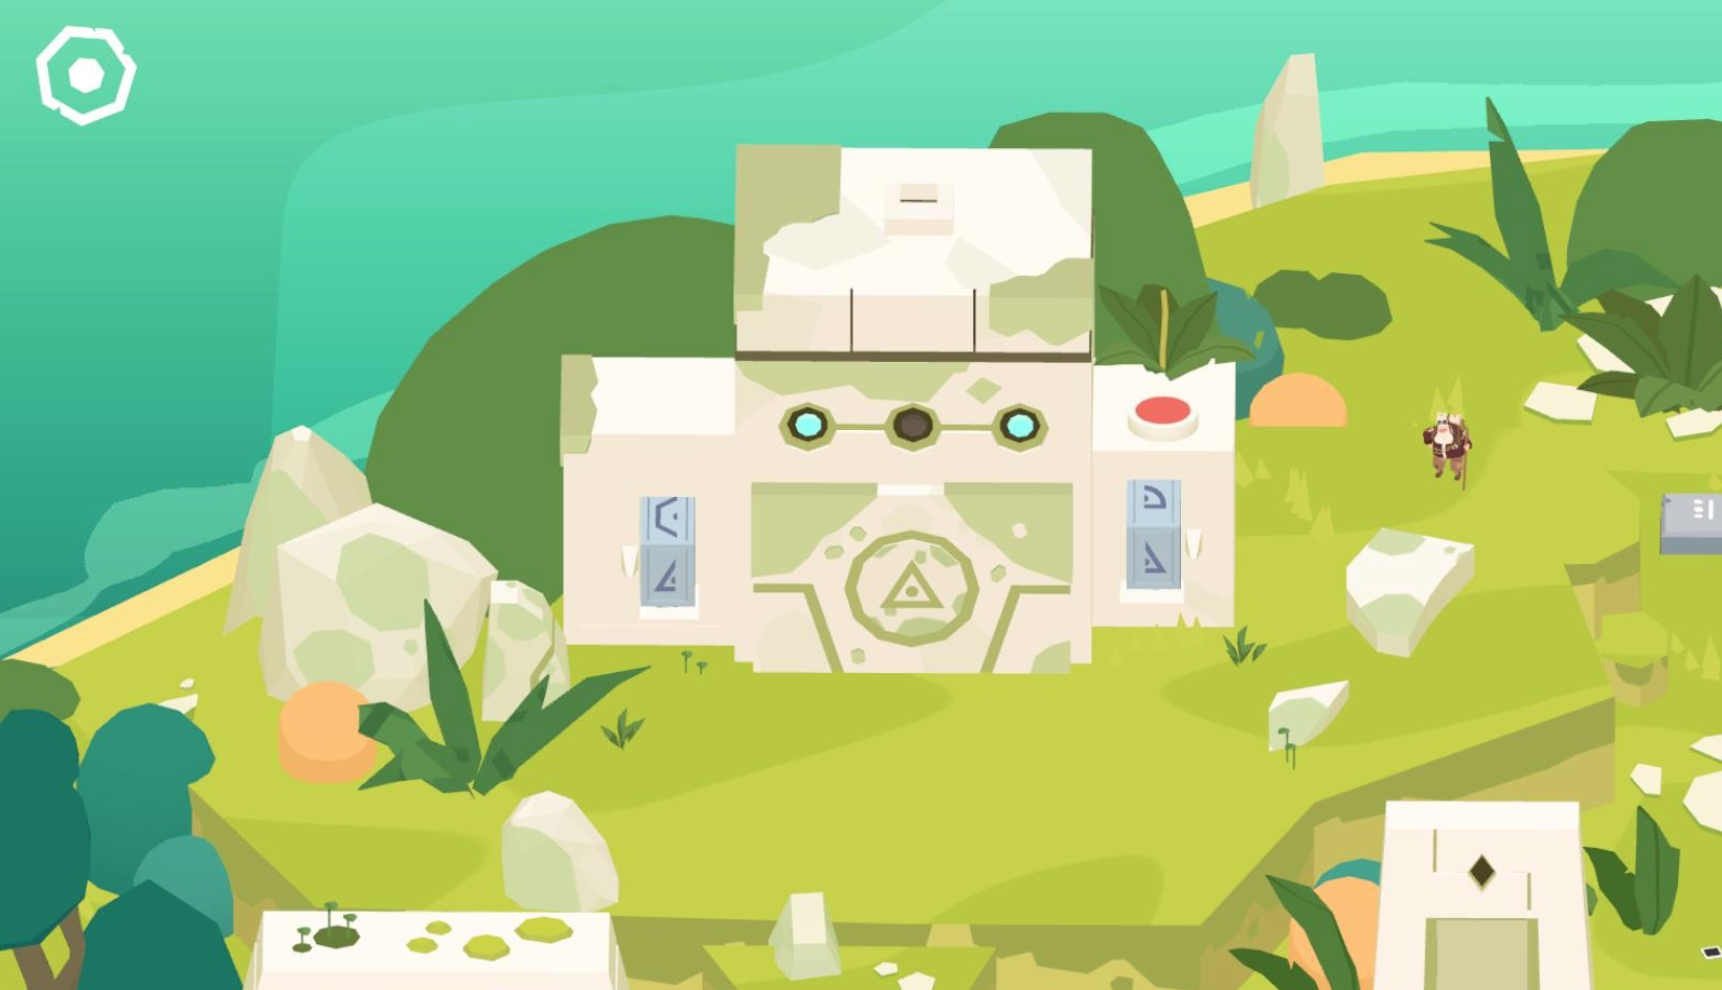
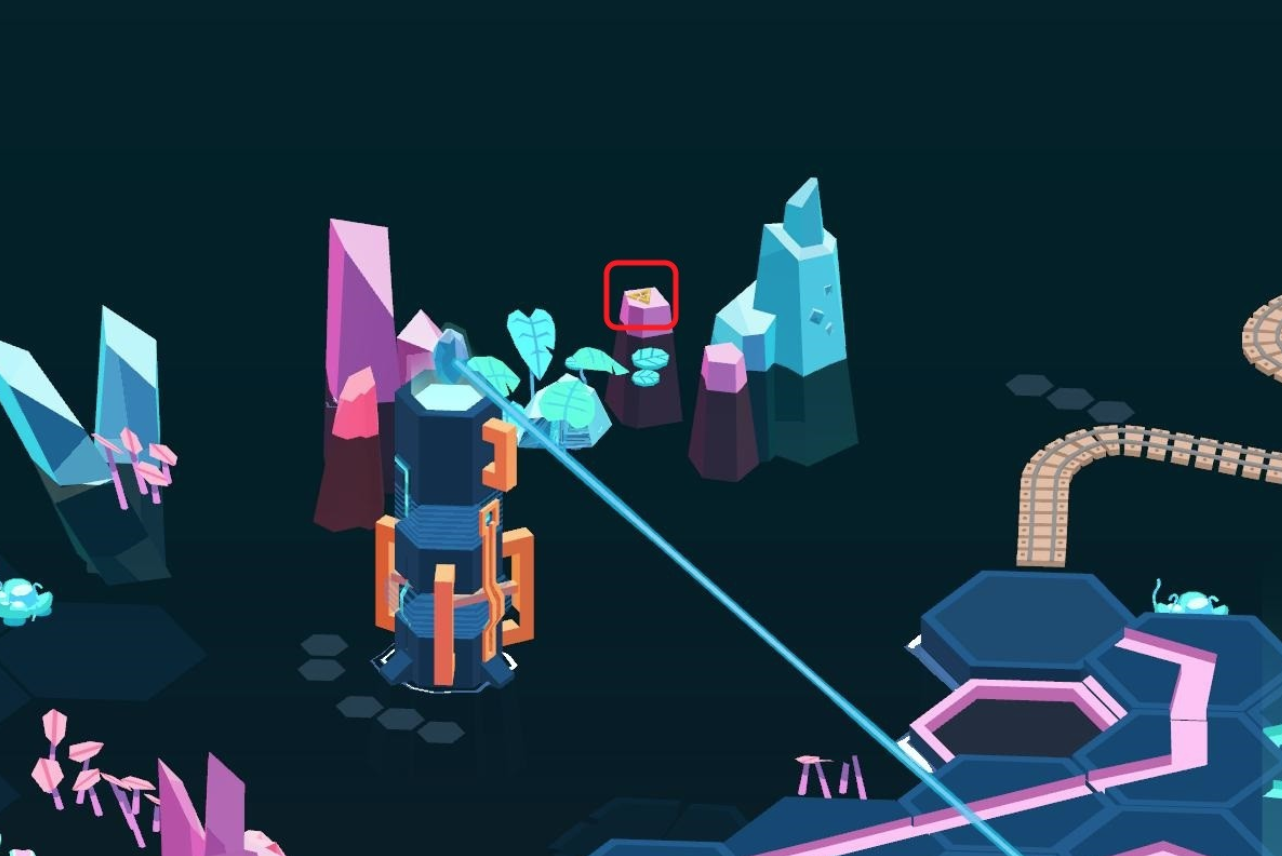
We click the wheels on the left and right, selecting the drawing of the half triangles.
A ray bursts out of the structure, and the gate opens. The old turtle Herman gets out. He agrees to help Milton return home as a token of gratitude for waking him up after 563 years.
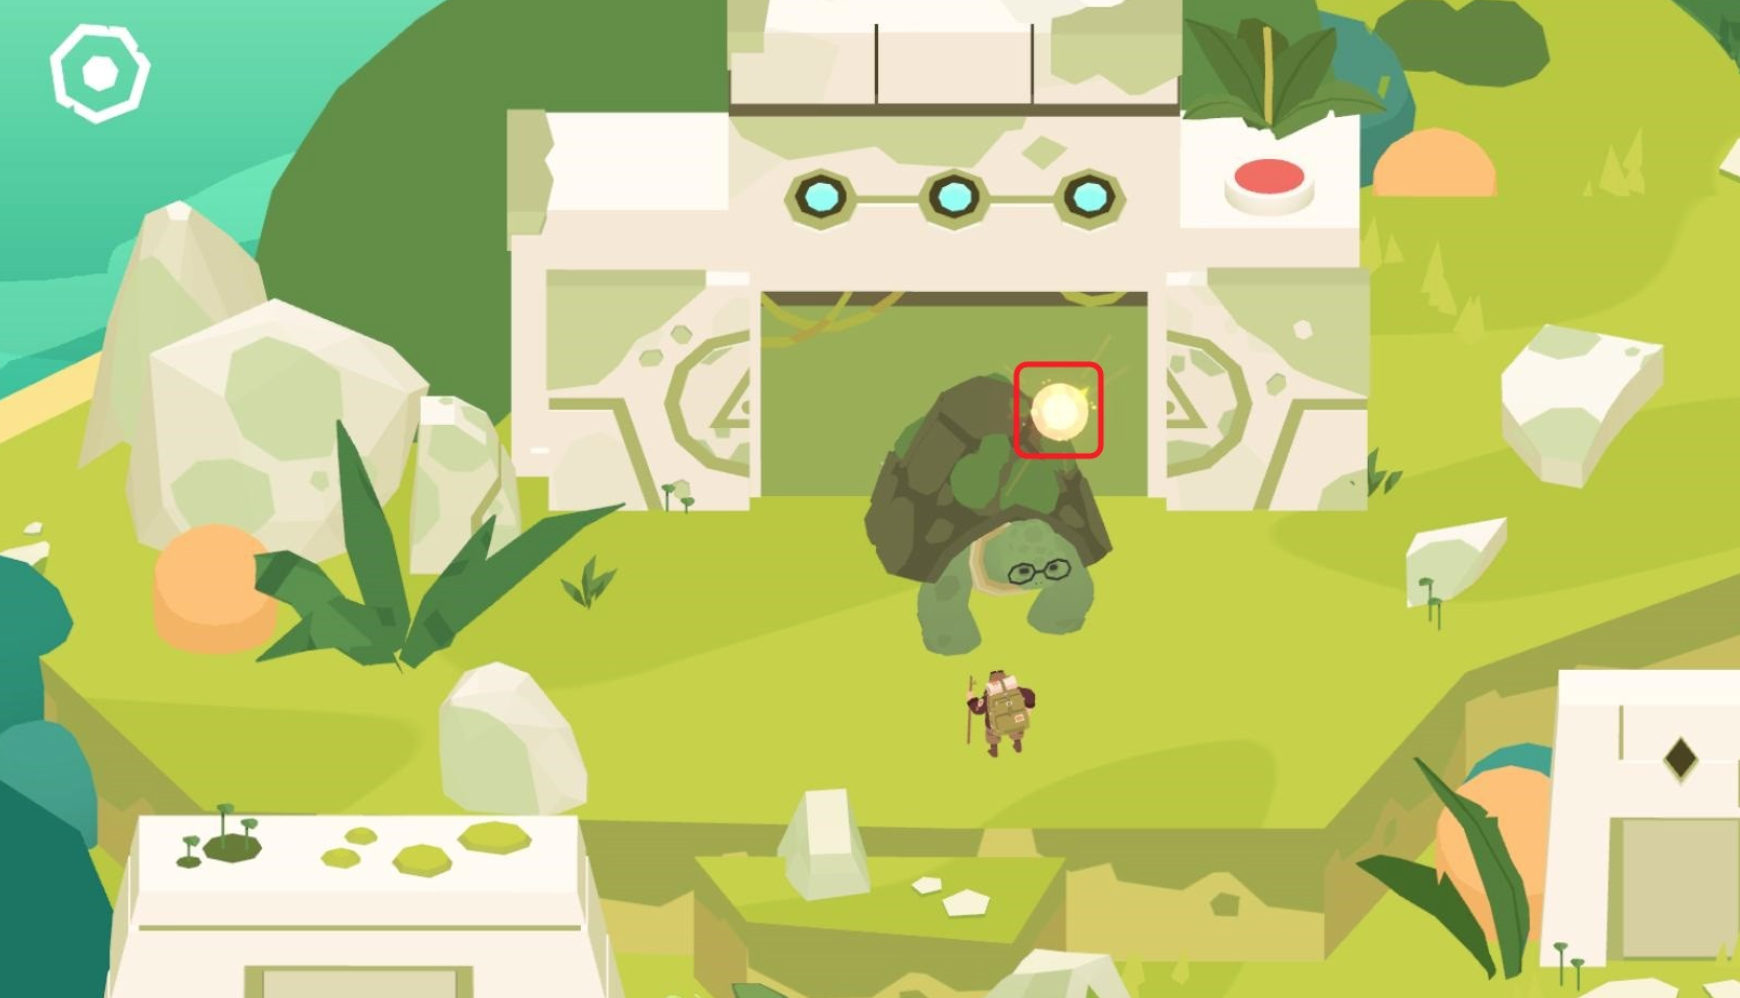
We click LMB on the SPHERE above Herman, to open the spherical gates, with which you can move between the islands.
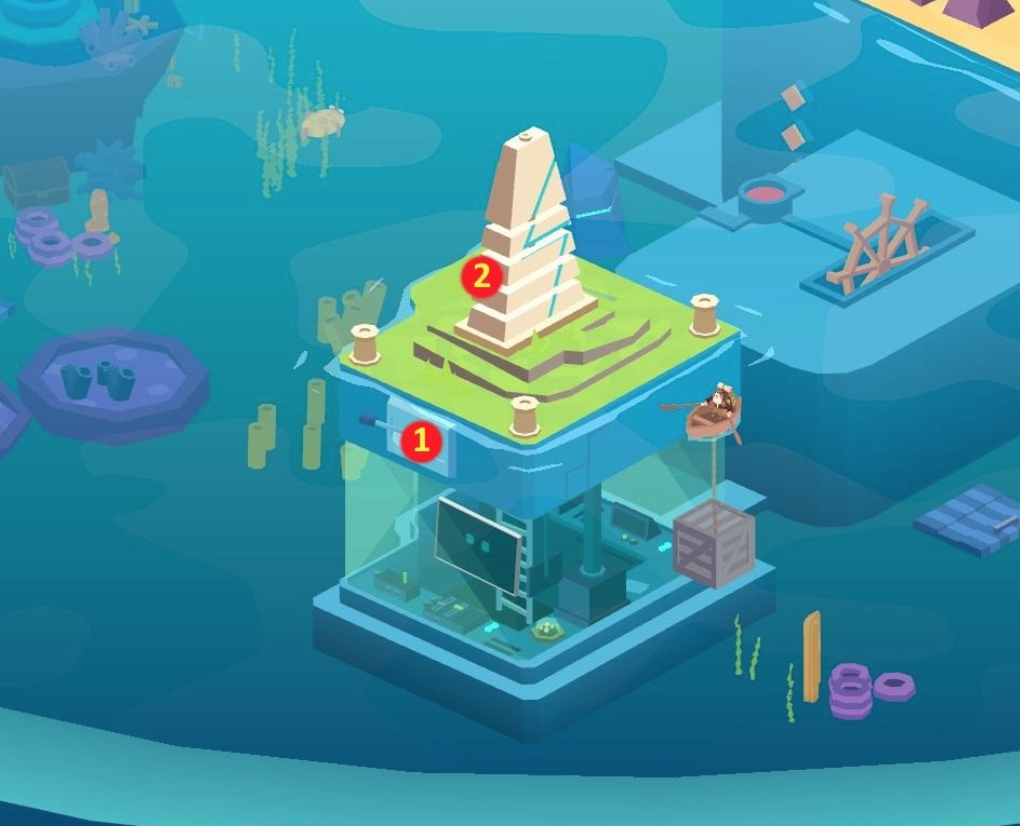
Herman explains that it will be possible to move to the next island, only when all the spheres on this island are collected. First Milton should look at the Star Monument, where useful things are found.
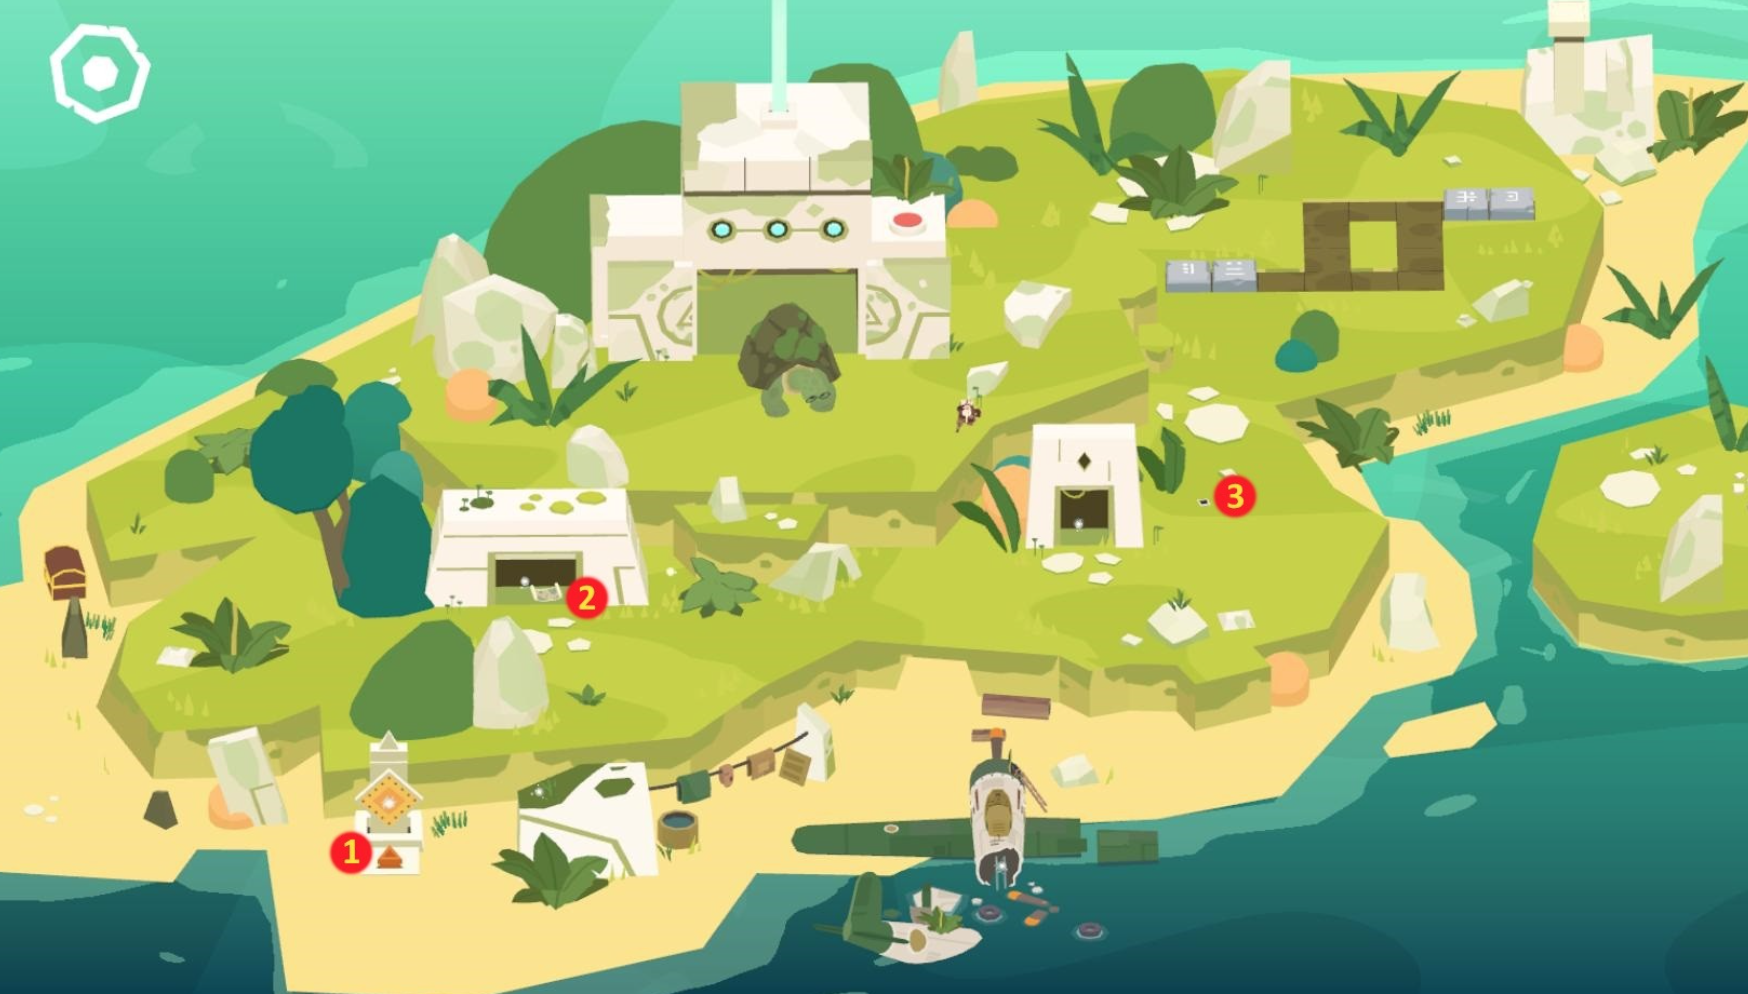
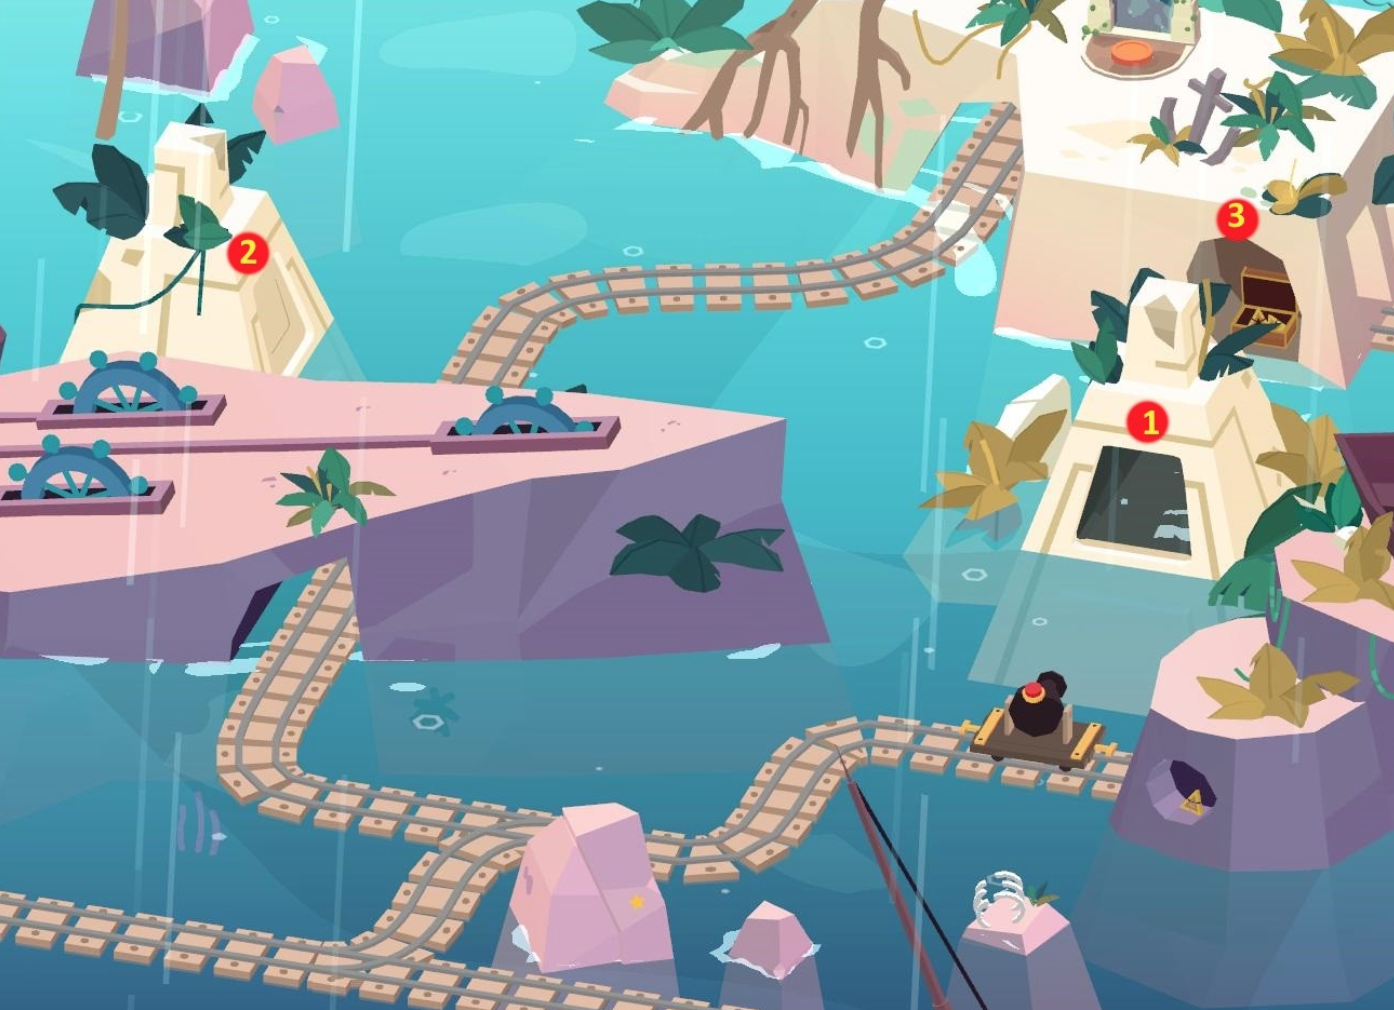
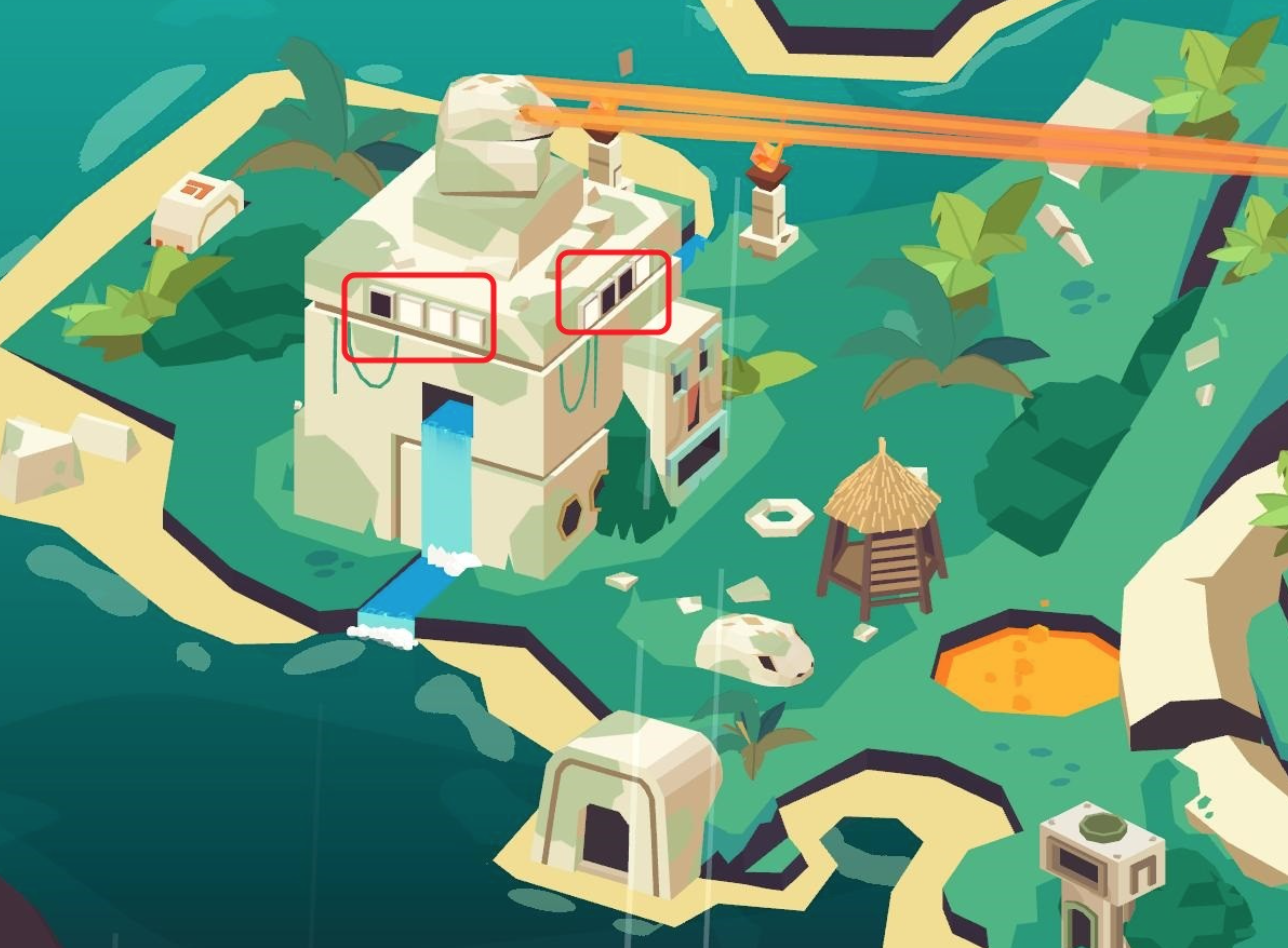
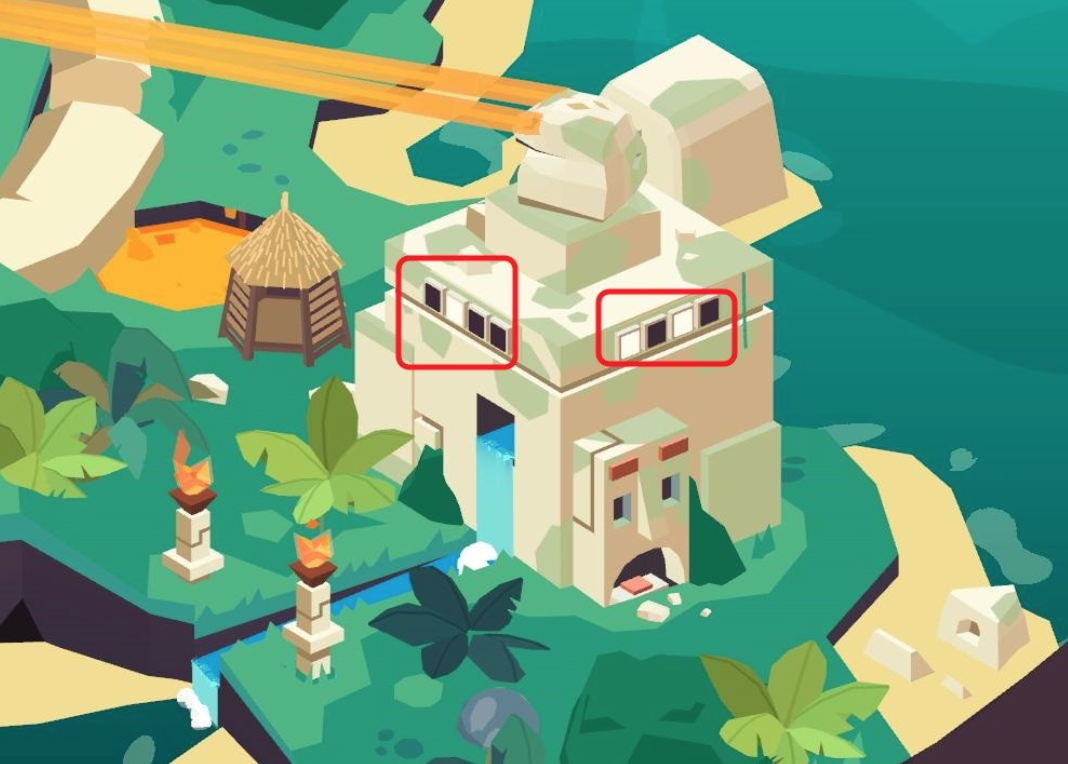
Press the button in front of Star Monument 1 – several stars are missing. We notice how the gates opened in two buildings. To the right of the structure on the right we select PHOTO 2. From the structure on the left we take the STAR MAP 3 – with its help you can now find the stars.
Open the map, let’s look at the locations of the stars.
Examining the areas, we find the seven missing STARS. Press the button under the Star Monument, click LMB on the SPHERE that appears.
We notice a structure that will require a blue key
First, let’s enter the portal of movement.
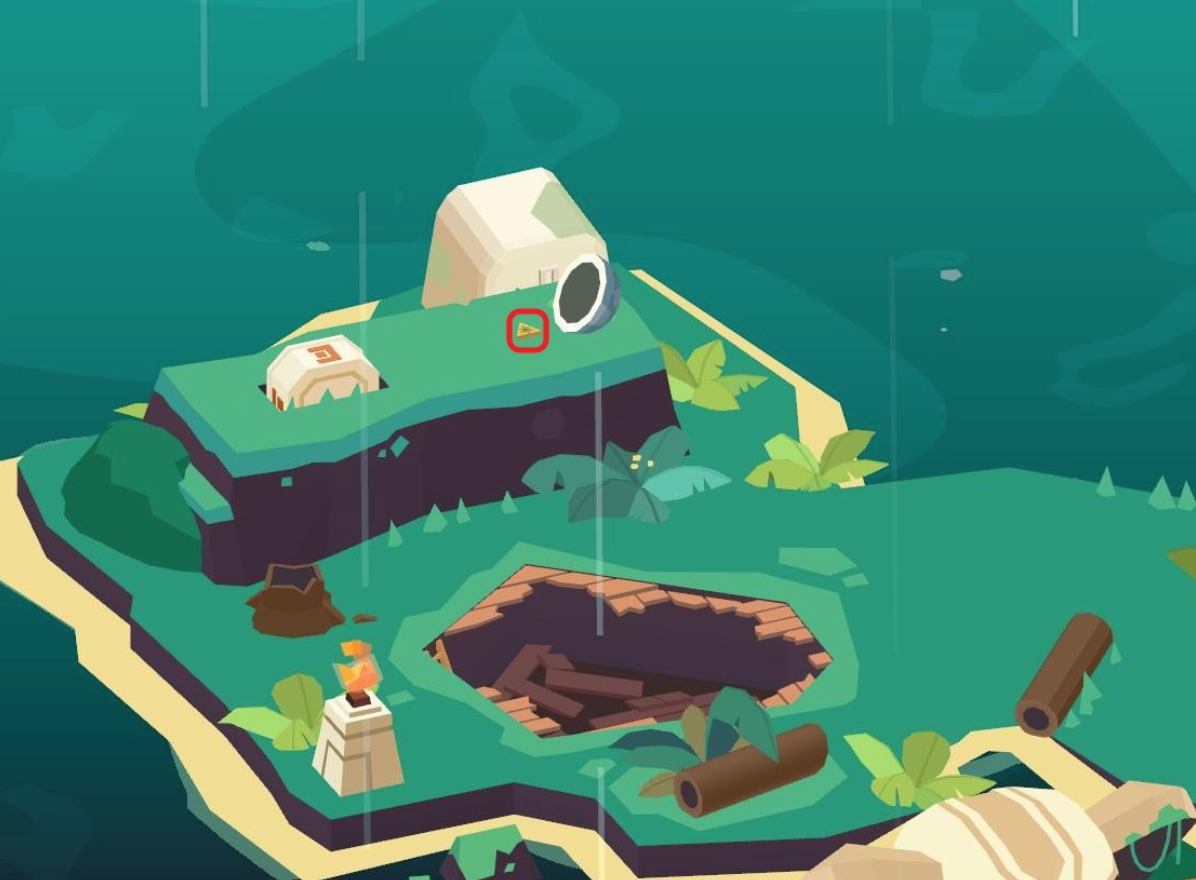
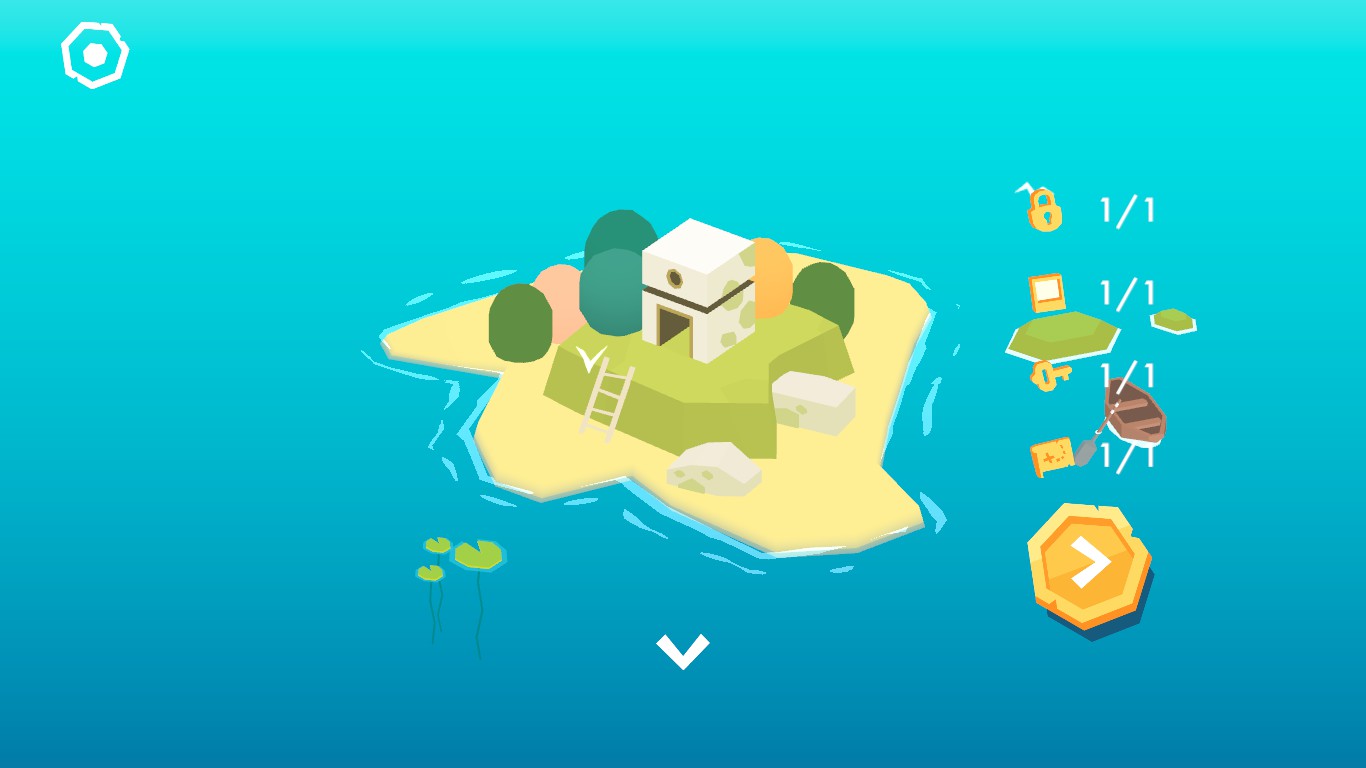
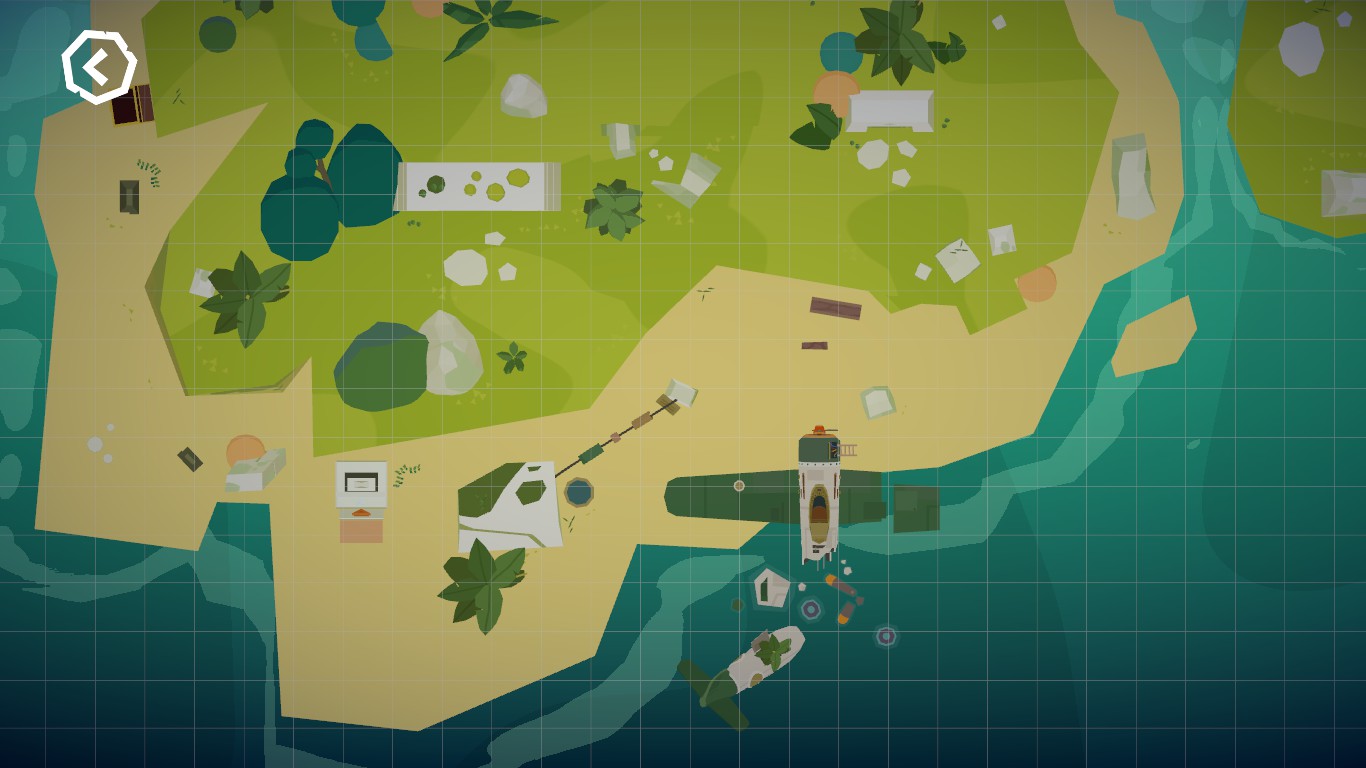
What to do on Secret Base Island
- Artifacts – 7
- Castles – 2
- Photos – 1
- Keys – 1
- Maps – 1
- Spheres – 4
Sphere 1
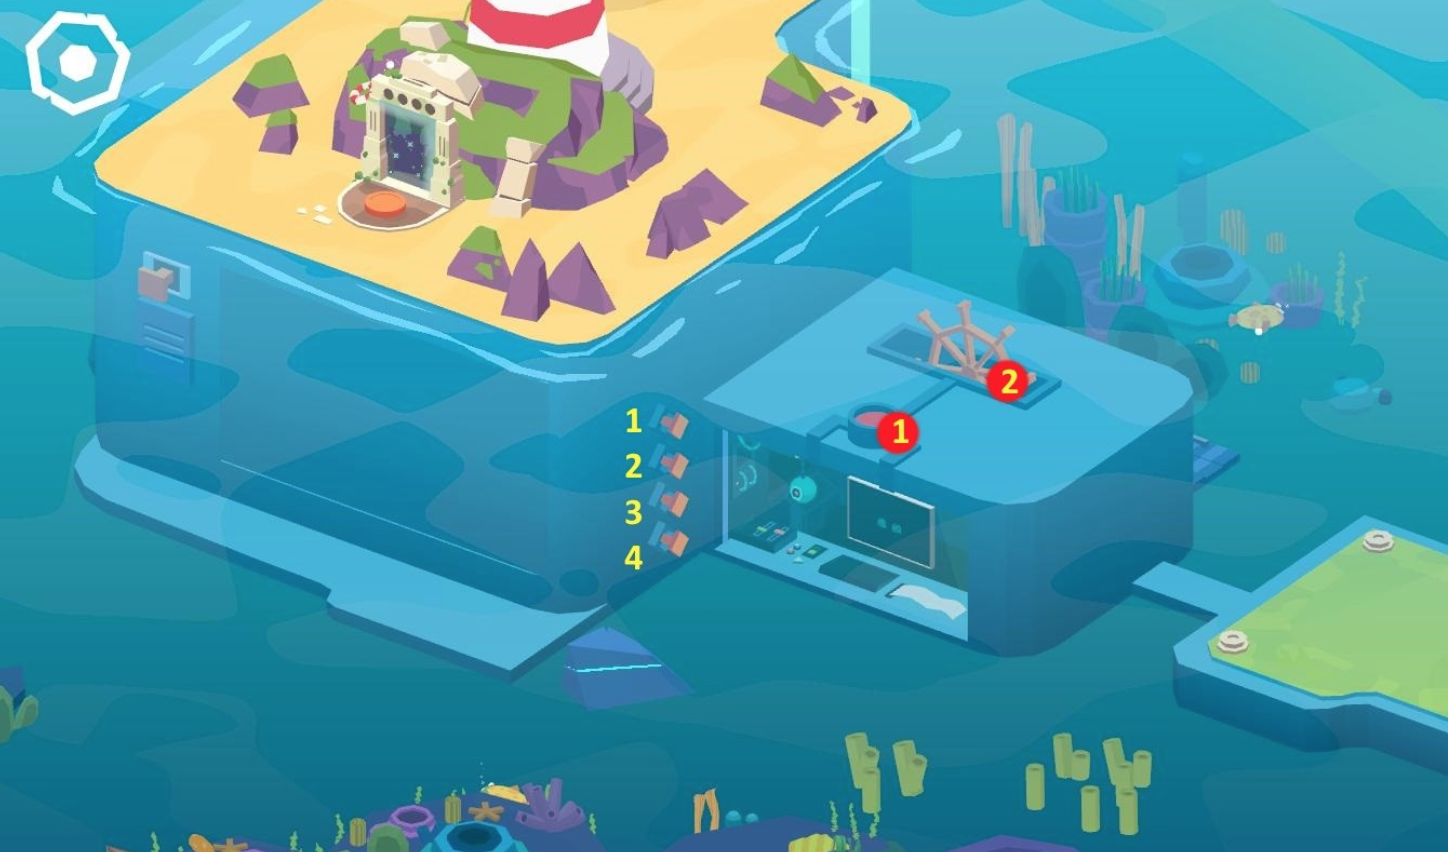
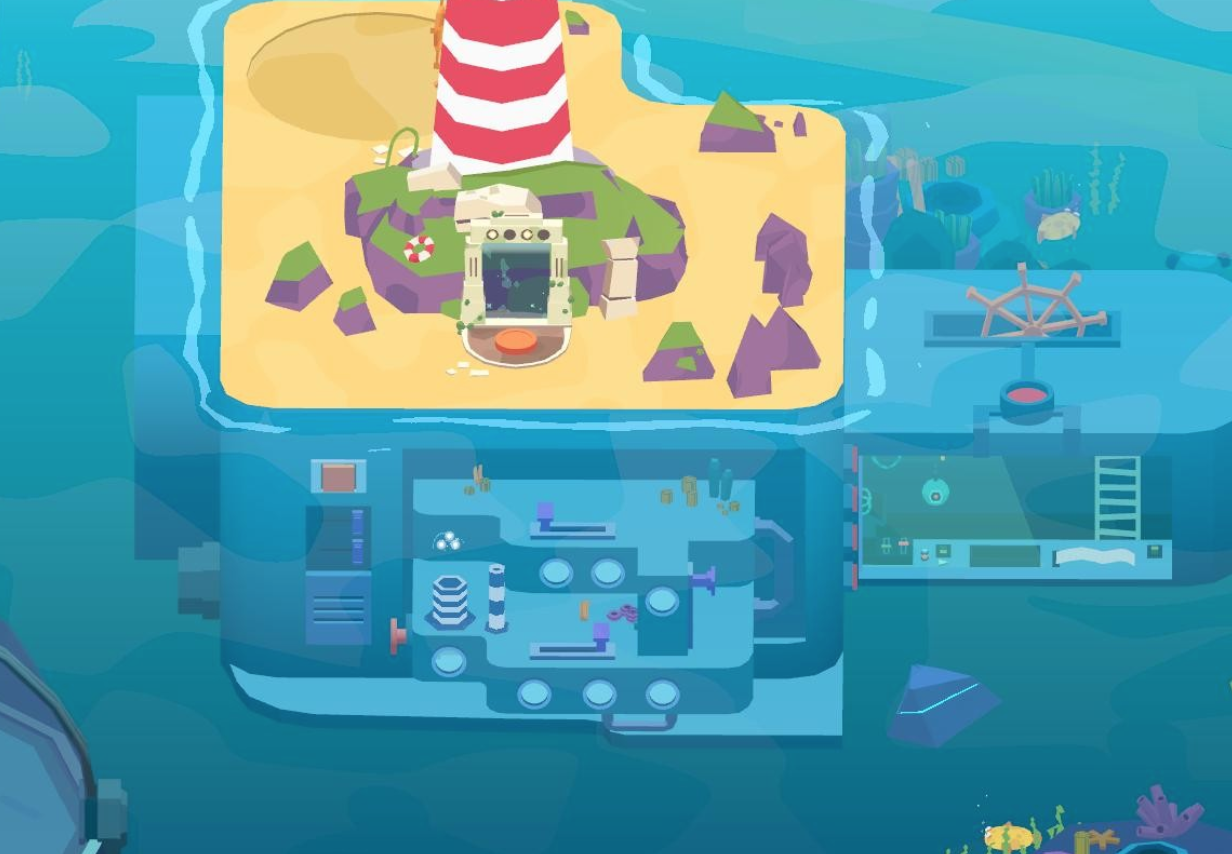
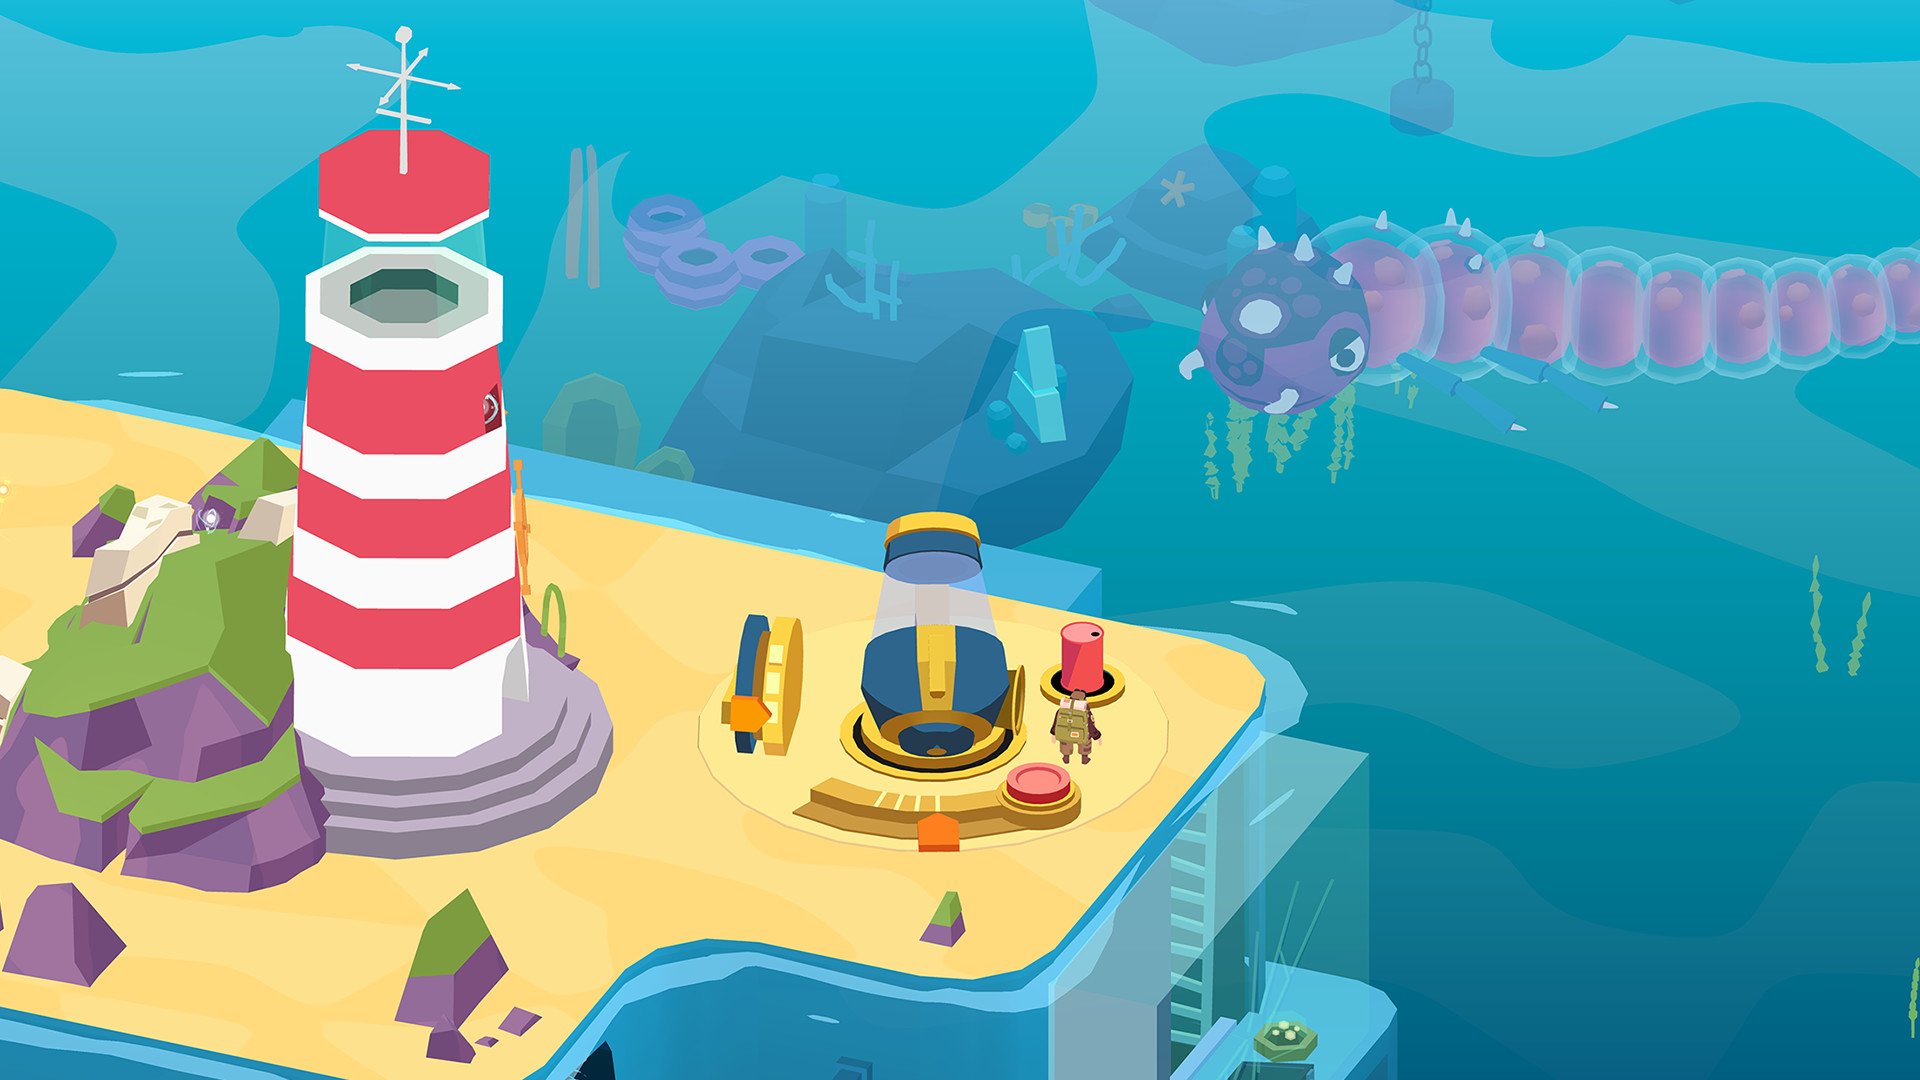
Press red button 1 on the roof of the underwater laboratory. Rotate the extended steering wheel 2.
The curtain protecting the panoramic viewport opens and Milton is approached by the robot D.A.V.I.D., stuck in an underwater laboratory.
Press the buttons in order from top to bottom: 3, 2, 4, 1.
The curtain opens on the second window. DAVID. asks to open the rest of the windows.
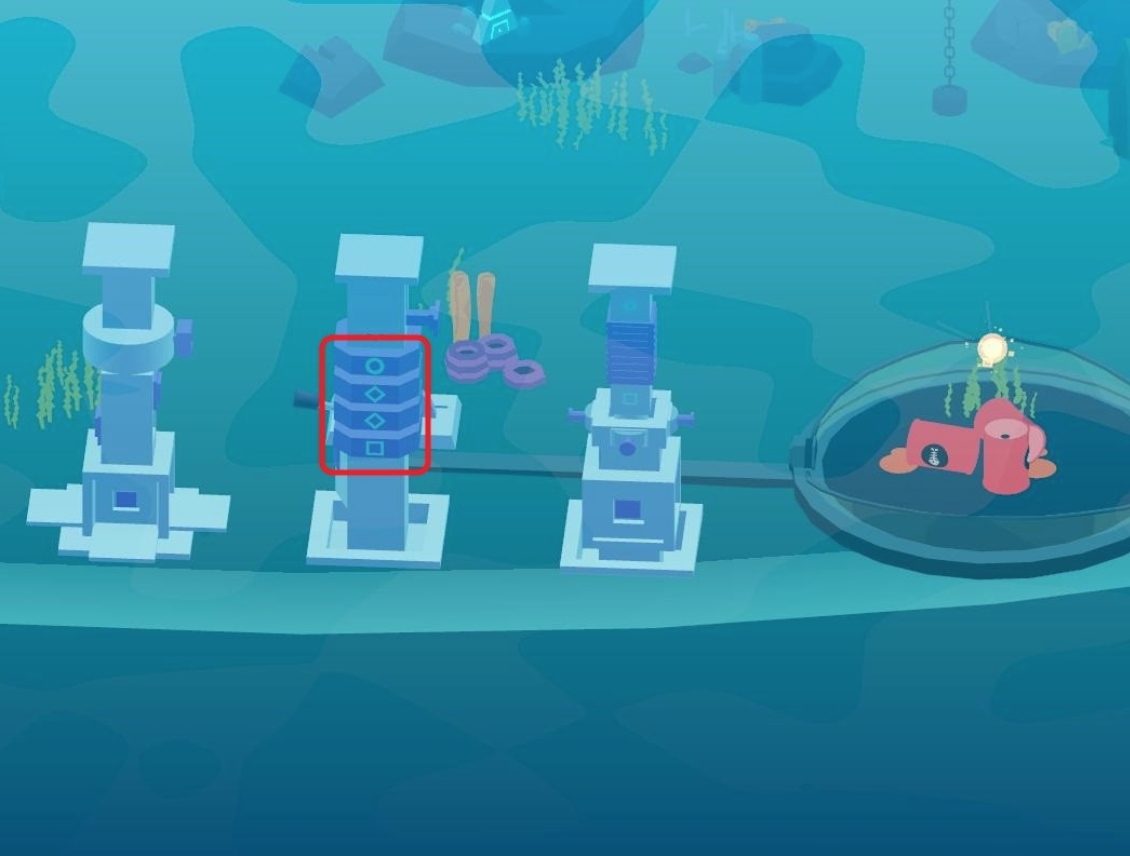
We consistently move the emerging levers, press the buttons. Pay attention to the clue on the third column. We expose the symbols we saw on the column in the center, we take SPHERE 1 from under the opened glass dome.
DAVID. talks about the emerging sea monster.
Sphere 2
Move aside the shield knocked down by the monster.
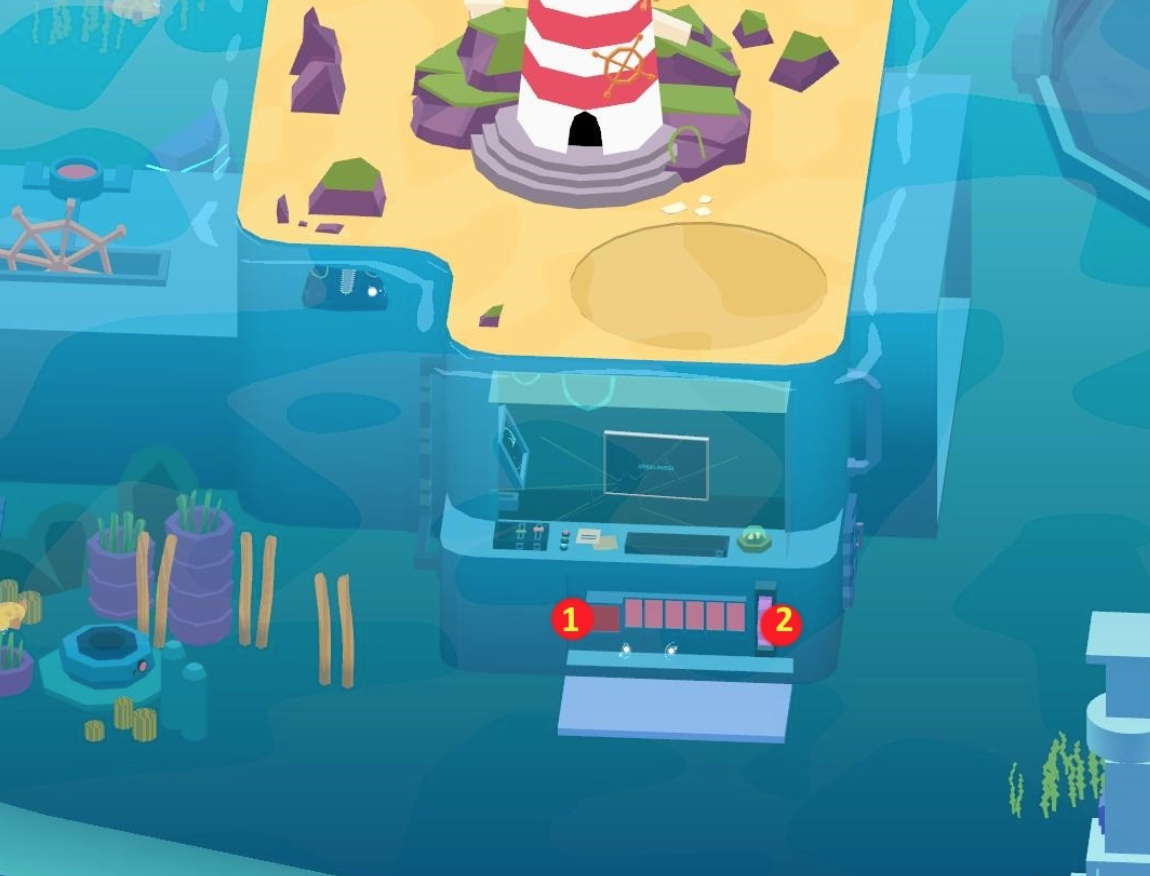
Press the red button 1 until the scale is completely filled. Turn the opened wheel 2. Automatically move to the left.
Turn the lever 1 to the left. Click on the segments of obelisk 2 to collect the drawing. We turn the lever to the right, we automatically move to the opened window. We receive from D.A.V.I.D. SPHERE 2.
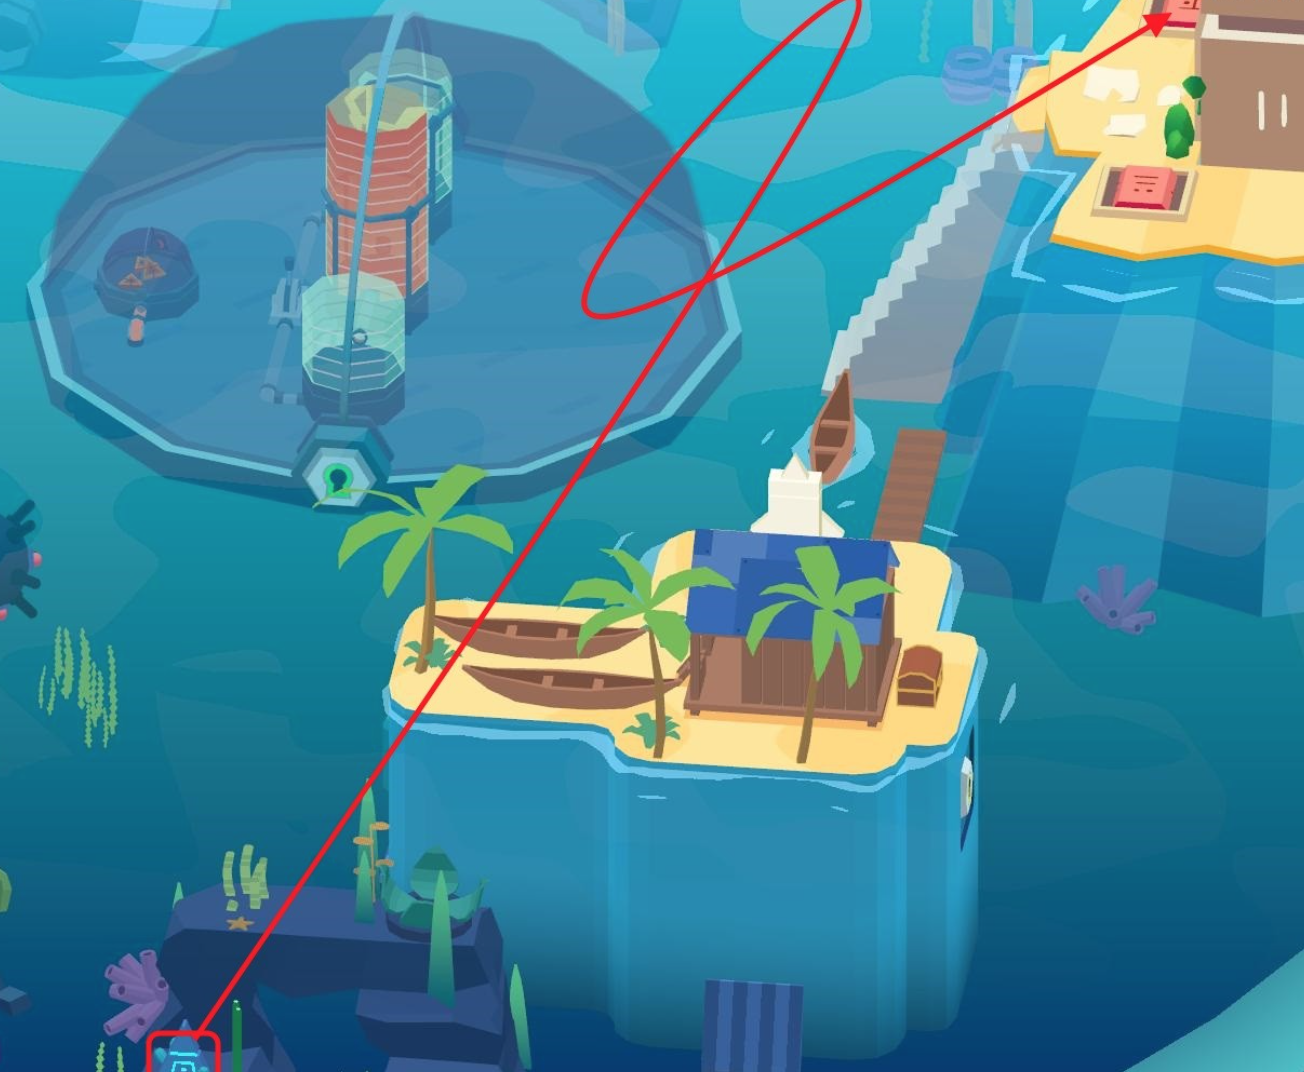
Map
In one of the boats on land near the hut we find STAR MAP 1.
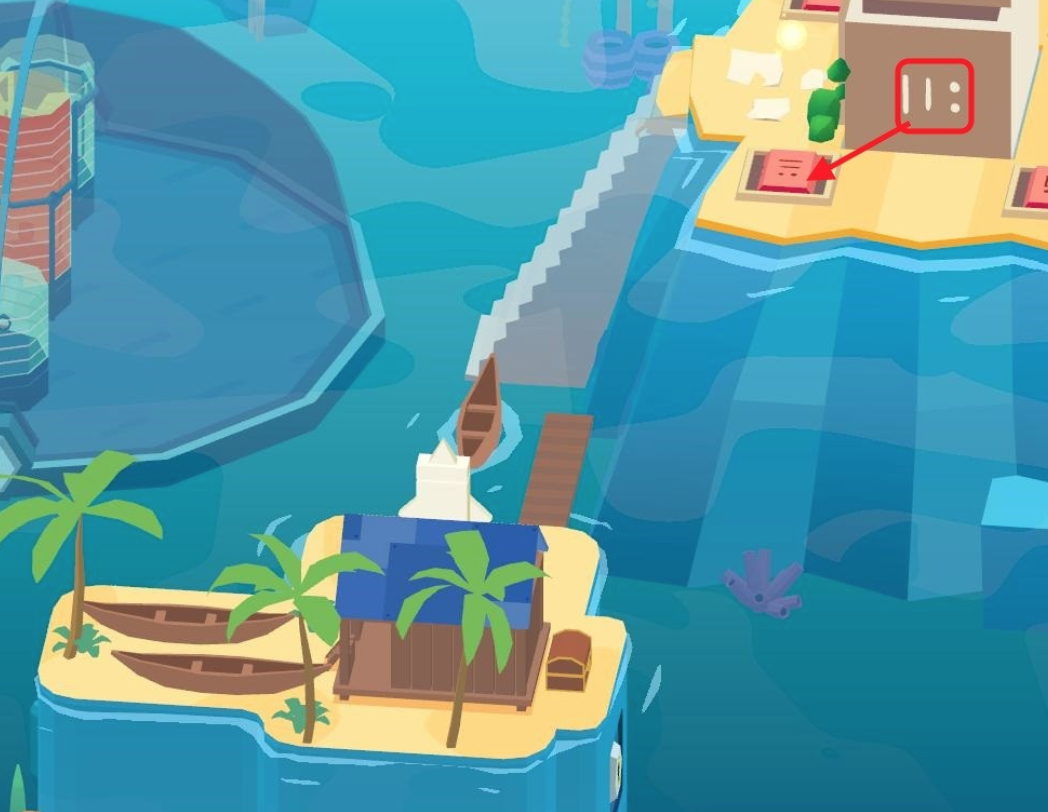
The photo
We select PHOTO 2 lying near the star monument.
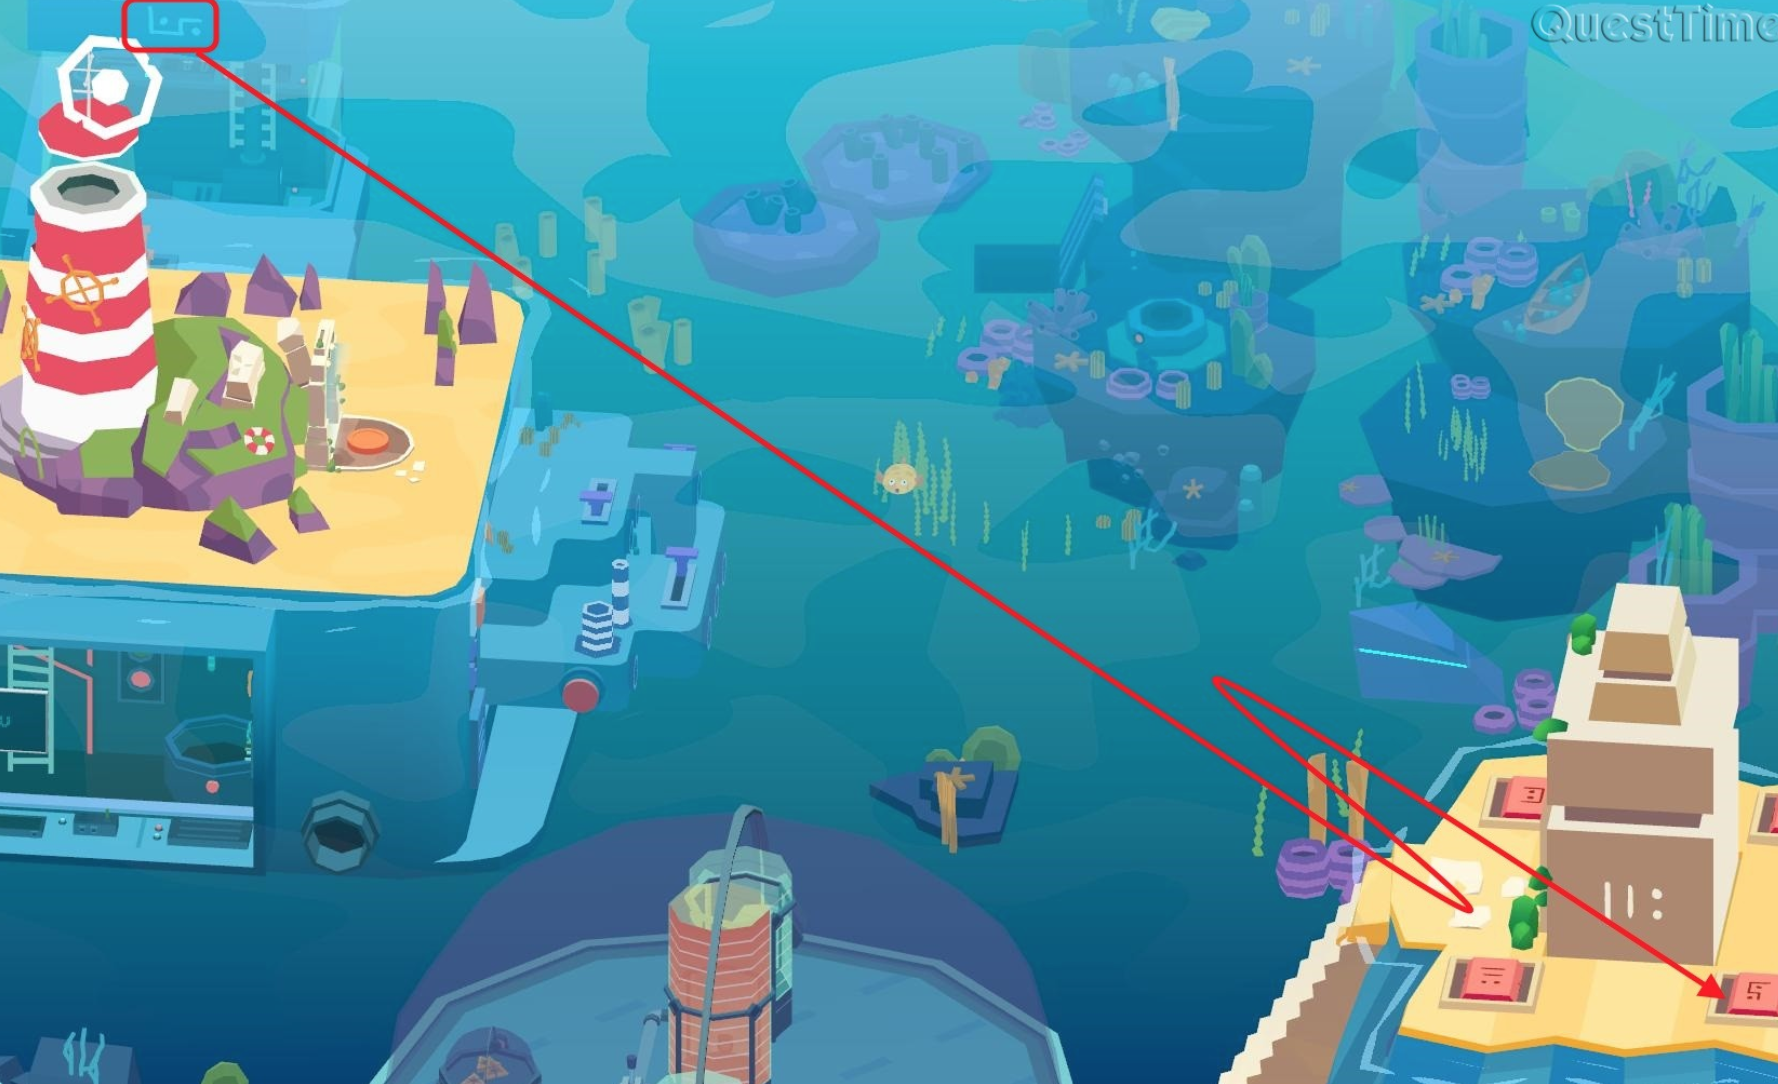
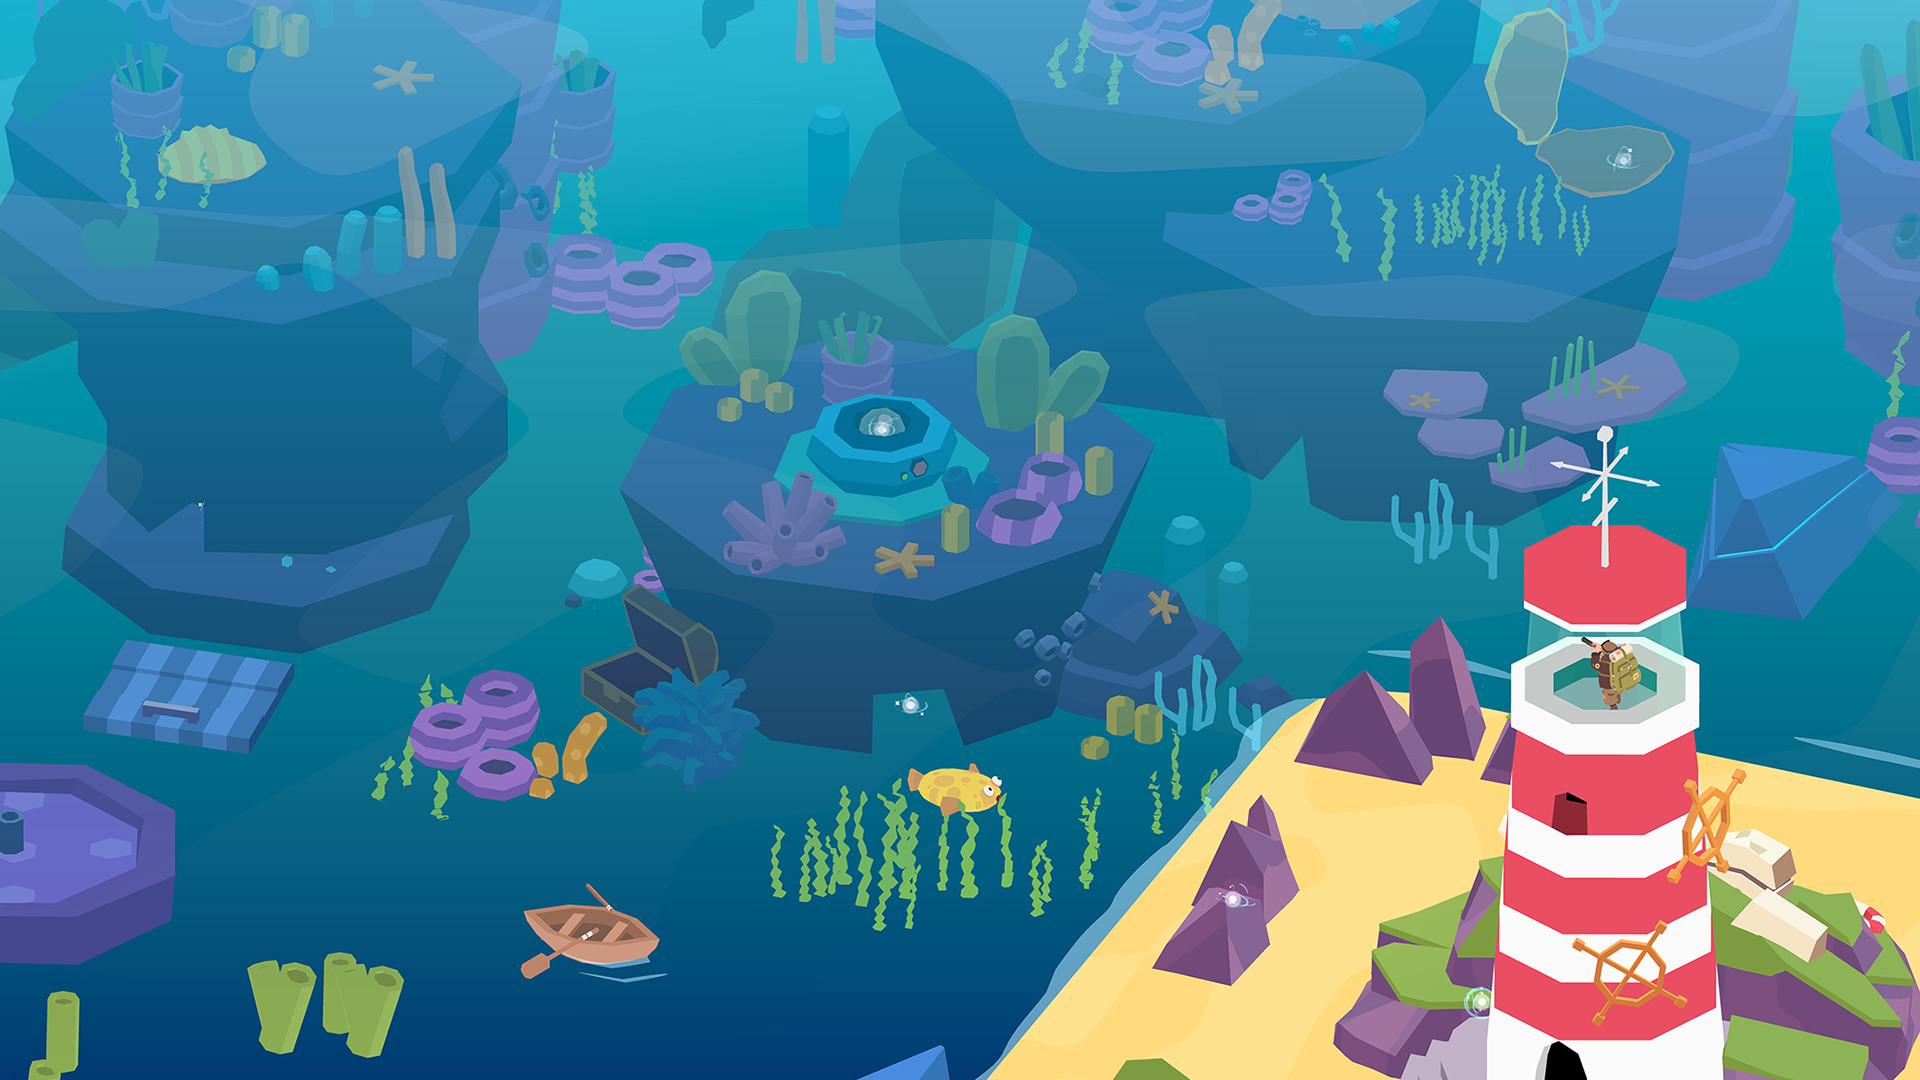
Sphere 3
Using the map, we collect stars – some of the stars are open, and some are hidden in chests or hiding in shells or under fishes.
Note . The process of collecting Stars is quite simple – we open the map, look where the Stars are marked on it, close it and look in that place.
To get the rest of the stars, you need to complete additional steps.
Press the button on the wall of the base of the lighthouse, move the levers – the aquarium moves out. We move the upper lever to the right – we see how three stars move to the upper window on the right. Move down the lever on the right – the stars are visible in the lower right window. Move the lower lever to the left and press the button on the left side. We take away three stars.
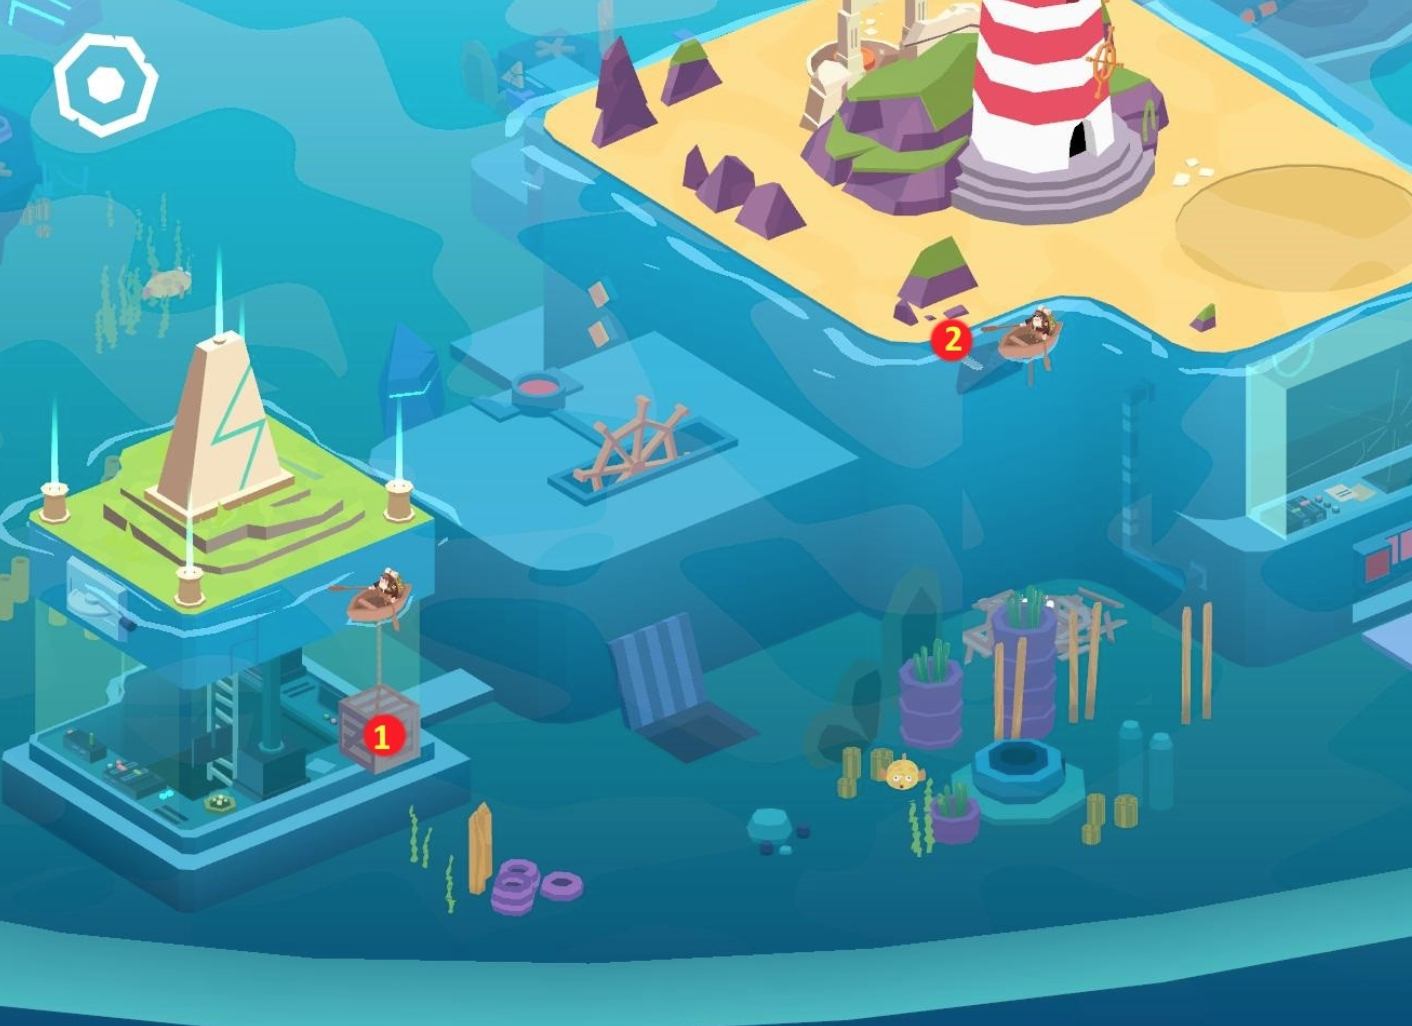
We pay attention to box 1, tied to the boat in which Milton is sitting. We click twice on the boat, we force the pilot to swim to the niche, from which the nose of the saw-fish 2 sharpens. We click on the saw, we collect three stars from the bottom.
We press the button at the base of the star monument, place all the collected stars – a stone structure rises upward, at the four corners of which there are stone wheels with symbols.
We examine the walls of structures and stones, to find the symbols drawn on them. Put them on the wheels, take SPHERE 3.
Sphere 4
We set the cannon to vertical center and 1 horizontally, make a shot by pressing the button.
We set the cannon to vertical up and 2 horizontally, make a shot.
We set the cannon to vertical down and 2 horizontally, make a shot.
We take away SPHERE 4 – the gates are open.
Key
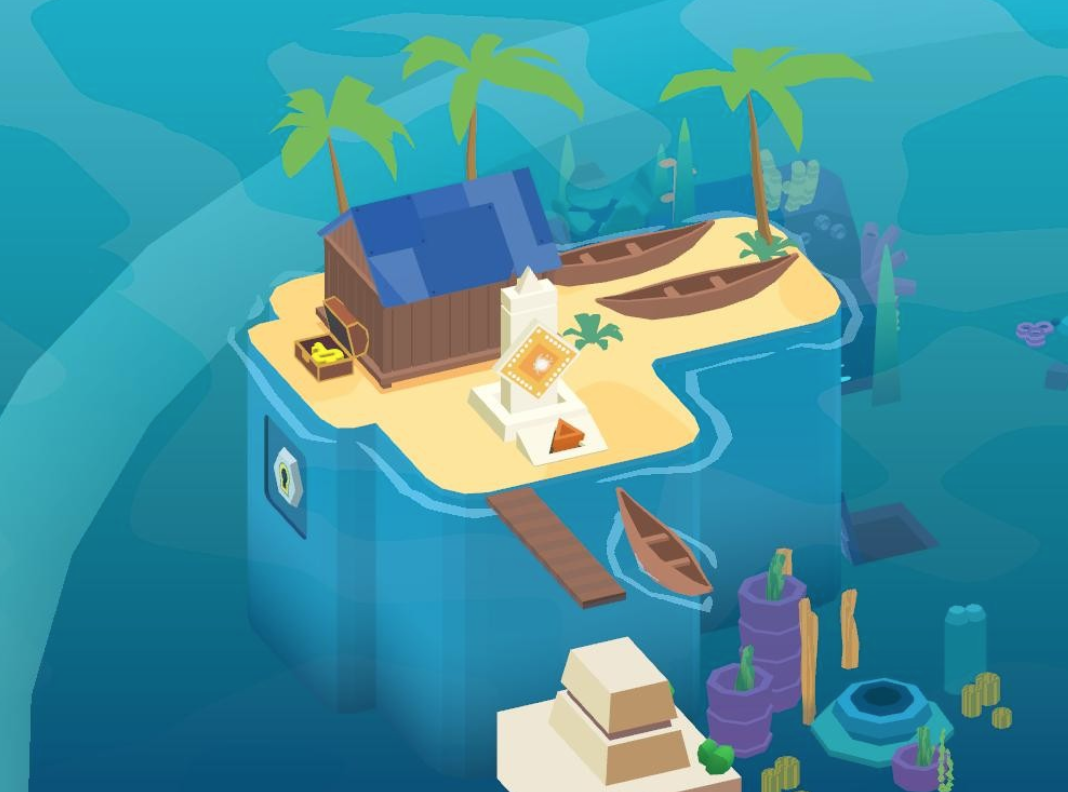
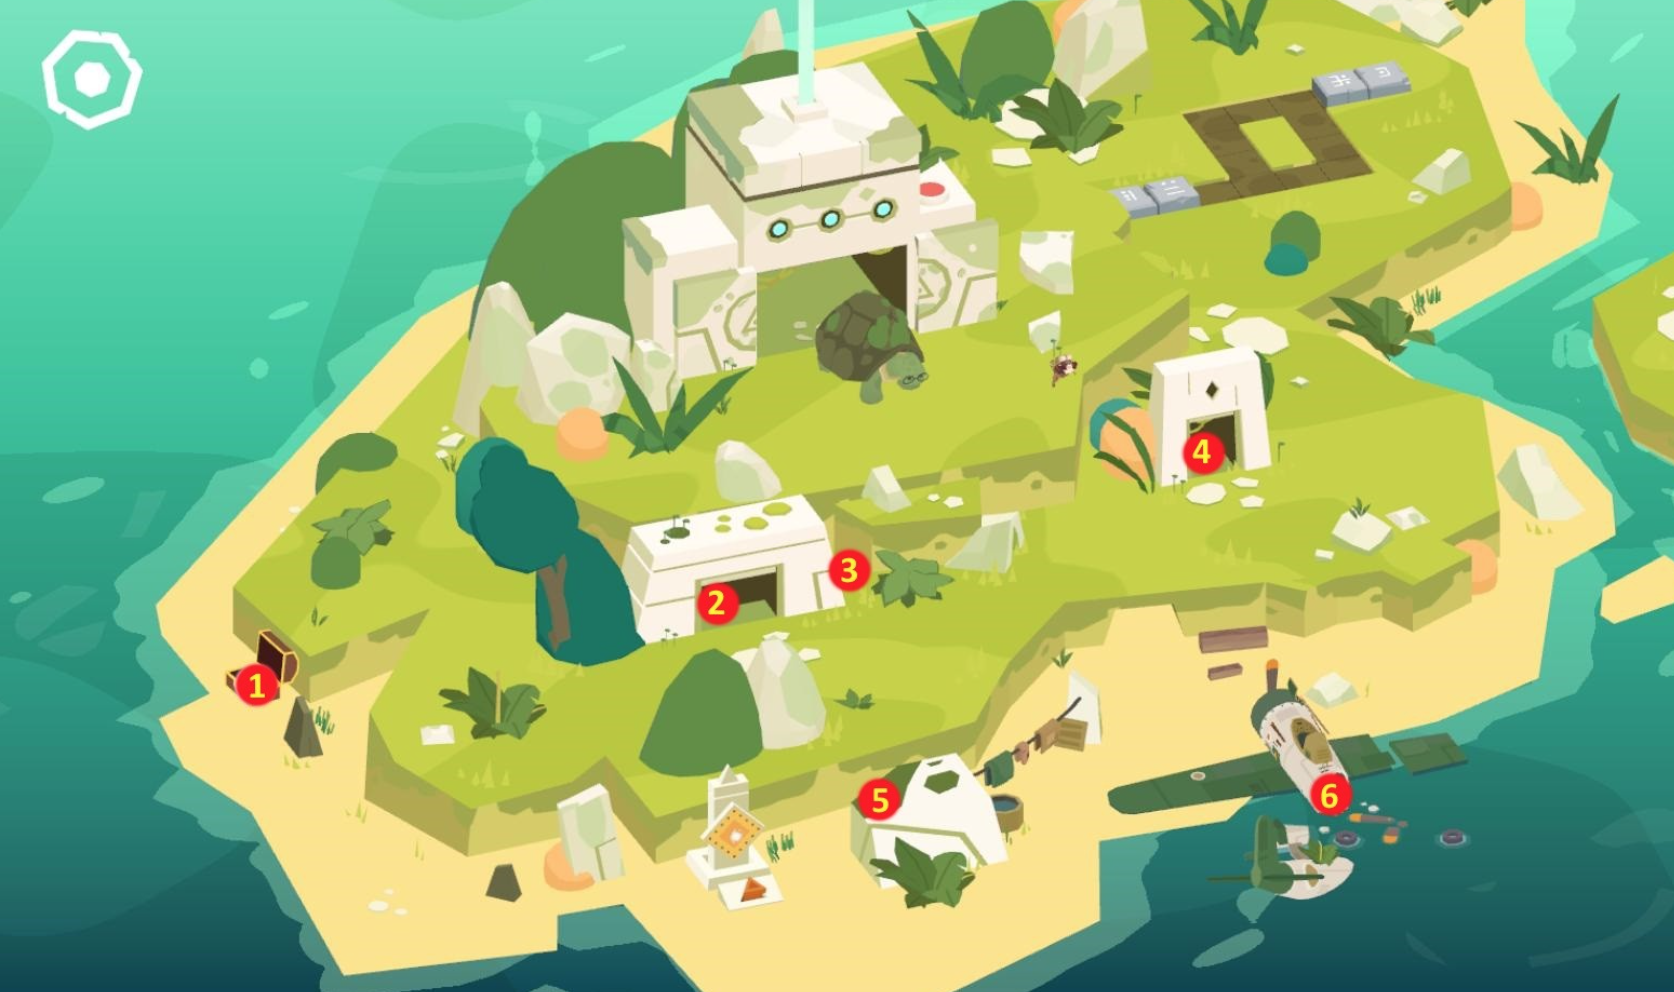
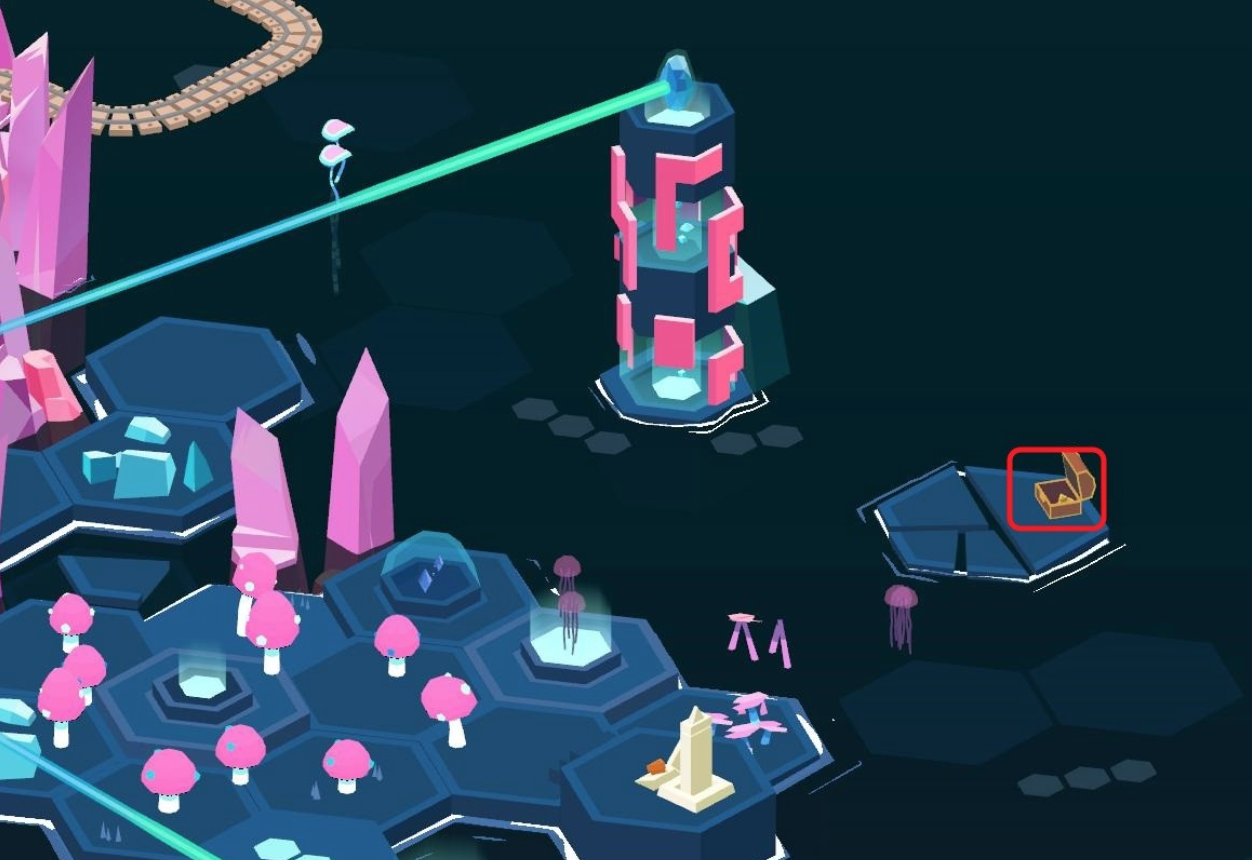
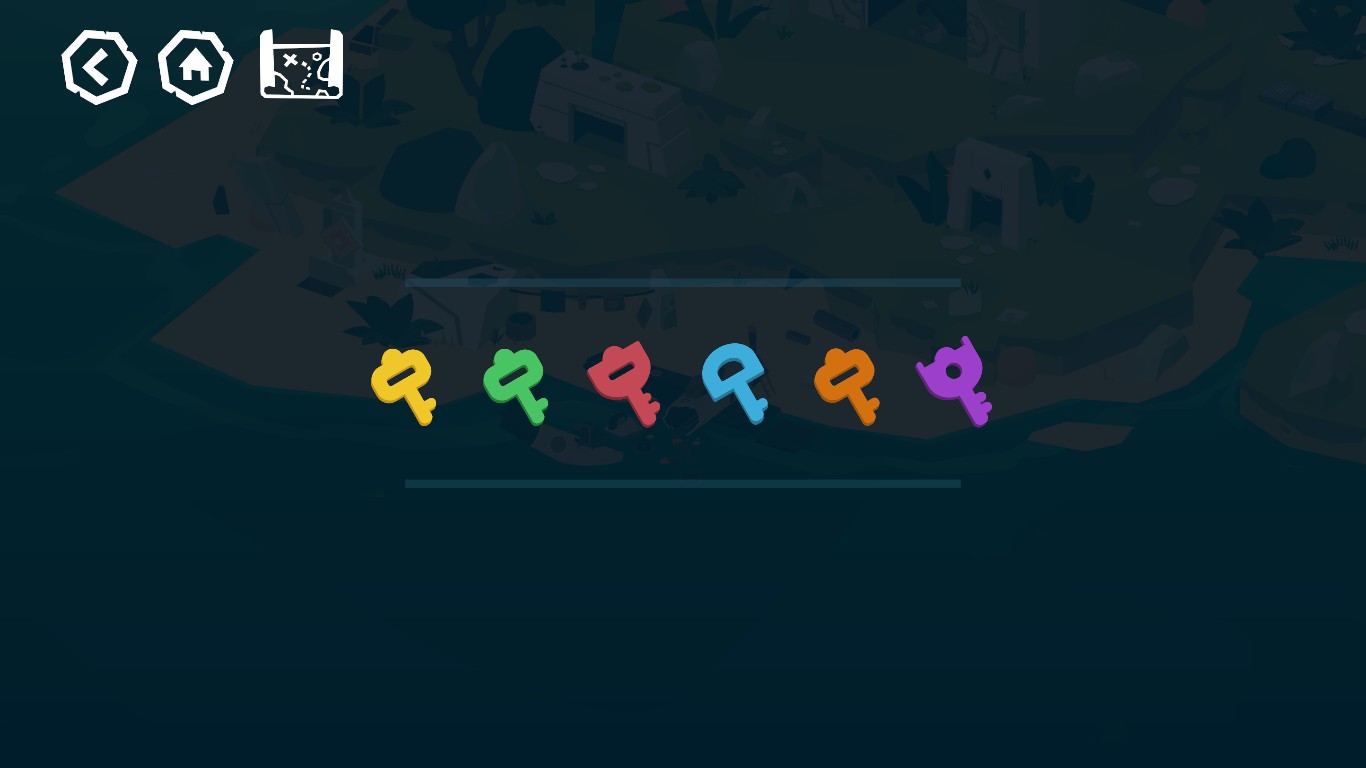
Open the chest behind the back wall of the hut; take out the YELLOW KEY .
Artifacts
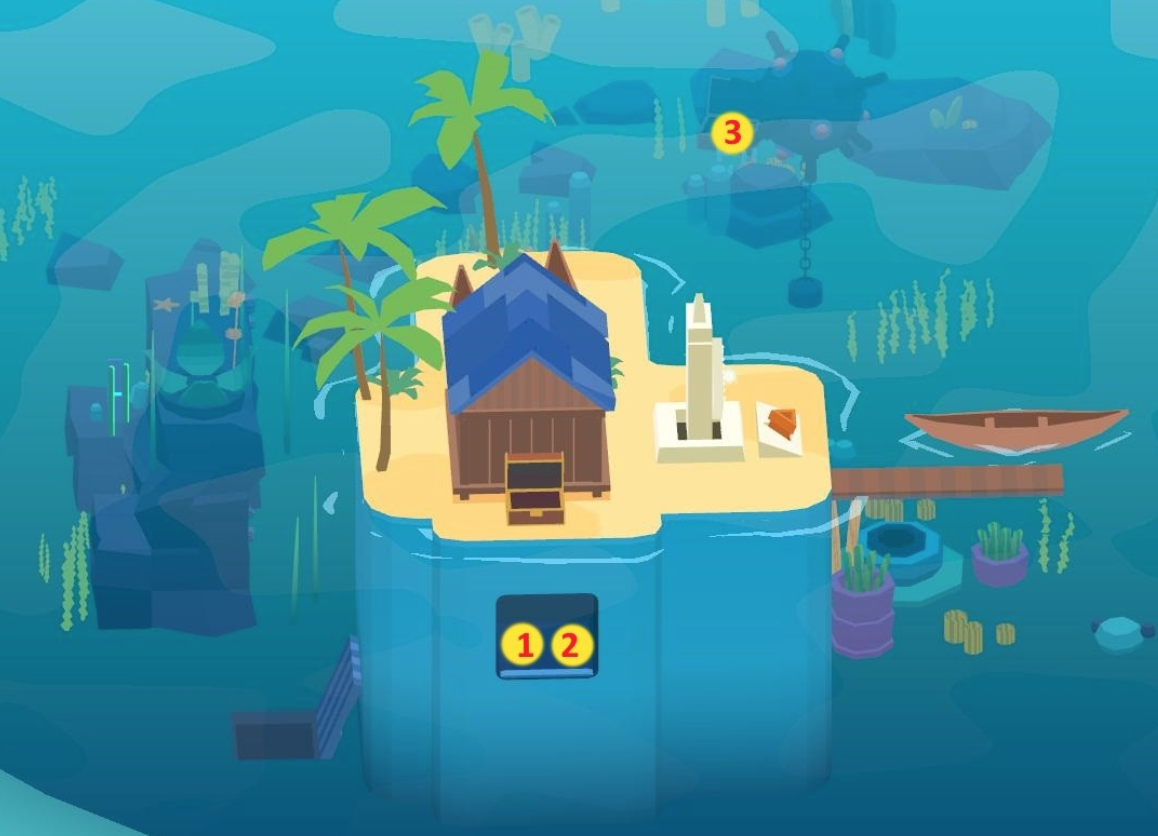
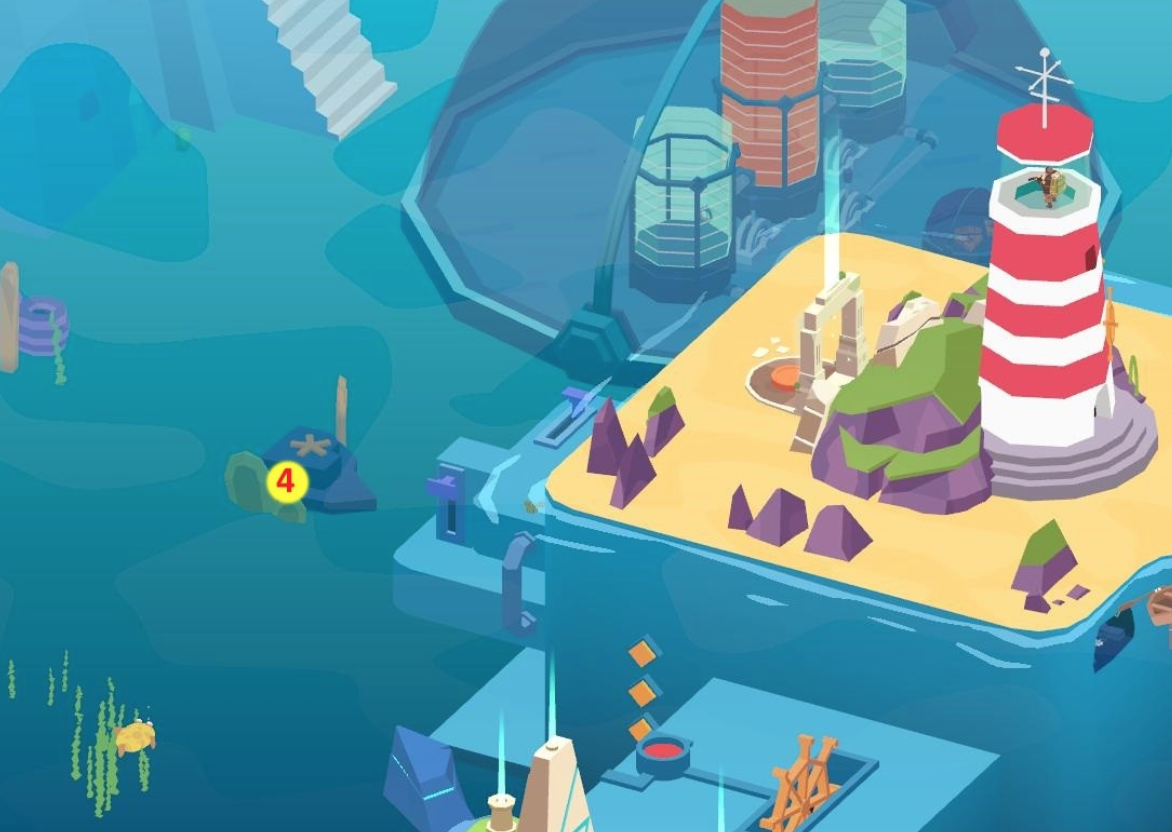
Open the lock located below with the key, take out two ARTIFACTS. We take one more ARTIFACT from the flooded chest. We take away ARTIFACT 4 from the stone (4) . We notice that under the glass dome , locked with a green lock, the key to which is to be found on other islands, there are three more artifacts.
Note . To search for Artifacts, we also use the Star Map.
We leave the island.
What to do on Forest island
- Artifacts – 4
- Castles – 1
- Photos – 1
- Keys – 1
- Maps – 1
- Spheres – 5
Sphere 1
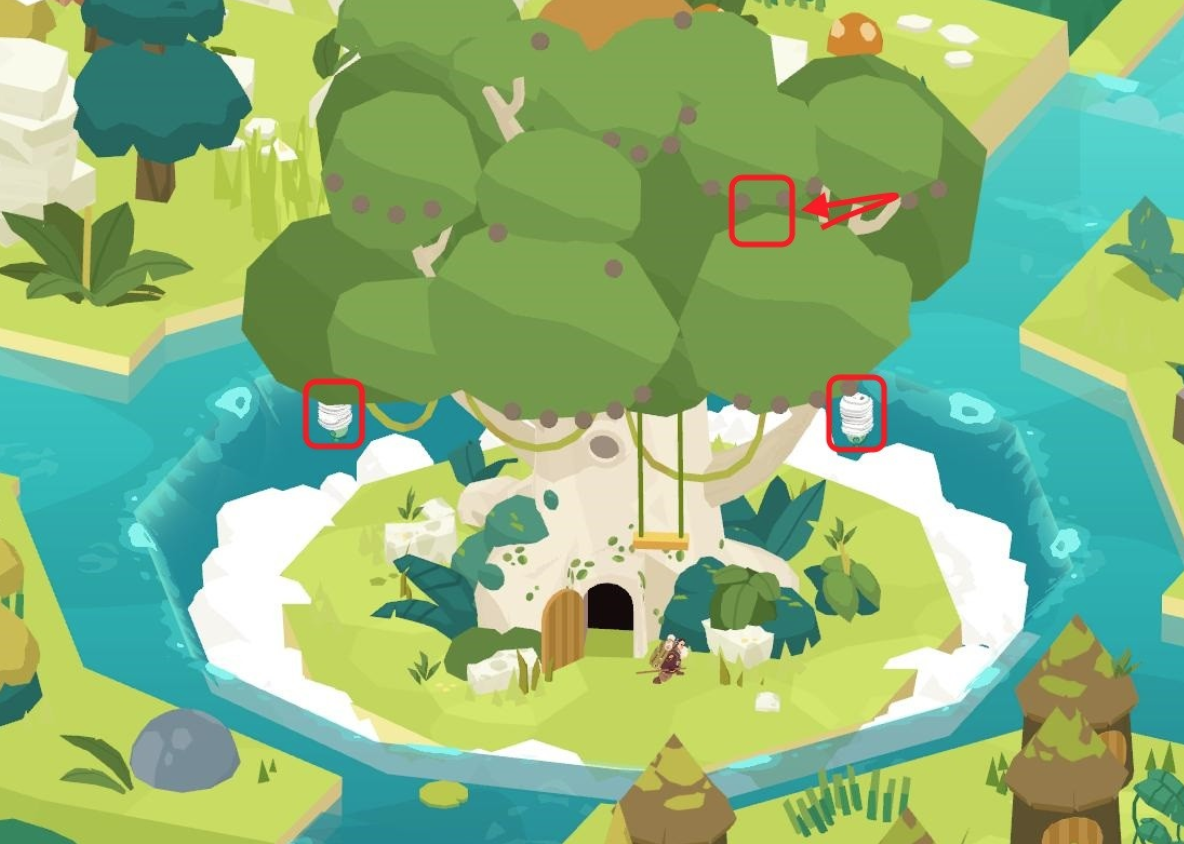
We click a few times on the three dangling fellows, we help them from captivity of the sticky webs. We’ll receive SPHERE 1.
Map
At the pier we find the STAR MAP .
Sphere 2
Use the map, collect STARS.
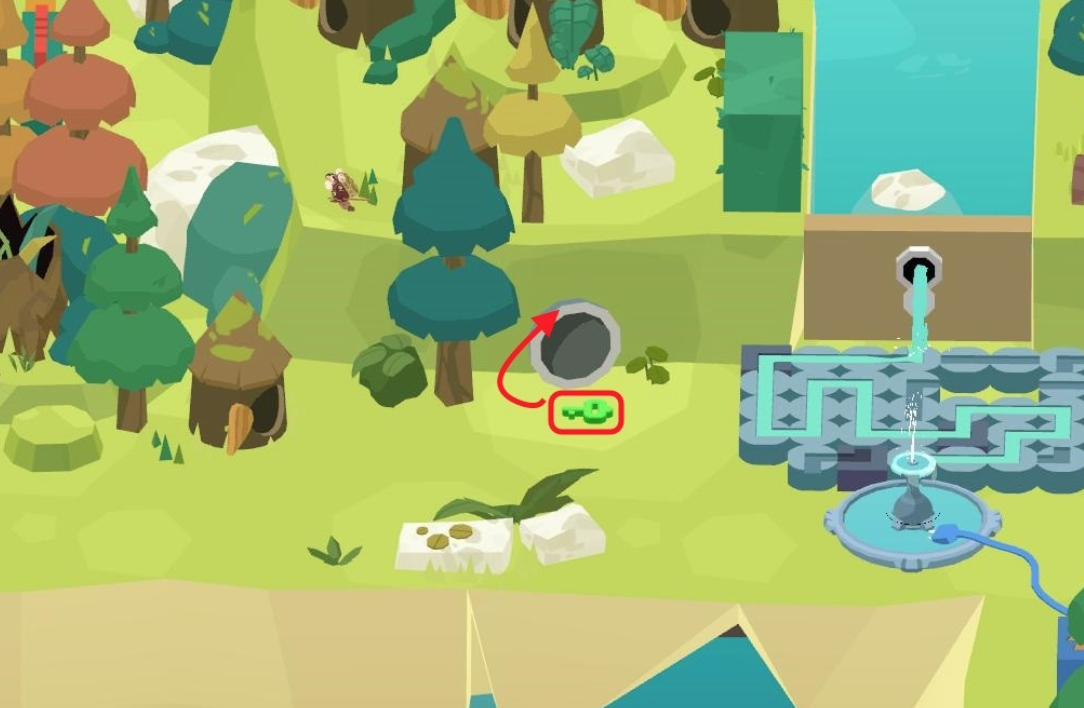
For two groups of stars, we perform the following actions:
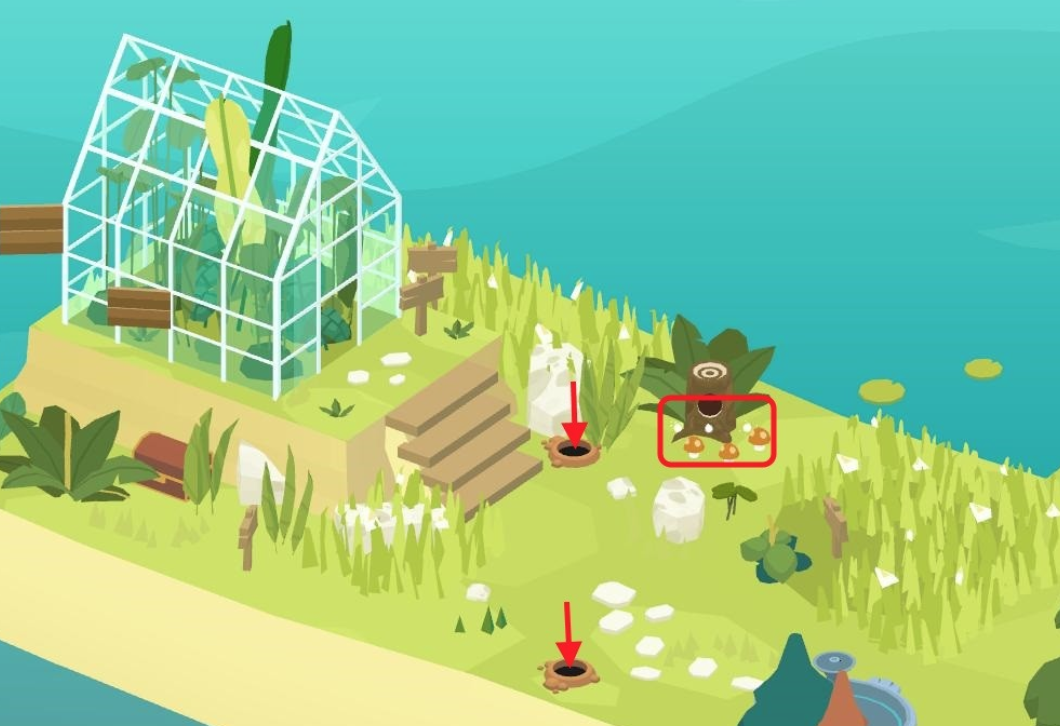
We drive five rabbits into the holes in the ground (we click on them with LMB until they jump into the hole). We receive three STARS.
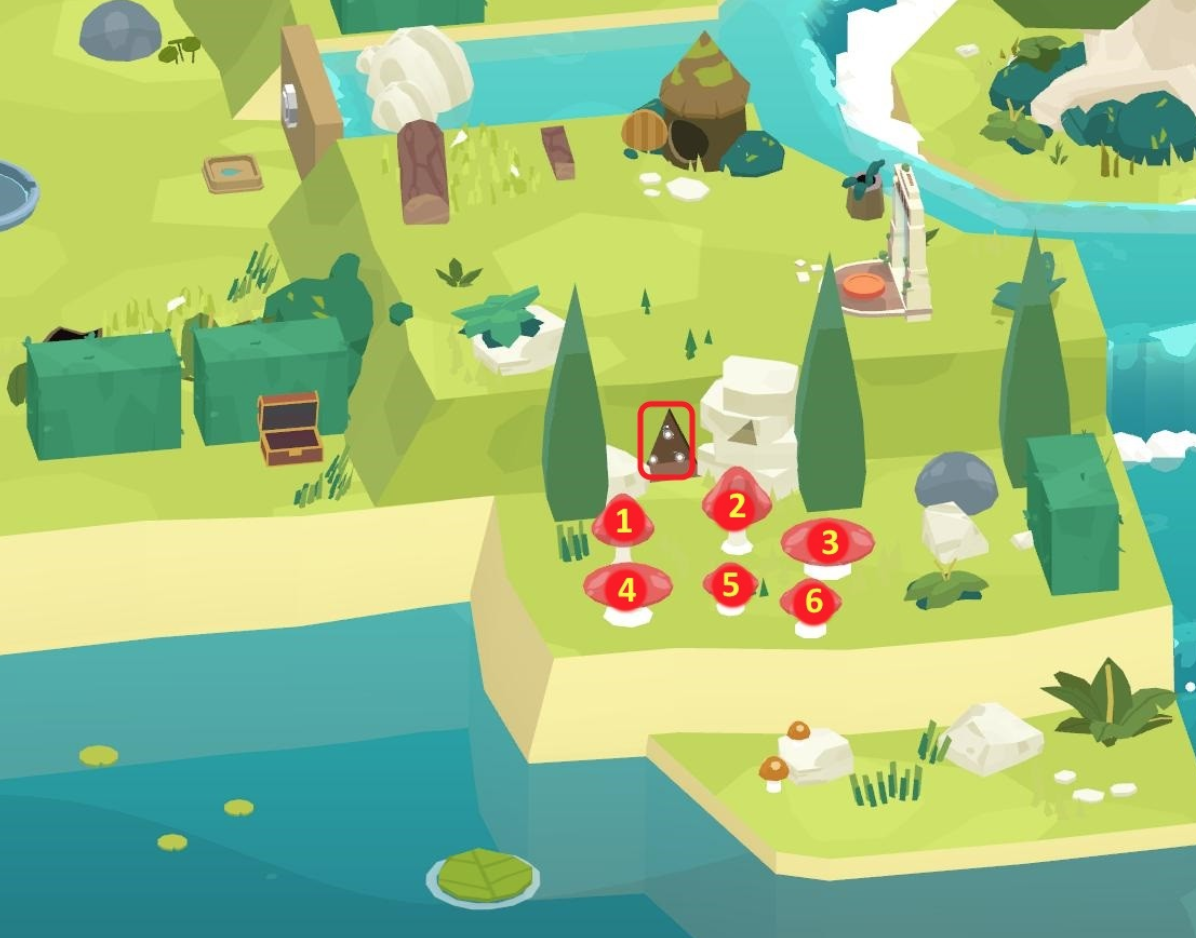
Click on the mushrooms in the order: 2, 4, 1, 6, 5, 3. Take three STARS.
Place the stars on the Star Monument.
Three pillars with figures on top rise from the water. Each figurine is marked with a colored circle.
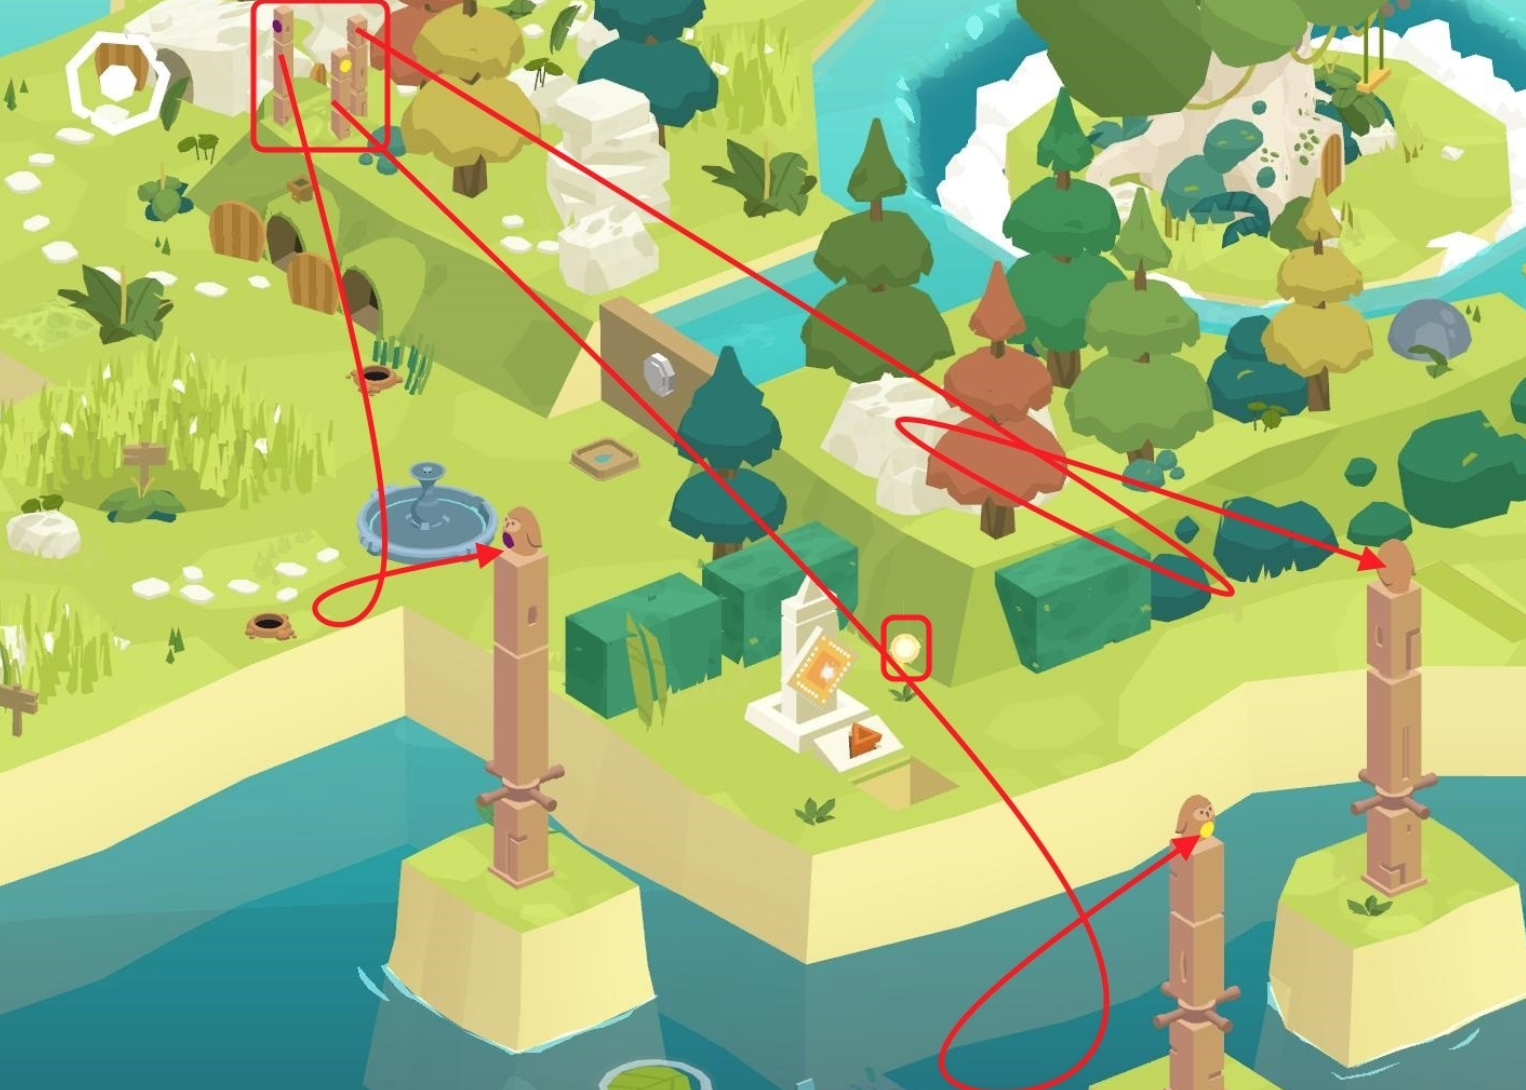
We look where the colored circle on the pillar in the forest is facing, we turn the figure with the same color of the circle in the same direction. We get SPHERE 2.
Sphere 3
We speak with the fellow, who asks to restore electricity.
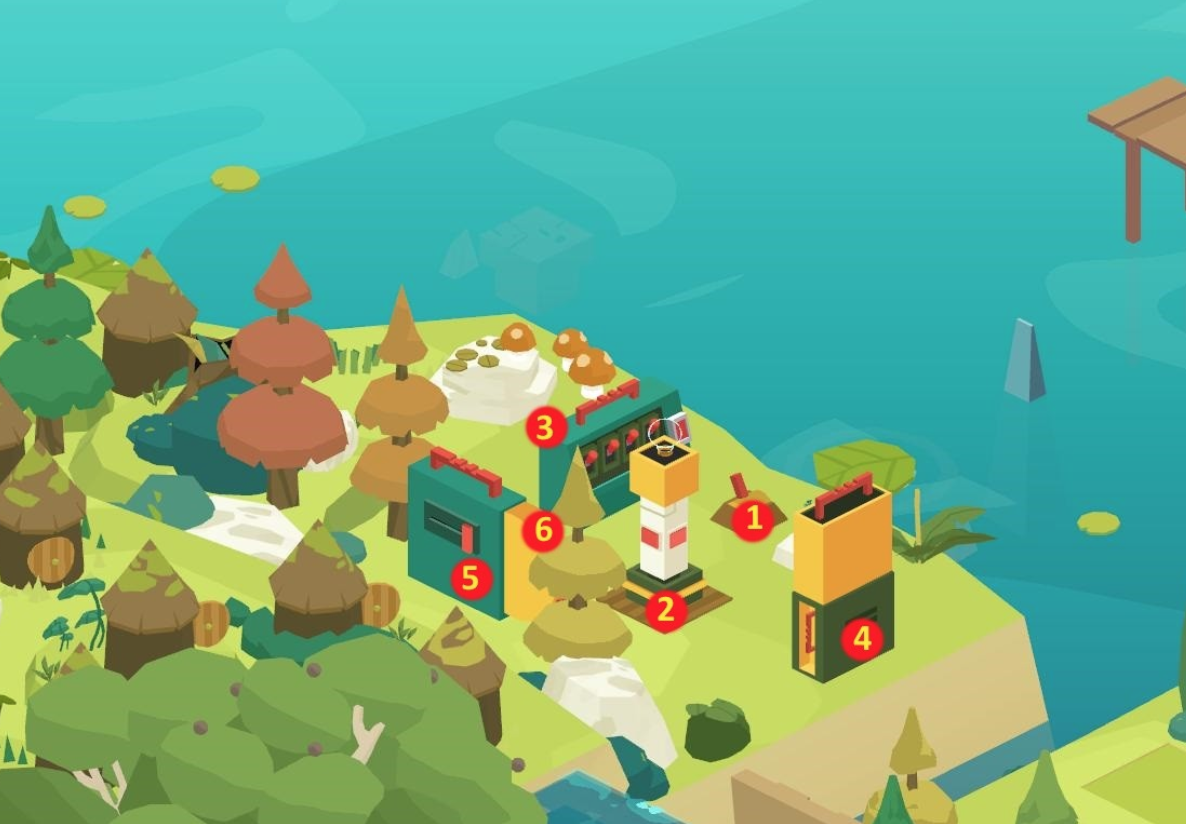
We interact with the raised lever 1, pushing column 2. Press the four buttons on its sides. Pull block 3 up, press the button on its panel. We click on the four toggle switches that have opened for interaction. Pull up the second block 4 that appears. We take out the side panels.
Press the buttons on both panels. We quickly turn the panels on the other side and press two more buttons until the scales on them are zero. Pull up the third block 5, move the slider on its back panel to the right. We take out the pressure gauge from the sidewall 6.
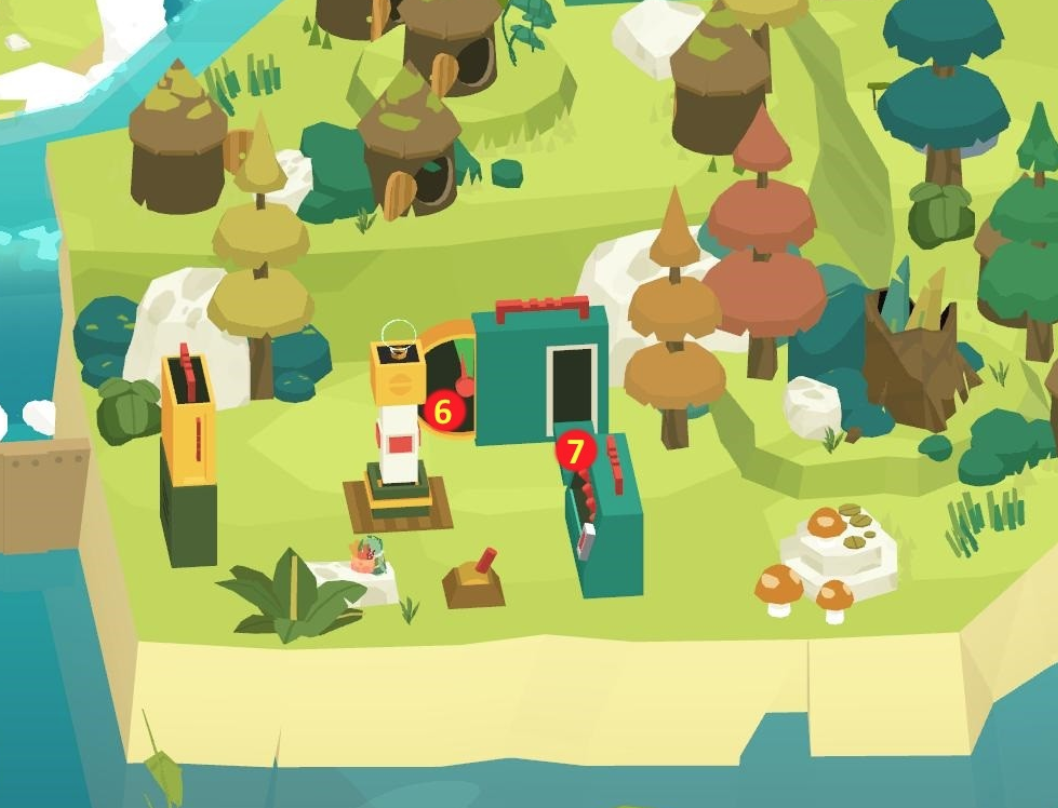
We press on button 7 that appeared until the arrow of the manometer 6 goes into the green zone – a light on the column in the center lights up.
At the request of the fellow, we go to column 8.
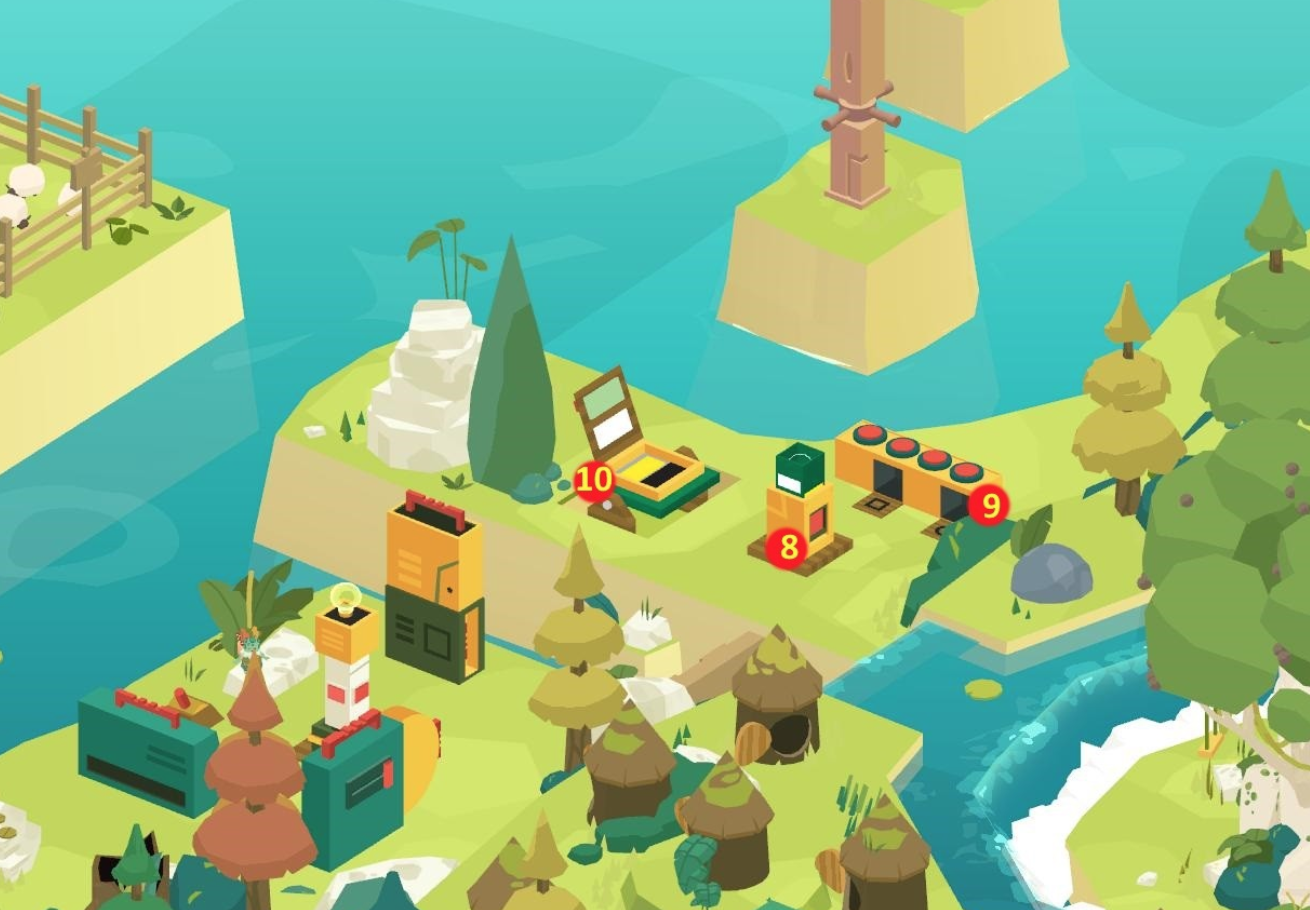
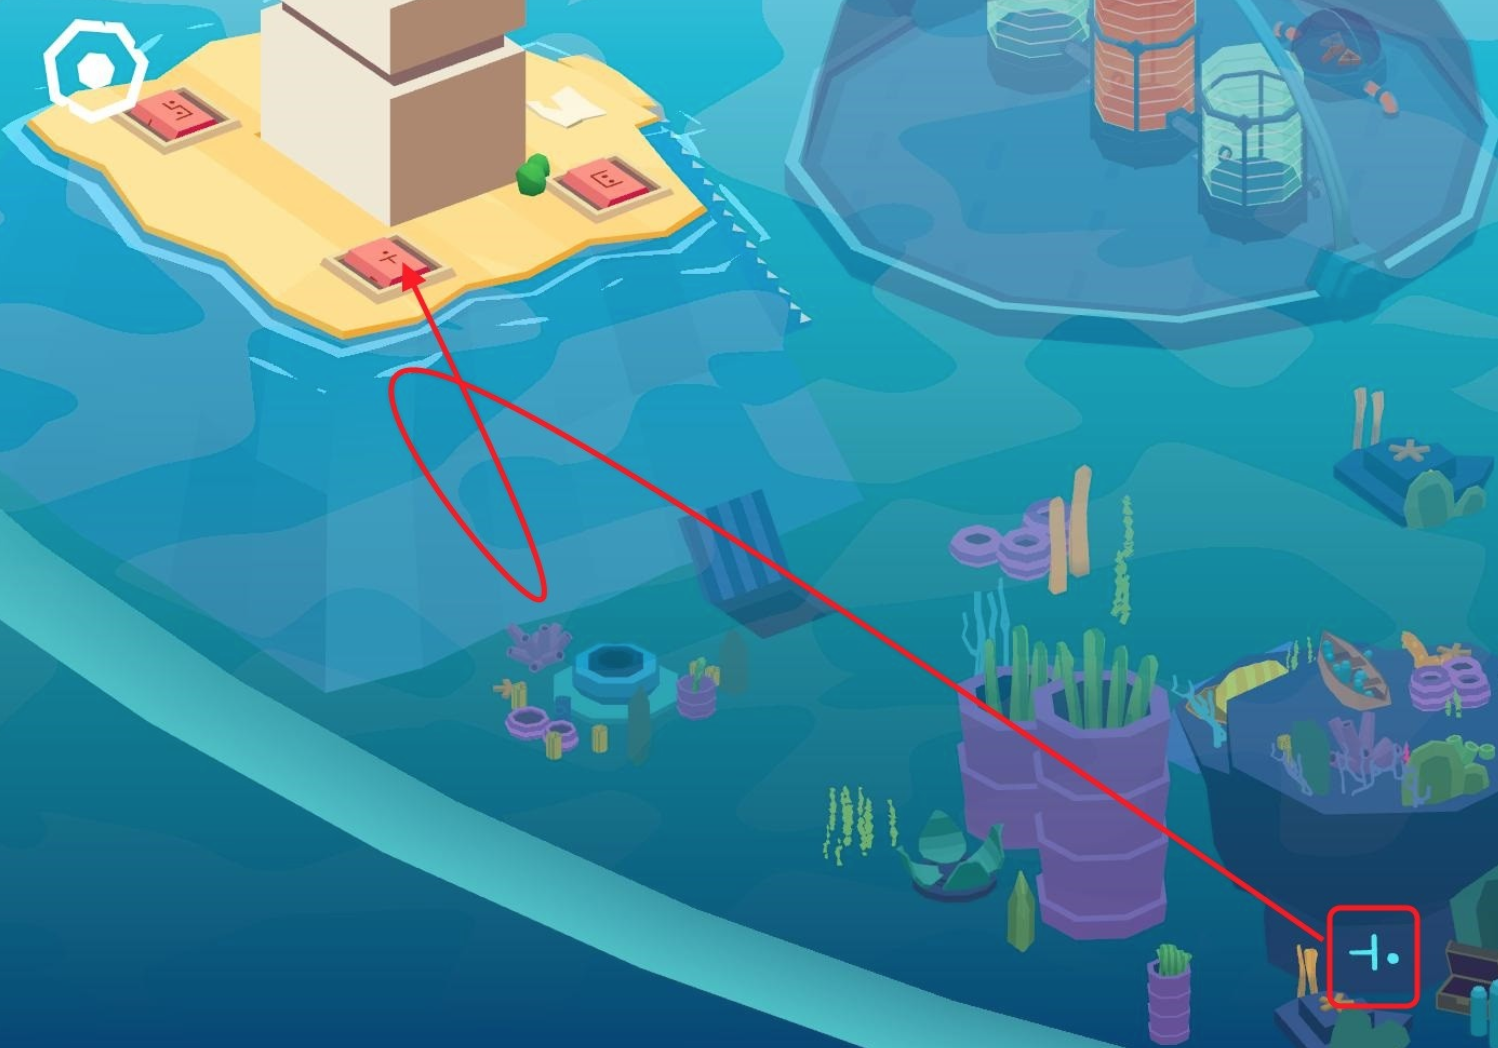
We press the two appeared buttons. We press four buttons on the raised block 9 – plates with pictures open on it, and the upper part extends from the column. Open the cover of the extended hatch 10. Look at the color of the plates on the top of the column, use the keys in the hatch to set the same color (from the bottom plate to the top – black, yellow, white, blue).
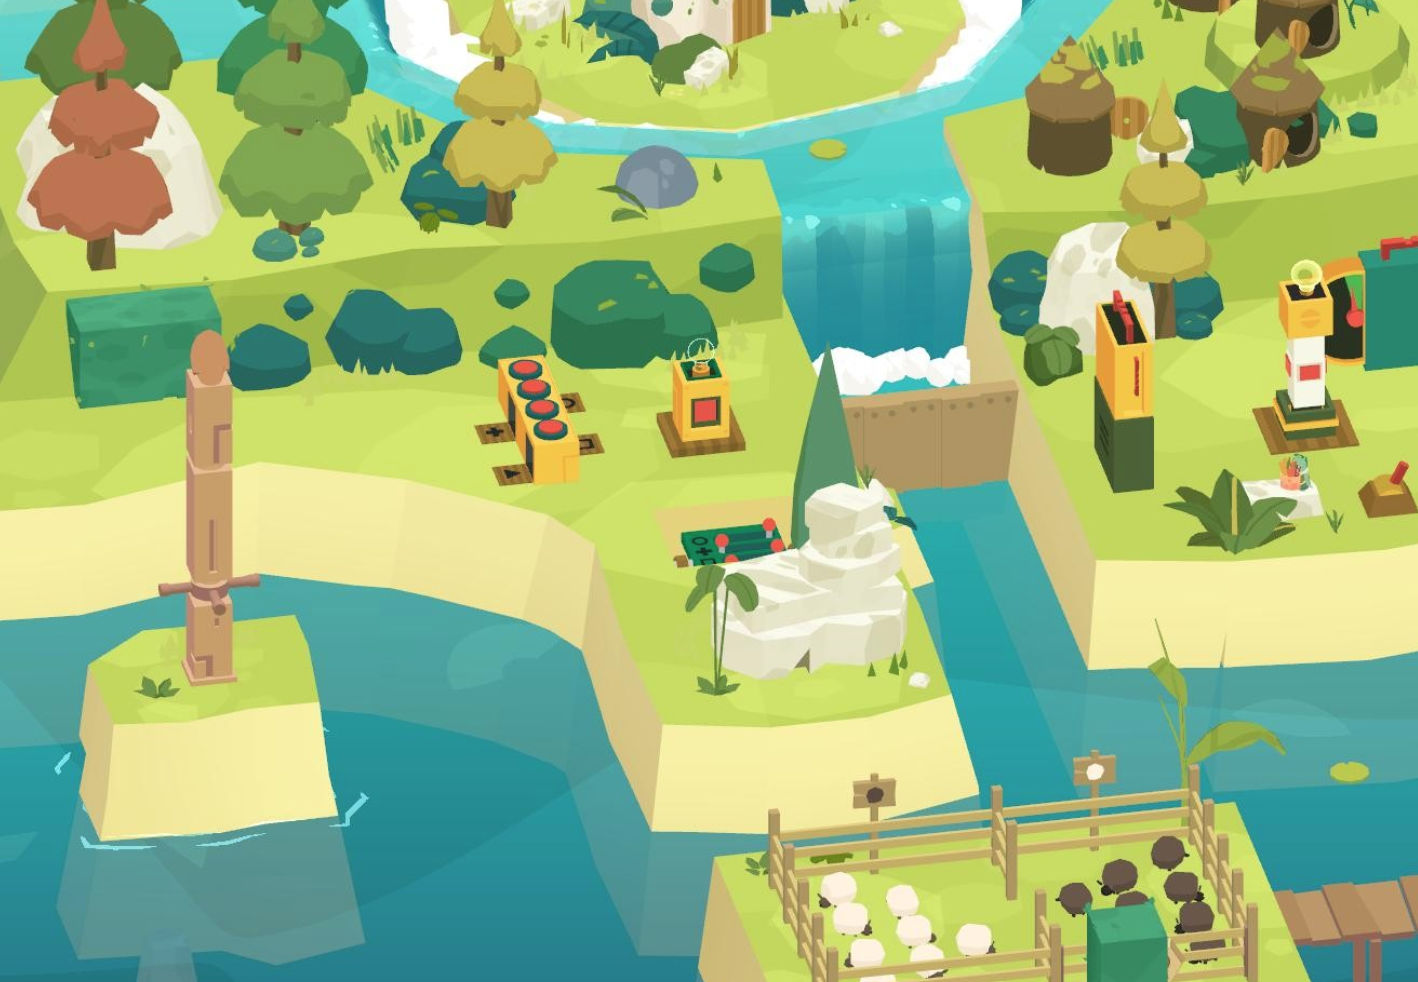
On the panel that opens, set the toggle switches to the position suggested by the plates with pictures:
- Circle – to the right;
- The cross is to the left;
- Square – right;
- The triangle is to the left.
A light comes on the second column.
We receive SPHERE 3 from the grateful fellow.
Sphere 4
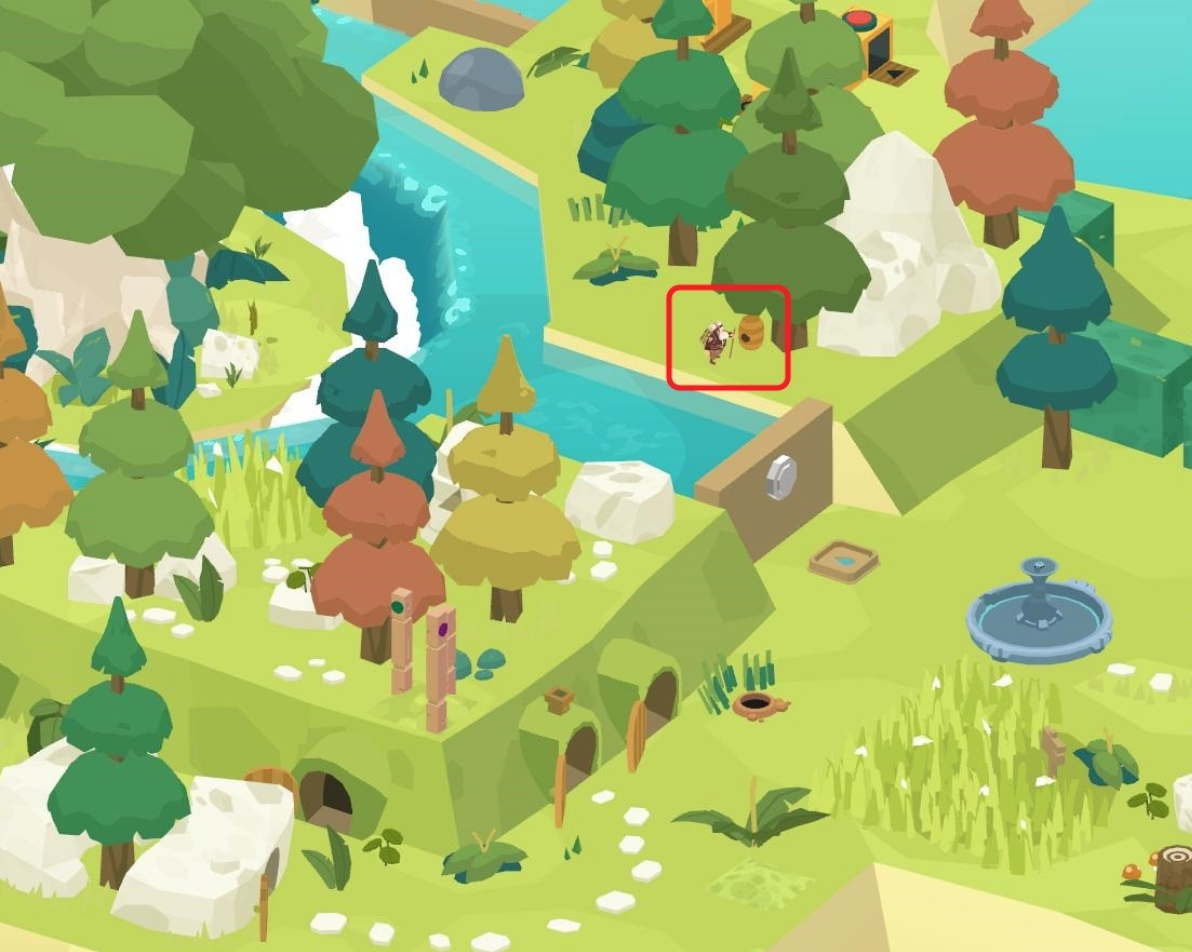
We draw attention to Milton, looking at a hive of wild bees. We click on it LMB.
Milton strikes the hive with a stick and is forced to jump into the water to escape the enraged swarm.

We build a pipeline to bring water into the fountain and save the pilot. We get SPHERE 4.
Sphere 5
A monster appears from the cave – a spider with a sphere on its back.
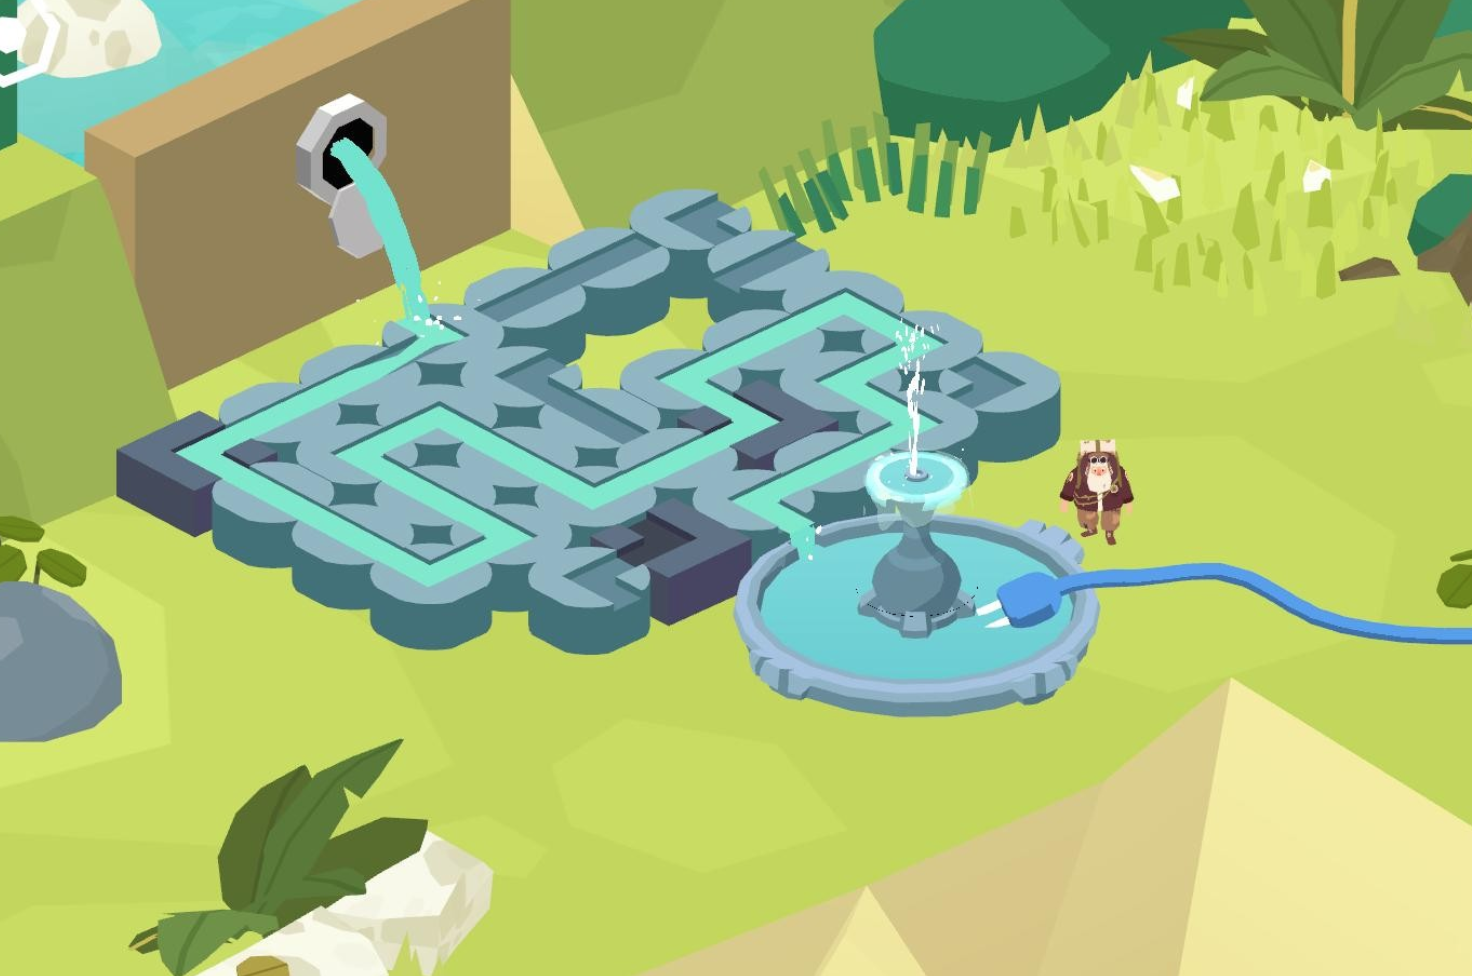
We build a pipeline to pass a current through the water and make a short circuit. We get SPHERE 5.
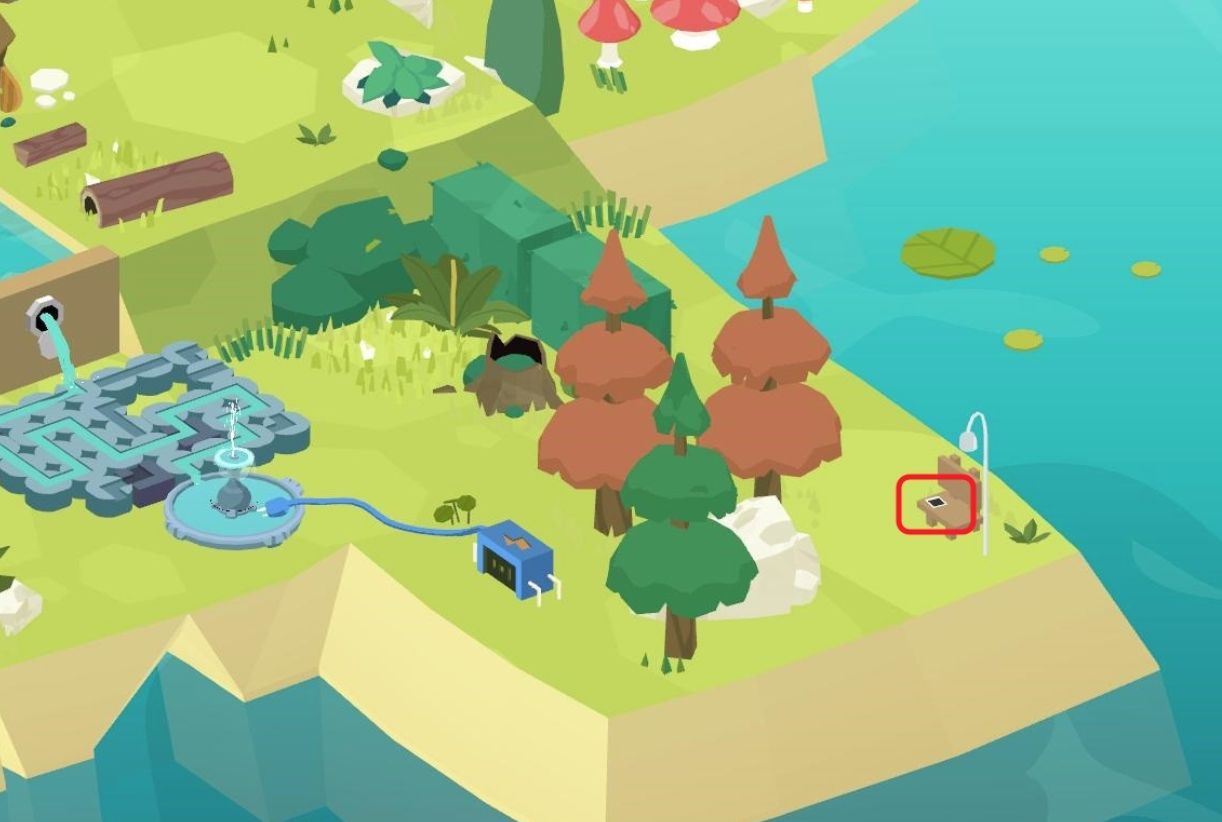
The photo
We take the PHOTO from the bench under the lantern.
Key
To the left of the pipeline, we raise a giant shell . We find under it the GREEN KEY .
Go to the gate sphere, return to Secret Base Island.
What more to do on Secret Base Island
Artifacts (end)
Use the green key to open the glass cover .
To open the flaps of the hood, which contains the artifacts, we need to pour six measures of water into the first and second containers. There are three containers – for eight measures, for twelve measures and for five measures of liquid. There are twelve measures of water available, which first fills the second container.
We pour water:
- 0, 12, 0 – start.
- 8, 4, 0 – from central to left;
- 3, 4, 5 – from left to right;
- 3, 10, 0 – from right to center;
- 0, 10, 3 – from left to right;
- 8, 1, 3 – from central to left;
- 6, 1, 5 – from left to right;
- 6, 6, 0 – from right to central
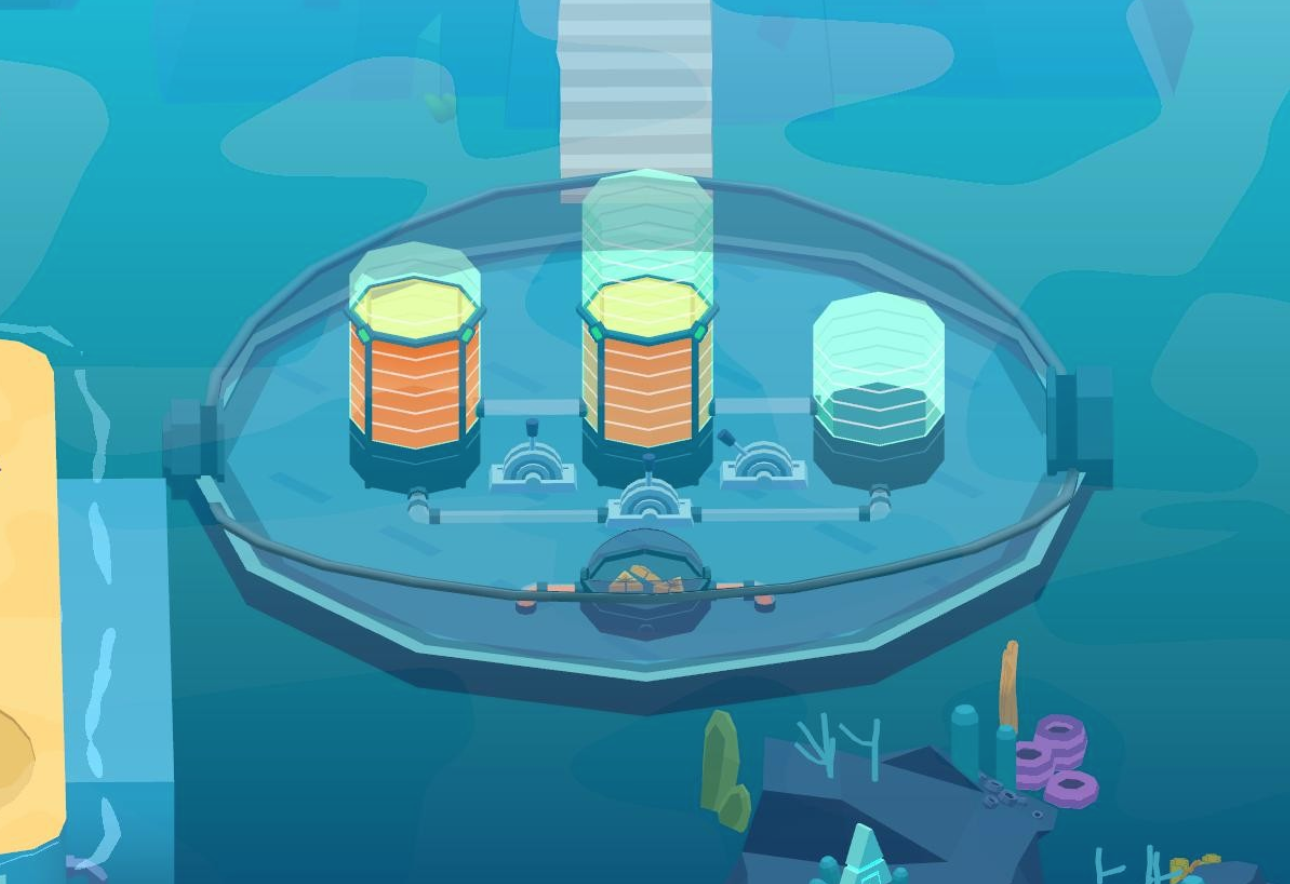
We take three ARTIFACTS.
We go to the gate, we return to the Forest Island.
What more to do on Forest island
Artifacts
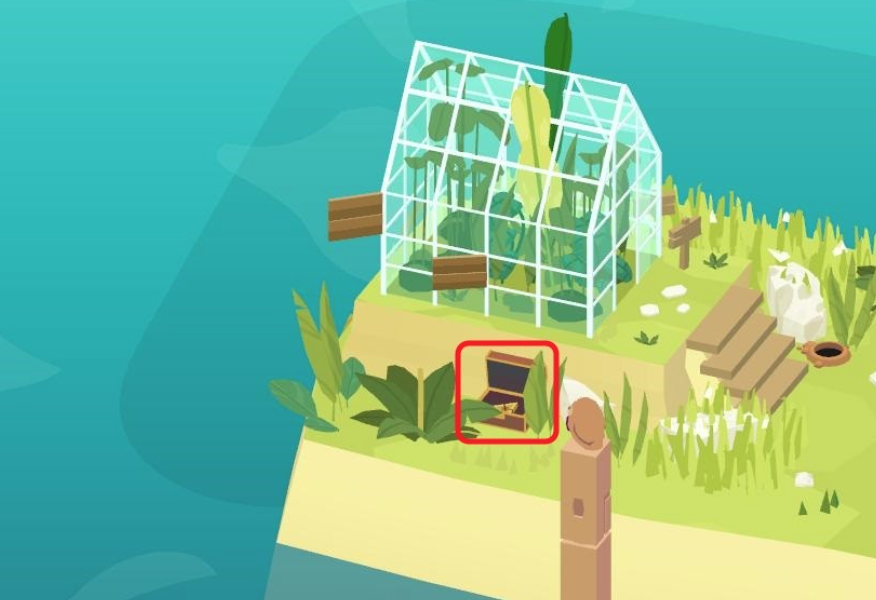
ARTEFACT 1 is found in the chest near the greenhouse.
ARTEFACT 2 is found under a giant shell .
ARTEFACT 3 is also found under the shell .
Lock
Please note that you need a red key to open the sheep pen .
We go to the gates of the spheres, we move to the next island.
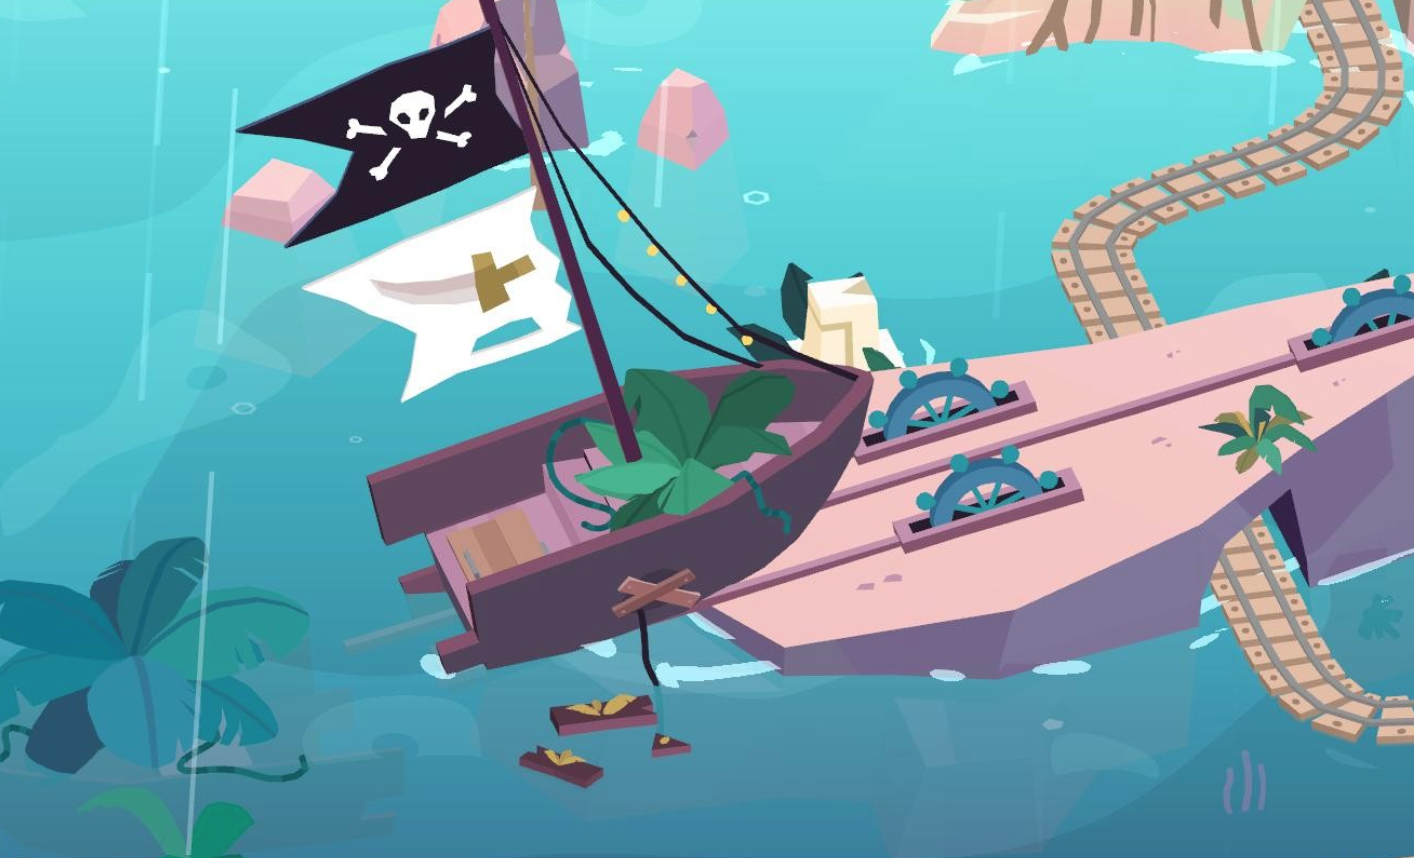
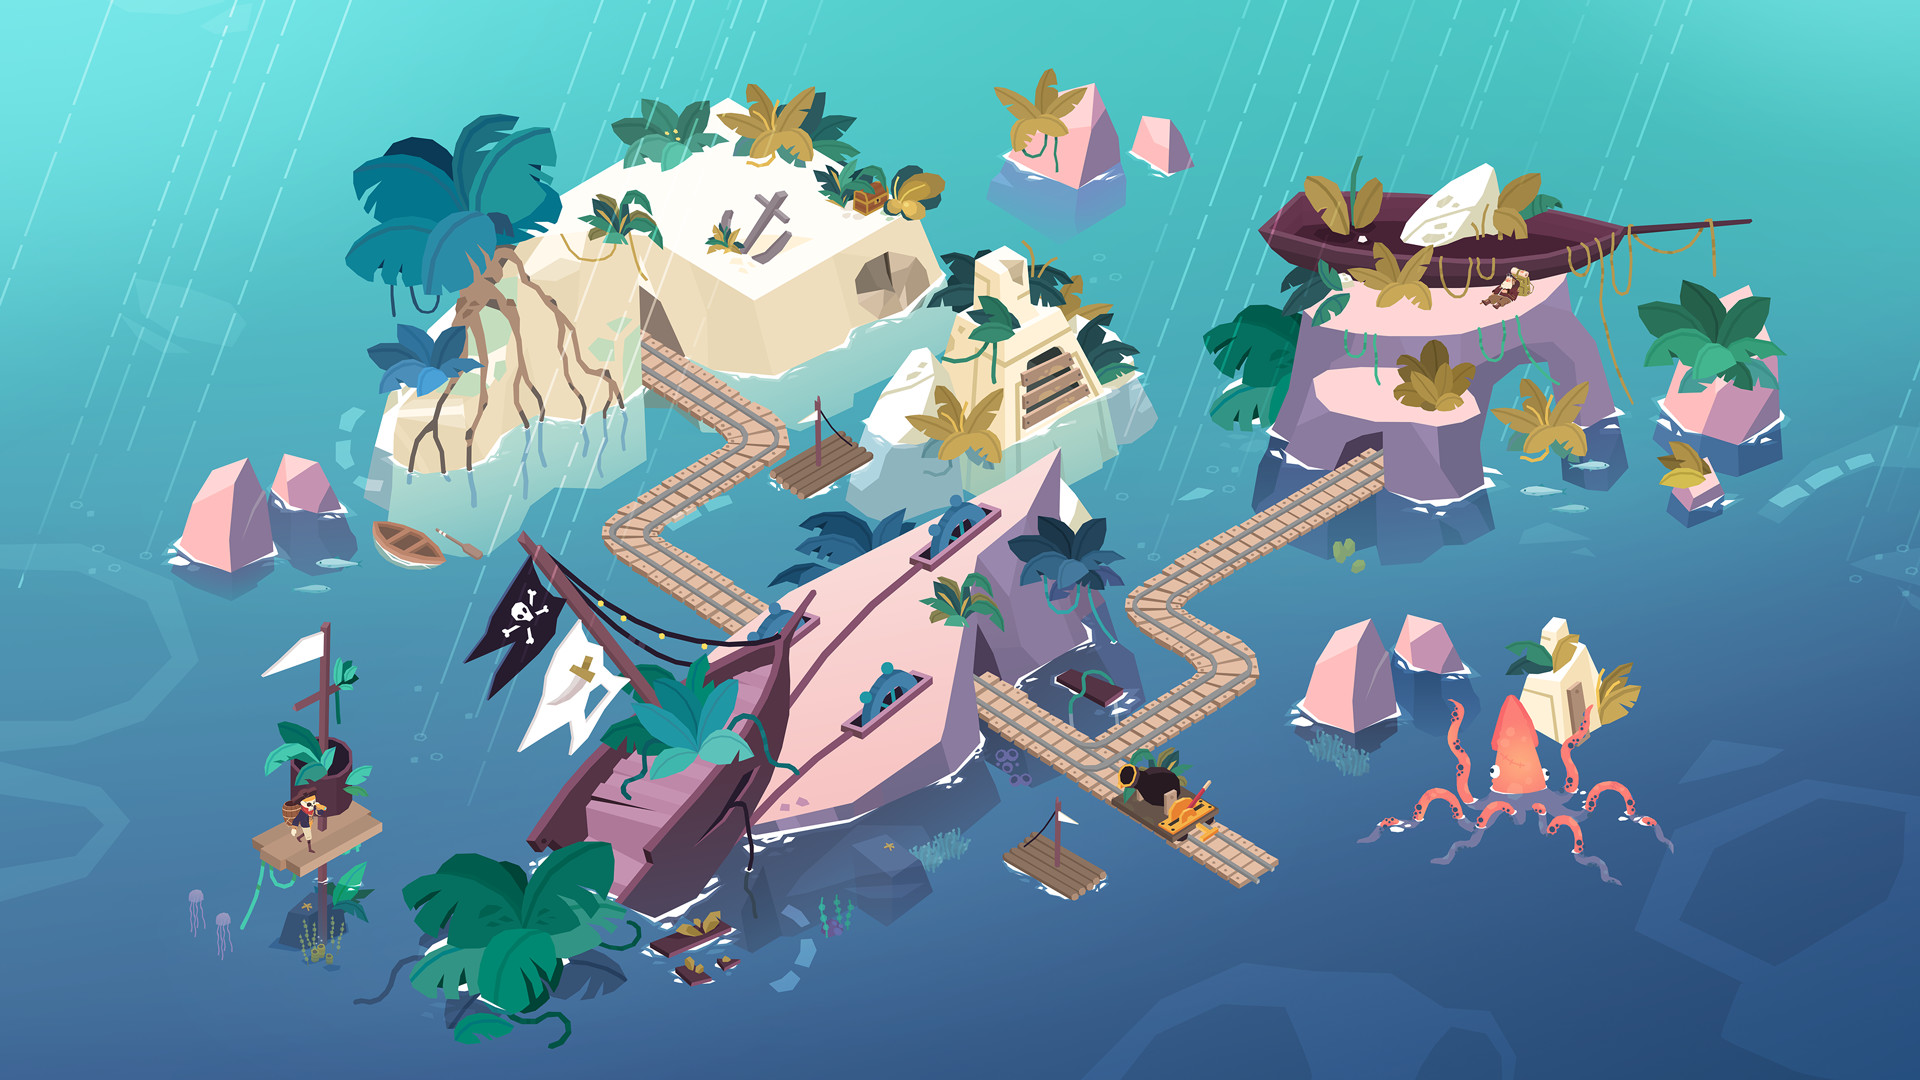
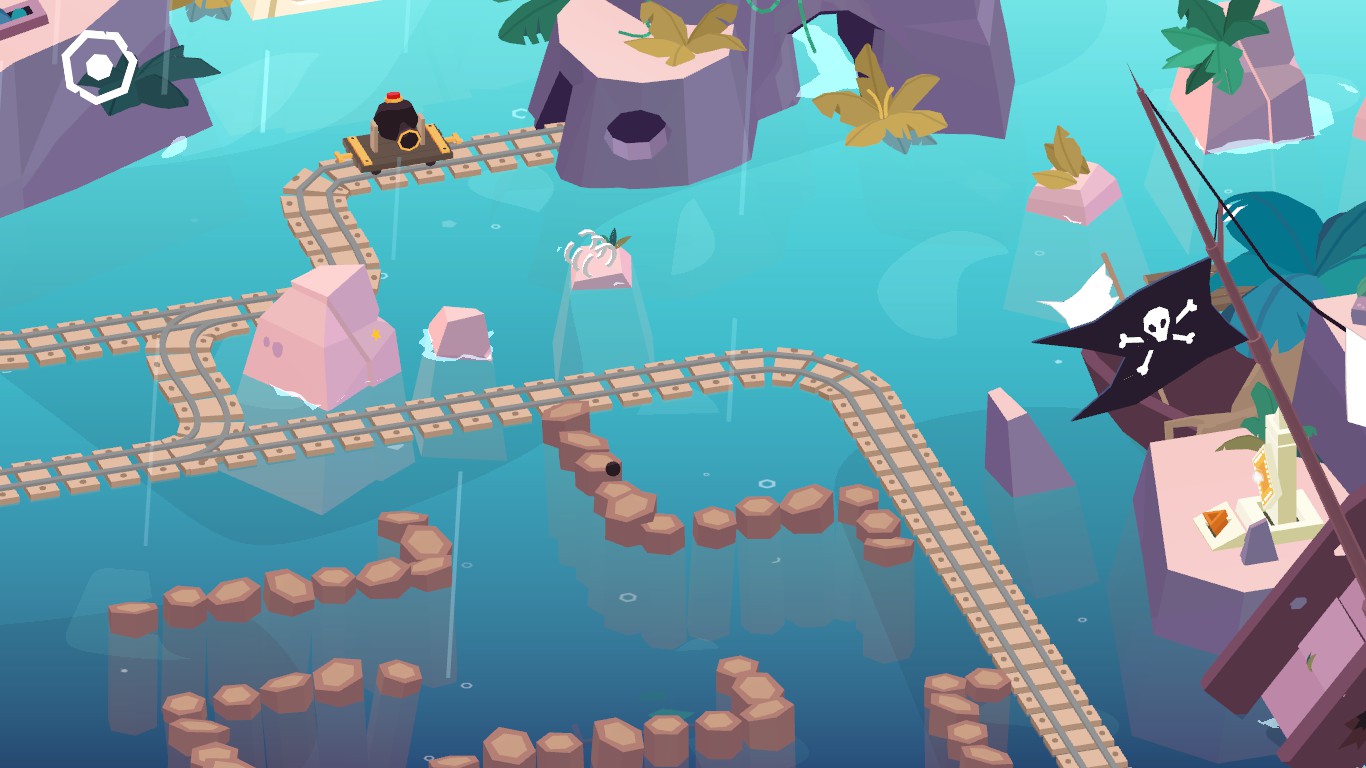
What to do on Shipwreck island
- Artifacts – 10
- Castles – 1
- Photos – 1
- Keys – 1
- Maps – 1
- Spheres – 3
Arriving on the island, Milton encounters a duck, whose house he saw on Forest Island, and which becomes his companion.
The photo
On a detached rock we find a PHOTO.
Map
We find the STAR MAP on the table next to the boxes.
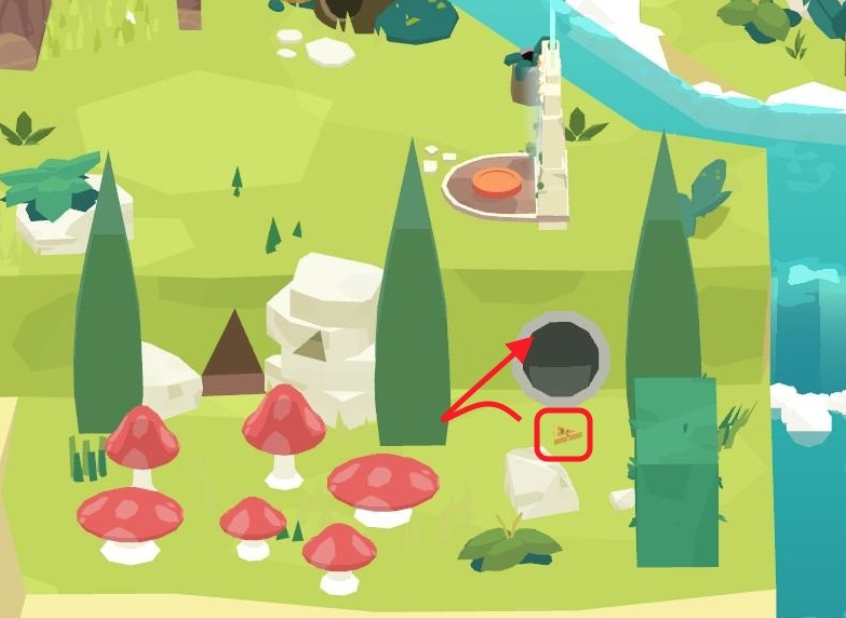
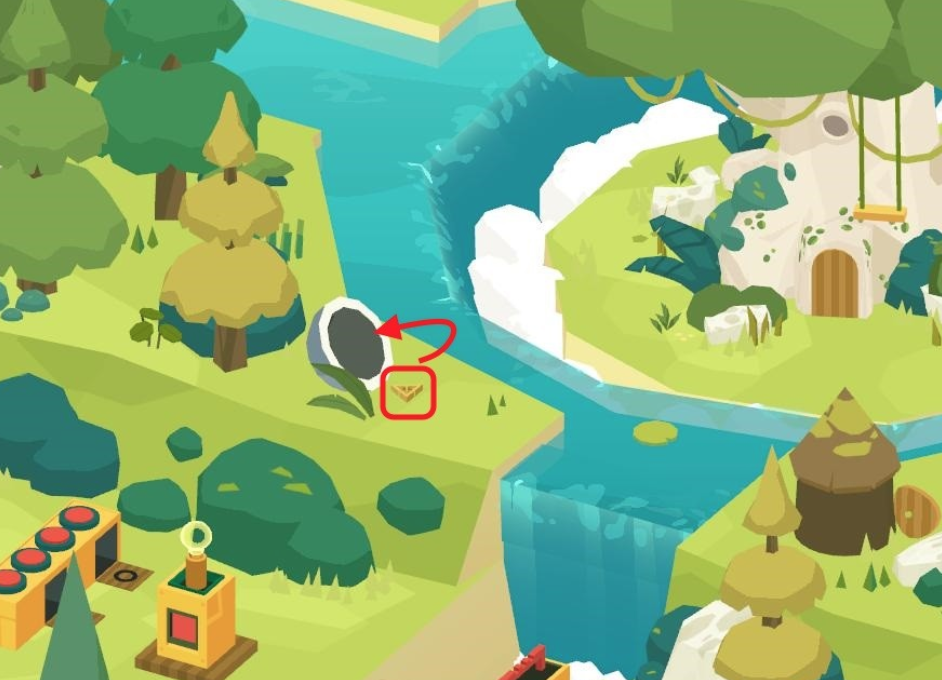
Sphere 1
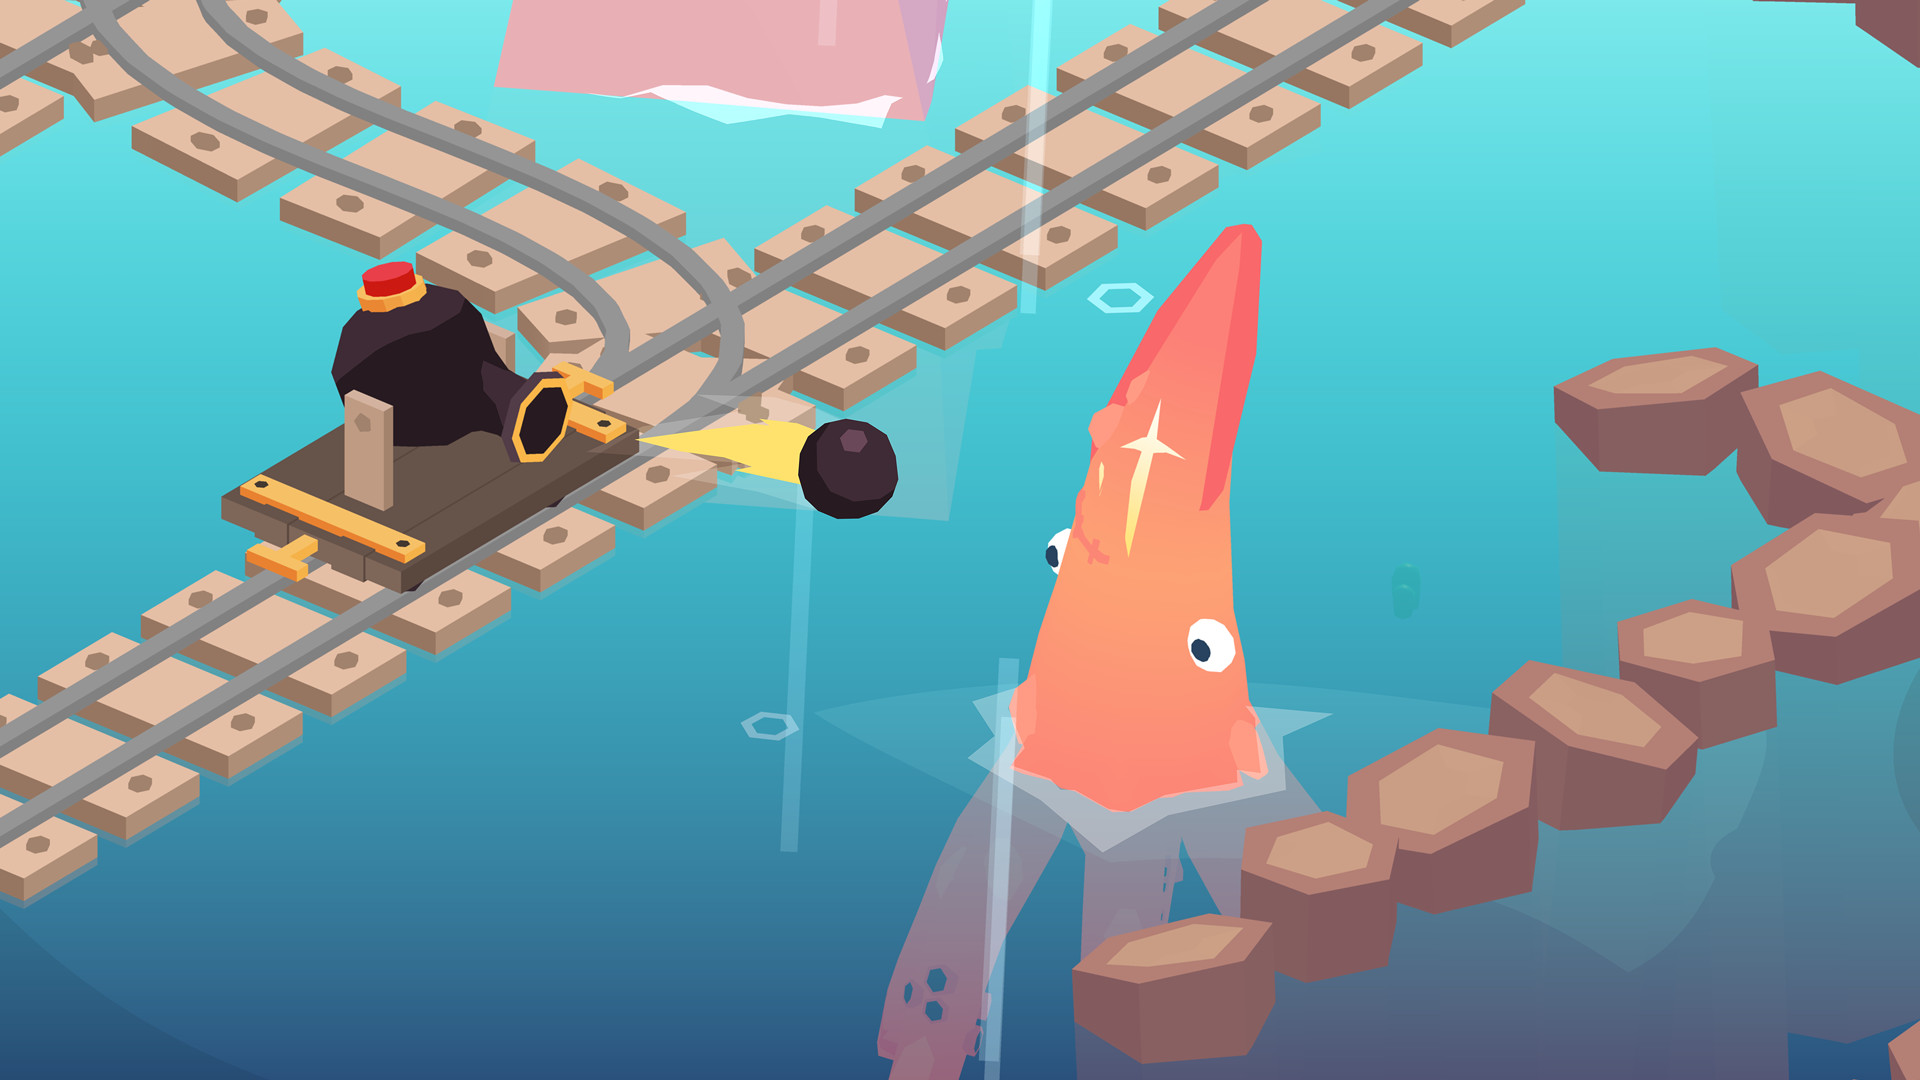
Speak with the farmer.
She asks to get rid of the ship that sank in her garden.
On the rails we bring the cannon to the ship, shoot at the places marked with a cross.
Note . To turn the cannon in the desired direction, you should move it to a circular area.
The ship sinks, but a kraken appears.
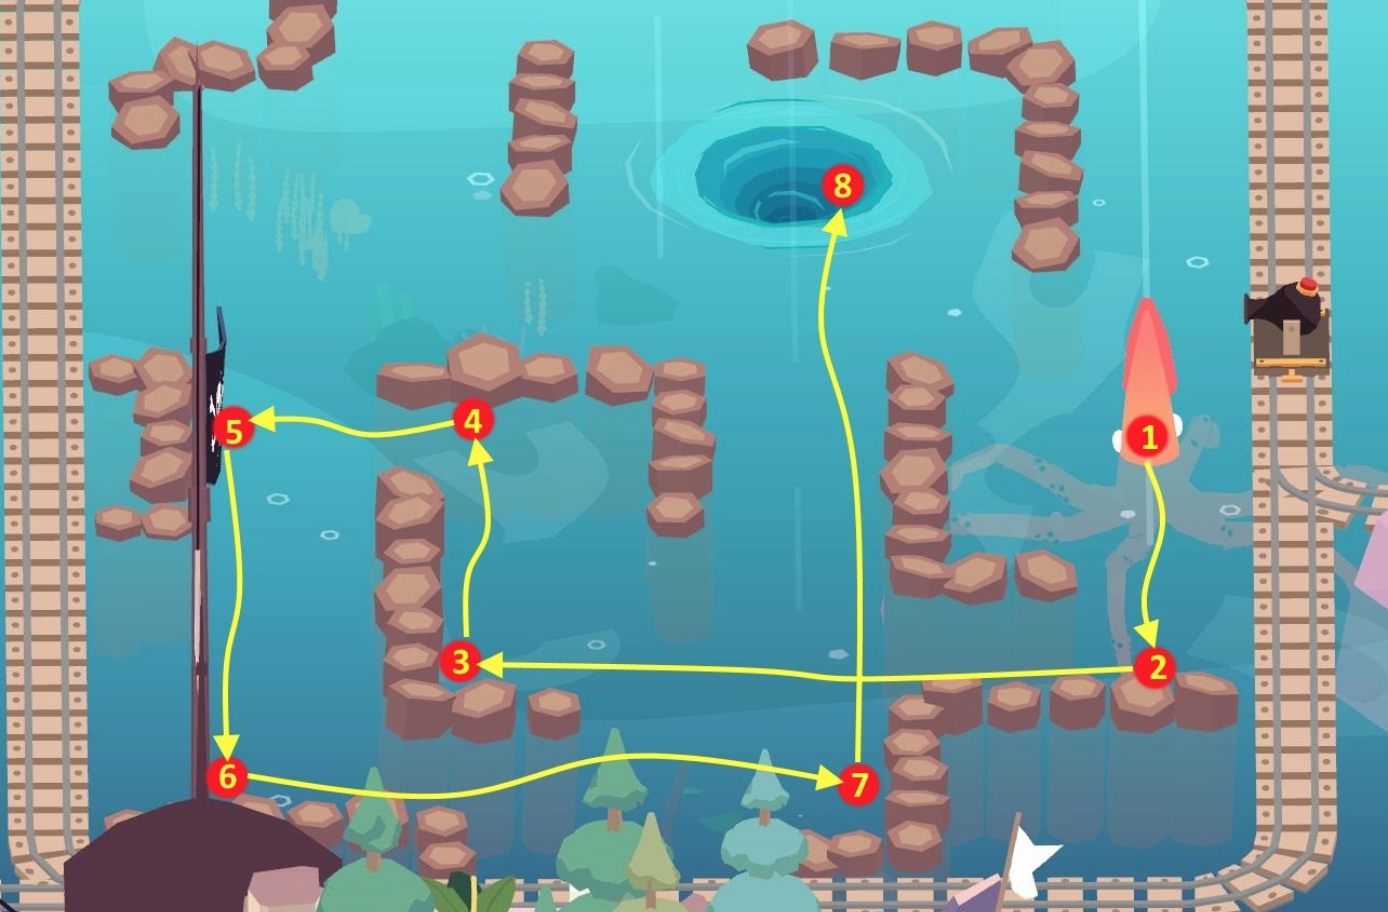
With the help of the cannon we drive the kraken into the whirlpool, we get SPHERE 1.
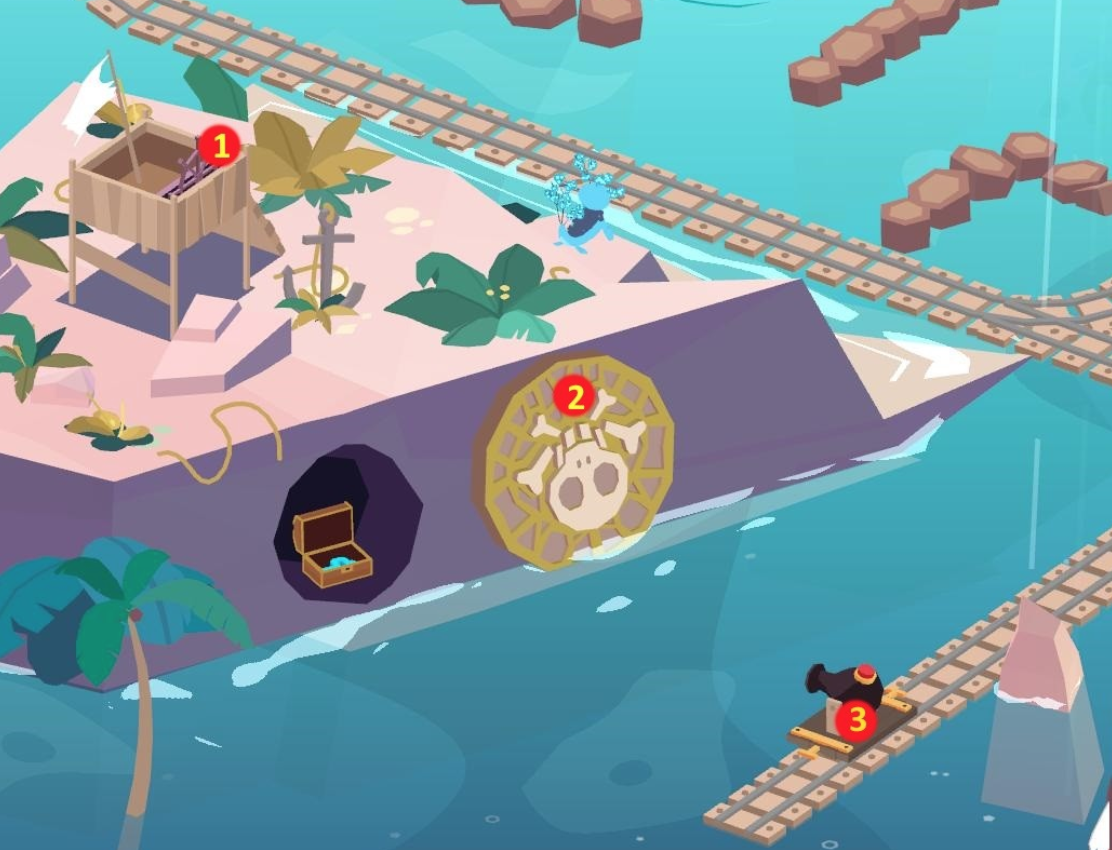
Sphere 2
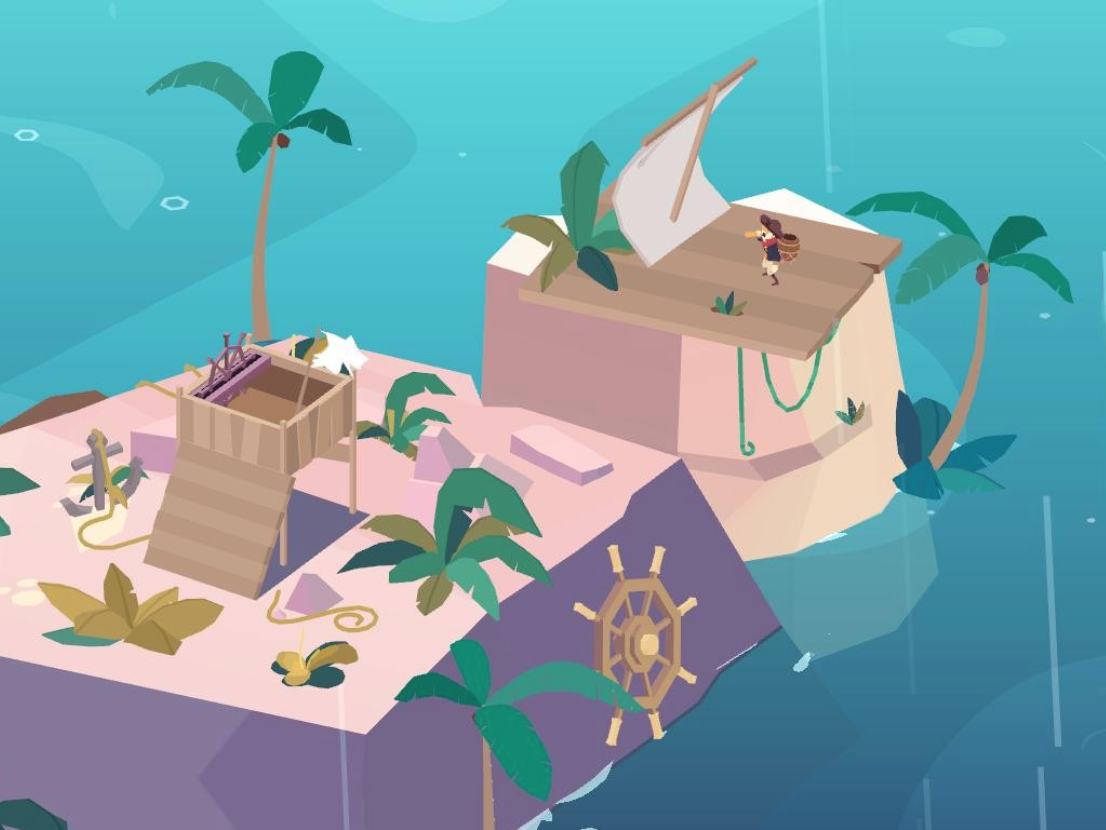
We speak with Bill Bermuda, who is sure that we will not be able to find his hidden treasure.
We are looking for hidden chests.
A star was hidden in chest 1 .
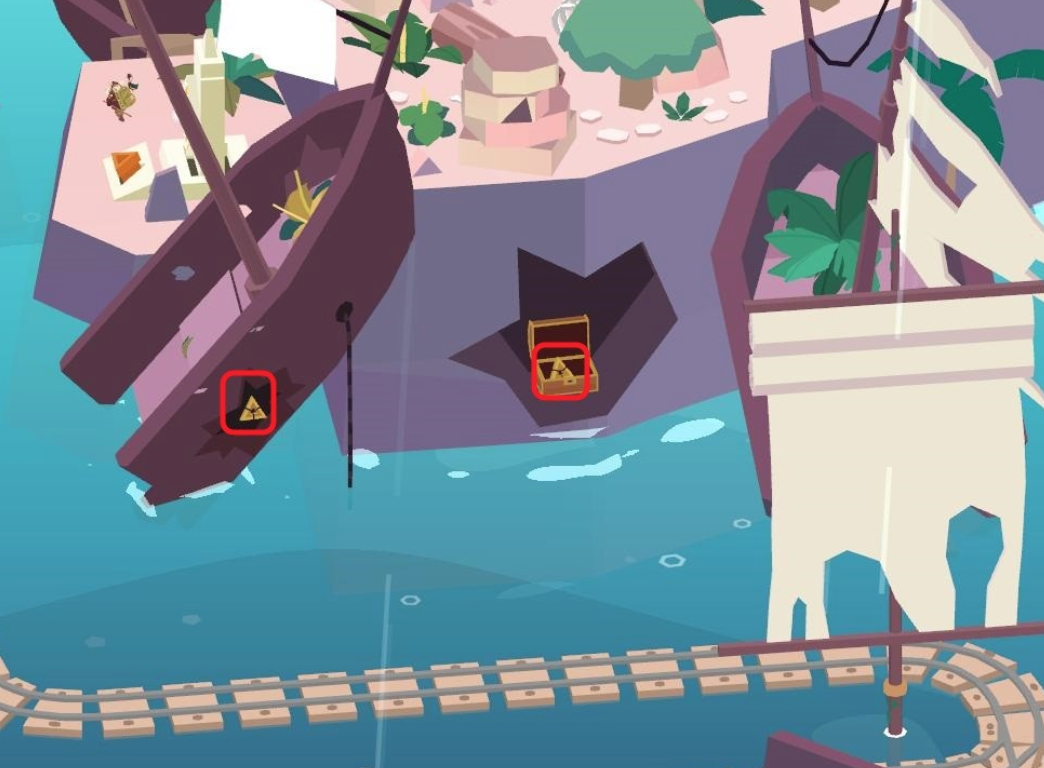
We rotate the steering wheels on the deck, pull out the bow of the ship from the water. We open the hatch, which contains the chest 2 with artifacts.
Shoot the place marked with a cross on pyramid 1 with a cannon – pyramid 2 extends. We shoot at the cross on it – a through hole opens in pyramid 1. We shoot through it at rock 3, we find a chest 3 with artifacts.
We rotate the steering wheel 1 on the observation deck, roll back to the side circle 2 with the pirate emblem. We bring cannon 3 along the rails, shoot at the masonry. In the niche we find chest 4 with a key.
We shoot at the masonry of the base of the island with the monument. In the niche we find chest 5 with an artifact.
We receive SPHERE 2 from the pirate.
Sphere 3
Collect the STARS with the help of the map.
One of them is in the hold of the ship, pulled out of the water.
Place the collected stars on the Star Monument by clicking on the button below it.
Masts rise from the water.
We bring a cannon to each of the masts, shoot at the places marked with a cross . Having shot three masts, we get SPHERE 3.
Artifacts
2 – in a chest in the wall, which can only be pierced by performing additional actions (see description above);

1 – in a chest in the hold of the bow of the ship, which must first be pulled out of the water and 1 – in the hold of the same ship, the side of which must be pierced with a cannon;
1 – in the rock , which needs to be pierced with a cannon;
1 – in a chest in the rock, which must be pierced with a cannon and 1 – in the hold of a nearby ship, the side of which must be pierced with a cannon;
1 – in the hold of a ship, the side of which must be pierced with a cannon.
Key
From the chest , which is in a niche, pierced by a cannon (see above), we take out the BLUE KEY .
We go to the gates of the spheres, we move to Turtle Island.
What more to do on Turtle island
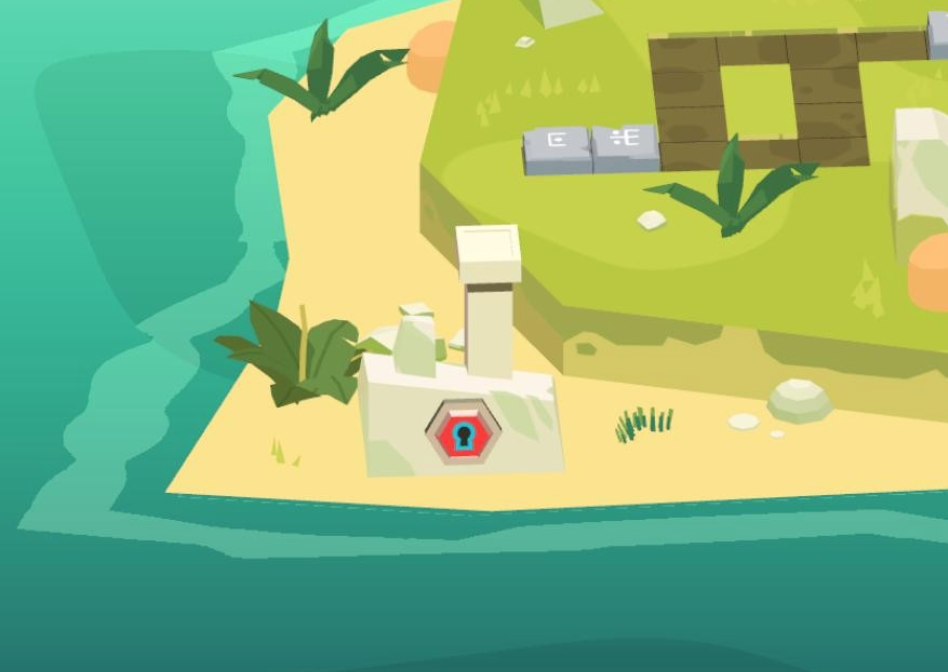
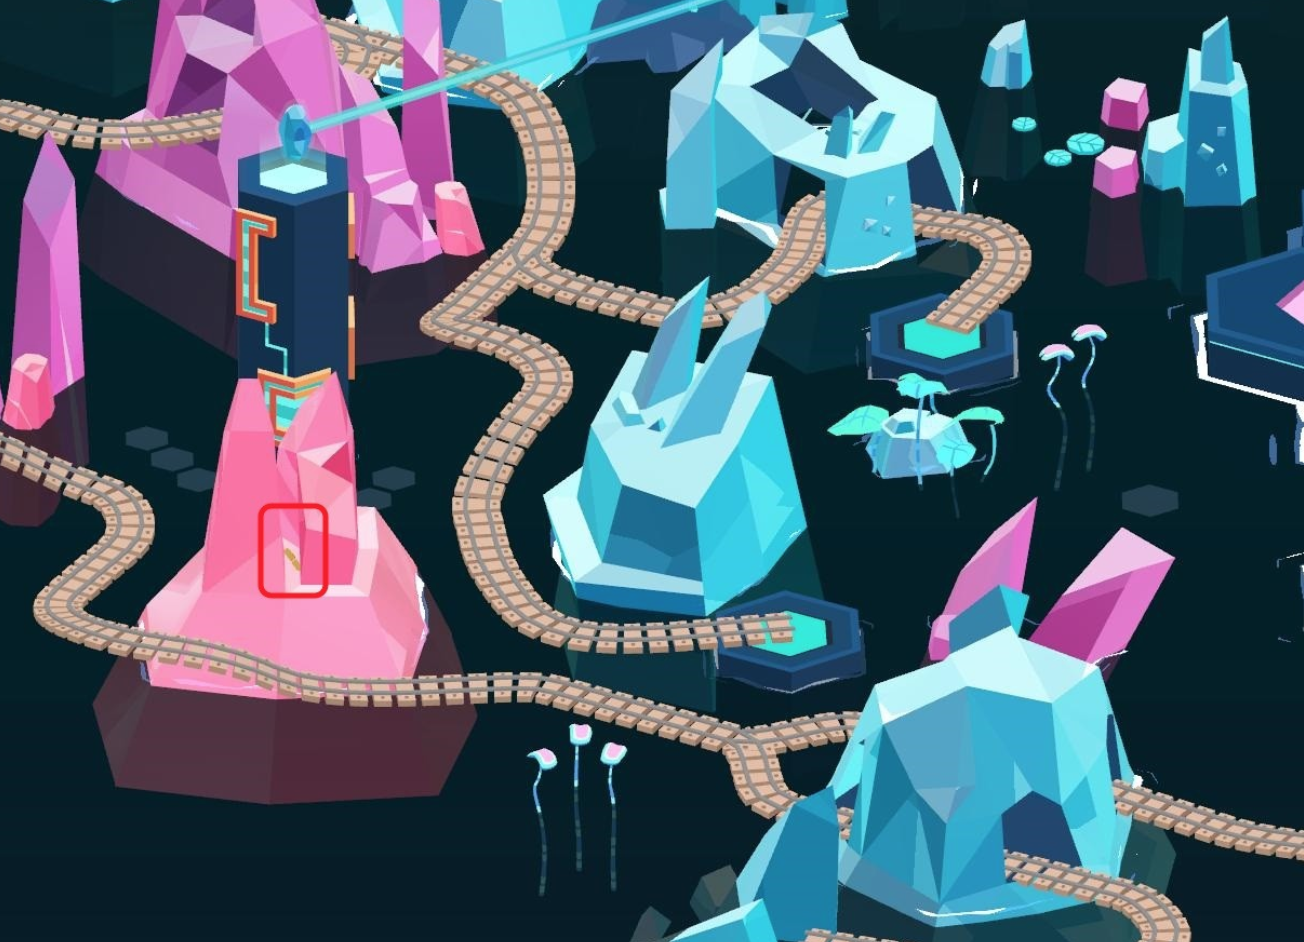
Use the blue key to open the lock on the column ; take the ORANGE KEY .
We go to the gates of the spheres, we return to the Island of the shipwreck.
What more to do on Shipwreck island
Orange key to open the lock on the attraction “Russian hills”.
Milton and his new companion, the duck, get into the trolley and ride the slides.
We take away two ARTIFACTS from the trolley .
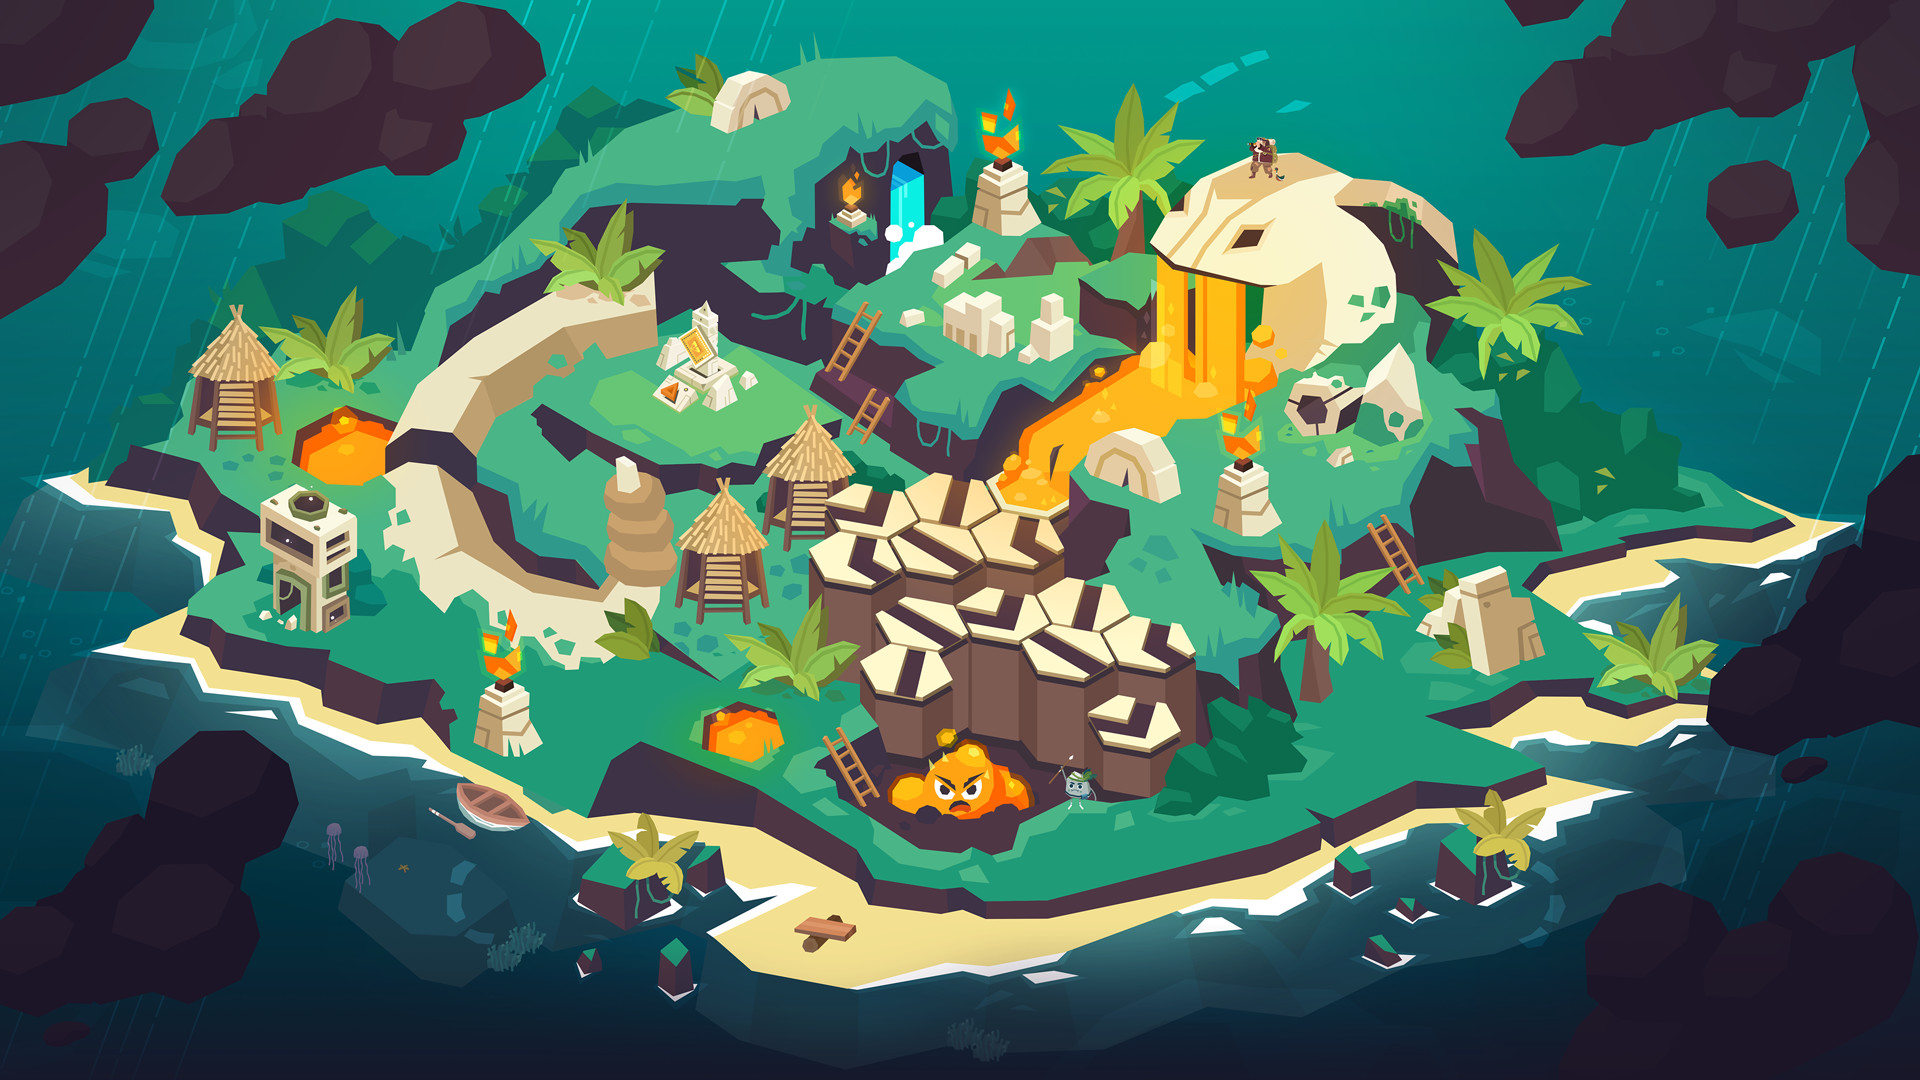
We go to the gates of the spheres, we move to the Lava Island.
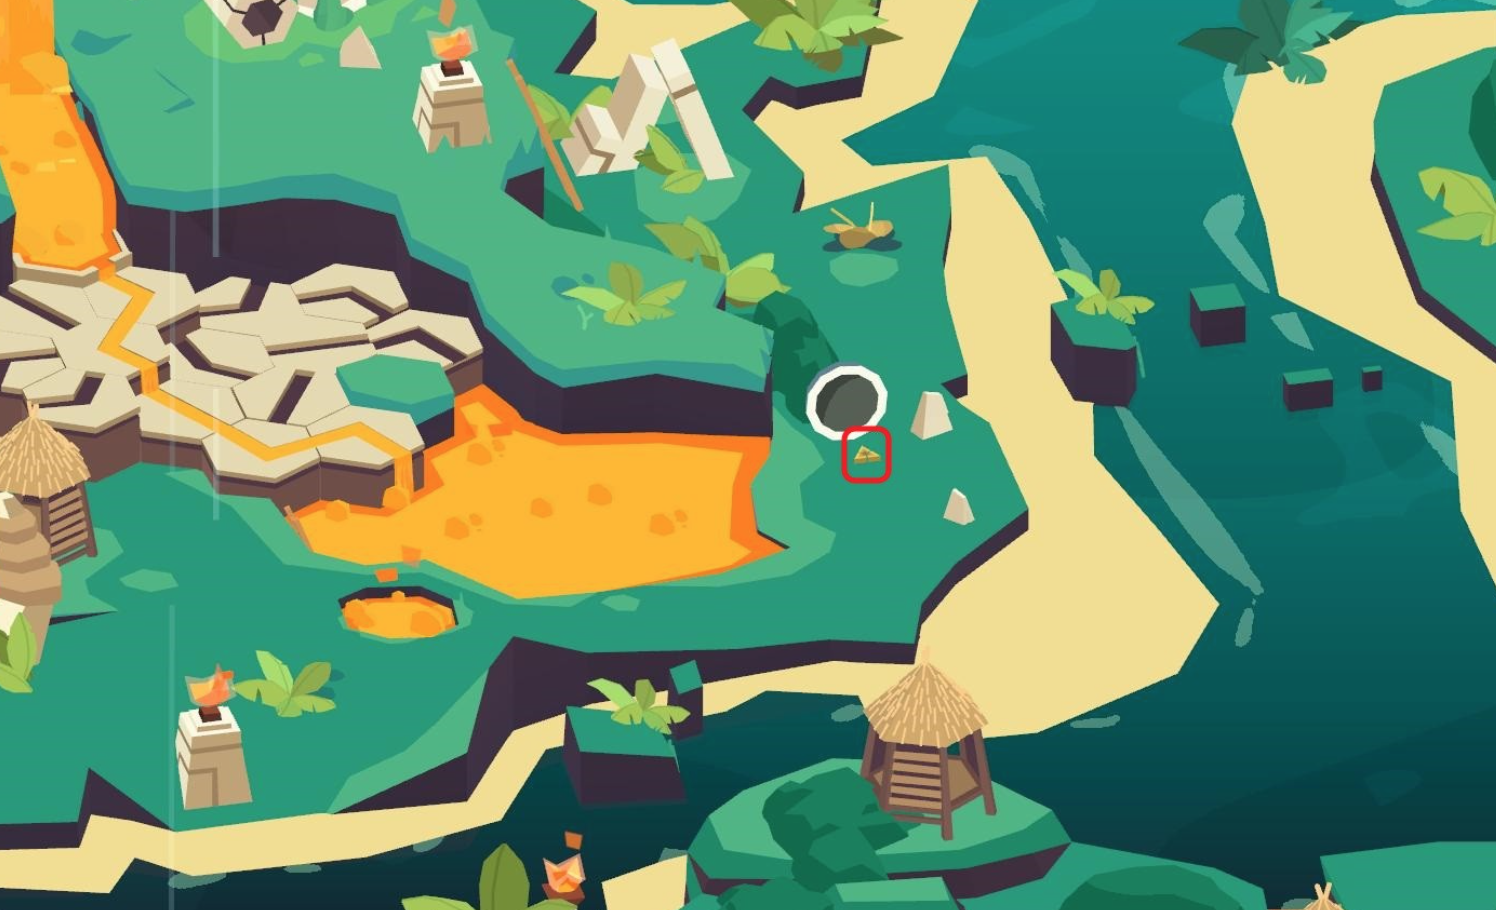
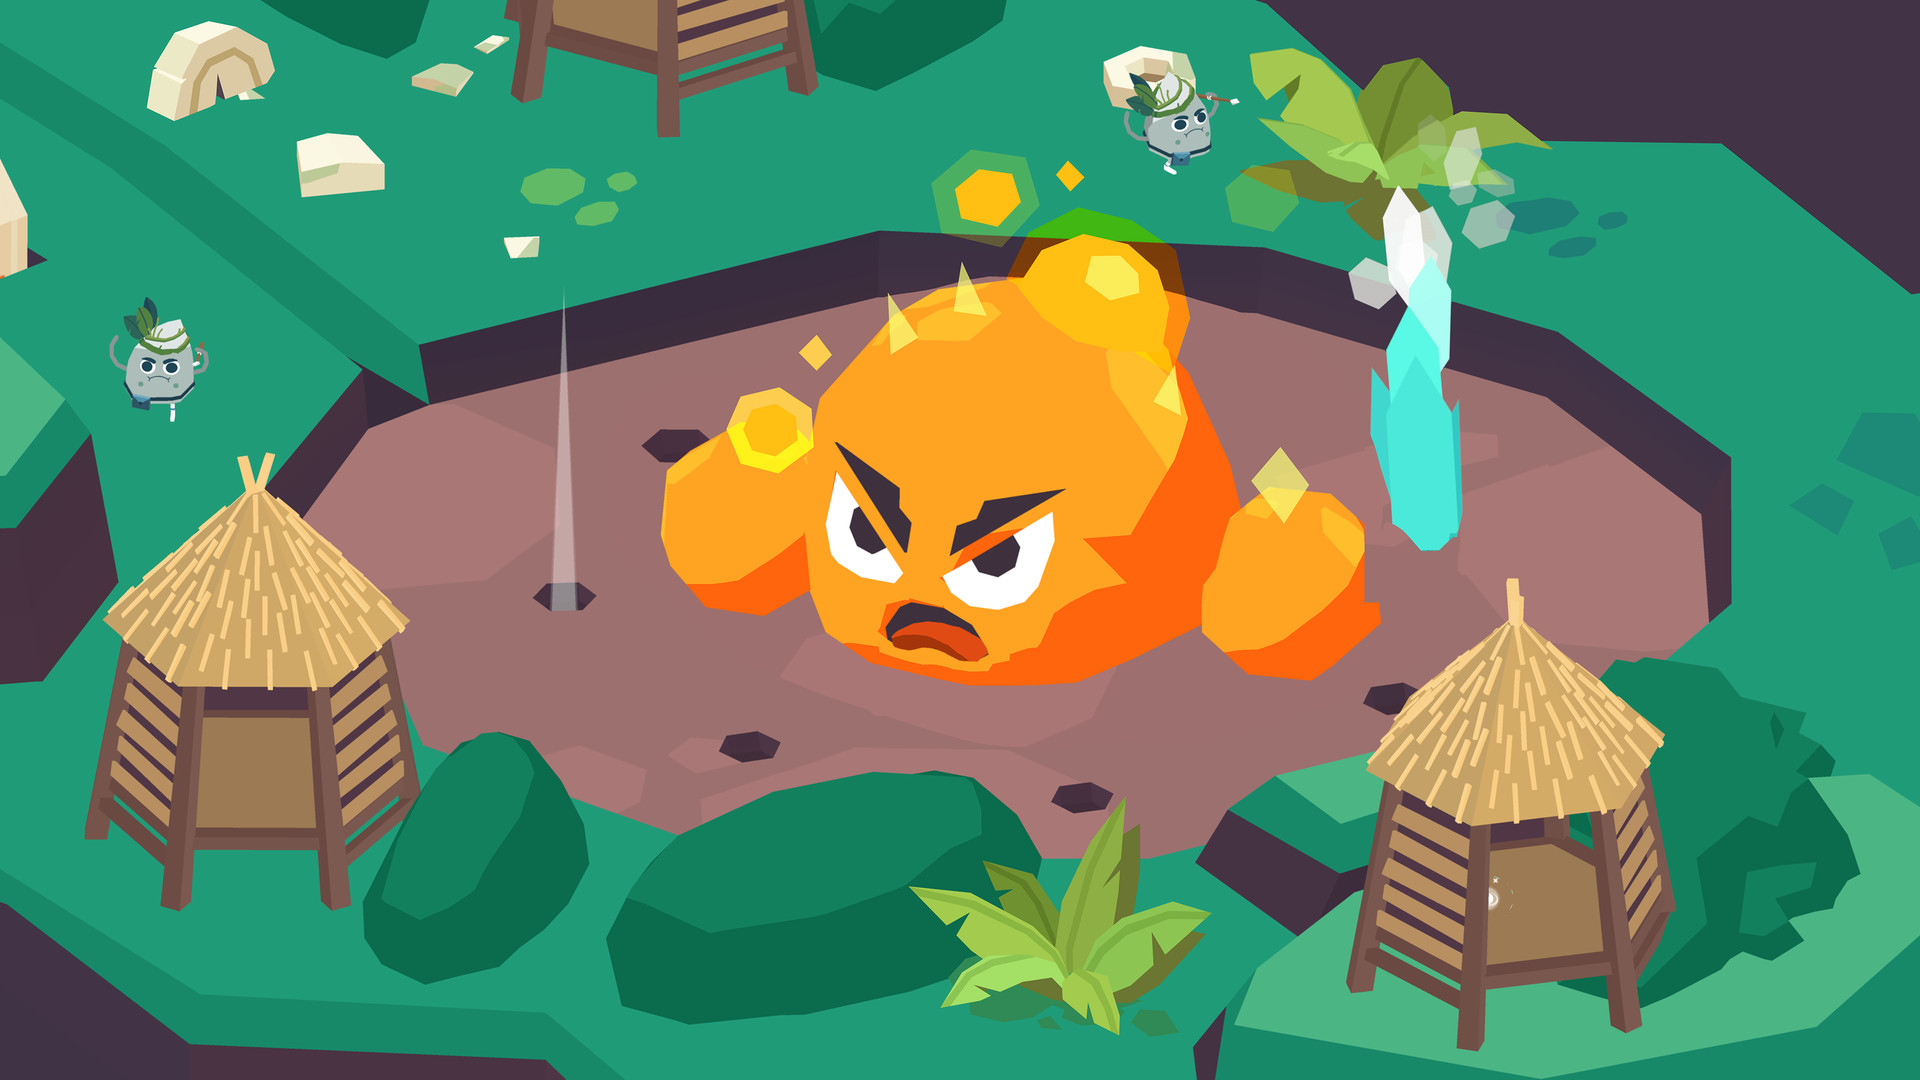
What to do on Lava island
- Artifacts – 6
- Castles – 0
- Photos – 1
- Keys – 1
- Maps – 1
- Spheres – 3
The photo
We search and find a PHOTO .
Map 1
In one of the huts we find a STAR MAP .
Sphere 1
With the help of the map, we collect accessible and easily detectable STARS that are in tree trunks, in bushes, in wigwams and huts, and so on, and for which you do not need to take additional actions (except for turning the lever to open the door).
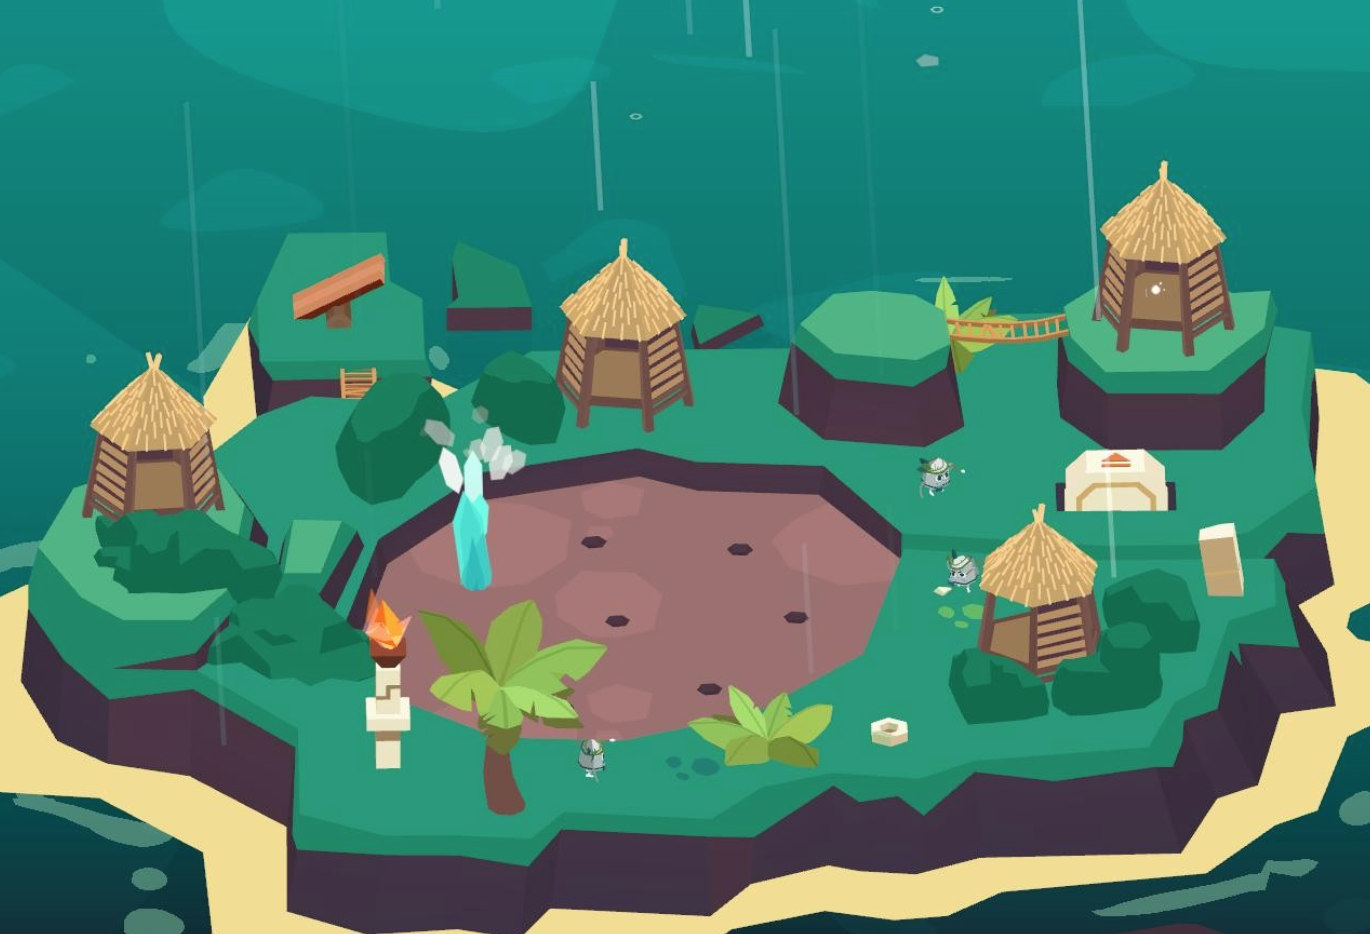
We find eight STARS in the geysers – we click on the hole in the ground and quickly pick up the star that has risen on the stream of the geyser nearby.
Click on the nose of the bas-relief on the wall of the building with a snake on the roof, pick up another STAR.
Press the button at the base of the Star Monument and place the collected stars on it. We take away the SPHERE 1.
Sphere 2
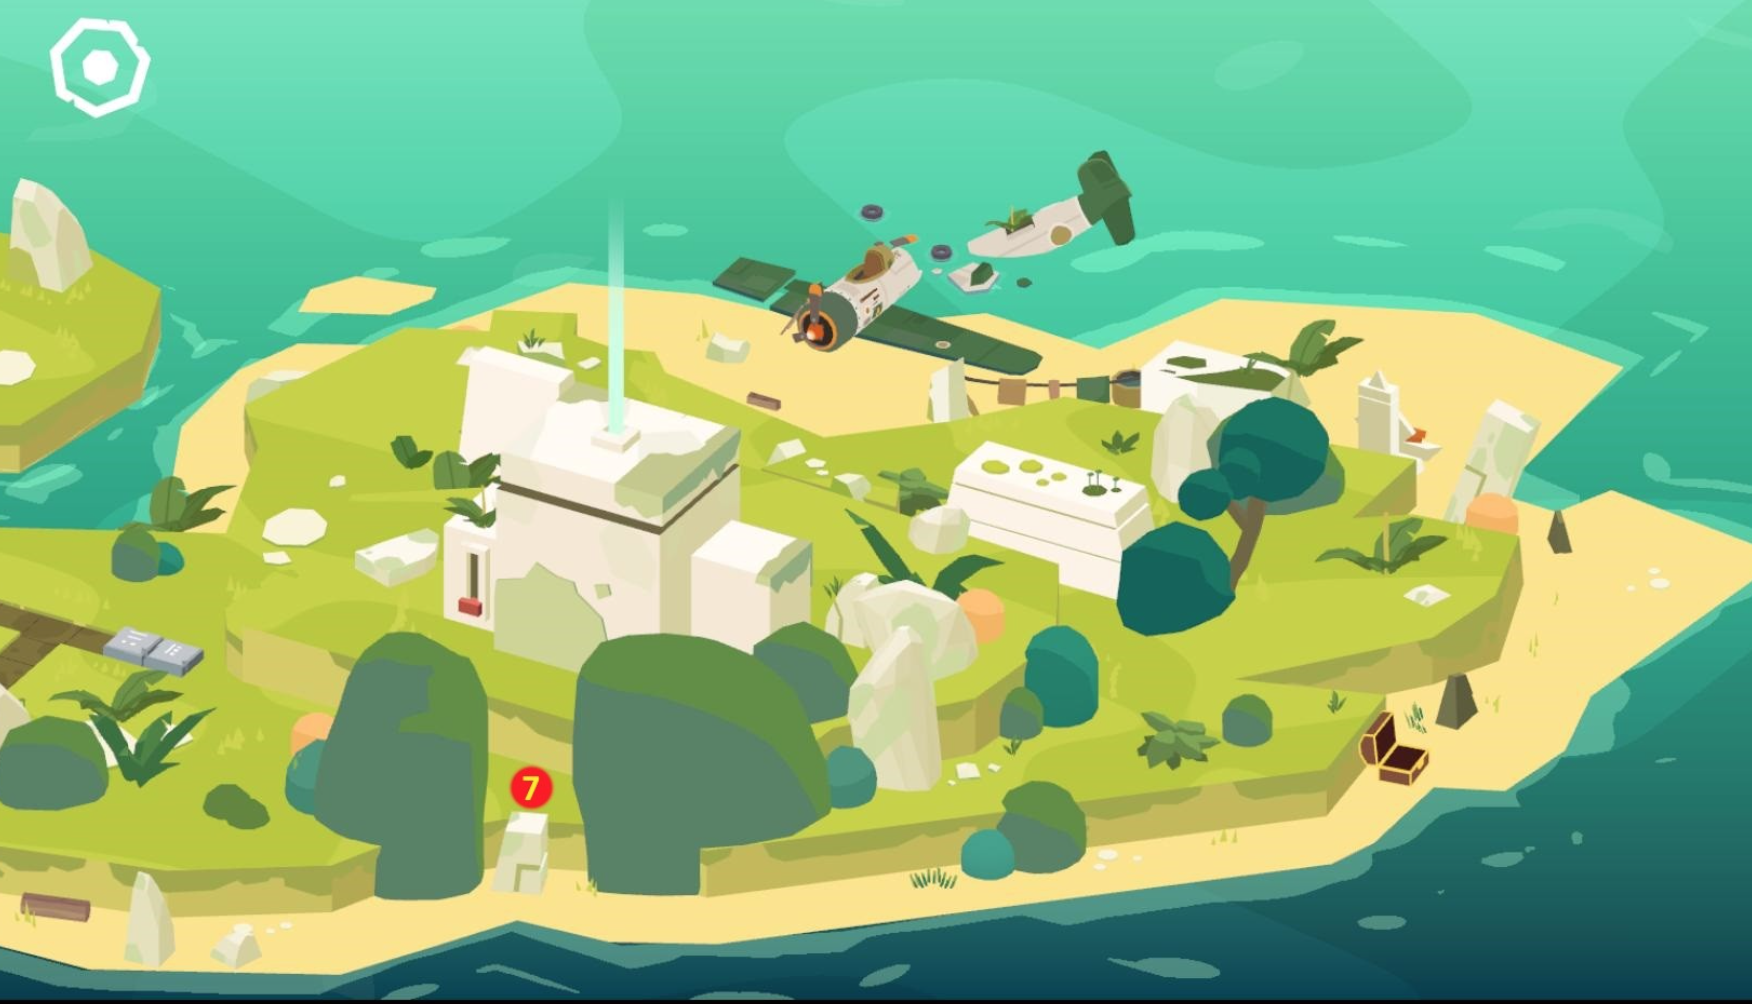
Notice that the sphere (like the artifact) is under the plank flooring. We draw your attention to the fact that Milton is located on the board. We click on the boards, on which Milton flies, until he breaks through the flooring. We take away the SPHERE 2 .
Sphere 3
Aboriginal people ask to wake up the god of fire.
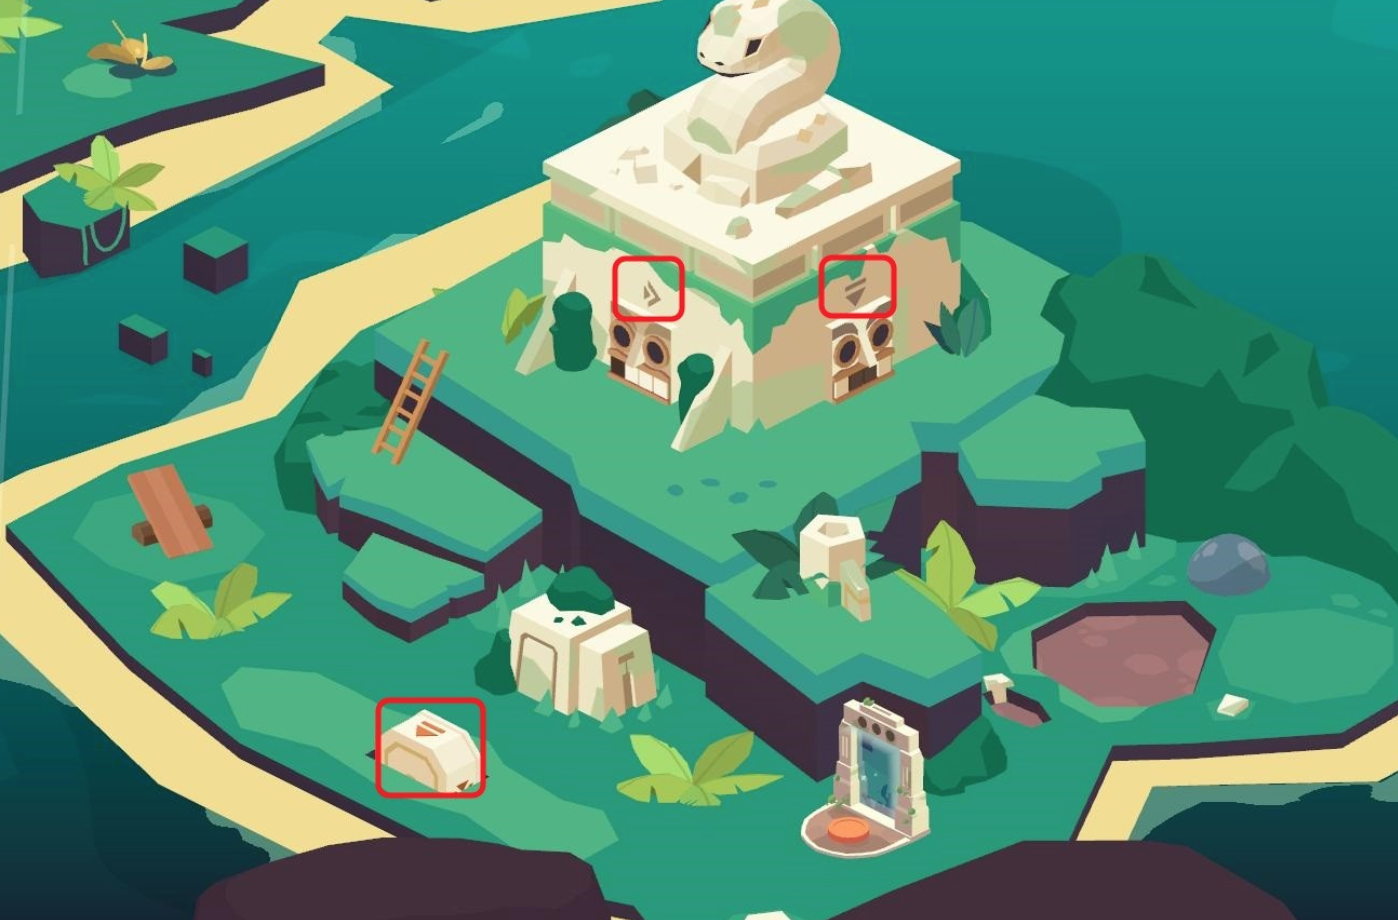
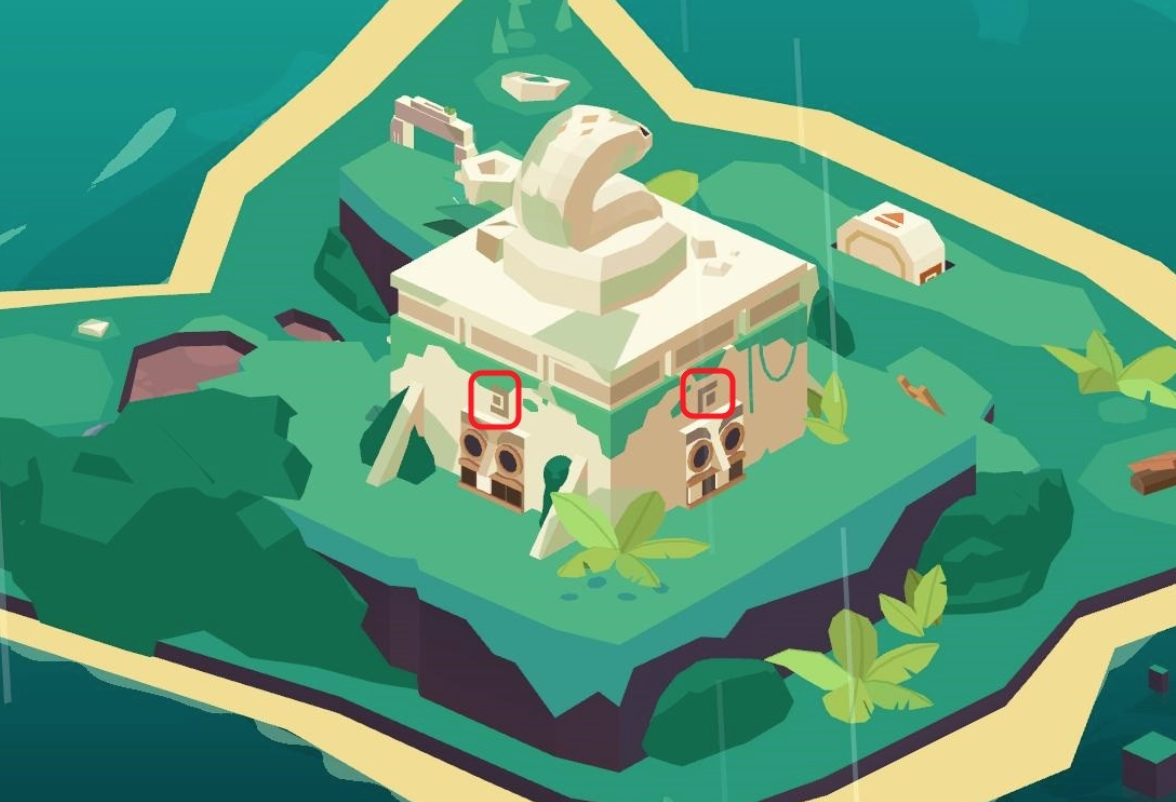
On the second structure with a snake on the roof, we look at the symbols on the four sides. We find four turning stones, put on them the symbol that is depicted on the wall of the structure facing the stone.
We press the four opened buttons – rays come out of the eyes of the snake, penetrating into the eye socket of the statue of the snake in the center of the island.
Press the button on the side surface of the first structure with a snake on the roof opposite to the one where the star was taken. Click on the two opened buttons – on the four sides of the structure, panels with keys that change color from white to black and vice versa when you press them. We look at the second building, remember the location of the dark-light squares on each of the walls.
We also color the keys on the corresponding wall of the first structure – rays rush from the eyes of the snake on the roof into the eye socket of the snake in the center of the island.
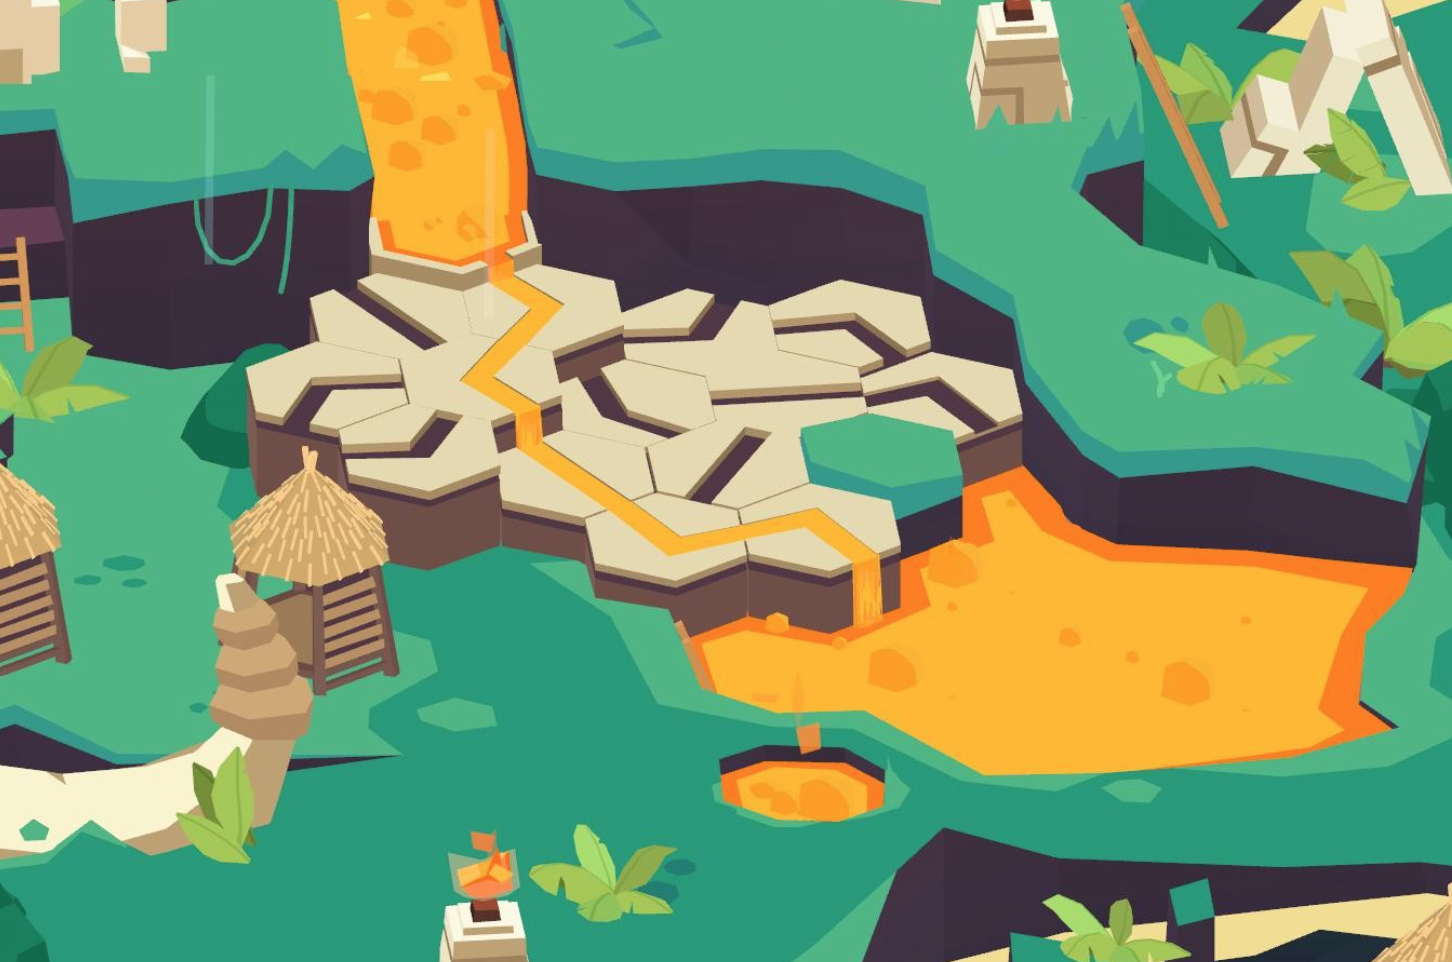
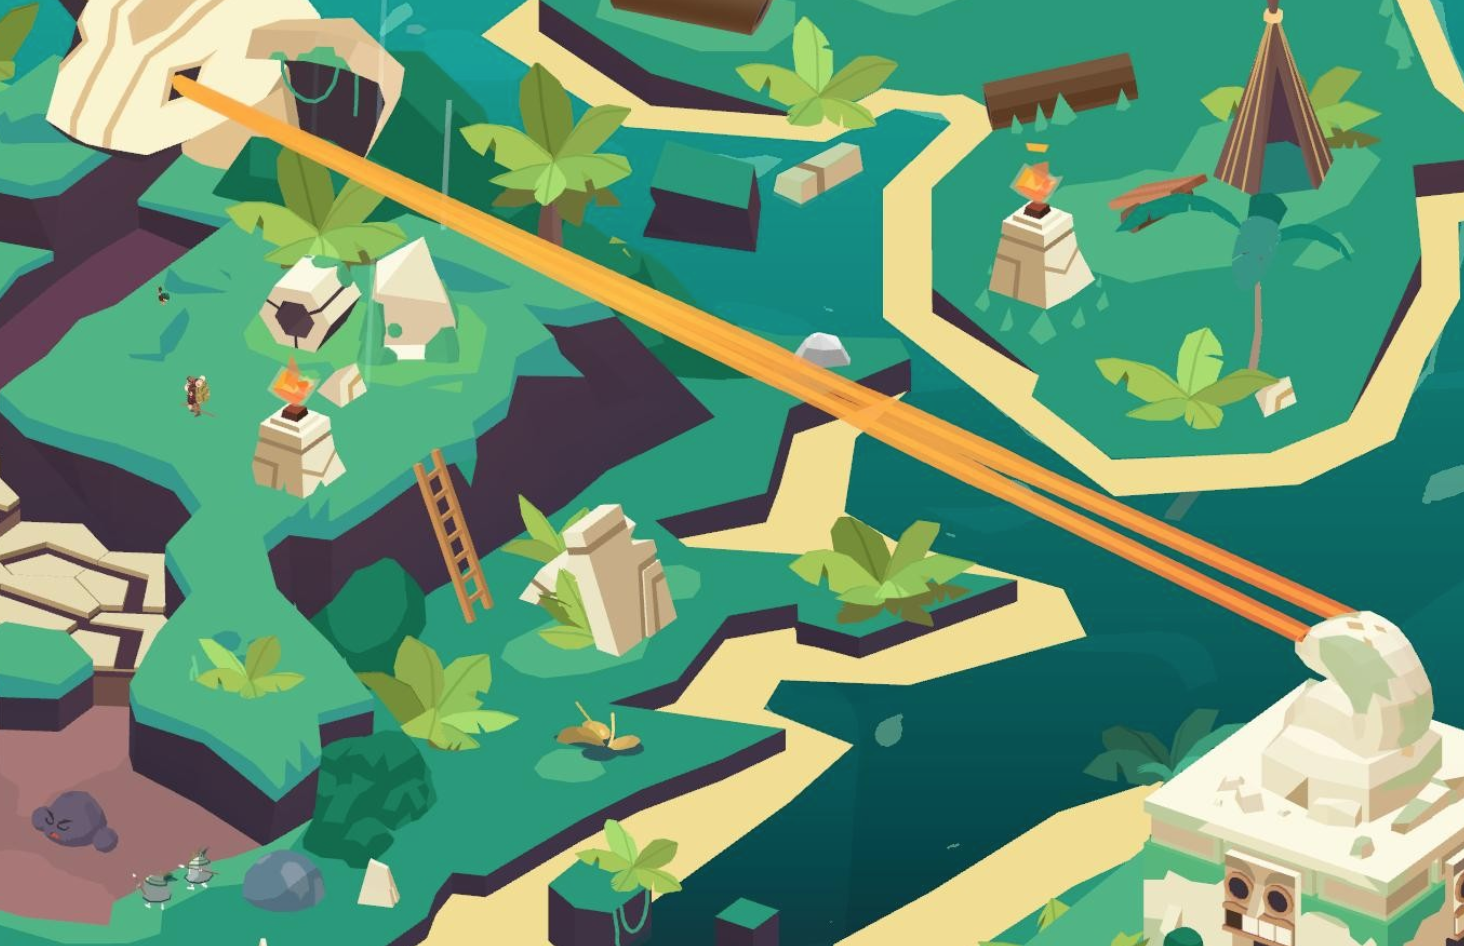
We build a channel, awaken the God of Fire.
Now the natives are asking us to rid them of the angry god.
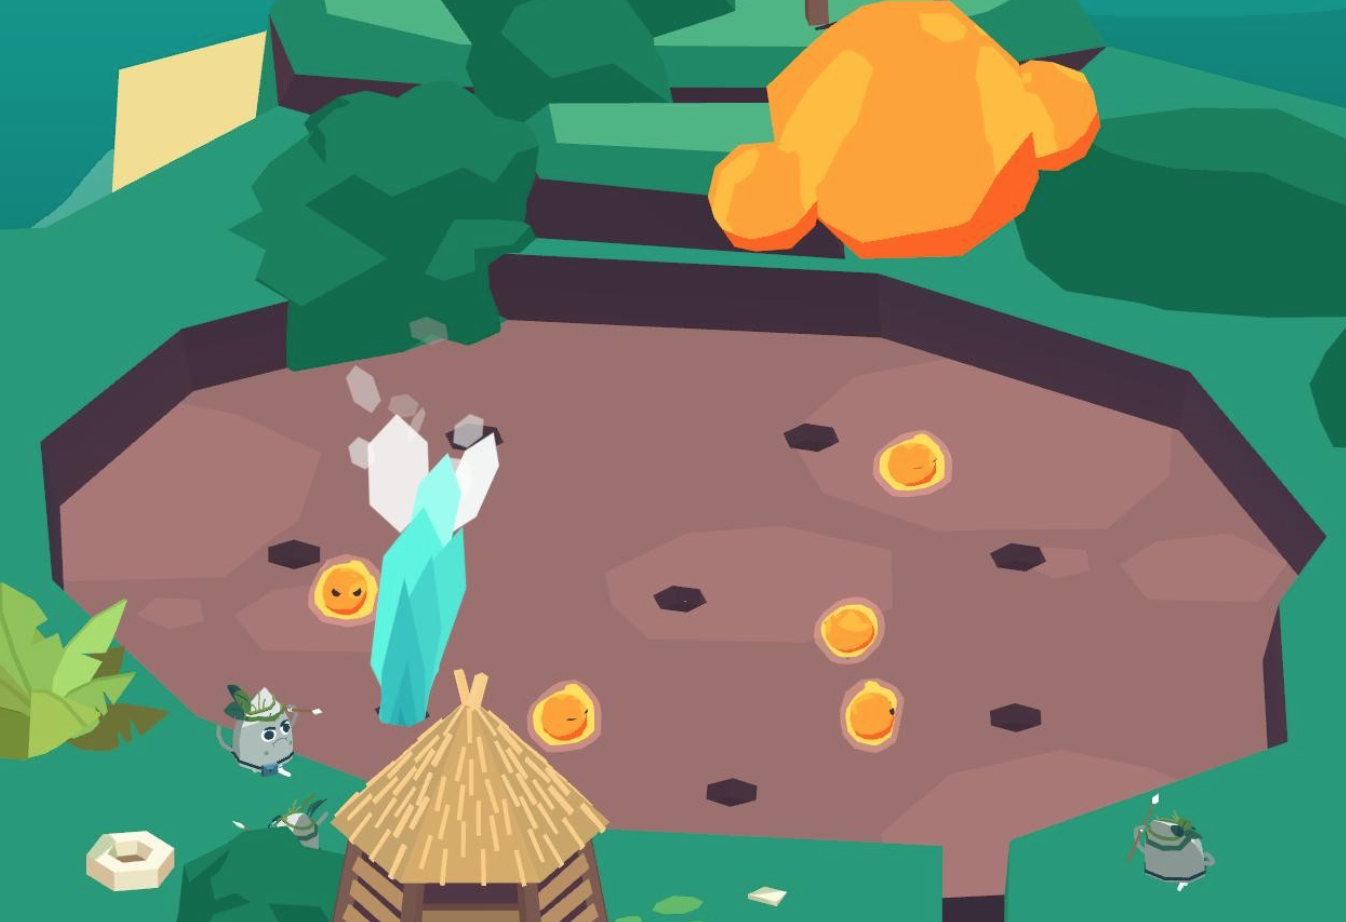
Our task is to press the desired hole in order to activate the geyser, towards which God is directed, and then his servants. We perform the action several times, we get SPHERE 3.
Artifacts
Find three ARTIFACTS in the pit with sphere 2.
Exploring the island, we find three more ARTIFACTS.
Key
Near the structure with a snake on the roof under the shell we find the RED KEY .
We go into the gates of the spheres, we move to the Forest Island.
Returning to Forest island
Open the sheep pen with the red key .
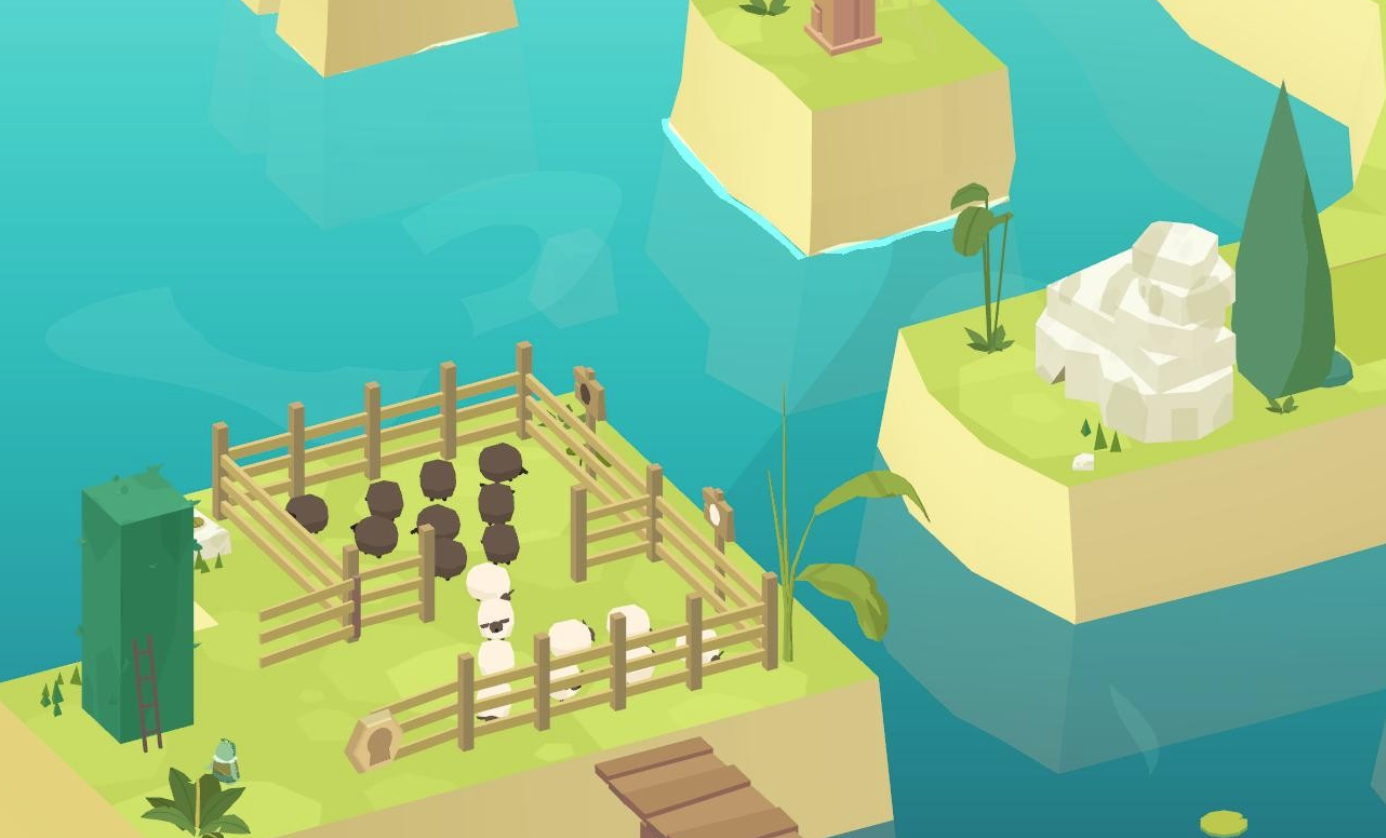
We change places of black and white sheep, we get an ARTEFACT as a gift.
We go into the gates of the spheres, we move to the Island-labyrinth.
What to do on Maze island
- Artifacts – 3
- Castles – 1
- Photos – 1
- Keys – 1
- Maps – 1
- Spheres – 0
Map and Photo
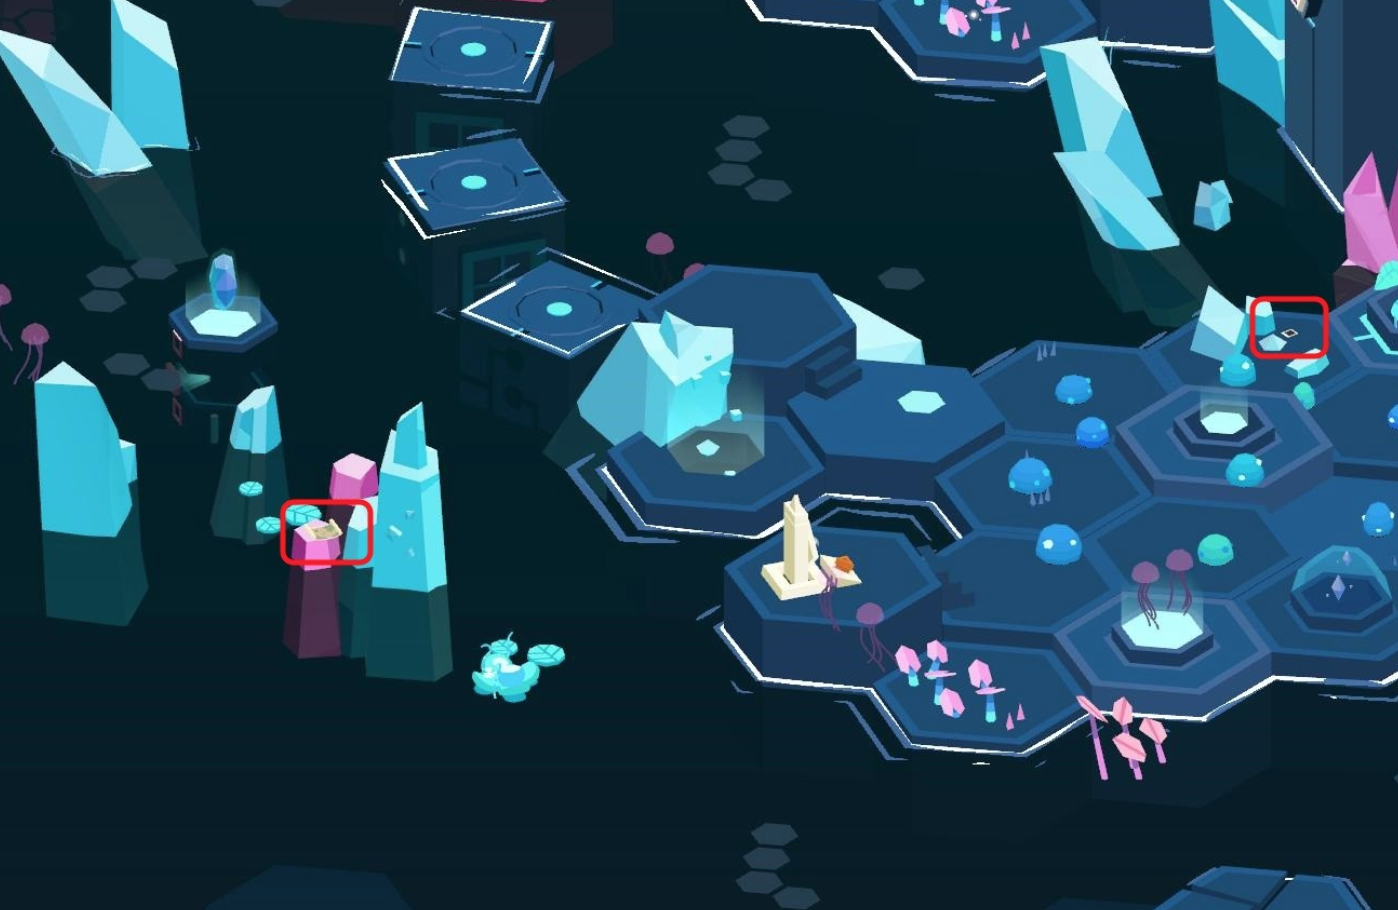
Examine the location, find a STAR MAP on one of the detached rocks. Not far away, on the site with mushrooms, we select a PHOTO ..
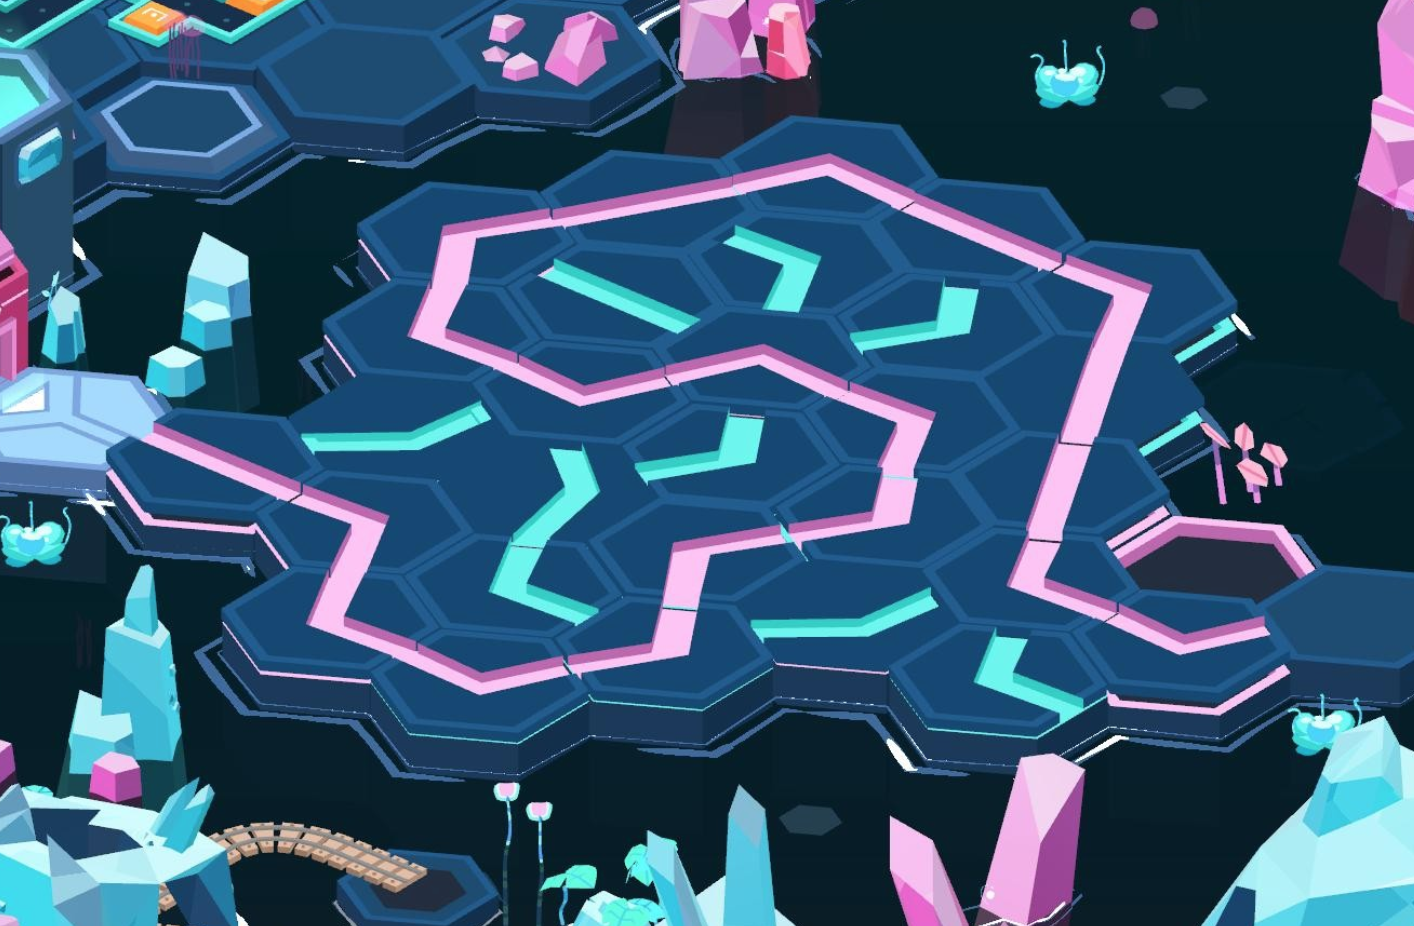
Milton and his companion Duck stop in front of a puzzle that resembles the starting one.
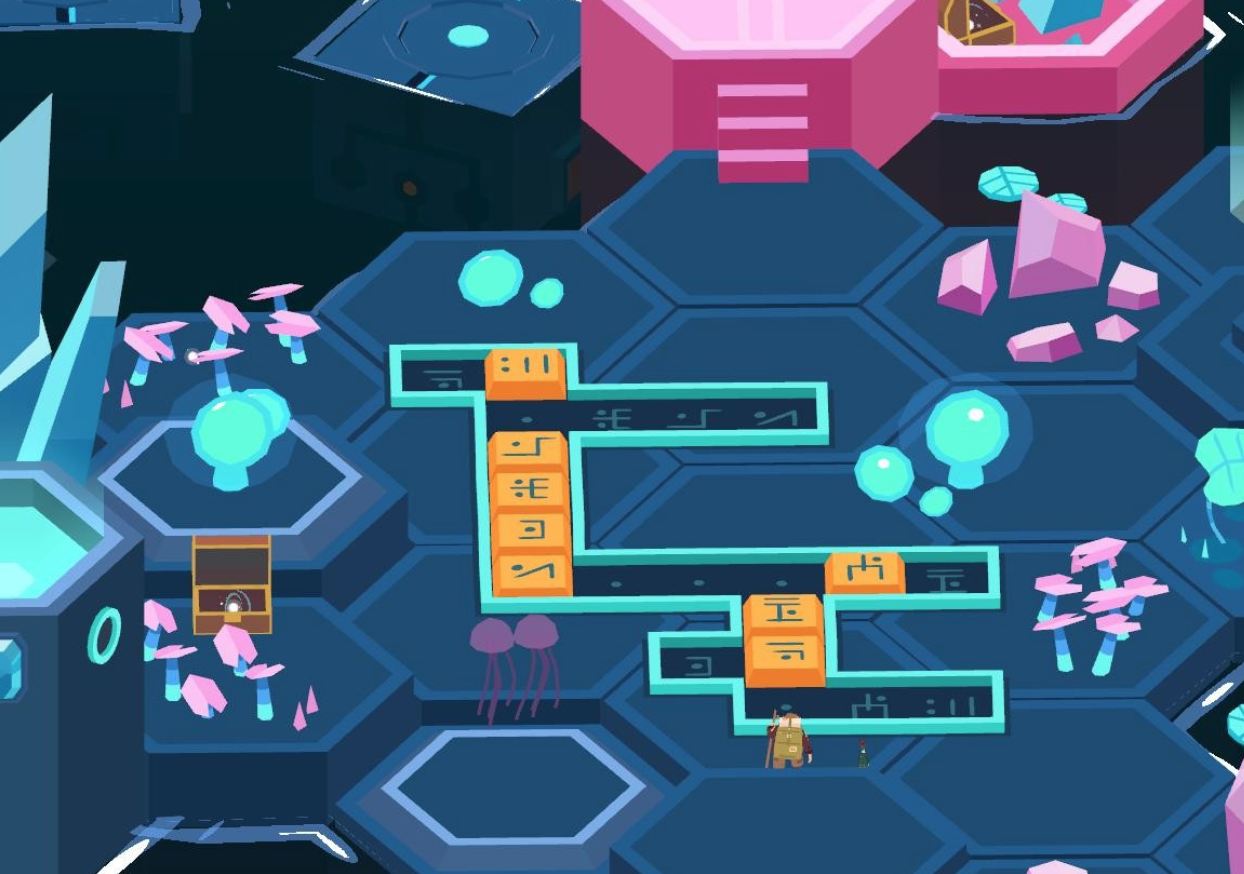
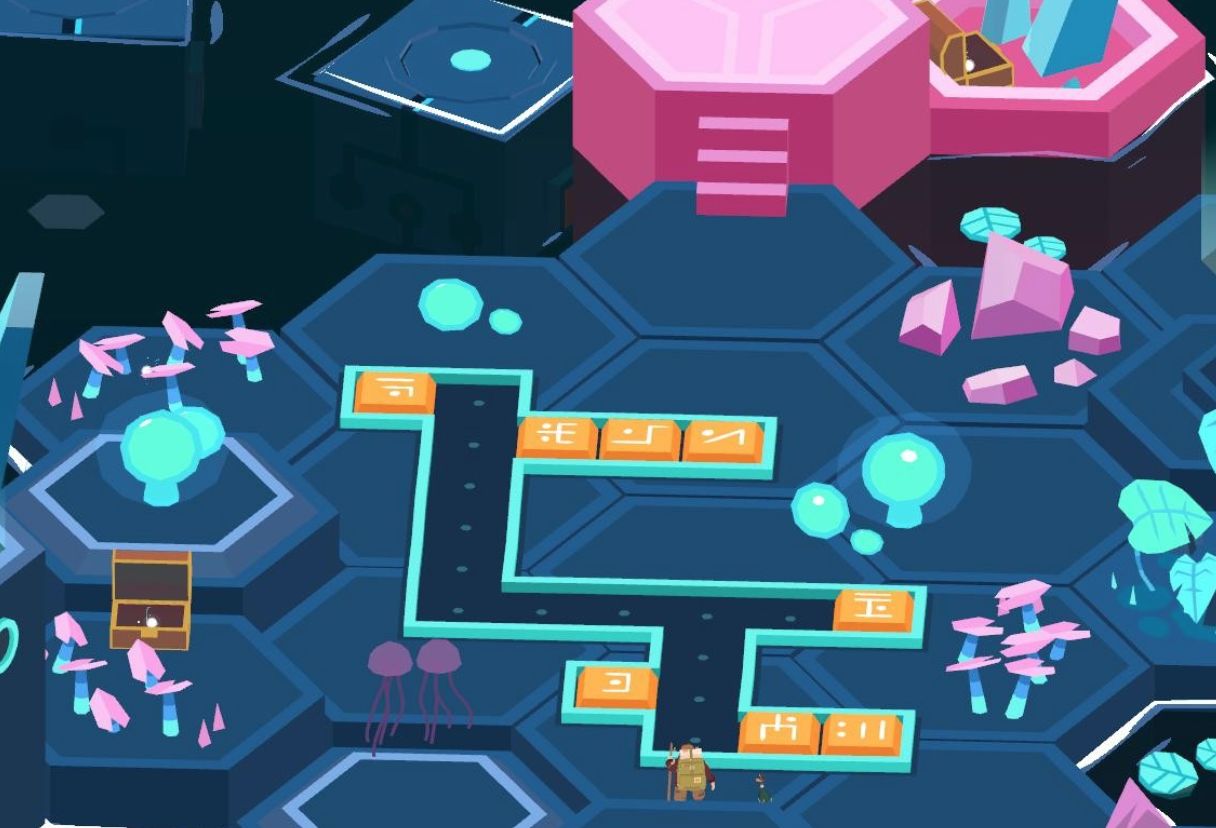
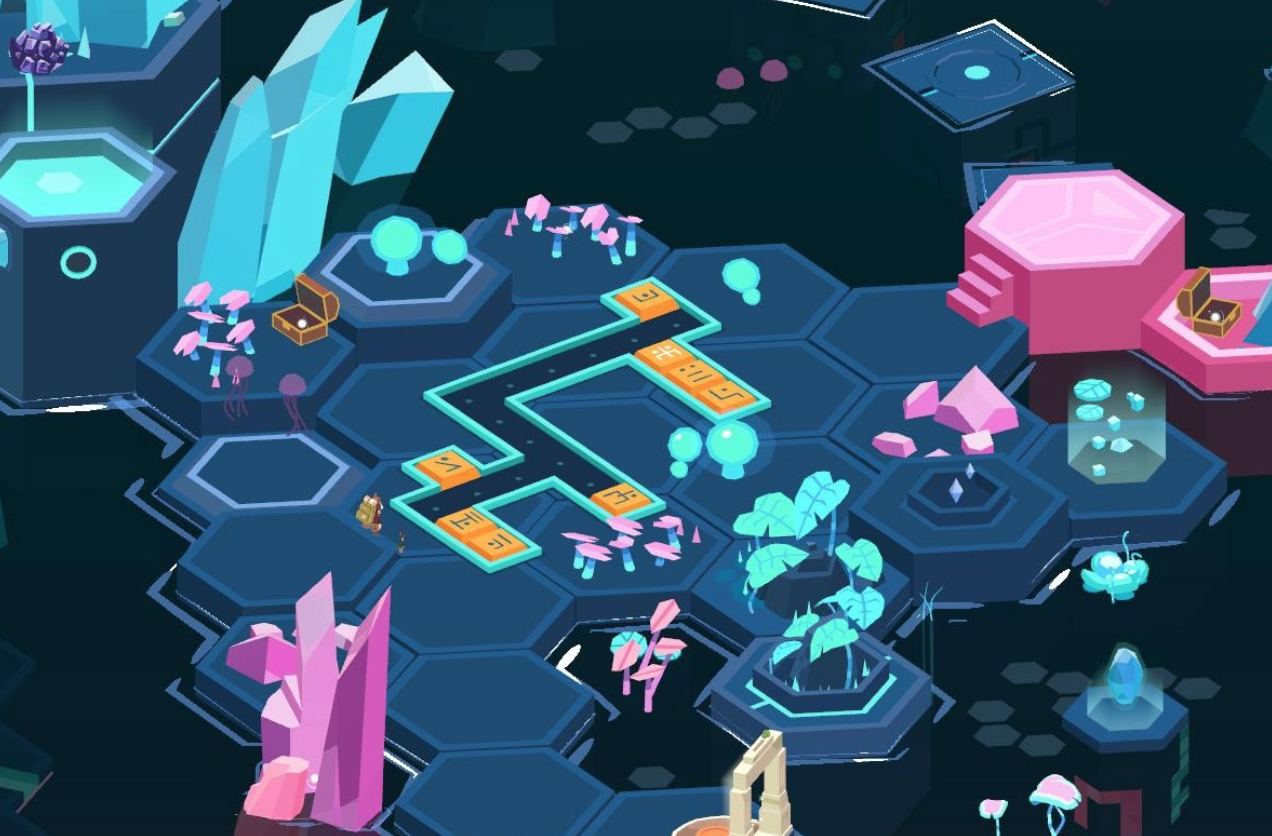
We place the slabs in their places.
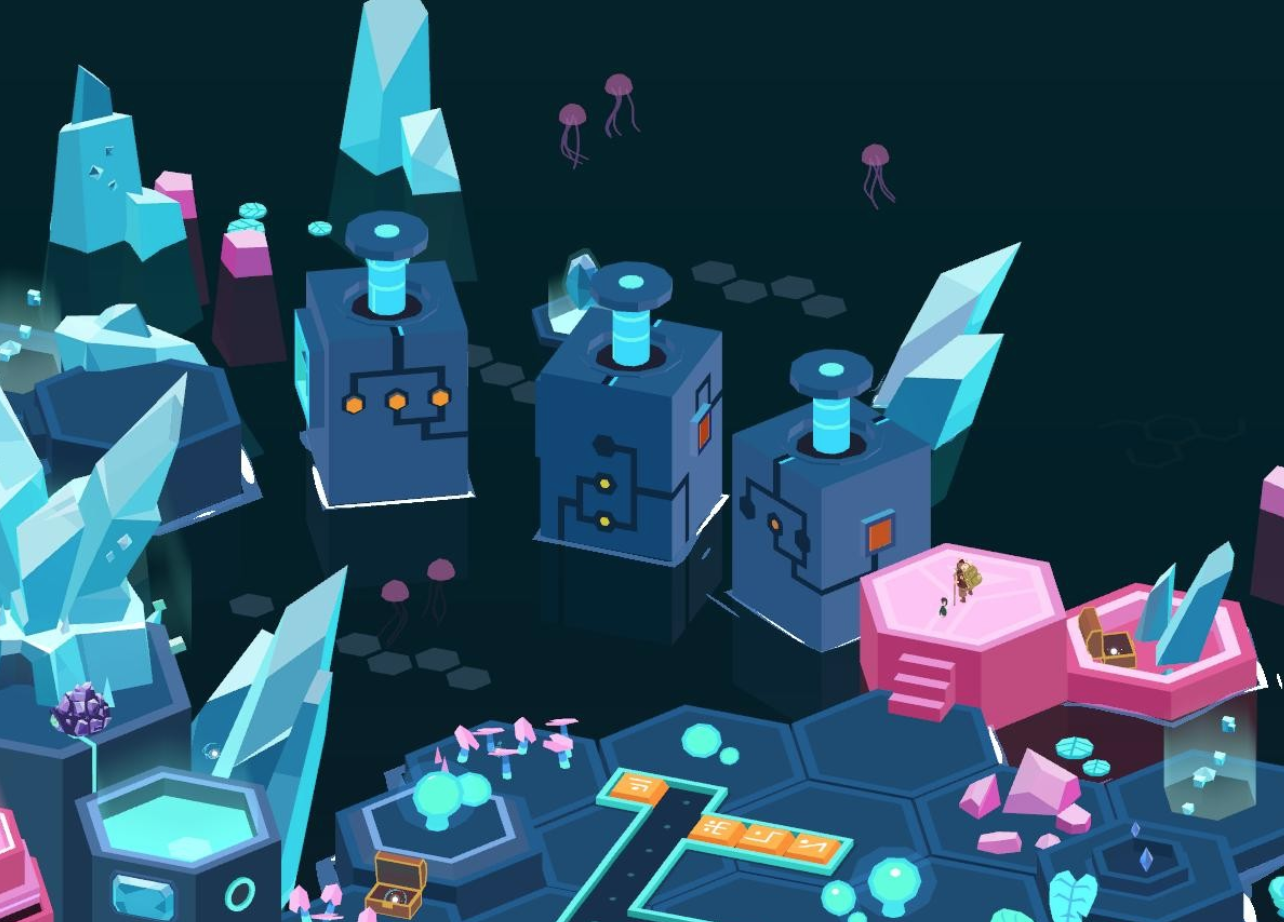
We click LMB on the round platforms on the three intermediate transition sites, open the circuit diagram on the sides of the cubes.
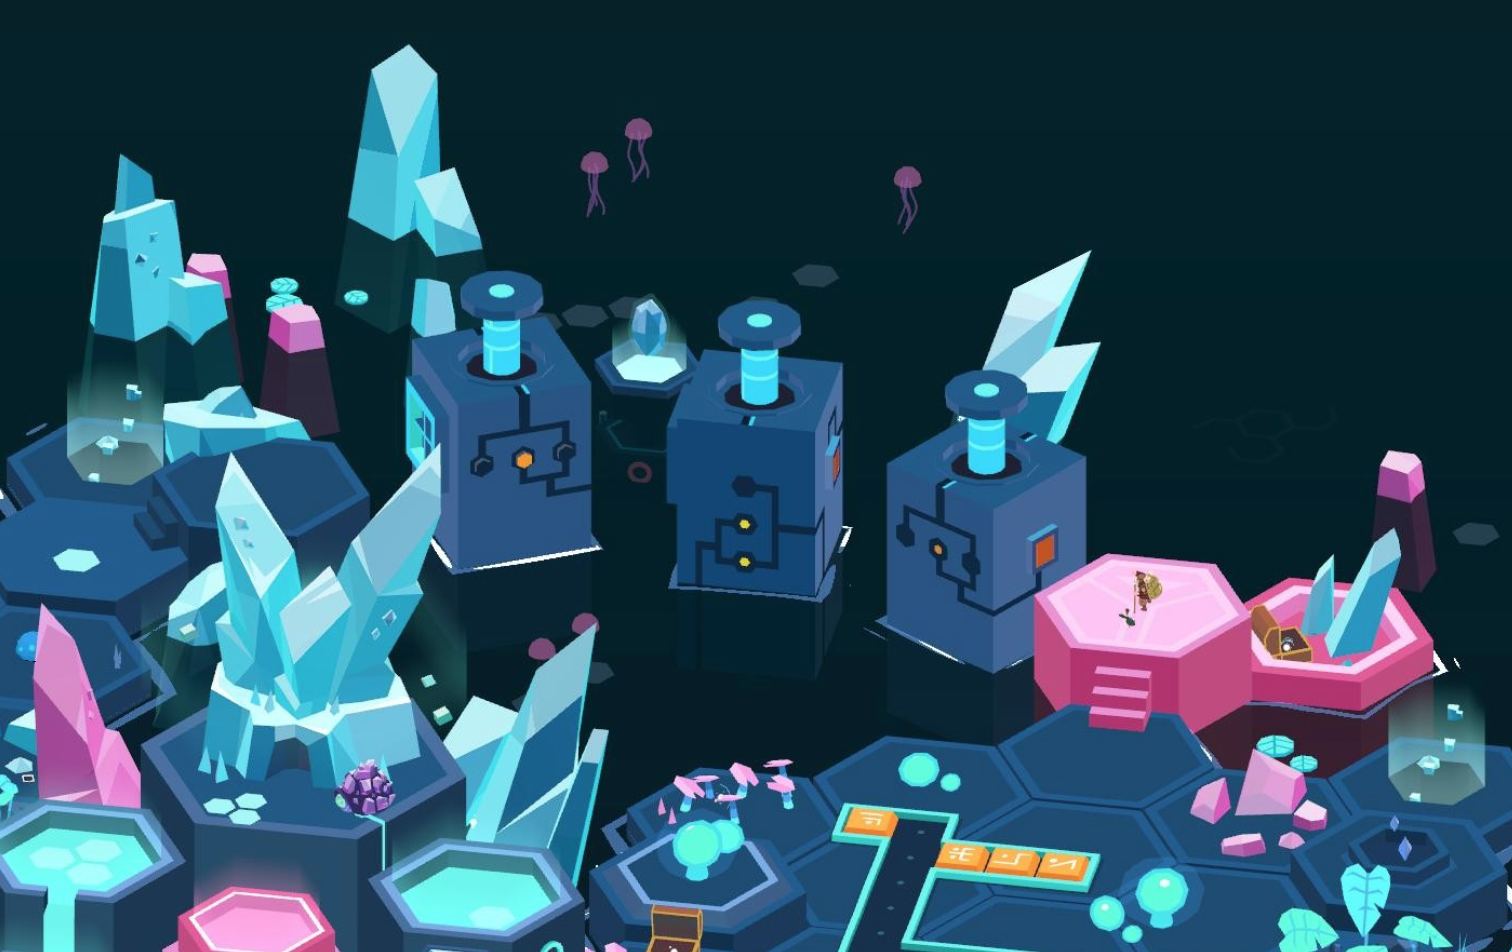
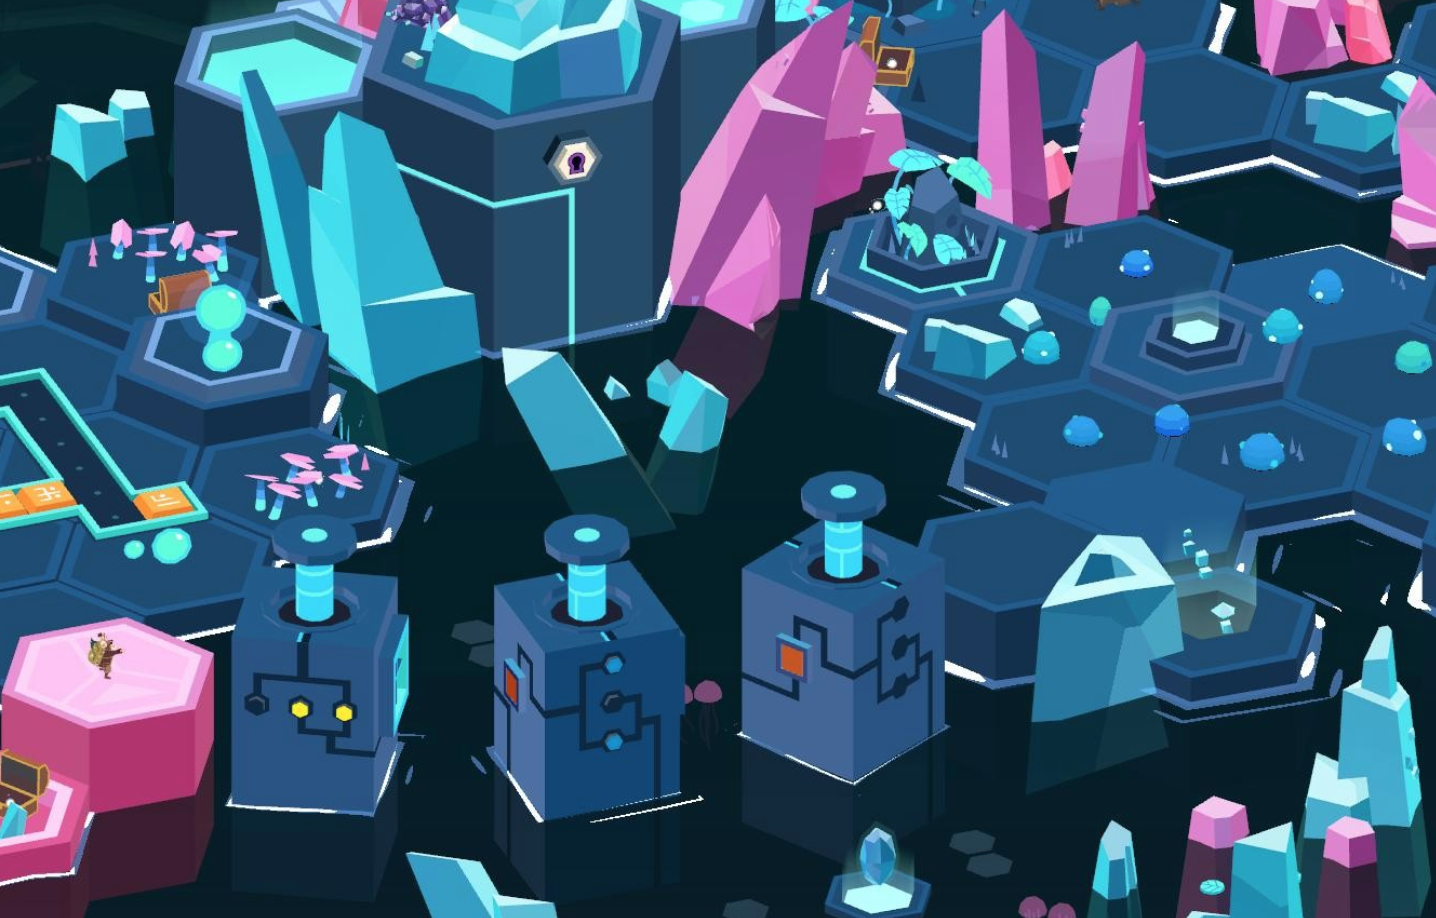
We repeat the scheme from one side to the other. Press the extended buttons. We rotate the crosses on the inner edges.
Milton and the Duck move across the sites.
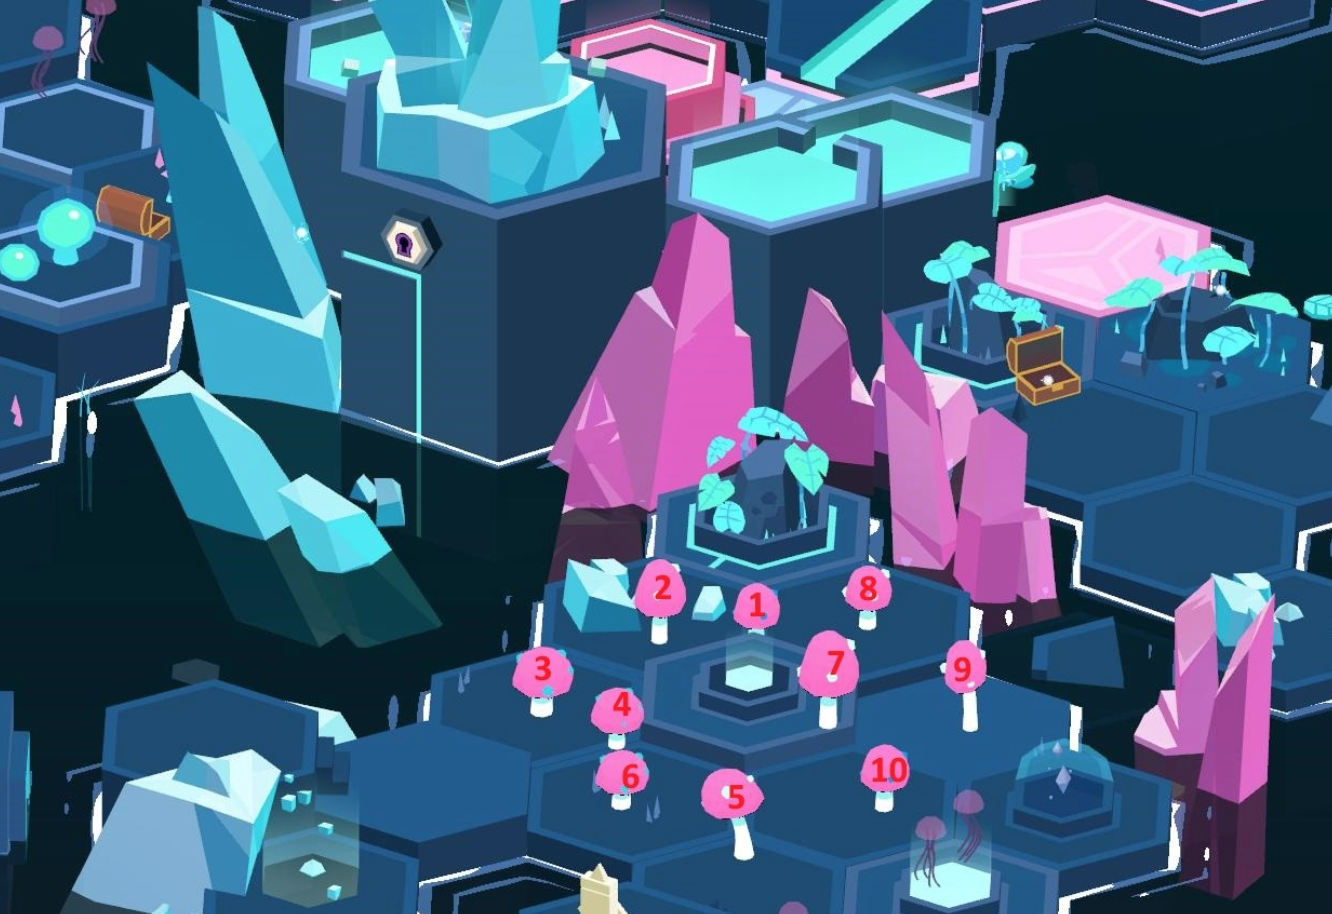
We remember the order in which the mushrooms are blinking, we repeat it by clicking on their caps.
Milton and the Duck sit in the cart.
Building a path.
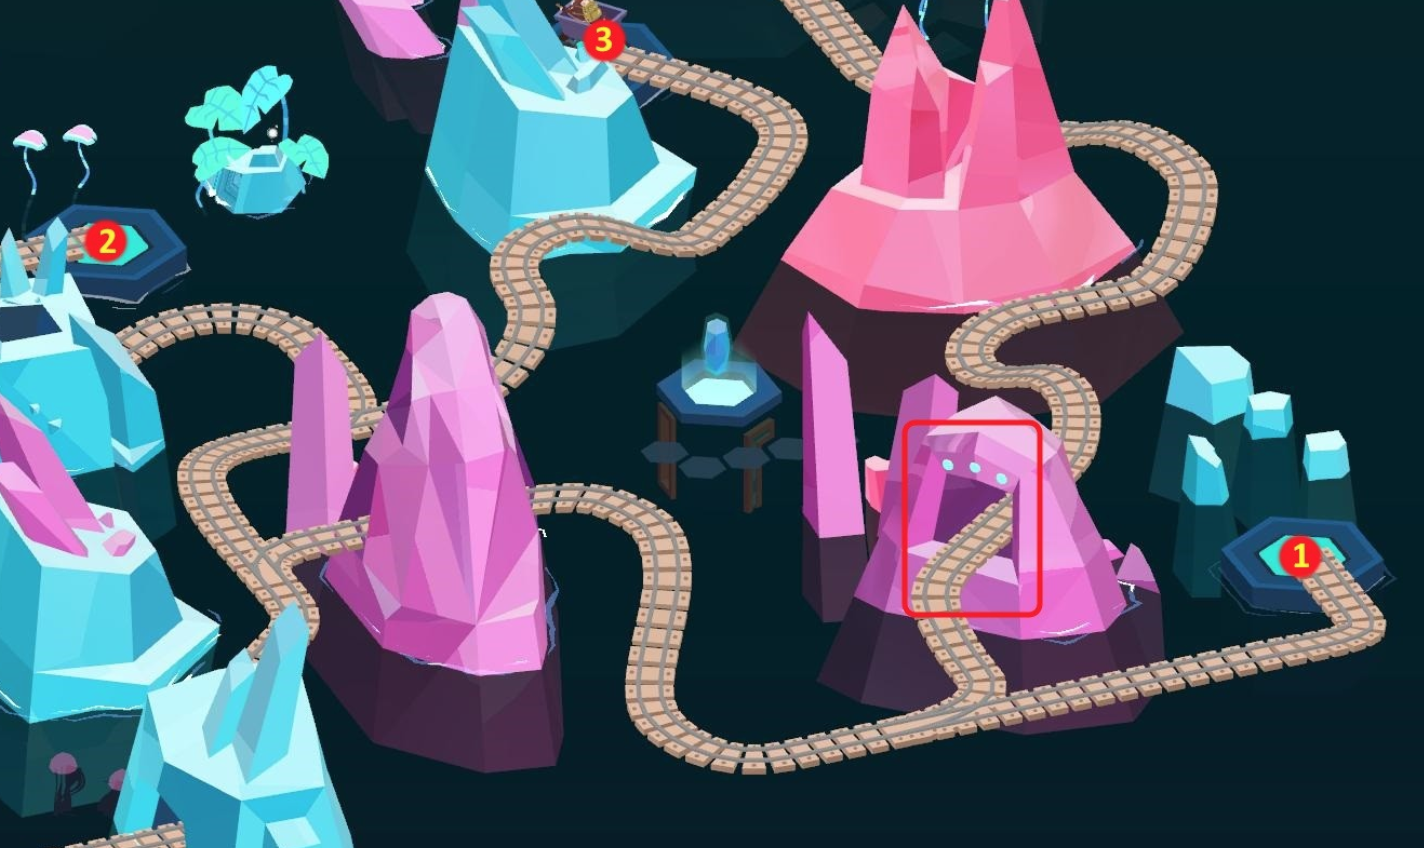
We bring the trolley with passengers to the first platform – the light on the lantern above the gate on the left comes on. We bring the trolley to the second platform – the second lamp comes on. We lead the trolley to the third platform, then, when the third lantern lights up, into the opened gate. We lead her to the site on which the path was paved.
Milton and the Duck go out to the door, where they see the image of the Star.
Use the Star Map, collect the Stars. Place them on the Star Monument by clicking on the button in front of it.
Milton walks through the opened door and wakes up the old turtle, Herman’s brother.
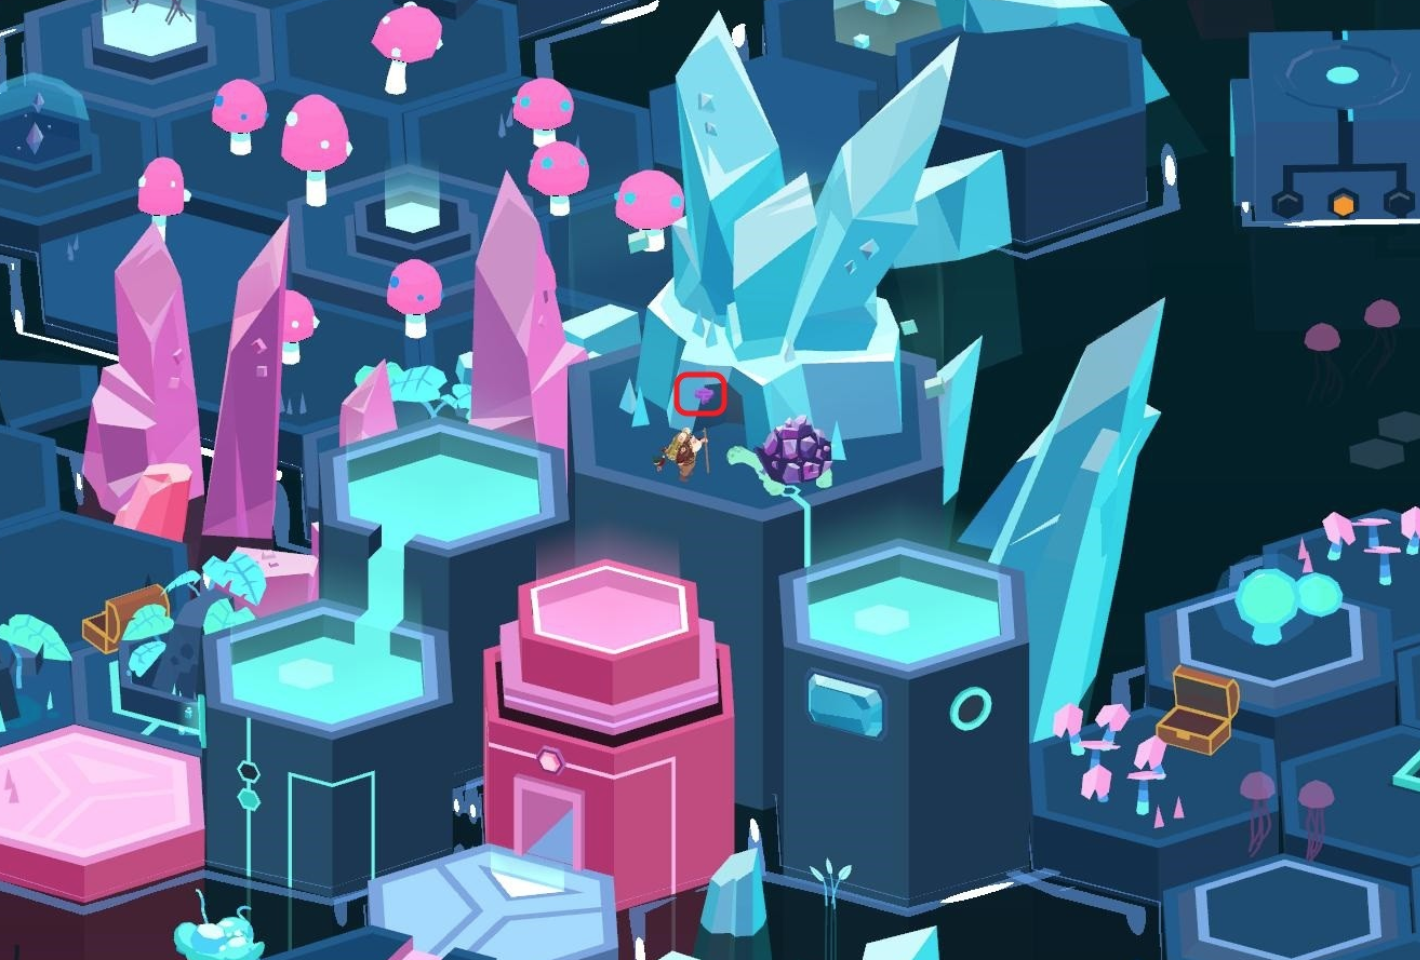
We receive the KEY that activates the Towers – the last test that you need to pass in order to leave Bermuda. We use the key to the lock on the back of the building.
Five Towers rise upward.
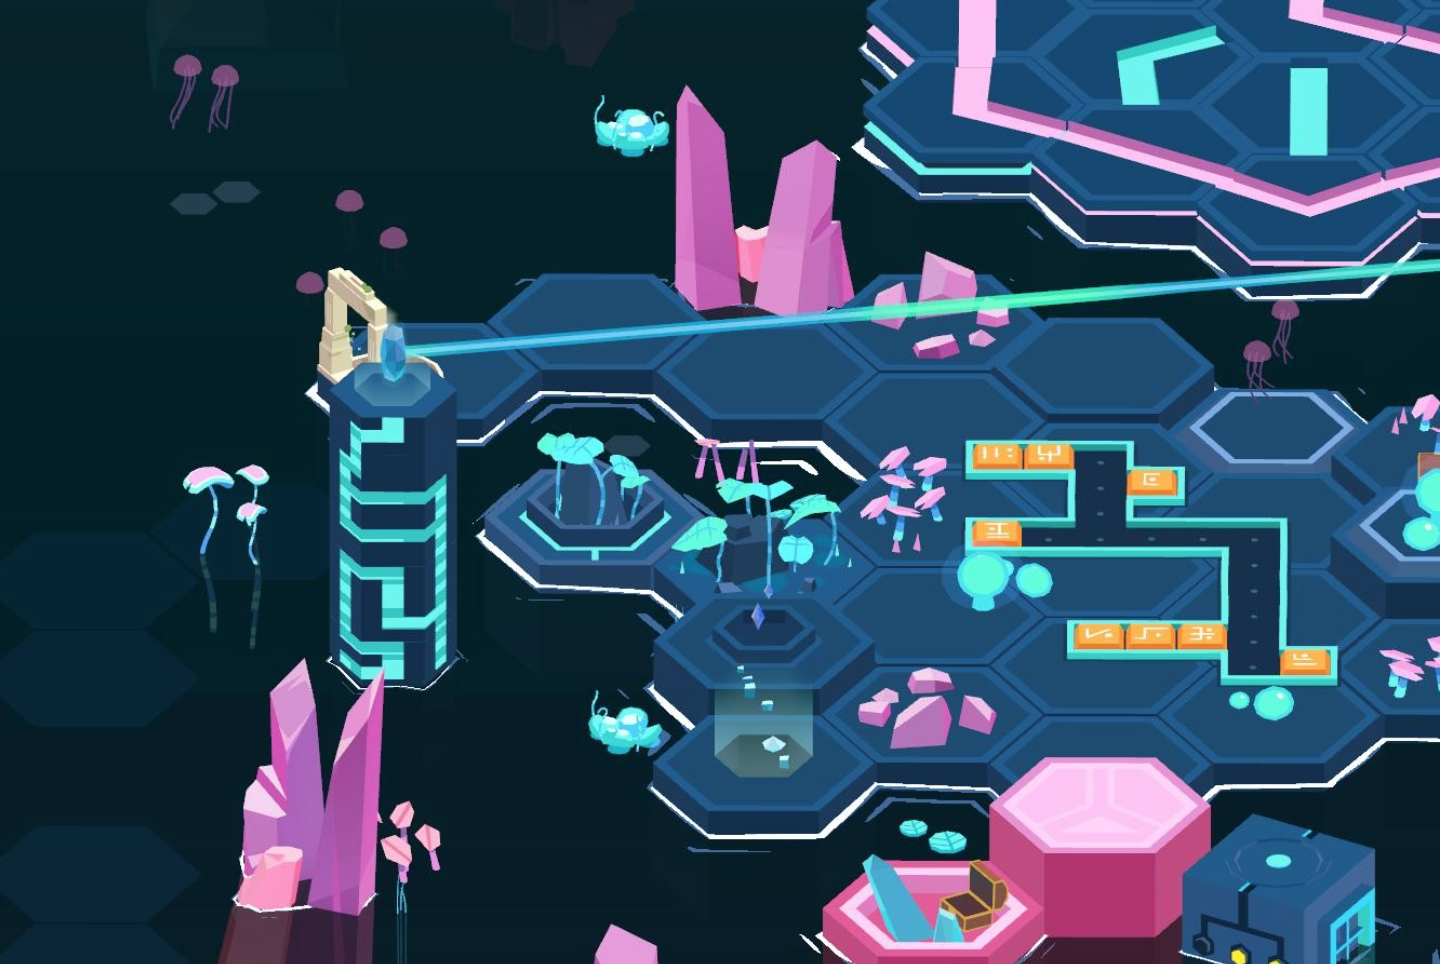
We rotate the segments of the first Tower – a ray bursts out of the crystal at its top.
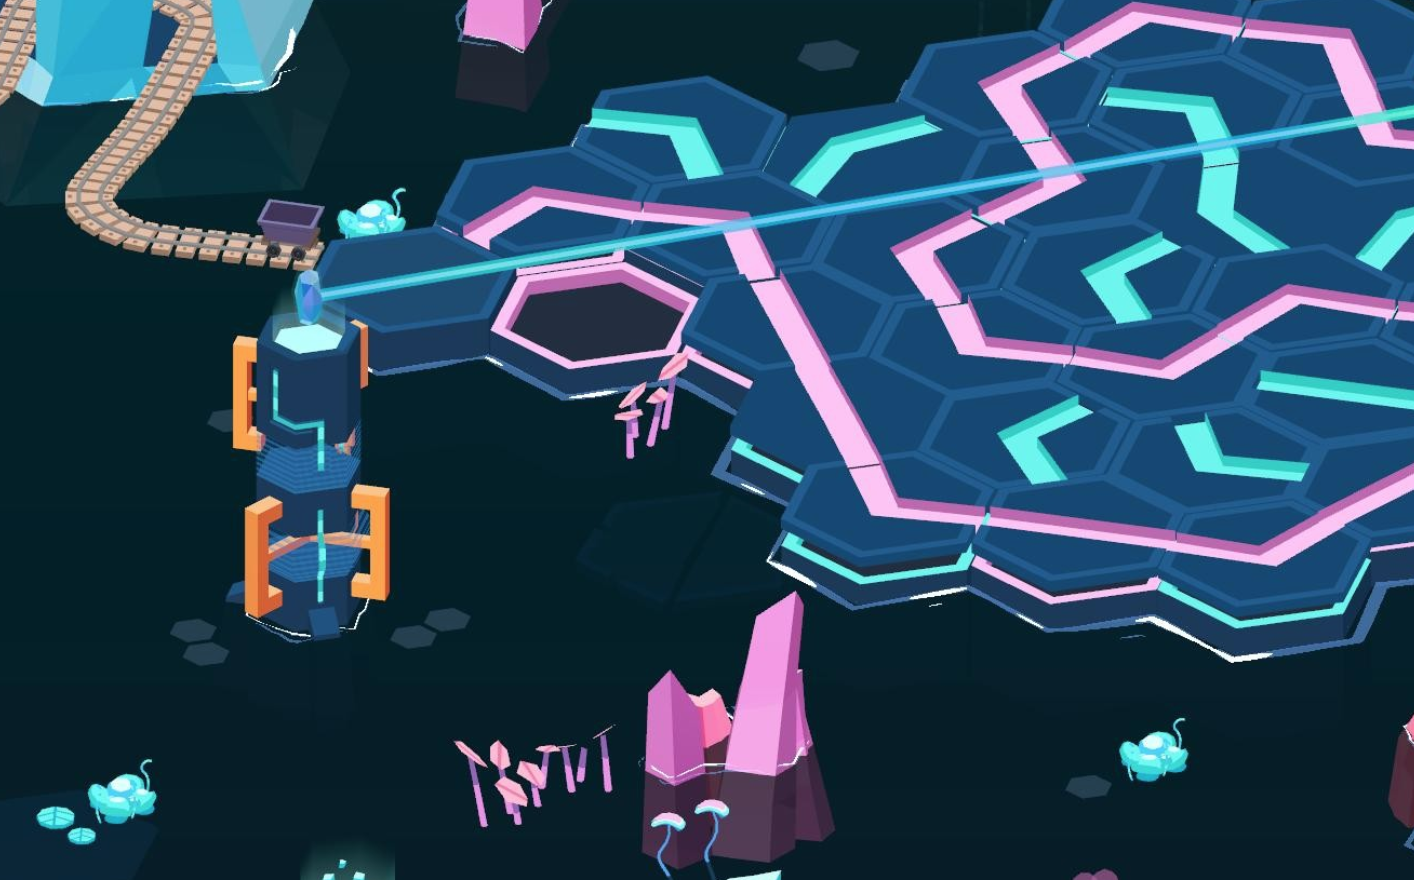
We set up the second Tower, we get the second beam.
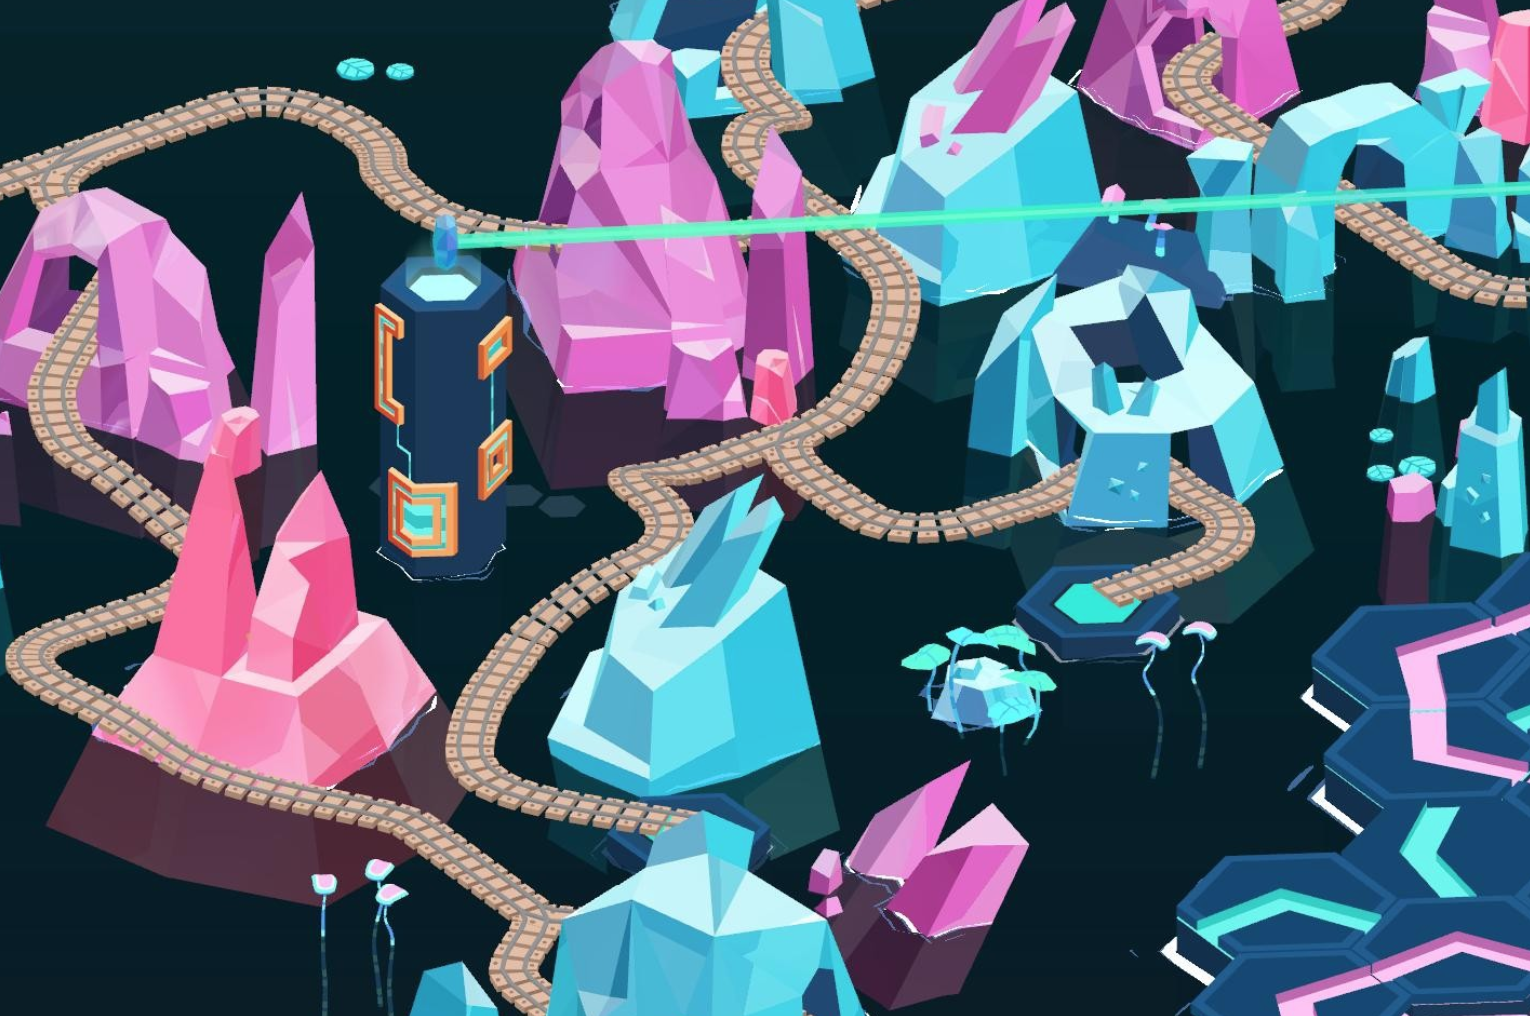
Rotate the segments of the third tower – the third ray emerges from the crystal on the Tower.
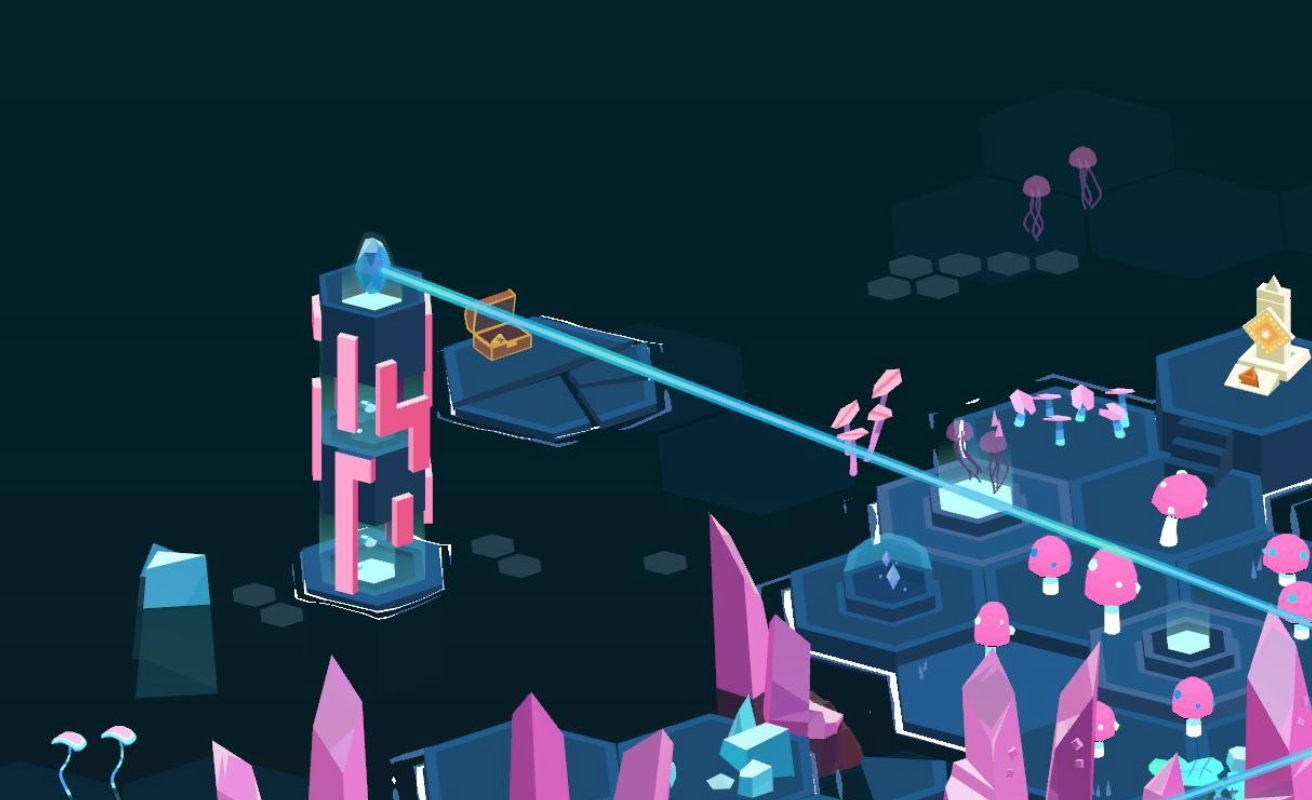
We manipulate with the fourth Tower, we get the fourth ray.
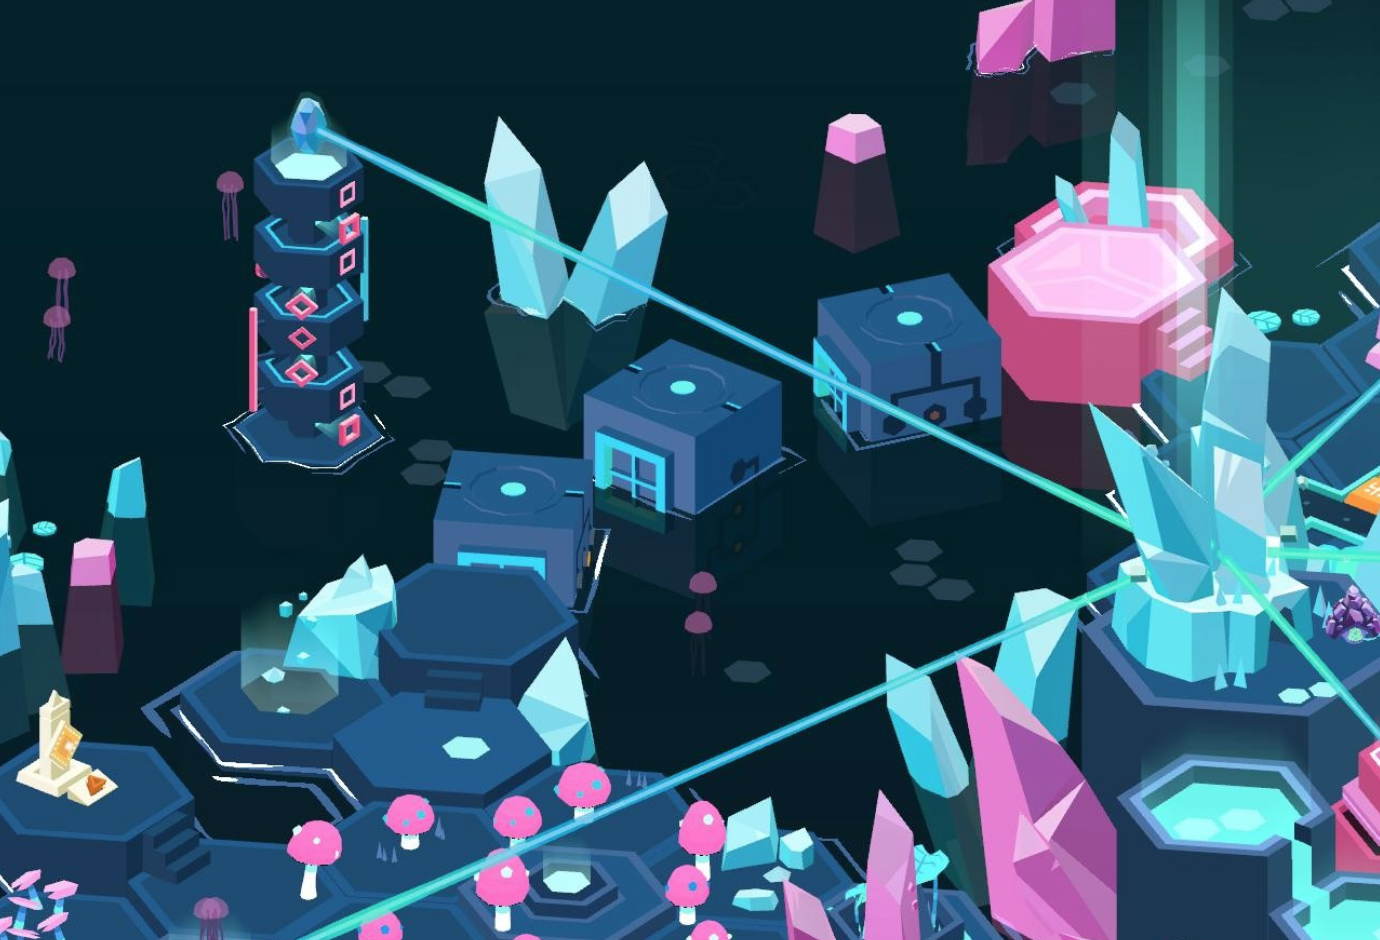
We rotate the segments of the fifth tower, we get the fifth ray.
Milton leaves Bermuda.
We return to the island.
Artifacts
We find three ARTIFACTS available on the island.
We go into the gates of the spheres, we leave the island, now finally.
Completed the game!
lenin 17

A superb game that excels in just about every area, held back only by one or two notable flaws or a collection of smaller ones that prevent the game from earning full marks.
Down in Bermuda is a delightful adventure to play, especially if you want to just relax and enjoy some fun, clever puzzles in a charming isometric island setting.

Top Adventure Games
More