Walkthrough for Syberia 3: The Complete Journey
CHAPTER 1: VALSEMBOR CLINIC
SYBERIA
WILDERNESS
Watch the intro, to see how you are found lost in a blizzard, after Hans left you.
VALSEMBOR CLINIC
WARD
After 3 months of recovering, you wake up in a run-down hospital ward. You share this ward with one other patient - a man with a missing leg. He greets you warmly, as you wake up. Choose how you want to respond to him. He introduces himself as Kurk from the Youkol tribes. You remember the Youkols fondly. The story of how he lost his leg during the annual snow ostrich migration is tragic, and you‘re shocked to see him tied to the bed. But he is hopeful that Dr Zamiatine will bring him a new artificial leg soon. When the conversation is over, you have to find a way out of the room. There’s a door with curtains on the right - go through it, out to the balcony.
BALCONY
The balcony is long, and sheltered. Look carefully at the window on the left to see a close-up.
__large.png)
There’s quite a view through the window! You see an owl perched on a steeple on the building opposite. Click on the owl - what’s it doing there? Click on the area to the left of the owl, to see Kurk’s tribe’s camp. Click on the area to the right of the owl to see the town of Valsenbor.
__large.png)
When you’re ready, exit the close-up.
Head right, back into the ward.
WARD
Walk left, to the white door. Try to open the door, but it’s locked. Kurk advises you to try the Call Button next to the door. Okay, try that then.
__large.png)
You see a close-up of the Call Button. Push it. It doesn’t work! You’ll have to have a look at the mechanism to get it working again. In the close-up, click on the right-side of the call box, under the screw (not on the screw), and you’ll see a diagram of how it works. Now you just need to find something to get rid of that pesky screw. Kurk tells you to search the room. Exit the close-up.
Click on the table in the middle of the room, to see a close-up (this won‘t be an option, until Kurk tells you to search the room). You see a bowl of soup, and a KNIFE. Pick up the KNIFE, and exit the close-up.
Go back to the Call Button next to the door on the left. Click on the Call Button to see a close-up.
Open your Inventory (I), and scroll down to the KNIFE (Up & Down Arrow Keys). Use that on the screw in the Call Button box. Click & hold on the screw, then move your mouse in a circular motion to unscrew it. It’s tricky to get the hang off, at first.
__large.png)
Look at the top box on the right, to learn that the wire has been disconnected on purpose. So someone didn’t want you to be able to get out of that room. Click on the green wire and drag it up to the top box on the right to re-connect it. Push the battery down into the compartment, and keep trying, until it stays down. Now drag the compartment lid from the bottom, to close it. Exit the close-up.
Press the red Call Button. Watch the cut scene as you finally leave the room. Poor Kurt needs a rest.
COURTYARD
The Courtyard is a big area - explore it at your leisure. Look at the fountain in the middle of the Courtyard. Talk to the various patients if you like.
Find your way to the blue gate.
__large.png)
Click on the men behind the blue gate, to enter the Games Room.
GAMES ROOM
The men are enjoying a game of chess. They clearly don’t think much of the Youkols. Talk to them and work through all the dialogue with them. Make sure you ask about the Exit. They tell you that you can’t leave until Dr Olga says you are cured. When conversation is over, leave the room, and go back to the Courtyard.
COURTYARD
Enter through the white door.

DR MANGOLING’S OFFICE
Watch the cut scene with Dr Mangoling. He’s not quite what you would expect from a doctor, in fact, he’s rather sinister. Choose how you want to respond to him. He forces you to undergo a lie detector test. Again, choose how you want to respond. His actions may altar slightly, depending on how you respond. After the test, he gives you the KEY TO THE EXIT, and tells you that if you’re able to use it, then you’ve proved yourself cured. Hmm, there must be more to it than that! He also tells you that you’re things are stored in his filing cabinet. Walk over to the filing cabinet behind the desk to see a close-up.
Click on the drawer of the filing cabinet and pull it open. Now take your clothes from the filing cabinet to change back into them. That’s better!
When you’re ready, leave the office.
COURTYARD
Open your Inventory (I), scroll down to the KEY TO THE EXIT (Up & Down Arrow Keys), and examine it (3). You can manoeuvre the key in all different angles to see it. Look at the tentatcled end - what kind of twisted mind came up with this? Exit the close-up. Find your way to the lift.
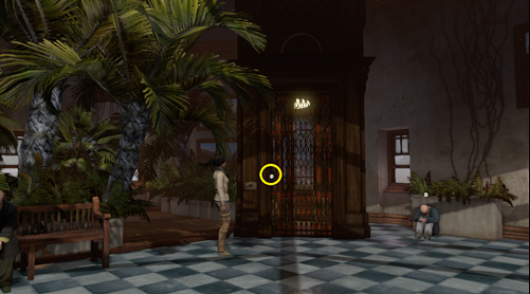
Click on the lift door to get a close-up.
Click on the keyhole - your Inventory opens up. Select KEY TO THE EXIT (Up & Down Arrow Keys), then use KEY TO THE EXIT in the keyhole.
What a strangely shaped keyhole. And KEY TO THE EXIT doesn’t seem to fit. You have to manoeuvre the tentacles of the key to match the keyhole.
__large.png)
Once in the close-up, look at the white dots in the base of the key. Each white dot controls a different tentacle, and you must manoeuvre each tentacle to the correct silhouette in the keyhole. It’s quite tricky, but keep trying until you manage it. Eventually, the key will fit. But… it still doesn’t work. It won’t unlock the door.
Dr Mangoling approaches you from behind, taunting you that you’re not yet well enough to be released. Choose how you want to respond to him.
When conversation is over, open your Inventory again (I) and select the KEY TO THE EXIT (Up & Down Arrow Keys). Observe the KEY (3), and manoeuvre the key so that it’s straight up & down or straight side to side. Look at the hole in the KEY - something has been removed from the KEY, in order to prevent it from working. You need to find a perfect copy of the KEY so that you can repair it. Find your way back to Dr Mangoling’s Office, and enter his Office.
DR MANGOLING’S OFFICE
Click on the desk drawer to open it. Watch a short cut scene as you see Dr Mangoling walk past.
In the close-up of the desk drawer, move the items around until you find the BROCHURE. Pick up the BROCHURE and put it on the desk. Open it up, and flip through the pages until you see a picture of the KEY TO THE EXIT. Open your Inventory (I) and select KEY TO THE EXIT (Up & Down Arrow Keys), then use that with the PAMPHLET to compare them. You learn that your KEY has a pin missing. You HAVE to find a replacement.
When you’re ready, leave the office.
COURTYARD
Find the door leading back to your ward.
__large.png)
Open the door, and enter your ward.
WARD
Walk over to Kurk, who has woken up after his rest. Talk to him, and choose how to respond. Through dialogue, open your Inventory (I), select the BROCHURE (Up & Down Arrow Keys), and use it on him. He tells you that his tribe’s smith can repair the KEY. When conversation is over, walk right, through the door and curtains, to the balcony.
BALCONY
Again, click on the window on the left to see a close-up.
Click on the owl, perched on the steeple. No matter what you do, you just can’t get his attention! Exit the close-up.
Return to the ward.
WARD
Talk to Kurk, who tells you to find something that would interest the owl. Go through the door on the left, into the Courtyard.
COURTYARD
Head back to the blue gate next to Dr Mangoling’s Office.

Go through the gate, into the Games Room.
GAMES ROOM
The men you spoke to earlier have both fallen asleep. Click on the man on the bench to search him - you find ANTON’S KEY. Now leave the Games Room.
COURTYARD
Find your way to the shrubbery next to the lift.
__large.png)
Head up through the shrubbery, to the aviary area.
AVIARY
Click on the aviary door.
Click on the automaton birds. Interesting! Try to open the door, but it’s locked. Open your Inventory (I), scroll down to ANTON’S KEY (Up & Down Arrows), and use that in the keyhole. Success! The aviary door opens! Now take the MECHANICAL BIRD on the left. Now step back, and return to the Courtyard.
COURTYARD
Find your way back to the ward.
WARD
Go through the door on the right, into the balcony.
BALCONY
Once again, click on the window on the left to see a close-up.
Open your Inventory (I), scroll down to the MECHANICAL BIRD (Up & Down Arrow Keys), and place it on the windowsill - the spot in front of your right shoulder. Now click on the MECHANICAL BIRD 2 times to activate it. Watch the cut scene with the owl. You automatically head back inside, to the ward.
WARD
Watch the cut scene. You start talking to Kurk. But suddenly, he goes into a trance, and a huge needle injects him with something. That can’t be good! Finally, you meet the evil Dr Olga. Choose how you want to respond to her. She may or may not drug you, depending on what you said to her.
After the confrontation with Dr Olga, you may need to return to the ward.
Look at poor Kurk. What was injected into him? Go right to the balcony.
BALCONY
The owl has returned. Click on him to get REPAIRED KEY TO THE EXIT. Now go right, back to the ward.
WARD
Kurk wakes up again, and he’s feeling worse than ever. Choose how to respond to him. Poor Kurk! He asks you to find a craftsman in Valsembor that can make his prosthesis leg. Go through the door on the left, out to the Courtyard.
COURTYARD
Walk right a few steps, to the lift.
Click on the lift to get a close-up.
Use REPAIRED KEY TO EXIT in the strangely shaped keyhole. This time, the key turns, and the lift is called. Enter the lift.
INSIDE THE LIFT
Click on the Control Panel in the lift, and ride the lift up to the Lobby.
LOBBY
You need to find Dr Zamiatine on this level. Kurk told you he was a friend to the Youkols, so you should be able to trust him. Explore the clinic, and talk to the staff if you like. Talk to the Receptionist in the Reception Kiosk, and work through all the dialogue.
There’s a doorway to the right of the Reception Kiosk.

Go through that doorway, into the corridor.
CORRIDOR
Head right, through the open doorway next to the 2 orderlies.

DR ZAMIATINE’S OFFICE
Dr Zamiatine greets you. He’s a friendly chap, who unfortunately, has put his trust in Dr Olga. Choose how you want to respond to him. He gives you ANTHOLOGY ON THE YOUKOLS. Open your Inventory (I), go to your Documents section (J), scroll down to the ANTHOLOGY, and select it to flip through the pages if you like. When you’ve finished, exit the close-up.
When you’re ready, leave the office.
CORRIDOR
A door is ajar at the bottom right of the corridor. Go through that door, into Dr Olga’s Office.
DR OLGA’S OFFICE
Watch the cut scene, as you eavesdrop on a video conference call between Dr Olga, and someone she called ‘Colonel’. Oh dear! This is NOT good! When the video conference calls ends, you peek into her office… but she’s gone! But… where did she go? Explore her office. Click on the computer to see a close-up.
On the computer screen, read all 4 emails. After you’ve read them, quit the emails page.
Watch the cut scene with Mr Cantin. He’s the detective who was chasing you throughout Syberia II. Choose how you want to respond to him.
After the unpleasant exchange with Mr Cantin, step away from the desk. There is a suit of armour standing next to the wall, and there is a rope next to the suit of armour. Click on the rope, to see a close-up.
Click on the rope, and drag it down. The curtain next to it slides open. Click on the shield shape in the wall, that was hidden behind the curtain to see a close-up.
Hmm, there are 5 coloured buttons here, but you have no idea what to do. Exit the close-up.
Click on the sword that the suit of armour is holding, to see a close-up.

There are 3 rows at the top of the sword, and when you move them, it affects the ‘picture’ underneath. Pull up the 3 pins on the left, so you can freely rotate the rows. Now rotate the rows, and create the following picture.

You now see the bottom of the blade on the sword. Notice that there are 5 coloured gems in the blade - take note of the colours:
                        Blue


        Green                        Blue


        Red                           Red
Exit the close-up.
Click on the shield in the wall again, to see the close-up.
Slide each of the 5 gems to match the colours from the blade of the sword. When the colours are correct, a secret passage will open. So THAT’S how Dr Olga got out of the office! Enter the secret passage.
SECRET PASSAGE
Press the button at the end of the secret passage, to call the secret lift. Enter the lift.
SECRET LIFT
Watch the short cut scene as you ride down into the tunnels.
UNDERGROUND TUNNELS
~~~~~~~~~~~~~~~~~~~~~~~~~~~~~~~~~~~~~~
TUNNEL
Yikes, this tunnel is rather spooky, with skeletons on either side of you. Walk forward a few steps, and watch the cut scene with Dr Olga and Dr Mangoling. They are contaminating the Youkols drinking water supply with oil!
After they leave, walk down & left a few steps, and take the EMPTY GAS CAN from the wooden crate. Now head right, and follow the path along, until you reach the bridge. Cross over the bridge, to the other side.
Walk down & left a few steps, and click on the wooden crate to see a close-up.

Look at the hydrochloric acid at the top. So the whole barrel is full of hydrochloric acid. Now open your Inventory (I), scroll down to the EMPTY GAS CAN (Up & Down Arrow Keys), and use that with the tap at the bottom to get a FULL GAS CAN full of hydrochloric acid. Exit the close-up.
Follow the path up & right, until you reach the tap that Dr Mangoling was messing with. Try to turn it, but it’s stuck. Walk right a few more steps, and climb down the stairs. Look at the metal stub thing in the ground, that’s keeping the boat chained. You see a close-up.
Open your Inventory (I), scroll down to the FULL GAS CAN (Up & Down Arrow Keys), and use that on the chain to melt it. Watch the cut scene, as you climb into the boat, ride through the tunnels, and eventually arrive at the Youkol Camp.
CHAPTER 2: YOUKOL CAMP
============================================================
YOUKOL CAMP
YOUKOL CAMP
I’ll say it now - the snow ostriches are MAGNIFICANT!!!
Watch the cut scene. One of the Youkols speaks to you - choose how you want to respond to him. You learn that some of the snow ostriches are very sick, after drinking contaminated water. Poor things! There must be a way you can help them. The Shaman Woman who first found you, also speaks to you to welcome you to the camp.
Talk to the various members of the Youkol tribe - they ask you to help cleanse the river of the contamination that is making their snow ostriches sick. When you’re ready, head up the path.
__large.png)
Continue along the path until you reach the river damn.
RIVER DAMN
This is where you can cleanse the contaminated water by stopping the flow of the water. Walk over to the water wheel, and look at the gauge attached to the water wheel - it indicates the water flow from the damn. If you can get a good view of the gauge (camera angles permitting), you’ll see that the indicator needle is not in the green zone.
Now click on the ladder on the wall to get a close-up. Climbing the ladder gives you access to 4 levers, and turning the 4 levers opens or closes 4 sections in the damn. It’s a tricky puzzle, not made any easier by the awkward control system. Set the levers like so.
Lever 1 - Close it completely
Lever 2 - Open it at 45 degrees
Lever 3 - Open it at 90 degrees
Lever 4 - Close it completely
__large.png)
Watch the cut scene to see the contaminated oily water being held at the top, and the clean fresh water filtering through. If you look at the water gauge, the indicator needle is now in the green zone. Walk away from the damn, and head back down the path, to the camp.
YOUKOL CAMP
Walk left a few steps, and approach the market tent. The Youkol in front of the tent talks to you about Kurk - choose how you want to respond to him. When conversation is over, enter the market tent.
MARKET TENT
MARKET TENT
The tent is HUGE! Explore the tent at your leisure. Look at the white squid stone. It’s tricky to navigate through the tent, but head up the left path a few steps, then left onto the next path. You should see the Shaman’s hut.
__large.png)
Walk forward and enter the Shaman’s hut.
SHAMAN’S HUT
Watch the cut scene with the Shaman, Ayawaska. Choose how you want to respond to her. Make sure you ask about the Pass, so you can leave the camp. When conversation is over, leave the hut.
MARKET TENT
Continue along the main path. A group of snow ostriches are standing at the top left. You can even stroke one of them. One of them has a yurt (cart) attached to him that has been left open.
__large.png)
Climb up the ladder, into the yurt.
YURT
Explore the yurt. Look at the wooden crate on the right to get a close-up.
Move the items in the crate around, until you find the CANDLES. You automatically exit the close-up.
Climb back out of the yurt.
MARKET TENT
Now concentrate on the middle section. Find the man looking at vegetables, and talk to him (he won’t talk to you unless you’ve already learned that you need a Pass) - choose how you want to respond to him.
__large.png)
He gives you his wife’s UNOFFICIAL PASS. The only problem, is that you need to get it stamped at the Town Hall. Now make your way up to the back right of the tent. Go out the back door,
__large.png)
BEHIND THE MARKET TENT \ CHECK-POINT
Walk left along the path, until the Guard stops you. Choose how you want to respond to him. He refuses to let you pass, until you have a valid Pass. Which you don’t yet have. Open the door of the cabin, and enter the cabin.
CHECK-POINT CABIN
Explore the cabin. You need to find a stamp to validate your UNOFFICIAL PASS. Look at the stamp machine on the desk to get a close-up.
It looks like something is missing from the stamp machine. Maybe it needs some more ink? Click on the stamp machine again to focus in on it.
Look at all the various parts. Look at the shape engrained in the leather. Take the SPONGE from the arm on the left. Open up the clamps on either side, and take the STAMP PART.
__large.png)
Zoom out of the stamp machine 2 times.
Leave the cabin.
BEHIND THE MARKET TENT \ CHECK-POINT
Follow the path up & right, and continue along until you reach the lake. Look at the puddle in the ground next to the lake, to see a close-up.
A squid is frozen in the inky puddle. Open your Inventory (I), scroll down to the SPONGE (Up & Down Arrow Keys), and use that in the inky puddle, so it becomes SPONGE SOAKED IN INK. You automatically exit the close-up.
Now you still need to fix the STAMP PART.
Head down & left a few steps, so you are half-way along the path. Now go up the path, so you are back outside the market tent. Enter the market tent.
MARKET TENT
Head down a few steps, and find the man working the forge in the centre of the market.
__large.png)
Talk to him, to tell him what you need. You should already have the required items, so choose the following dialogue option.
3. Open The Inventory
Now scroll up & down your Inventory (Up & Down Arrow Keys). Give him the STAMP PART, then give him the CANDLES (place it on the counter next to him). He gets to work, and gives you a working STAMP. Leave him, and head back up to the top right corner of the tent, near the snow ostrich with the ladder. Exit the tent via the right.
BEHIND THE MARKET TENT \ CHECK-POINT
Walk down & left, until you see the cabin again. Enter the cabin.
CHECK-POINT CABIN
Walk over to the table, and look at the stamp machine to see a close-up.
Zoom in on the stamp machine.
__large.png)
Make sure the arm at Position 1 is straight out. Open your Inventory (I) and scroll to the SPONGE SOAKED IN INK (Up & Down Arrow Keys). Use SPONGE SOAKED IN INK in place in the arm. Now look at the lever at Position 2, and make sure it is up. Open your Inventory (I). Scroll to the STAMP (Up & Down Arrow Keys), and place it in Position 3. Now pull the lever at Position 2 down again, so it clamps the STAMP in place. Push the arm at Position 1 right a bit, so it‘s under the STAMP. Zoom out 1 level, so you can still see the stamp machine on the table.
Pull down the lever at the top of the stamp machine, thus inking the STAMP. Zoom into the stamp machine again.
Pull the arm at Position 1 left, so it’s out the way again. Place the STAMP PART in Position 4. Place the UNOFFICIAL PASS on top of the STAMP PART in Position 4. Close both clamps at Positions 5. Now zoom out 1 level, so you can still see the stamp machine on the table.
Again, pull down the lever at the top, thus stamping your UNOFFICIAL PASS. Pull the lever back up again. Zoom into the stamp machine again. Open both clamps at Positions 5, then pick up the OFFICIAL PASS.
Watch the cut scene as Mr Cantin finally catches up with you. Choose how you want to respond to him. He will leave you alone in the cabin for a while, so this is your chance to escape. Look at the bottle in the cabinet.
__large.png)
Nudge the cabinet, so the bottle falls to the ground. Unfortunately the bottle didn’t break. Look at the lamp on the desk, and nudge it off the desk - it falls onto the bottle, thus breaking it. Now click on the rug to sit down.
Use one of the shards from the broken bottle to cut your bonds. Free at last. Now simply leave the cabin.
BEHIND THE MARKET TENT \ CHECK-POINT
The Guard is still here. Talk to him, and choose the following option.
- Open the Inventory.
Scroll to your newly acquired OFFICIAL PASS (Up & Down Arrow Keys), and give it to the Guard. He accepts the OFFICIAL PASS, and raises the barricade for you. Watch the cut scene as Cantin returns, arrest warrant in hand. Luckily, the Youkols help you out, to stop him from catching you. You continue on your journey, and soon arrive in Valsembor.
CHAPTER 3: VALSEMBOR TOWN - PART 1
============================================================
TOWN
HARBOUR
Welcome to the town of Valsembor. This is where you’ll get Kurk’s prosthetic leg. There’s a huge ferry boat right in front of you. Take the upper left path, and make your way along the harbour. Chat to the group of people if you like. Continue along to the end of the harbour, and follow it right. Climb up the stairs, to the lighthouse.
Chat to the fisherman if you like. When you’re ready, climb back down the stairs.
There’s nothing you can really do in this part of the harbour yet, but it was good to explore it. Follow the path back along, and make your way back to the start, where the ferry boat is.
Now take the upper right path. Follow the path along to the right, past the ferry boat.
__large.png)
Watch the cut scene with the drunken Captain Obo, and choose how you want to respond to him. He talks about his ferry boat, the Krystal, and also a monster in the water. What could that mean? After he staggers off, continue along the harbour until you see the car next to the archway.
__large.png)
Go up the archway, into the next street.
TOWN STREETS
The man on the bench is fast asleep, so just ignore him. Notice that he’s outside a tavern - look at the tavern sign next to the door. Now open the door and enter the tavern.
TAVERN
This tavern seems interesting.
__large.png)
Talk to the Barkeeper behind the bar - he’s the one that helped you with the Pass, back in the Youkol camp. Work through all the dialogue with him. Talk to the woman cleaning the table. You learn that she is Sarah Steiner, granddaughter of Simon Steiner, who is responsible for making Kurk’s prosthetic leg. Work through all the dialogue with Sarah. Chat to the other customers if you like. When you’re ready, leave the tavern.
TOWN STREETS
Now let’s follow Sarah’s directions to find her grandfather’s workshop. Walk right, to the end of the street, where the white car is. Turn left, and follow the street along, round all the turns, until you reach a set of stairs. Climb up the stairs.
There’s a quaint little shop on the right. Look in the window - yep, this is definitely Steiner’s workshop. Open the door, and enter the shop.
STEINER’S WORKSHOP
Watch the cut scene with Mr Steiner. He wants to see OSCAR’S PENDANT that you wear around your neck, and accuses you of stealing it. Choose how you want to respond to him. Believing you are a thief, he locks you inside the shop. But as you argue with him, his heart acts up, and he asks you to fetch his medication. The problem is, that he’s hidden it! You’ll have to find it, and quickly! Walk right, to the wall with all the clocks.
__large.png)
Look at both parts of the surface beneath the clocks, and pick up the EMPTY CUP from the surface on the right. Back away from the counter.
Walk around, behind the counter, where Mr Steiner is sitting. Click on the drawers to get a close-up. Number the drawers like so
__large.png)
Pull open Drawer 6, and take STEINER’S PRESCRIPTION. Close the drawer again. Open your Inventory (I), then go to the Documents section (J). Scroll to STEINER’S PRESCRIPTION (Up & Down Arrow Keys), and Observe it (3).
Read the prescription (2) to learn that his medications are best taken at tea time. Exit the close-up 2 times.
Back out of the drawer close-up.
Look at the wall behind Mr Steiner.
__large.png)
Examine the cuckoo clock on the wall to get a close-up.
Open your Inventory (I). Scroll round to the EMPTY CUP (Up & Down Arrow Keys), and place on the platform at the bottom of the clock. Open the glass covering on the clock face - it’s difficult to see when it’s open or closed - and move the clock hands to show 5.00pm. When the time is set correctly, watch the cut scene as a cup of tea, complete with heart medication, is prepared. Pick up the cup of STEINER’S MEDICATION. You automatically exit the close-up.
Walk back over to Steiner. Open your Inventory (I), scroll down to STEINER’S MEDICATION (Up & Down Arrow Keys), and give it to Steiner. Ahhh, he’s feeling much better now! Watch the cut scene, then decide how you want to respond to him. Follow him down the stairs to the Basement.
STEINER’S WORKSHOP - BASEMENT
Wow, even the Basement is full of clocks. Look at the cardboard box on the floor in front of you to see a close-up.
Move the film reels around, until you find the correct FILM REEL, then exit the close-up.
Head along the Basement, to where Steiner is waiting. Chat to him - he tells you to find a film on Baranour. It’s the FILM REEL you found in the cardboard box. Look at the projector on the left to see a close-up.
Open your Inventory (I), scroll down to the FILM REEL (Up & Down Arrow Keys), and use that with the film projector. Watch the cut scene. You view the film on Baranour, and learn about the nuclear catastrophe on that island.
Look at the desk to the left of the film projector, and pick up the NEWSPAPER CLIPPING. Open your Inventory (I), go to the Documents section (J), scroll down to the NEWSPAPER CLIPPING (Up & Down Arrow Keys), and Observe it (3). Read the NEWSPAPER CLIPPING (2) to learn more about the nuclear incident. Exit the close-up 2 times.
Walk left a few steps, and look at the table again to get a close-up.
Look at Kurk’s prosthetic leg on the table - it looks like it isn’t finished. Exit the close-up.
Make sure you look at the model of the ferry boat Krystal in the middle of the room. Press the button to light up the model. When you’re ready, exit the close-up.
Explore the rest of the Basement at your leisure. There’s some interesting things to see, When you’re ready, climb up the stairs and leave the Basement.
STEINER’S WORKSHOP
Watch the cut scene with Sarah and Simon Steiner. You discuss the possibility of using the Krystal ferry boat to transport the Youkols and their snow ostriches across the river. Choose how you want to respond to Mr Steiner. After some more chat, Sarah returns to the tavern, while Steiner heads back down to the Basement. It’s up to you to convince Captain Obo to sell the Krystal ferry boat to you. When you’re ready, leave the shop.
TOWN STREETS
The camera angle sometimes makes things tricky, as you leave Steiner’s shop. If necessary, click the cursor left or right, until the camera angle is better. Now if necessary, head right, back to the outside of Steiner’s shop (but don’t enter). Climb down the stairs next to the shop. Follow the street, through all the turns, until you see the white car parked in the street. Head down the street on the right.
__large.png)
Walk along the street a few steps, then enter the tavern.
TAVERN
Walk over to the fireplace on the left. Look at the painting on the wall to the left of the fireplace - you see something strange in the water. Exit the close-up.
Talk to Captain Obo and decide how you want to respond to him. Remember, you want him to let you use his ferry boat. However, you don’t get very far. You’ll need to sober him up. After your first attempt fails, find Sarah again, and talk to her. The Bartender will offer to brew you up a restorative, to stop Captain Obo from being drunk. Choose how you want to respond to the Bartender. Now return to Captain Obo’s table. Talk to Captain Obo. The best way to get him onside is as follows.
- Coax
- Valsembor needs you
- Idiots can say what they want
- Baranour
- Play on his pride
After laying down some conditions, he comes to an agreement with you. When you’re ready, leave the tavern.
TOWN STREETS
Walk left, down to the harbour.
HARBOUR
Walk right a few steps, and head along the harbour until you see the wooden steps leading up to the ferry boat. Climb up the stairs, and enter the boat.
THE FERRY BOAT KRYSTAL
UPPER DECK
The boat hasn’t left dock for many years, so you need to get it ship-shape, so to speak. Enter through either door with the red light, into the cabin area.
__large.png)
CABIN AREA
There’s lots of seating in here. About halfway along the cabin, at either side of the cabin, are some stairs leading up.
__large.png)
Climb the stairs, up to the Captain‘s Quarters.
CAPTAIN’S QUARTERS
Look at the gramophone on the back shelf. Look at CAPTAIN OBO’S LOGBOOK on the desk near the front, to get a close-up. Pick up CAPTAIN OBO’S LOGBOOK.
Open your Inventory (I), and open the Documents section (J). Scroll round to CAPTAIN OBO’S LOGBOOK (Up & Down Arrow Keys), and observe it (3). Flip through the pages of the LOGBOOK (Left & Right Arrow Keys), and read the pages (2). You learn about Captain Obo’s prospective on what happened at Baranour, and the horrors that traumatised him. When you’ve finished reading, exit the close-up.
Climb the stairs on the right, up to the Bridge.
BRIDGE
Talk to Captain Obo and work through all the dialogue. He tells you that you need to fill up the coal bunker, then he gives you CAPTAIN OBO’S CODE (0509). Climb back down the stairs to the Captain’s Quarters.
CAPTAIN’S QUARTERS
Nothing else you can do here. Climb down the stairs to the Cabin Area.
CABIN AREA
Okay, you can’t do any more repairs on the boat, until the coal bunker is restocked. Leave the Cabin Area through any door.
UPPER DECK
Find your way to the front of the boat, where the coal bunker is.
__large.png)
Interact with the wheel of the coal bunker to get a close-up. Turn the wheel until the coal bunker doors are completely open - you’ll hear a clang, and you’ll automatically exit the close-up.
Walk down a few steps, and leave the boat via the wooden stairs.
TOWN
HARBOUR
Walk over to the gray warehouse doors opposite the boat - there are tyre tracks on the ground. Look at the keypad to the left of the door to get a close-up.
Enter the code Captain Obo gave you - 0509 (you won‘t get any indication until all 4 numbers are entered). The warehouse doors open. Enter the warehouse.
WAREHOUSE
The warehouse is where all the coal is stored. Walk forward a few steps, so you see the cage. Take CHUTE from the cage.
__large.png)
There’s a small wooden crate to the left of the cage, with a METAL BAR leaning up against it. Take the METAL BAR. There‘s a big lever in the middle of the floor - ignore it for now. Now walk left along the track a few steps.
There are 4 green lights on either side of you - 8 green lights in total. Each of these green lights indicates a coal chute. 7 of them are empty, one 1 of them is full. Your job is to find the one that is full of coal. With METAL BAR in hand, simply hit the metal chutes, and listen for the one that sounds different.
__large.png)
Go back to the start of the warehouse, and stand behind the coal cart.
Push the coal cart forward, until it’s next to the second last coal chute on the right. Now exit the close-up.
Turn your attention to the 2nd last coal chute on the right. With the chute highlighted, press the Up Arrow, so that the Look option is selected. Now click on the coal chute. You see a close-up the coal chute door.
Open your Inventory (I) and scroll down to the CHUTE (Up & Down Arrow Keys). Use the CHUTE in your Inventory with the coal chute door - watch, as you balance it onto the coal cart. Now press the button on the side of the coal chute, and watch as the little metal door slides open, and the coal is transported into the coal cart. You automatically exit the close-up.
Now the coal cart is full of coal… you need to find a way to get it onto the boat. Walk up to the lever in the floor, and flip the lever, so that the tracks move. Go back to the coal cart. Now you can try and push the coal cart if you like, but since it’s full of coal, it’s much too heavy for you to move. Climb into the little blue car behind the coal cart.
There are several controls in the little blue car.
__large.png)
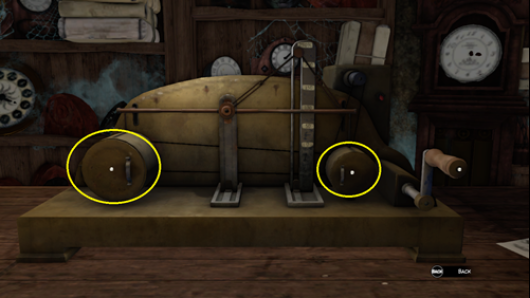
Look at the 3 green buttons on the left - if you look closely, it seems like there’s something wrong with the top button when you press it. Also notice that there is no green light at the bottom right hole. Open your Inventory (I), scroll down to the KNIFE (Up & Down Arrow Keys), and use that on the top green button. Wiggle the KNIFE around slightly, then pry off the green BUTTON. Now insert the green BUTTON into the hole at the bottom right, and push the green BUTTON to activate it. Now push the lever at the top right up, and watch the cut scene as you push the coal cart out of the warehouse, and onto the harbour next to the boat.
HARBOUR
Well, you got the coat out of the warehouse. Now you have to use the crane to get it onto the boat. Look at the keypad at the base of the crane.
__large.png)
Enter Captain Obo’s code again - 0509 - to lower the ladder. Climb the tall ladder, until you’re inside the crane.
CRANE
Be prepared for a very frustrating puzzle! Flick through the channels on the monitor, and set the channel so you can see the warehouse door, with the cart full of coal in front of it. Like this.
__large.png)
Look at the circular lever, and rotate it anti-clockwise 1 time, so that the circular lever is on the left side of the circle, and the monitor shows the crane hanging over the crate full of coal.
Look at the 2 buttons in the middle, and push the top one.

The crane grabs onto the cart full of coal, and lifts it up.
Flick through the channels on the monitor again, and set the channel that shows the boat.

Look at the lever on the left, and pull it towards the right 2 times. The entire crane slides over to the right, so it‘s sitting on top of a circle in the ground.
Flip the lever on the right, up to the top - the crane rotates round.
Look at the lever on the left again, and pull it towards the right. The crane moves forward, towards the boat.
Look at the lever on the right, and pull it back down. The crane rotates.
Look at the lever on the left, and pull it towards the right. The crane slides right again.
Flick through the channels on the monitor, and set the channel so you can see the crane hovering over the opened coal bunker in the boat.
Look at the round lever, and rotate it clockwise 1 time, so the lever is at the top.
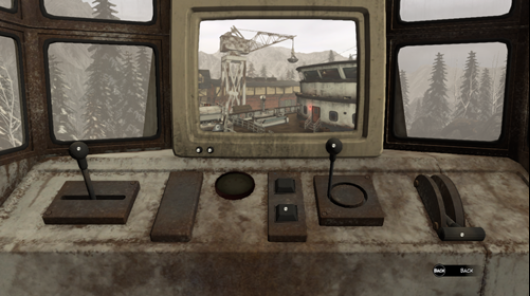
Look at the 2 buttons in the middle, and push the bottom button. The coal is successfully loaded into the coal bunker.
HARBOUR
Watch the cut scene with Captain Obo. The next job is to fill the water tank. Choose how you want to respond to him. After he leaves, click on the wooden stairs on the left, and climb aboard the ferry boat.
CHAPTER 3: VALSEMBOR TOWN - PART 2
============================================================
THE FERRY BOAT KRYSTAL
UPPER DECK
Walk right a few steps, and look at the water pipe to see a close-up.
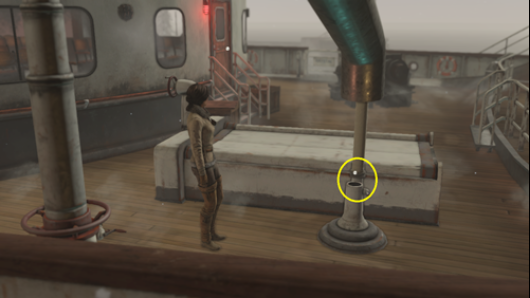
Flip the lever to widen the hole slightly. Now insert the hose into the hole, then quickly flip the lever back, to lock it in place. You automatically exit the close-up.
Walk left a few steps, open the gate on the left, and leave the boat.
TOWN
HARBOUR
Head up towards the water tower. Click on the ladder on the right side of it, to climb up.
WATER TOWER
PLATFORM
Pull the lever to release the water. Watch the short cut scene. Climb back down the ladder.
TOWN
HARBOUR
Walk down a few steps, and climb back up the wooden stairs, onto the boat.
THE FERRY BOAT KRYSTAL
UPPER DECK
Enter the cabin area on the left.
CABIN AREA
Find the stairs at each side of the cabin, and climb up the stairs, up to the Captain’s Quarters.
CAPTAIN’S QUARTERS
Climb up the stairs on the right, to the Bridge.
BRIDGE
Walk right a few steps. Watch the cut scene with Captain Obo - he’s lost the ignition key. Choose how you want to respond to him. He remembers that 20 years ago, he threw the ignition key into the water. Work through all the dialogue with him. You’ll have to find a replacement ignition key. Now if you remember, there was a model replica of the Krystal boat in the basement of Steiner’s workshop. Maybe Steiner could help you out with a replacement key? It’s worth a shot. Climb down the stairs to the Captain’s Quarters.
CAPTAIN’S QUARTERS
Climb down the stairs to the Cabin Area.
CABIN AREA
Leave the Cabin Area through any of the doors.
UPPER DECK
Find your way to the gate on the side of the boat. Open the gate, and climb down the wooden stairs to the harbour.
TOWN
HARBOUR
Let’s go back to Steiner’s workshop. Head up the harbour, until you see the car and the archway. Go up, under the archway, into the next street.
TOWN STREETS
The tavern is here, but there’s no point in entering it at the moment. Walk up to the end of the street, to where the white car is parked. Turn left into the next street.
Follow the street along, through all the turns, until you reach the bottom of the stairs. Climb up the stairs.
Steiner’s workshop is building on the right - enter it.
STEINER’S WORKSHOP
Watch the cut scene with Sarah, and choose how you want to respond to her. She gives you permission to examine the model of the Krystal downstairs, and she also gives you a CRANK. Climb down the stairs, into the basement.
STEINER’S WORKSHOP - BASEMENT
Walk left a few steps, and click on the glass case in the middle of the room, where the model Krystal is kept. You get a close-up.
Navigate to the front of the case, and flip the switch to turn the lights on. Exit the close-up.
Navigate to the side of the case, and click on the panel to see a close-up. Open your Inventory (I), scroll down to the CRANK (Up & Down Arrow Keys), and insert that into the little hole in the panel. Now turn the crank handle clockwise to open up the casing. Look at the plaque at the front of the boat for a cryptic clue, and pay close attention to the numbers. Click on the model boat to get a close-up.
Look at the wheel on the left of the boat, and notice the numbers above it. Try rotating the wheel a few times, and notice the affect it has on the anchor. The aim is to completely lower the anchor. Rotate the wheel to 30 - the anchor lowers slightly. Rotate the wheel to 80 (halfway between 70 & 90) - the anchor lowers some more. Rotate the wheel to 60 (halfway between 50 & 70) - the anchor lowers again. Rotate the wheel all the way round, to 100 - the anchor is fully lowered. Pull the anchor chain down - the top of the boat rises up, revealing a secret compartment. Look at the secret compartment to see a close-up.
Take the MINITURE IGNITION KEY FOR THE KRYSTAL. You automatically exit the close-up.
Now this key is far too small for the full size boat. So you’ll have to make a copy of it, and enlarge it.
Walk over to the table on the left. Look at the prosthetic leg - it’s good that Steiner managed to finish it. Now look at the key replicator machine to the right of the prosthetic leg, to see a close-up of it.
This key replicator machine wasn’t here before. Zoom in on the tin on the bottom shelf.
Take a KEY BLANK from the tin. If you make any mistakes, you can come back here, and take another KEY BLANK. Now zoom out.
Zoom in on the machine on the top shelf to see a close-up of it.
There are various parts to the machine. There are 2 little doors - 1 on the left, and one on the right.
Zoom in on the door on the left.
Open the little door. Open your Inventory (I) and scroll down (Up & Down Arrow Keys) to the MINITURE IGNITION KEY FOR THE KRYSTAL. Insert that into middle of the compartment. Push the switch down to hold the MINITURE KEY in place. Close the little door, then zoom out.
Zoom in on the door on the right.
Open the little door. Open your Inventory (I) and scroll down (Up & Down Arrow Keys) to the KEY BLANK. Insert that into the middle of the compartment. Close the little door, then zoom out.
Crank the handle on the right, and notice that it changes the percentages on the indicator. Crank it to 200% to double it‘s size, then press the button at the top right of the machine. Watch the cut scene, as the machine works it magic. Zoom in on the door on the right again.
Open the little door again and take KEY OF THE KRYSTAL from the compartment. You automatically exit the close-up.
That’s all you can do here in the basement, so when you’re ready, climb up the stairs on the right, and return to the shop.
STEINER’S WORKSHOP
Leave the shop.
TOWN STREETS
As before, the camera angles might make things awkward as you leave the shop. Pan left or right, until you can see where you are.
Now you have an IGNITION KEY, so let’s get back to the Krystal. Climb down the stairs next to Steiner’s Workshop.
Follow the street, through all the turns, until you see the white car parked in the street. Take the road going right.
Continue down the street until you reach the Harbour.
HARBOUR
Head right a few steps, so you see the wooden stairs on the water. Climb up the stairs, onto the Krystal.
THE FERRY BOAT KRYSTAL
UPPER DECK
Enter the cabin area on the left, through any of it’s doors.
CABIN AREA
Find the stairs on either side of the cabin that are heading up. Climb up the stairs to the Captain’s Quarters.
CAPTAIN’S QUARTERS
Climb up the stairs on the right, up to the Bridge.
BRIDGE
Captain Obo isn’t here anymore, but look at the panel next to the steering wheel.

You automatically use your IGNITION KEY. Captain Obo arrives - choose how you want to respond to him. He tells you that the last thing you need to do, is persuade the Mayor to open the port locks on the river, so that the boat can set sail. Well, I guess there’s nothing else for it then. You’ll have to find the Mayor. Climb down the stairs to the Captain’s Quarters.
CAPTAIN’S QUARTERS
Climb down the stairs on the left, into the Cabin Area.
CABIN AREA
Leave the Cabin Area through any of the doors.
UPPER DECK
Find your way to the gate at the side of the boat, and climb down the wooden stairs to the Harbour.
TOWN
HARBOUR
Walk up to the car and the archway.
Head right through the archway, into the next street.
TOWN STREETS
Head up to the top of the street, where the white car is parked.
Now remember, you’re looking for the Mayor. So this time, turn right into the next street.
Follow the street along, past the green car, until you see a fountain.

Click on the fountain if you like, but you don’t have any coins to throw in. Walk forward a few steps, past the fountain, so you see a street parallel to the street you just came from. Head up & right along this new street. The street winds right, and then you’ll see some stairs. Climb up the stairs.
Walk forward a few steps. This area is the Town Square. You hear voices of several people protesting. Continue forward, and you’ll see the protestors. Talk to them to learn that they are protesting against the Youkols. While you are here, explore the darker ground in the middle of the area. If you can get the right camera angle, you’ll see a huge statue of Oscar. But it’s tricky to get the correct angle. Anyway, climb up the stairs in front of the protestors. The Mayor is standing on the balcony here. Talk to him and choose how you want to respond to him. You want to persuade him to open the port locks for you, so the best options to choose are as follows.
- Sorry for bothering you
- Leave with the Youkols
- You’re risking a lot
- Show them who’s boss
- It can make you
You’ve convinced him. He authorises you to open the port locks. BUT… it will have to be done manually. He gives you a SUPERINTENDENT’S NOTICE, which is instructions on how to fix the underwater mechanism of the port locks. After he leaves, climb down the stairs, away from his balcony. Walk right a few steps, and climb down the next set of stairs.
Walk forward a few steps, then follow the street round the corner. Continue on, past the fountain, and back to the parallel street. When you see the white car parked in the street, take the road on the left.
Follow the street down to the Harbour.
HARBOUR
Head right a few steps, so you see the wooden stairs in the water. Climb up the stairs, onto the Krystal.
THE FERRY BOAT KRYSTAL
UPPER DECK
Enter the Cabin Area on the left.
CABIN AREA
Find the stairs on either side of the area, leading up. Climb up the stairs to the Captain’s Quarters.
CAPTAIN’S QUARTERS
Climb up the stairs on the right, to the Bridge.
BRIDGE
Talk to Captain Obo and decide how you want to respond to him. He tells you that there’s a diving suit in the shed at the far end of the harbour. Let’s go and get it then. Climb down the stairs, to the Captain’s Quarters.
CAPTAIN’S QUARTERS
Climb down the stairs on the left, to the Cabin Area.
CABIN AREA
Leave the Cabin Area through any door.
UPPER DECK
Find the gate on the side of the boat, and climb down the wooden stairs.
TOWN
HARBOUR
Head down, and continue to the end. Now turn up, past the front of the boat, and follow the edge of the water all the way along, until you reach the wall with lobster cages stacked in front of it.
Turn right, and see Captain Obo waiting for you in front of the shed. He’s already opened it for you. Enter the shed.
SHED
This is where you can prepare for your diving trip to open the port locks. Pick up the EMPTY AIR BOTTLES from the ground, near the door. Look at the rail of clothing to get a close-up.
Move the front clothing out of the way, and take the yellow DIVING SUIT behind. You automatically exit the close-up.
Walk to the end of the hut, and pick up the DIVING HELMET from on top of the cabinet at the back. Click on the contraption on the wall on the left, to get a close-up.
Click on the rusty-looking section to zoom in.
Open your Inventory (J), scroll down to the EMPTY AIR BOTTLES (Up & Down Arrow Keys), and use that in the rusty area to place them down. Notice that the gauge shows empty. Also notice that the green label on the bottles says ‘180 Bar’. Pull down the handle at the top, to lock the bottles in place. Zoom out 1 time.
Look at the panel at the top left, and zoom in on it.
Rotate the octagonal knob at the top right, until the dial shows 180. Click on the green button at the bottom. Now zoom out 1 time.
Look again at the empty water bottles in the rusty area.
There are 2 red handles at the top - pull them both down. You automatically take the FULL AIR BOTTLES, and exit the close-up.
Enter the changing room in the corner of the shed. Watch the cut scene as you change into your diving gear and enter the water.
UNDER WATER
BOTTOM OF THE LAKE
Now you have to unlock the underwater mechanism in order to open the port locks. Go right, and continue right, until you see a round door.

Pick up the LARGE COG, and pick up the SQUARE KEY at the base of the door. Now click on the door to see a close-up.
You need to repair this door. In the close-up, pick up the COG, and pick up the STACKED GEARWHEEL. Look at the 3 spikes on the door. Open your Inventory (I), scroll down to LARGE COG (Up & Down Arrow Keys), and use that on the top left spike. Open your Inventory again (I), scroll down to COG (Up & Down Arrow Keys), and use that on the top right spike. For the 3rd time, open your Inventory (I), scroll down to STACKED GEARWHEEL, and use that on the bottom spike. That’s half the job done, but the door still won’t open. Exit the close-up.
Go right, and continue right, until you see another door. Look at the door to see a close-up.
There is a socket underneath the red wheel. Open your Inventory (J), scroll down to the SQUARE KEY (Up & Down Arrow Keys), and use that in the socket. Rotate the SQUARE KEY, so that the door opens slightly. Rotate the red wheel anticlockwise as much as you can. Pull down the lever to the left of the door. Watch the short cut scene of a giant door sliding open. Now pull this round door open to reveal the mechanism inside. Exit the close-up.
Go left a few steps, then head up through the giant door you just opened.
Walk forward a few steps, and enter the wreckage of the boat. What on earth could have left these marks? Pick up the CHAIN from the wreckage. Walk left to leave the wreckage. Now the camera angles can make things quite tricky, so the easiest way to get out of here is to walk left a few steps to the wall, and continue left through the huge doorway. Keep going left, until you’re back at the first gear mechanism you fixed a little while ago. Look at the round door to see a close-up.
Open your Inventory (I), scroll down to the CHAIN (Up & Down Arrow Keys), and use that on the gap between the 3 gears and the red wheel. Turn the red wheel clockwise as much as you can. Pull down the lever to the right of the round door. Watch the cut scene as the port locks are completely opened, and you return to the Youkol Camp to tell them the good news.
YOUKOL CAMP REVISITED
BEHIND THE MARKET TENT \ CHECK-POINT
You arrive back at the Youkol camp, excited to tell the Youkols that you’ve found safe passage for them across the lake. Knock on the door of the check-point cabin, but you’re not allowed inside. Look through the window to witness Mr Cantin interrogated and arrested. Serves him right for threatening you earlier on (hee hee). Follow the path up & right, until you reach the market tent. Enter the market tent.
MARKET TENT
Head left, and follow the path along, until you see the Shaman’s tent.

Enter the Shaman’s tent.
SHAMAN’S TENT
Chat to Ayawaska, and tell her about the ferry that can take all the Youkols across the lake.
CHAPTER 4: VALSEMBOR TOWN REVISITED
============================================================
THE FERRY BOAT KRYSTAL
UPPER DECK
You soon gather all the Youkols (except Kurk) and the snow ostriches onto the ferry. Hopefully Simon Steiner will return soon, after fitting Kurk with his prosthetic leg. While you are waiting, head right, up 2 flights of stairs, to the front of the boat.
FRONT OF THE BOAT
Talk to Ayawaska, the Youkol Shaman, and work through all the dialogue with her.
__large.png)
She’s not happy about travelling on the boat to avoid Baranour. When conversation is over, head right, down both flights of stairs, back to the Upper Deck.
UPPER DECK
Continue left a few steps, until you see the gate leading off the boat. Step off the boat, and watch the cut scene with Sarah Steiner. Choose how you want to respond to her.
TOWN
HARBOUR
It’s clear that Simon Steiner and Kurk are in trouble. It’s up to you to rescue them. Let’s go back to Steiner’s Workshop, and see if there are any clues you can find. Head up the harbour, until you see the car and the archway. Go up, under the archway, into the next street.
TOWN STREETS
This is where the tavern is. Talk to the crowd if you want, but they’re a bit worse for wear. Walk up to the end of the street, to where the white car is parked. Turn left into the next street.
Follow the street along, through all the turns, until you reach the bottom of the stairs. Climb up the stairs.
Steiner’s workshop is building on the right. But it’s closed now. No clues to find. Damn! Head left along the street, to a set of stairs and an opened gate. That gate was closed before, wasn’t it? Head through the gate.
Look at the cart to see a close-up. Take the WEDGE, another WEDGE, and a SMALL WEDGE from the cart wheel. The SMALL WEDGE may be left on the street, so make sure you pick it up. The cart rolls down the hill… and crashes. Whoops! There’s nothing else you can do here, so go back down through the gate.
Climb up the stairs to a small courtyard area.
COURTYARD AREA
Head left, and follow the path into the tram station area.
TRAM STATION AREA
Walk round to the side of the tram station building.
__large.png)
Click on the wooden door to see a close-up. The door is locked - you‘ll need to find a way to open it. Pan down to the bottom of the door.
Look at the gap under the door - it’s a pretty big gap. Now click on the bottom of the door to zoom in.
Open your Inventory (J), scroll down to the SMALL WEDGE (Up & Down Arrow Keys), and use that at the bottom right of the door, to raise it up slightly. Open your Inventory (J), scroll down to a WEDGE (Up & Down Arrow Keys), and use that to the right of the SMALL WEDGE.
__large.png)
Now remove the SMALL WEDGE. Repeat the process at the bottom left of the door. Open your Inventory (J), scroll down to the SMALL WEDGE (Up & Down Arrow Keys), and use that at the bottom left of the door, to raise it up slightly. Open your Inventory (J), scroll down to the other WEDGE (Up & Down Arrow Keys), and use that to the right of the SMALL WEDGE. Again, remove the SMALL WEDGE. Finally, open your Inventory again (J), scroll down to the SMALL WEDGE again (Up & Down Arrow Keys), and use that ON TOP of the wedge at the bottom right. The door will fall open. Enter the Control Station.
CONTROL STATION
Look at the control panel next to the window - no power. Walk down a few steps and look at the fuse box on the right.
__large.png)
Click on the fuse box to see a close-up. Open your Inventory (J), scroll down to the KNIFE (Up & Down Arrow Keys), and insert that into the crack on the side. Wiggle the KNIFE up and down to pry the door of the fuse box open. Pull the red handle down. That’s looking better. Exit the close-up.
Look at the control panel next to the window again, to get a close-up. Pull down the handle on the right, and watch the cut scene as the tram rides down to you. Leave the Control Station.
TRAM STATION AREA
Walk right a few steps, and enter the tram.
TRAM
Click the tram controls at the top left, then watch the cut scene, as you return to the clinic.
VALSEMBOR CLINIC
CLINIC GATES
You arrive outside the gates of the clinic. Head up through the gates, into the clinic grounds.
CLINIC GROUNDS
Follow the path along, past the helicopter, and enter the door into the clinic.
LOBBY
The place really is full of soldiers. Yikes! Listen to the soldiers conversation. You’ll have to get to Kurk without being caught. But you have to find a way to distract the soldiers first. Exit the close-up. You automatically sneak back outside.
CLINIC GROUNDS
Go back over to the helicopter, and walk behind the helicopter.
__large.png)
Climb up the stairs, and enter the helicopter.
INSIDE THE HELICOPTER
Walk left a few steps. Look at the opened trunk to see a close-up.
Move all the items out of the way, until you find a WALKIE TALKIE. You automatically exit the close-up.
Leave the helicopter.
CLINIC GROUNDS
Head right a few steps, so you are in front of the helicopter again.
Continue right, and enter the clinic through the front door.
LOBBY
Sneak right a few steps, so you are hiding behind the pillar. Notice the soldier in the Reception Kiosk. Open your Inventory (J), scroll down to the WALKIE TALKIE (Up & Down Arrow Keys), and use that on the soldier. Choose how you want to respond. That’s got rid of the soldiers… for now! Head up, past the Reception Kiosk, and then enter through the doorway on the right, into the corridor.
__large.png)
CORRIDOR
Take a few steps right, and watch the cut scene. Dr Zamiatine calls you into his office.
DR ZAMIATINE’S OFFICE
Watch the cut scene. Poor Steiner - after he fitted Kurk’s prosthetic leg, Olga and her goon soldiers pounced on him, leading to another episode with his heart. A bad one! He urges you to protect the Youkols from Olga. Choose how you want to respond. If only Dr Zamiatine had listened to you earlier, when you tried to warn him about Olga! Steiner also tells you that it may be possible to get Oscar back. That makes your heart soar! When you’re ready, leave the office.
CORRIDOR
Enter Dr Olga’s office at the bottom right.
__large.png)
DR OLGA’S OFFICE
Head through the door on the right.
You see poor Kurk strapped to his chair, here.
__large.png)
Click on Kurk to see a close-up.
__large.png)
Notice the pendulum in front of him. Try to talk to Kurk, but he’s in a trance, and he can‘t hear you. Try to use the mouthpiece on the side of the chair, at the top left - it’s useless. Pan round to the side of the chair, to where the clipboard is. Zoom in on the clipboard.
Take the PAPERCLIP from the clipboard, then zoom out of the close-up.
Pan round to the back of the chair.
There’s a small panel at the back of the chair - zoom into it.
Pull the panel off, to reveal the mechanism inside. Open your Inventory (J), scroll down to the PAPERCLIP (Up & Down Arrow Keys), and use that in the mechanism. This jams the mechanism, so the pendulum in front of Kurk stops swinging. Exit the close-up.
Pan round to the other side of the chair (opposite the mouthpiece), and click on the syringe to see a close-up.
Click on the needle part at the bottom, and open it to empty the drugs that was being pumped into poor Kurk. Close the needle part again. Open the lid at the top part of the syringe. Now open your Inventory (J), scroll down to SHAMAN’S BEVERAGE (Up & Down Arrow Keys), and pour that into the syringe. Close the lid of the syringe. Pull the lever over on the right, to lower the syringe and inject Kurk with SHAMAN’S BEVERAGE. This brings him out of his trance, however, he‘s still restrained in the chair. You need to free him, somehow. Exit the close-up 2 times.
Head over to Olga’s desk. Take OLGA’S STATUETTE, and take NOTE FROM DR MANGOLING. You can read the NOTE in your Inventory if you like, but it proves useless. Hmm, OLGA’S STATUETTE seems rather solid and weighty. You could do some damage with that. Head back over to Kurk in his chair, and click on the chair to get a close-up.
Click on the bottom right area to zoom in on it.
You see a small Control Box. This Control Box is what powers the torture chair. Pull open the door to the Control Box, to reveal a numerical pad. Sadly, you don’t know what code to use here. But concentrate on the area above the numeral pad. Open your Inventory (J), scroll down to OLGA’S STATUETTE (Up & Down Arrow Keys), and use that on the area above the numerical pad. You smash the Control Box, thus releasing Kurk from his torture. Watch the long cut scene, as you and Kurk make your daring, nail-biting escape! As you board the Krystal again, Sarah Steiner gives you her SCARF as a memento.
THE FERRY BOAT KRYSTAL
STEERING AREA
Captain Obo still has some concerns. Choose how you want to respond to him. It isn’t long before the boat gets stuck in an iceberg, and Captain Obo wants you to use the boat’s ice breakers to break free. Work through all the dialogue with him. When conversation is over, head down to the Machine Room. Climb down the stairs to the Captain’s Quarters.
CAPTAIN’S QUARTERS
Climb down the stairs to the cabin area.
CABIN AREA
Look carefully at the ground near the benches, and pick up HANDMADE MATCHES from the ground.
__large.png)
There are some Youkols seated in the benches at the front - chat to them if you like. Now, find the stairs leading down, on either side of the boat.
__large.png)
Climb down those stairs, into the Machine Room.
MACHINE ROOM
You’re on a small platform, with stairs on the left heading up, stairs on the left heading down, and stairs on the right heading down. Climb down the stairs on the right.
There’s another set of stairs in front of you, to the left.
__large.png)
Climb up those stairs. Walk right a few steps, to the Control Panel.
__large.png)
Click on the Control Panel to get a close-up.
__large.png)
Now get ready for some major frustration! You have to use this Control Panel to activate the ice breakers, but the control system makes it very tricky. The monitor on the left lets you see how the ice breakers are performing. Note the gauge panel - the aim is to get the arrow into the green area.
Turn the wheel at the top right, and keep turning it, until the pipe on the right extends itself, and connects to the gears on the left. Look at the red button on the bottom right, and pull open the cover. Now push the red button to activate the gears.
Now this next part has to be done quickly, otherwise the gears will stall, and you’ll have to push the red button again. Pull the lever in the middle, down towards the bottom of the screen, to lower the ice breakers. Now concentrate on the gear system underneath the gauge. Pull the lever into 1st position, then quickly pull the lever into 3rd position, then quickly pull the lever into 2nd position. So… Position 1, Position 3, Position 2. Remember, if the gears stall, push the red button to start again. If things go well, watch the cut scene as the ice breakers cut through the ice.
STEERING AREA
You automatically return to the Steering Area. But just as you breathe a sigh of relief… you’re hit with another problem. Captain Obo asks you to investigate. Climb down the stairs on the left, to the Captain‘s Quarters.
CAPTAIN’S QUARTERS
Climb down the stairs on the left, to the Cabin Area.
CABIN AREA
Chat to the Youkols if you like. Look at the bench area to get a close-up.
__large.png)
Pull the box out from under the bench. Open the box, and look at it to zoom in.
Move the items around, until you find an EMERGENCY FLARE. You automatically exit the close-up.
Head left, and leave the Cabin Area through the back door.
UPPER DECK
Walk left a few steps, and watch the cut scene. Oh no! The Kraken! So everything Captain Obo said… was true! Captain Obo saves you from the Kraken’s attack, and tells you that the monster is attracted to the running lights on the boat, so you have to turn them off. Choose how you want to respond to him. Walk round to the side of the boat, and pick up the CROWBAR that’s leaning against a wooden crate.
__large.png)
Walk up the side of the boat a few steps, to the running light. Click on the running light to lower it, then click on it again to smash it. Walk up a few more steps, to the next running light. The Kraken smashes it. Climb up the stairs on the right, to the front of the boat.
FRONT OF THE BOAT
Click on the leading light to smash it. Walk left a few steps, and climb down the stairs.
UPPER DECK
Walk forward a few steps, to the running light. Click on the running light to lower it, then click on it again to smash it. Follow the railing along to the next running light. Click on the running light to try and lower it, but it’s stuck. But you can’t let that stop you. Look at the nearby wooden crate, and push is over to the running light. Climb on top of the wooden crate. Now click on the light to smash it. Climb down off the crate. That’s 5 lights so far. But there’s 1 more light to smash. Head down to the back of the boat, where the Kraken is guarding the light. You need to distract it, so you can smash that last light. Open your Inventory (J), scroll down to the EMERGENCY FLARE (Up & Down Arrow Keys), and use that with the running light. Watch the cut scene as the Kraken is distracted. Now click on the running light to smash it. With no more lights to attract it, the Kraken releases it’s grip on your boat. Choose how you want to respond to Captain Obo.
But you spoke too soon! The Kraken grabs the boat again, and tries to drag it down into the sea. Captain Obo has another plan - cut the engines. Maybe it’s the sound of the engines that’s attracting the beast. Well, you need to go back down to the Machine Room, in order to cut the engines. Enter the Cabin Area through any door.
CABIN AREA
Find the stairs near the back left, that head down. Climb down those stairs, into the Machine Room.
MACHINE ROOM
Climb down the stairs on the right. As before, climb up the small set of stairs in front of you, to the left. Head right along the platform, past the Control Panel, and on to the end of the platform. Pull the lever on the right.
__large.png)
The engines are cut now, so hopefully the monster will leave you alone. Let’s go back to Captain Obo. Walk back left, along the platform, and climb down the small set of stairs at the end. Climb up the stairs on the left. Climb up the next set of stairs on the left, back up to the Cabin Area.
CABIN AREA
Leave the Cabin Area through any door.
UPPER DECK
Go along the right side of the boat, until you find Captain Obo in the lifeboat. Talk to him and choose how you want to respond to him. He tells you that he has a plan to lure the monster away from the Krystal. He can use the lifeboat and the gramophone as bait. He just needs a light source. Okay then, enter the Cabin Area through any door.
CABIN AREA
Find your way to the stairs halfway along the Cabin Area, and climb up the stairs to the Captain’s Quarters.
CAPTAIN’S QUARTERS
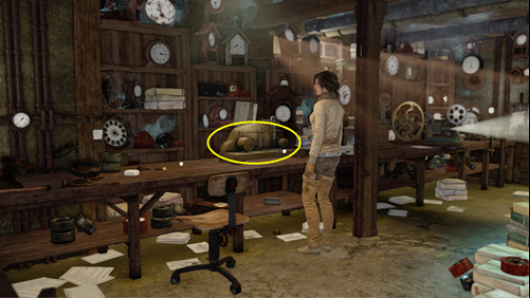
Look at the pile of books on the ground, in front of the bookcase on the left, to get a close-up.
Look at the 3 books on the ground. The book on the right seems a little odd. Open the book… Ah-Ha. It has a secret cut-out section. Take the bottle of EXTRA STRONG VODKA from the book. Exit the close-up.
Climb down the stairs, to the Cabin Area.
CABIN AREA
Walk left a few steps, to the back of the Cabin Area, then climb down the stairs at either side, down to the Machine Room.
MACHINE ROOM
This time, climb down the stairs on the left, to the back area of the Machine Room.
Go right, to the desk, and click on the desk to get a close-up.
There are 2 parts of a lamp here. Pick up the part on the right, and you automatically attach it to the other part. Look at the fuel inlet on the left of the lamp. Open your Inventory (J), scroll down to the EXTRA STRONG VODKA (Up & Down Arrow Keys), and pour that into the fuel inlet. Now open your Inventory again (J), scroll down to the HANDMADE MATCHES (Up & Down Arrow Keys), and use that to light the lantern. Pick up the lantern.
Return to the stairs on the left, and climb up those stairs. Climb up the next set of stairs on the left.
CABIN AREA
Leave the Cabin Area through any door.
UPPER DECK
Head along the right side of the boat, until your see Captain Obo still in the lifeboat. Click on Captain Obo, and give him the lantern you repaired. However, he wasn’t entirely honest with you when he told you about his plan to lure the Kraken away. He will use the lifeboat, yes, but he has to stay onboard the lifeboat in order to steer it away from the Krystal. He… he’s sacrificing himself in order to save everyone else. He’s waited 20 years for this! Twenty years to redeem himself! And now, in this act of bravery, he’s more than earned his redemption. Any guilt he felt, and any blame the villagers felt towards him, can finally be laid to rest. R.I.P. Captain Obo. You truly died a hero. *sob*
Watch the cut scene, as a huge tsunami hits your boat.
CHAPTER 5: BARANOUR - PART 1
============================================================
THE FERRY BOAT KRYSTAL
UPPER DECK
After the tsunami hit, you wake up on the Upper Deck of the boat. The Youkols urge you to speak to Kurk.
FRONT OF THE BOAT
Choose how you want to respond to Kurk. It seems that, despite your best intentions, the Kraken’s attack knocked you off course, and the boat has run aground at Baranour Amusement Park. Now, you know there’s radiation on Baranour, but your concern is that if you and the Youkols are exposed to too much radiation, none of you will complete the journey. You need to find a way to determine exactly how much radiation there is, before you can let anyone leave the boat. You also need to move the boat forward slightly, so that the snow ostriches can get out of the hold.
Look at the radiation meter to get a close-up.
__large.png)
The radiation meter is split into several parts.
__large.png)
Look at the indicator at the top. It looks like it’s in the green zone, but you need to be sure that the entire zone is safe, not just the boat. Look at the middle part - it contains radiation goggles. That would be handy! Look at the bottom part to zoom in on it.
Pull the little drawer open. Empty! The radiation goggles are not here. Damn! Zoom out of the drawer.
Pan around to the left side of the radiation meter, so you can see the lever. Look at the lever to zoom in on it. Try to pull the lever, but it’s locked, and you don’t have the key. Zoom out of the lever, and exit the close-up of the radiation meter.
Walk right a few steps, then climb down 2 sets of stairs, to the Upper Deck.
UPPER DECK
Talk to the Youkols if you like. Enter the Cabin Area through any door.
CABIN AREA
Find the stairs leading up, on either side of the cabin. Climb the stairs up to the Captain’s Quarters.
CAPTAIN’S QUARTERS
Continue up the stairs on the right, and climb up to the Bridge.
BRIDGE
Look at the column next to the steering wheel to get a close-up.
__large.png)
Take the KEY OF THE KRYSTAL, then exit the close-up. Now let’s go back to the radiation meter. Climb down the stairs to the Captain’s Quarters.
CAPTAIN’S QUARTERS
Climb down the stairs to the Cabin Area.
CABIN AREA
Leave the Cabin Area through any door.
UPPER DECK
Head towards the end of the boat. Climb up both sets of stairs, so you’re back at the front of the boat.
FRONT OF THE BOAT
As before, click on the radiation meter to see a close-up.
Pan round to the left side of the meter, so you can see the lever. Click on the base of the lever to zoom in.
Now open your Inventory (I). Zoom down to KEY OF THE KRYSTAL (Up & Down Arrow Keys), and use that in the base of the lever. Rotate the KEY. Now pull the lever all the way down. You hear a click, and you automatically pan round to the front again.
A secret compartment opened, revealing the RADIATION GOGGLES. Click on the drawer at the bottom of the radiation meter to zoom in.
Pick up the RADIATION GOGGLES. Watch the cut scene as you use the RADIATION GOGGLES to see how much radiation is in Baranour Amusement Park. It seems pretty clear. Time to explore the Park then. Walk right a few steps, and climb down both sets of stairs.
UPPER DECK
Find the gate leading off the boat. Open the gate, and exit the boat.
BEACH
BROKEN BRIDGE
Look at the power cable that’s dangling over the lamp post, to see a close-up.
__large.png)
Click on the power cable - no more power. I guess you have to restore power then. Exit the close-up.
Head right, over the bridge, until you see a big gap. Look at the tractor on the left, on the other side of the gap.
__large.png)
You may be able to use it to tow the boat. You just have to find a way over there.
There’s some broken planks on your side of the bridge, leading down to the beach. Head down the planks.
SAND
Head down the sand for a few steps, then right few a few steps, until you can see the steps leading up into the park.
__large.png)
Before you enter the Park itself, let’s explore the Lifeguard’s Hut next to it. Walk up to the Lifeguard’s Hut, and climb up the ladder.
LIFEGUARD’S HUT
Take the TELESCOPIC HOOK that’s leaning against the wall on the left. It could be useful. That’s all you can do here, so climb back down the ladder.
SAND
Head left, and continue left across the sand, until you reach the broken planks leading up to the broken bridge. Climb up the broken planks, back onto the bridge.
BROKEN BRIDGE
Look again at the power cables dangling over the lamp post, to see a close-up.
Look at the top part of the cables. Open your Inventory (I), scroll down to the TELESCOPIC HOOK (Up & Down Arrow Keys), and use that with the dangling cables. Watch the short cut scene. Choose how you want to respond to the Youkol. He’ll reconnect the power cables for you. Now walk right a few steps, so you see the gap in the bridge again.
Climb down the broken planks, onto the sand.
SAND
Head right, and continue right, past the stairs. Look closely at the bench next to the stairs.
__large.png)
Approach the bench, and watch an emotional cut scene. There’s an automaton sitting on the bench. When you see his Serial Number, you realise that it matches the Serial Number on Oscar’s Heart - the medallion you wear around your neck. Click on the Serial Number in the automaton’s chest - yep, it definitely matches! Could it really be possible… could you bring Oscar back? Unfortunately, there’s a keyhole that you can’t unlock yet. You’ll have to come back later. Exit the close-up.
Climb up the stairs, to the gates of the Amusement Park.
BARANOUR AMUSEMENT PARK
GATES
Enter through the gates, into the Park.
PARK ENTRANCE
The park is HUGE! Walk left a few steps, so you see a door leading into a building.
__large.png)
Enter the building.
WORKSHOP
There’s a desk next to the door on the right. Look at the desk to see a close-up.
There’s a small metal box on the desk. Look at the Voralberg crest on the box. The box is locked, and you can’t unlock it yet. When you’re ready, exit the close-up.
Look at the map on the wall above the desk. When you’re ready, exit the close-up.
Walk left a few steps, and look in the box on the table next to the conveyor belt, to get a close-up.
Move the items around until you find a COG. You automatically exit the close-up.
Go left a few steps, and exit the hut through the ‘back door’.
BOARDWALK
Walk right a few steps along the boardwalk. You see a wreckage of 2 rollercoaster cars. Look at the wreckage to see a close-up. Undo the nut connecting them, and watch the cut scene as the cars fall down the boardwalk.
Now that the roller coaster cars are gone, that leaves the track clear. Continue right along the boardwalk, until you see a tractor. This is actually the other side of the broken bridge, where you first saw the tractor. Click on the tractor to get a close-up.
Look at the automaton in the driver’s seat - it isn’t working. Look at the winch & hook on the back of the tractor. Maybe you could use this to tow the Krystal? Watch the cut scene. You need to repair the tractor. You automatically exit the close-up.
Look at the broken automaton on the ground, that you pulled from the tractor, to see a close-up.
Take the SMALL KEY from the broken automaton. You automatically exit the close-up.
Now that SMALL KEY should fit something. A small box, maybe? Have you seen any small boxes on your travels? Retrace your steps left along the boardwalk, until you reach the door. Go through the door, into the Workshop.
WORKSHOP
Walk right to the other side of the building. There’s a desk in front of the wall, with a small box on top. Look at the small box to see a close-up.
Now open your Inventory (I), scroll down to the SMALL KEY (Up & Down Arrow Keys), and use that in the keyhole of the small box. Rotate the key to open the small box. Oh, it’s a toolkit. Take the VORALBERG NO. 10 SPANNER from the lid of the toolbox, and notice the shape of it - that could fit into the automaton you found on the bench outside the Park. You automatically take the VORALBERG SPANNER from the base of the toolbox. Exit the close-up.
Leave the building through the door on the right.
PARK ENTRANCE
Kurk and the Shaman are here waiting for you. Choose how you want to respond to Kurk. He’s authorised the Youkols to leave the boat and explore the Park. Watch the cut scene.
PARK EXIT
Kurk and the Shaman have taken you to another part of the Park. The gates here lead out of the park and into the heart of Baranour. But that whole area is contaminated with radiation, so you can’t go that way. Walk left along the perimeter a few steps, until you see a door - it‘s between the squid fountain and the giant bear with no head statue.
__large.png)
Go through the door, into the wrecked building. If you don’t get the indication that you can enter the door, simply get closer to it.
WRECKED BUILDING
Hmm, the building is completely clogged. There’s nothing you can do in here, just walk left, and leave the building again.
PARK EXIT
Continue left around the perimeter, going up between the giant bear with no head statue, and the rocket.
__large.png)
Look behind the rocket, in front of the fence, and pick up the METAL SHANK from the ground, under the bench. Now make your way back down, so you are in front of the rocket and the giant bear with no head statue. Walk down a few more steps, so you can see the swing ride on the right, and a small fence on the left.
__large.png)
Head down a few more steps, then head right, in front of the swing ride. Continue right, until you reach the Park Entrance again.
PARK ENTRANCE
Leave the Park through the gates on the right.
BEACH
SAND
Climb down the stairs, to the sand. You still need to get power to Baranour Park. Has that Youkol fixed the power cables yet? Let’s go and see. Head left along the sand, until you see the broken boards leading up to the broken bridge. Climb left, up the broken boards.
BROKEN BRIDGE
Go right along the bridge, and climb up the ramp, onto the boat.
THE FERRY BOAT KRYSTAL
UPPER DECK
Enter the Cabin Area through any door.
CABIN AREA
Find the stairs leading down, on either side of the cabin. Climb down the stairs, into the Machine Room.
MACHINE ROOM
Climb down the stairs on the right, then climb up the next stairs on the right. Go right along the platform, and pull the lever at the end of the platform. YES! You have power again! Watch the cut scene, as the Park springs back to life.
FRONT OF BOAT
After the cut scene, you find yourself at the front of the boat. Walk right a few steps and climb down both sets of stairs, to the Upper Deck.
UPPER DECK
Find the gate leading off the boat. Open the gate, and exit the boat.
BEACH
BROKEN BRIDGE
Head right along the broken bridge, then climb right down the broken planks, onto the sand.
SAND
Walk right to the stairs, but don’t go up the stairs yet. Look at the automaton on the bench next to the stairs, to see a close-up.
Look at the cross-shaped keyhole in the automaton to zoom in. Open your Inventory (I), scroll down to the VORALBERG NO. 10 SPANNER (Up & Down Arrow Keys), and use that in the cross-shaped keyhole. Rotate the key, and the chest plate comes loose. Pull it completely open to see inside the chest. Remove the old heart from the chest. Now open your Inventory (I), scroll to SOUVINEER OF OSCAR (Up & Down Arrow Keys), and use that in the chest, in place of the old heart. Open both valves at the top of the heart, then guide both tubes into the open valves. The control system makes it rather fiddly, but just persevere. Once both tubes are in place, zoom in on the heart.
__large.png)
There’s a kind of dome on the right section of the heart, and above that is a small hole that‘s blocking the opening. Open your Inventory (I), scroll down to VORALBERG SPANNER (Up & Down Arrow Keys), and use that in the small hole above the dome . Rotate the VORALBERG SPANNER until it won’t turn anymore. Open the dome section, to reveal another, larger keyhole. Watch the cut scene. Hmm, seems like you’re gonna need ANOTHER Voralberg key. Step away from the bench.
Climb back up the stairs, to the gates of the Amusement Park.
BARANOUR AMUSEMENT PARK
GATES
Enter through the gates, into the Park. Watch the short cut scene. Hmm, someone rode the rollercoaster into the Park.
PARK ENTRANCE
Walk down a few steps, then climb up the stairs on the right.
__large.png)
ROLLER COASTER RIDE
Pick up the CRUMPLED UP NOTE from the ground. Climb into the rollercoaster car on the left.
Inside the rollercoaster car, look at the right side of it to see a close-up.
Pick up another METAL SHANK, then exit the close-up.
Look at the dial, to see a close-up of the controls.
Crank the handle at the top left, and notice that the lever at the top right rises. You’ve activated the rollercoaster. Pull the handle at the top right, back down again, and off you go. Watch the cut scene as you ride the rollercoaster. WWWHHHHHHHHEEEEEEEEEEEEEEEEEEE!
But now you’re right back at the start of the ride. So… what now? Well, if you looked at the map in the building with the conveyor belt, you would have seen the numbers 15 & 25. Hmm, maybe that’s a clue.
Look at the dial again, to see a close-up of the controls.
Crank the handle at the top left, all the way round, so the dial at the top left indicates 50. Notice that the large dial has holes next to each number. Open your Inventory (I), scroll down to a METAL SHANK (Up & Down Arrow Keys), and insert that into hole number 15. Now open your Inventory again (I), scroll down to the other METAL SHANK (Up & Down Arrow Keys), and insert that into hole number 25. Now pull down the lever at the top right.
You’re off again. But this time, you stop part-way along the rollercoaster ride. Pan down slightly, so you can see the dial. Remove the METAL SHANK from hole number 25. The rollercoaster starts moving again, but then stops again a short time later. Climb out, onto the platform on the left.
SECRET PLATFORM
The only thing you can do here, is climb down the trapdoor on the right.
UNDERGROUND SUBWAY
SUBWAY STATION
You’ve found an underground subway.
__large.png)
Walk forward, and climb down the stairs.
PLATFORM
There’s a train here in the station, but it’s not a patch on Oscar’s old train. *sniff* Follow the platform up, until you see an open carriage.
__large.png)
Look at the stretched skin in a frame on the right, to get a close-up.
The stretched skin is strange. Exit the close-up.
Look at the suitcase at the lower left, to see a close-up.
Look at the flowers in the suitcase, and look at the poster in the suitcase. When you’re ready, exit the close-up.
Look at the sacks on the left, to get a close-up.
Look at the 3 sacks on the ground, and look at the mushrooms. Exit the close-up. Enter the open carriage on the right.
TRAIN CARRIAGE
Hmm, it seems like someone is living here. Walk left a few steps, and meet the woman who lives here. Decide how you want to respond to her. She seems rather fond of her automaton dog. Again, decide how you want to respond to her. She introduces herself as Katerina. If you’re polite, you can convince her to lend you her VORALBERG ACTIVATION KEY. You automatically leave the train carriage.
PLATFORM
Enter the train carriage again.
TRAIN CARRIAGE
Walk right a few steps, and look at the PHOTO ALBUM on the dressing table to get a close-up.
Pick up the PHOTO ALBUM. Look at the photo of Andre. Exit the close-up.
Explore the rest of the carriage if you like. When you’re ready, leave the carriage.
PLATFORM
Head down a few steps, then climb up the stairs on the left.
SUBWAY STATION
Go through the door in the back wall and climb up the ladder.
BARANOUR AMUSEMENT PARK
SECRET PLATFORM
Climb into the rollercoaster car.
ROLLER COASTER RIDE
Look at the large dial to see a close-up.
Remove the METAL SHANK from the large dial, at hole number 15. Watch the cut scene as the rollercoaster continues it’s ride. When you reach the end of the ride, exit the close-up 2 times.
Kurk and the Shaman are waiting for you. Decide how you want to respond to them. Watch the cut scene. Work through all the dialogue with Kurk. When conversation is over, climb down the stairs at the back right.
PARK ENTRANCE
Walk left a few steps, then head up through the gates to leave the Park.
GATES
Climb down the stairs on the right.
CHAPTER 5: BARANOUR - PART 2
============================================================
BEACH
SAND
Look at the automaton on the bench to the right of the stairs, to see a close-up.
Click on the key at the bottom of the chest plate to zoom in.
Pull the chest plate open again. Zoom in on the heart.
Now open your Inventory (I), scroll down to the VORALBERG ACTIVATION KEY (Up & Down Arrow Keys), and use that in the Voralberg keyhole. Rotate the ACTIVATION KEY, and keep rotating it until it won’t turn any more. Watch the cut scene. Ahhh, Oscar! It’s so good to see you again! A different body and a different voice, sure. But it’s still Oscar. Oscar’s heart and Oscar’s soul! However, this new automaton body does need some maintenance. Decide how you want to respond to Oscar. He’s quite shocked when he realises that he doesn’t have any clothes. Again, decide how you want to respond to him. He refuses to move from the bench until he has some clothes. Okay, let’s find him some clothes then.
Climb up the stairs, to the gates of the Amusement Park.
BARANOUR AMUSEMENT PARK
GATES
Enter through the gates, into the Park.
PARK ENTRANCE
Walk down a few steps, then climb up the stairs on the right.
ROLLER COASTER RIDE
Climb into the rollercoaster car.
Look at the large dial, to see a close-up of the controls.
As before, crank the handle at the top left, all the way round, so the dial at the top left indicates 50. Notice that the large dial has holes next to each number. Open your Inventory (I), scroll down to a METAL SHANK (Up & Down Arrow Keys), and insert that into hole number 15. Now open your Inventory again (I), scroll down to the other METAL SHANK (Up & Down Arrow Keys), and insert that into hole number 25. Now pull down the lever at the top right.
The rollercoaster begins it‘s journey, and then stops partway along. Pan down slightly, so you can see the dial. Remove the METAL SHANK from hole number 15. The rollercoaster starts moving again, but then stops again when it reaches the Secret Platform. Climb out, onto the platform on the left.
SECRET PLATFORM
Climb down the trapdoor, into the underground subway.
UNDERGROUND SUBWAY
SUBWAY STATION
Walk forward a few steps, and climb down the stairs to the platform.
PLATFORM
Head up, to the open train carriage. Enter the open carriage on the right.
TRAIN CARRIAGE
Watch the cut scene with Katerina and the Youkols. They’re listening to a soap opera on the radio, and the Youkols are finding it very emotional. You automatically exit the carriage.
PLATFORM
Enter the carriage on the right again.
TRAIN CARRIAGE
Walk left a few steps. Talk to Katerina and decide how you want to respond to her. Make sure you give her back the VORALBERG ACTIVATION KEY. She gives you KEY TO ANDREI’S CABINET. Walk right, to the other end of the carriage. Look at the wardrobe in the back corner to see a close-up.
Open your Inventory (I), scroll down to KEY TO ANDREI’S CABINET, and use that in the wardrobe to open it. Oscar joins you. So he DID leave the bench, after all. Decide how you want to respond to him. Oscar decides which clothes he likes, and dresses himself accordingly. Decide how you want to respond to him. He tells you that he will wait for you on the pier, and then he leaves. When you’re ready, leave the carriage.
PLATFORM
Let’s go an meet up with Oscar again. Head down the platform, until you see the stairs on the left. Climb up the stairs.
SUBWAY STATION
Go through the door in the back wall, and climb up the ladder.
BARANOUR AMUSEMENT PARK
SECRET PLATFORM
Climb back into the rollercoaster car.
ROLLER COASTER RIDE
Click on the large dial to see a close-up.
Remove the METAL SHANK at hole number 25. The rollercoaster car takes you back to the start. Exit the close-up 2 times.
Climb down the stairs at the back right.
PARK ENTRANCE
Walk left, and continue left, until you see the door to the Workshop.
__large.png)
Enter the Workshop.
WORKSHOP
Walk left, to the far end of the building, and exit through the ‘back door’.
BOARDWALK
Head right along the boardwalk, and continue right, until you see the tractor. Oscar is sitting in the tractor, all ready for you. Talk to Oscar and decide how you want to respond to him. Watch the cut scene. Oscar wants you to connect the Krystal to the tractor. Walk right a few steps - someone has kindly placed a plank over the broken bridge, so you can easily get back to the Krystal now. So let’s use it. Cross right, over the plank.
BEACH
REPAIRED BRIDGE
Look at the cable lying on the bridge. That would be perfect for towing the Krystal - you just need some help to get it free. Talk to the nearby Youkols and ask them to attach the cable to the tractor. They do so. Head down the bridge, and cross over the plank again.
BARANOUR AMUSEMENT PARK
BOARDWALK
Talk to Oscar in the tractor, and use the following dialogue option.
1. Advance
Watch the cut scene. The little tractor fails to move the huge Krystal, and only drives it further into the sand. Oscar suggest you tie the cable somewhere higher, so the boat would be pulled upwards as well as forwards. He also asks you to give some slack in the rope, so that he can move the tractor. Look at the winch on the back on the tractor, to get a close-up.
__large.png)
Try to turn the handle, but it won’t move. Open your Inventory (I), scroll down to the VORALBERG SPANNER, and use that at the base of the handle, where it joins onto the winch. Rotate the VORALBERG SPANNER slightly. That’s better. Now rotate the handle as much as you can.
Talk to Oscar in the tractor again, and use the following dialogue option.
1. Advance
Oscar moves the tractor forward. Head left, along the boardwalk. Notice the Ferris Wheel, as you pass the fence. That might be the answer to your problems. Talk to the Youkols that are standing next to the fence, and ask them to attach the cable from the tractor, to the Ferris Wheel. Now head up through the gap in the fence, so you are inside the Park again.
__large.png)
Step up, through the gap in the fence, so you are back inside the Park.
FERRIS WHEEL
Walk up the right side of the Ferris Wheel, so you see a ladder.
Climb up the ladder.
At the top of the ladder, look at the Ferris Wheel mechanism on the right to see a close-up.
Open your Inventory (I), scroll down to the COG (Up & Down Arrow Keys), and use that in the cog part of the mechanism. Pull down the lever on the right. Exit the close-up.
Walk left a few steps, and push the button next to the ladder. Watch the cut scene. The Ferris Wheel turns round, pulling the Krystal up and onto the beach, wrecking the place as it does so. Mission accomplished… you guess! Climb back down the ladder.
Head up, past the wrecked Ferris Wheel, and go through the gap in the fence again.
BOARDWALK
Now you’ve destroyed the Ferris Wheel, you need to find another way back to the Krystal. Walk up a few steps, and go through the door on the right.
__large.png)
WORKSHOP
Go right, to the other end of the building. Leave the building through the door on the right.
PARK ENTRANCE
Walk right, to the gates. Go through the gates to leave the Park.
GATES
Climb down the stairs on the right.
BEACH
SAND
Walk right a few steps, and talk to the Youkols. Watch the cut scene. Oscar is fully clothed again. The Youkols are afraid and want to attack him, but the Shaman comes to his rescue. Decide how you want to respond to her. Does she have a crush on Oscar? You ask her to get everyone ready to leave, while you get the snow ostriches out. Head right, and follow the path round to the other side of the boat.
Continue right, until you see the lever in the wall.
__large.png)
Click on the lever to see a close-up.
Click on the lever again, and watch the cut scene as the boat’s hold is opened, and the snow ostriches are finally allowed out. The Youkols are happy to be going on the next stage of their migration journey. However, Olga and her goons are still hunting you!
CHAPTER 6: BARANOUR UNDERGROUND METRO STATION
============================================================
BARANOUR UNDERGROUND METRO STATION
RAILWAY LINE
I said it before, and I’ll say it again - the snow ostriches are MAGNIFICANT!
Something is spooking the snow ostriches, and they refuse to go any further. Head left a few steps, then up, and continue up, to the dark tunnel. Enter the mouth of the tunnel.
Watch the cut scene as dozens of bats fly at you from the tunnel. Yikes! That must be what’s spooking the snow ostriches. You need to find a way to get rid of them. Walk down a few steps and talk to Kurk and the Shaman. Decide how you want to respond to them. The Shaman tells you to find something that would frighten the bats. Walk all the way down, to the beginning of the tunnel. When the camera angle changes, walk right. Talk to the Youkol on the right and work through all the dialogue. Take the YOUKOL CLOTH from the snow ostrich.
__large.png)
Walk left a few steps, so the camera angle changes back.
Climb up onto the platform on the left, then climb up the stairs in the doorway on the left.
__large.png)
AIRLOCK
Oscar is here. Talk to him and work through all the dialogue with him. Walk through the doorway on the right, next to Oscar, into the airlock itself.
Walk over to the wall on the right, and push the big red button. You look through the window in the door, and see that it’s completely contaminated with radiation outside. So you can’t go outside, you’ll have to continue your journey through the subway then. Go back through the doorway on the left, back to where Oscar is standing.
There’s nothing else you can do here, so walk back down the stairs, to the railway line.
RAILWAY LINE
Climb down the platform, and onto the railway line. Walk right a few steps, and climb up onto the opposite platform. Talk to the Blacksmith Youkol at his workstation.
__large.png)
Not very helpful, is he? Go through the doorway on the right that’s near him, next to the 2 Youkols chatting.
LOWER LEVEL
You find yourself in the lower level of the Metro Station.
__large.png)
Follow the path at the top left, round the corner.
Climb down the stairs, to the sewers below.
SEWERS
The water looks extremely… contaminated! Walk left, through the gate, and look at the SEAWEED on the ground to get a close-up.
Pick up the SEAWEED. You automatically exit the close-up.
Head right along the platform, all the way to the other end. There’s another Youkol here, who wants to give you a gift. Decide how you want to respond to him. He gives you a tree ROOT to hit the bats with, then he runs off. Head left, back to the stairs. Climb up the stairs.
LOWER LEVEL
Follow the upper right path, round the corner.
Climb up the stairs, then walk forward to the railway line.
RAILWAY LINE
Notice that the Blacksmith Youkol has left his spot at the bottom right corner, but his workstation is still there. Look at the workstation to see a close-up.
Take the FLASK and the LIGHTER, from the workstation. Look at the small hole at the end of his workstation - it’s good for DIY. Open your Inventory (I), scroll down to the ROOT (Up & Down Arrow Keys), and place that in the small hole. Open your Inventory again (I), scroll down to the YOUKOL CLOTH (Up & Down Arrow Keys), and use that on the top of the ROOT in the hole. For the 3rd time, open your Inventory (I), scroll down to the FLASK (Up & Down Arrow Keys), and pour that onto the top of the ROOT with the YOUKOL CLOTH. For the final time, open your Inventory (I), scroll down to the LIGHTER (Up & Down Arrow Keys), and use the LIGHTER with the ROOT with the YOUKOL CLOTH. Voila! You’ve made yourself a TORCH. Climb down off the platform, onto the railway line.
Head up, all the way to the dark tunnel with the bats. Enter the dark tunnel and watch the cut scene. You scare the bats… but then they just fly right back into the dark tunnel. Damn! But notice the ventilation shaft in the roof.
Head down to the far end of the railway line. Talk to Kurk, and suggest that the ventilation shaft in the roof might be the only way to get the bats out, but they are currently sealed. The only way to open the ventilation ducts if from the outside… but it’s too contaminated for anything made of flesh & blood to go outside. The way he phrased it can only mean one thing! Oscar!
Walk left, then up a few steps, and climb onto the platform on the left. Climb up the stairs in the doorway on the left.
AIRLOCK
Watch the cut scene. Oscar volunteers to go outside and open the ventilation ducts for you. That’s very brave of him!
UNDERGROUND METRO STATION - AS OSCAR
AIRLOCK
Walk forward and climb up the stairs. Exit the station through the door.
TOWN CENTRE
Walk right a few steps, and watch the short cut scene. Walk over to the statue in the middle. Now from your position next to the statue, turn to face the Metro Station. Look at the conduit in the roof.
__large.png)
It should be easy for you to open that. Follow the Metro Station building right, until you see the bus stop. Ignore the red fire engine for now. From the bus stop, cross over the street to the row of buildings on the other side of the street.
__large.png)
Walk left a few steps, to the dark blue building with the open doorway.
__large.png)
Enter the building.
BANK
Go up through the door on the right, and walk behind the teller’s desks. Pick up SHEARS from the ground. Leave the bank.
TOWN CENTRE
Walk down a few steps and right a few steps, and make your way back to the red fire engine. Climb into the front of the fire engine.
__large.png)
Try to release the brake lever - love the comment about Kate Walker (hee hee)! Pan right slightly, and pull open the door for the glove compartment. Look in the glove compartment to see a close-up.
Move all the items around until you find the IGNITION KEY. You automatically exit the close-up.
Look at the ignition keyhole next to the steering wheel. Open your Inventory (I), scroll down to the IGNITION KEY (Up & Down Arrow Keys), and use that in the ignition keyhole. Rotate the IGNITION KEY to start the fire engine. Release the brake lever. Watch the cut scene as you move the fire engine closer to the conduit in the roof.
Walk over to the back of the fire engine. Climb onto the back of the fire engine. Climb to the upper part of the fire engine. Click on the Control Panel to get a close-up.
Rotate the fire engine clockwise (top wheel), so you can see the conduits in the roof of the Metro Station.
__large.png)
Raise the ladder slightly (bottom wheel), so it’s above the roof. Extend the ladder (lever on the right), so that the ladder reaches the roof. Now climb along the ladder, onto the roof. Look at the first conduit to get a close-up.
Look at both parts of the window. It’s completely welded shut, with no way to open it. So you’ll have to get creative. Open your Inventory (I), scroll down to the SHEARS (Up & Down Arrow Keys), and use that on the conduit. Watch the cut scene as you break it open. Notice that 2 automaton guard dogs are attracted by the noise, and come out to investigate. Climb back down the ladder.
Uh-oh… those 2 automaton guard dogs are here. And it looks like they’re not going away any time soon. How are you gonna get off the fire engine? Climb down to the lower section on the back of the fire engine. Click on the hose nozzle on the back of the fire engine to get a close-up.
Pull the pin out from the hose wheel. Pan round, so you can see the front of the contraption.
__large.png)
Zoom in on the cap at the front of the contraption on the left, and pull the cap out. Zoom in on the front of the hose wheel. Pull the hose out, and attach it to the contraption on the left.
__large.png)
Zoom in on the contraption on the left. Rotate the wheel. Now pan up to the hose nozzle, click on the hose nozzle, and watch the cut scene as you send the guard dogs packing. That’ll teach them! Climb down off the fire engine.
Explore the rest of the area if you like. When you’re ready, head back to the Metro Station (the long building with the green roof), and enter it.
AIRLOCK
Walk forward and climb down the stairs. Enter the airlock on the left.
Push the red button on the wall. Watch the cut scene, as you are quarantined. Oh dear!
UNDERGROUND METRO STATION
AIRLOCK
You watch helplessly, as Oscar is quarantined. You need to find some iodine for him. Look at the little compartment next to Oscar’s door, to get a close-up.
Open your Inventory (I), scroll down to the SEAWEED (Up & Down Arrow Keys), and insert that into the holder inside the little compartment. Close the compartment door, and watch the cut scene. Phew! Oscar is finally decontaminated, and he’s released from the airlock. Choose how you want to respond to him. You tell him to wait with the Youkols. When you’re ready, climb down the stairs.
RAILWAY LINE
Climb down off the platform, onto the railway line. You need to scare the bats again, so you need to relight your torch. Climb up onto the platform on the right. Look at the Blacksmith’s workstation to see a close-up.
Pick up the FLASK from the workstation. Watch the cut scene. This time, the bats fly of through the open conduit in the ceiling, and the snow ostriches carry on the journey.
You and the Youkols find a good place to camp for the night.
CHAPTER 7: OLYMPIA
============================================================
CAMPSITE
CAMP
You and the Youkols set up camp for the night. Walk right a few steps, and watch the short cut scene with a Youkol. Decide how you want to respond to him. Climb up into the yurt on top of the snow ostrich.
YURT
Look at the bed on the left - you can’t sleep yet! Look at the wooden box in the middle of the yurt, to see a close-up.
The Youkols have stored everything you managed to take out of the clinic. That’s kind of them! Exit the close-up.
There’s nothing else you can do in here at the moment, so just leave the yurt.
CAMP
Walk left a few steps, so you see the huge campfire.
__large.png)
Kurk and the Shaman are standing towards the left side of the campfire. Find them and talk to them. Decide how you want to respond to them. Watch the cut scene - you learn that their sacred Temple has disappeared, and a new stadium has taken it’s place. But they hope that their Temple is still here, hidden underneath the stadium. Decide how you want to respond.
When conversation is over, walk up, away from the bonfire.
__large.png)
When the camera angle changes, head left towards the fence.
The camera changes again, and you see an open gate leading into a building.
__large.png)
Go through the gate.
ABANDONED STADIUM
GROUND FLOOR
Walk left a few steps, and you’ll see an escalator, and graffiti on the wall. Climb up the escalator.
1ST FLOOR
At the top of the escalator, the path is leading in both directions.
__large.png)
Follow the red carpet left.
Continue right along the red carpet (ignore that short path on the left) until you see another escalator leading down.
__large.png)
Take that escalator down.
STAIRS
There are some Youkol tools, and a strange chair here.
__large.png)
Ignore them for now. Climb down the stairs in the middle of the screen.
CORRIDOR
Walk forward a few steps until you see a gate on the right. Open the gate, and walk through it.
SNOWY AREA
3 GATES
You’re outside again, and you can see 3 gates. Head through the gate on the left.
PATH WITH CANDLES
This pathway is lit up with candles. Follow the path along, through all the turns, until you reach the 2 gravestones.
__large.png)
Examine both gravestones, then go up (the path is hard to see) to the graveyard area.
GRAVEYARD AREA
There are a few more gravestones here, along with some huts. Look at the gravestones that are legible. Look at the sign at the back, to get a close-up.
__large.png)
Exit the close-up.
Walk left along the hard to see path, so that the camera angle changes.
Walk up to the hut and knock on the door. Watch the cut scene, as you enter the hut.
INSIDE THE HUT
Watch the cut scene with the woman. Choose how you want to respond to her. She’s very distrustful, and with good reason. She has Youkol blood in her veins, and her father was the leader of the last migration. He sacrificed himself to try and save the Youkol Temple. Now she is trying to find the Temple herself, but she’s not having any luck. Decide how you want to respond to her. Eventually, she gives you her YOUKOL MANUSCRIPT to give to Kurk. You automatically leave the hut.
GRAVEYARD AREA
Walk left a few steps, and enter the cave.
CAVE
Wow, the cave is actually a shrine. Look at the gravestone on the right to see a close-up.
Read the gravestone. Look at the hole in the rock above the gravestone - something’s wrong. Take the YOUKOL LENS 01 from the rock. When you’re ready, leave the cave.
GRAVEYARD AREA
Let’s head back to the camp, and see if Kurk can translate the YOUKOL MANUSCRIPT. Go left, and follow the path back, until you reach the gate. The camera angles make it hard to see where you’re going, but just persevere, and you’ll get there.
Head up through the gate.
3 GATES
You’re back in the area with 3 gates. Instead of going back through the building, you can take the shortcut, and go through the gate at the top.
CAMP SITE
CAMP
Go right, back to the huge campfire. Kurk is still standing near the left side of the fire. Talk to him and decide how you want to respond to him. Watch the cut scene as you give the YOUKOL MANUSCRIPT to Kurk, and ask him to visit the woman you met. It doesn’t take him long to translate it, and give you back a TRANSLATED YOUKOL MANUSCRIPT. Open your Inventory (I), go to the Documents section (J), scroll down to the TRANSLATED YOUKOL MANUSCRIPT (Up & Down Arrow Keys), and Observe it (3) to see the close-up.
Flick through the page and read the MANUSCRIPT. It tells about a secret map that can show the way to the hidden Temple. Pay close attention to the paragraph about sacrifice on the 2nd page. Also pay close attention to the glyphs, and what they mean. When you’re ready, exit the close-up.
Now you’ve read the MANUSCRIPT, maybe you should investigate the Stadium again. Go left around the campfire, until you see the fence in the distance.
__large.png)
Head up towards the fence. When the camera angle changes again, head up towards the Stadium, and enter the Stadium.
ABANDONED STADIUM
GROUND FLOOR
Walk left a few steps, and climb up the escalator.
1ST FLOOR
As before, the path leads left & right. Take the left path.
Follow the red carpet along a few steps, then take the short path on the left.
__large.png)
Go through the door, into the Observation Room.
OBSERVATION ROOM
If you visited here before, there wasn’t much you could do. But now, since you read the TRANSLATED YOUKOL MANUSCRIPT, you have a better idea of what to do. Look at the Trophy Display Case next to the door, to see a close-up.
You see… something… lying on the shelf. What on earth is that? Look at the Trophy Display Case again to zoom into it. There’s a glass door in the way. Open your Inventory (I), scroll down to the SCARF (Up & Down Arrow Keys), and use that on the glass door to smash it. Now pick up YOUKOL LENS 03 from the shelf. You automatically exit the close-up.
When you’re ready, leave the room.
1ST FLOOR
Remember that strange chair you saw earlier? Time to have another look at that. Continue right along the red carpet, until you see an escalator leading down. Climb down the escalator.
STAIRS
Look at the strange chair to get a close-up.
Pull down the flap on the chair.
__large.png)
You need to set the glyphs to the correct combination. Using the TRANSLATED YOUKOL MANUSCRIPT, set the glyphs like so.
__large.png)
Sacrifice Pain Death Sacrifice Mourning Madness
__large.png)
The camera pans up to the seat of the chair. Lift up the seat, then take YOUKOL LENS 02. Exit the close-up.
Climb down the stairs.
CORRIDOR
As before, walk forward a few steps until you see a gate on the right. Head right, through the gate.
3 GATES
Open the middle gate, at the top of the screen, and head through that gate.
SNOWY AREA
Go left, past the gate, past the fence, and continue left, then up, until you reach another building.
__large.png)
Open the door and enter the building.
SWIMMING POOL
SWIMMING POOL
This seems to be a swimming pool, although the swimming pool itself is actually empty. Climb up the stairs, to the diving board.
__large.png)
The diving boards are also shown in the TRANSLATED YOUKOL MANUSCRIPT, so they must be important. At the top of the stairs, walk left, to the end of the diving board.
Notice the 3 holes in here, in the diving board. It just so happens, that you have 3 YOUKOL LENS. Open your Inventory (I), scroll down to YOUKOL LENS 02 (the blue one), and place that in the left hole. Open your Inventory (I), scroll down to YOUKOL LENS 01 (the green one), and place that in the middle hole. Open your Inventory (I), scroll down to YOUKOL LENS 03 (the red one), and place that in the right hole. You know have 3 beams of coloured light shining into the empty pool. Watch the cut scene, as several mirrors rise up into the swimming pool. Click on the end of the diving board 2 times, to zoom into the swimming pool.
__large.png)
The aim here, is to direct all 3 coloured beams to bounce off the mirrors, and hit the door at the far left of the swimming pool. It’s frustratingly fiddly, and you may have to climb into the pool, look at the door at the far end, and then climb out again, before it will work! You can move all the mirrors, including the 3 in a row on the right. Direct the beams like so.
Blue
__large.png)
Green
__large.png)
Red
__large.png)
Watch the cut scene, as the door is opened, and the entrance to the Temple is revealed. The Shaman wants you to enter the Temple with them. Climb down the stairs on the right side of the diving board.
Head down a few steps, and work your way around the swimming pool until you see the ladder leading into the swimming pool. Climb down the ladder, into the swimming pool.
Head right, to where the door is, and go through the door, into the Temple.
TEMPLE
INSIDE THE TEMPLE
Watch the cut scene as the Youkols pay tribute to their ancestors. You start to hallucinate - you’re letting go of the past once and for all. Watch a few cut scenes, until you’re finally back at the campsite.
CAMPSITE
CAMP
It’s been a long day, and you’re exhausted. You bid Oscar a good night, then head off to the yurt for some much-needed sleep.
Watch the cut scene. The Youkols continue their journey as you sleep. The Youkol woman you met earlier watches you leave, and she seems sad to be alone once again.
CHAPTER 8: THE BRIDGE
============================================================
SACRED BRIDGE
SNOW OSTRICHES
Watch the cut scene, as the snow ostriches have reached the edge of a bridge… and then stopped. You climb out of your yurt to find out what is going on.
Climb back up into your yurt on top of the snow ostrich.
YOUR YURT
Look at the wooden crate on the right, to get a close-up.
Pick up the LIGHTER, and pick up the KNIFE from the wooden crate. Now exit the close-up.
Leave the yurt.
SNOW OSTRICHES
Walk forward, to the front of the snow ostriches. Continue forward, onto the Bridge. Now you can see that there’s no way across the bridge, as the far side of it is down. So that’s why the snow ostriches stopped. Walk right a few steps, and look at the shuttered booth on the front of the white building.
__large.png)
There’s a sign saying “Back Soon” on the booth. Walk round to the side of the building, and try to open the door. Locked! Step onto the balcony to the right of the building.
BALCONY
Follow the balcony round to the back door (ignore the ladder for now). Look at the back door to get a close-up.
Try to open the back door, but it’s locked. Peer through the window in the door - nobody in sight. Bang on the door - nobody answers. Hmm, the building seems deserted. Exit the close-up.
Walk left a few steps, and climb down the ladder.
__large.png)
Head right, over the balcony, and enter the Store Room.
STORE ROOM
Look at the button on the back wall.
__large.png)
Push the button. This calls a cart, that will take you over the water. When you’re ready, leave the Store Room.
BALCONY
Well, the cart is here waiting for you, but you’re not able to climb into it yet. You still need to do a few other things, first. Leave the cart for now - you can come back to it later.
Follow the balcony round, and climb down the next ladder.
__large.png)
Walk forward, and pull the lever next to the wall. This activates the waterwheels, and raises part of the bridge. Now climb up both ladders, so you’re back at ‘Ground Level’, so to speak. Head up, and go to the front of the building.
SACRED BRIDGE
From the front edge of the balcony, start walking left, and follow the path left, between some rocks. You’ll find Kurk here, gazing out over the water.
KURK
__large.png)
Talk to him and work through all the dialogue. You learn that the traditional Sacred Bridge has collapsed, and he’s concerned about crossing over this new Toll Bridge. When conversation is over, head right, and return to the front of the building.
SACRED BRIDGE
The booth that was shuttered before, is now open.
__large.png)
Talk to the man in the booth, watch the cut scene, and choose how you want to respond to him. Watch another cut scene, and work through all the dialogue with him. You learn that the Watcher on the other side of the bridge likes a little tipple of vodka occasionally, which is good to know.
Walk over to the bridge, and watch the cut scene as the man raises the 1st part of the bridge for you. Cross over the bridge as far as you can, and watch the cut scene as the next part of the bridge is raised. Now cross all the way over the bridge.
THE WATCHER
On the other side of the bridge, walk over to the Watcher’s hut.
__large.png)
Enter the hut.
THE WATCHER’S HUT
Watch the cut scene, and choose how you want to respond to the Watcher. He tells you that the Youkols cannot cross over the Bridge, until you pass a test. When conversation is over, leave the hut.
THE WATCHER
Explore the area if you like. When you’re ready, go back to the Bridge.
Cross over both sections of the Bridge. Watch the cut scene, as the man in the booth considers calling his Superior, to turn you in. Watch another cut scene, as the man raises the final part of the Bridge, before fleeing on his motorbike.
SACRED BRIDGE
Head back to the area with all the snow ostriches.
SNOW OSTRICHES
Look carefully at the ground near the snow ostriches, to get a close-up.
__large.png)
Pick up the BRICK. Look at the skid mark in the ground. What is his problem? Exit the close-up.
Find the Shaman’s yurt, in amongst all the snow ostriches. It’s the one with Oscar standing outside it.
__large.png)
Chat to Oscar if you like. Climb up the ladder, and enter the Shaman’s yurt.
SHAMAN’S YURT
Talk to the Shaman, and watch a cut scene. She’s still very weak, so she soon falls asleep. Pay attention to what she says about signals of smoke. Look at the chest next to her, to see a close-up.
Move all the items around, until you find AYAWASKA’S STAFF. Exit the close-up.
Leave the yurt.
SNOW OSTRICHES
Walk forward, to where the building with the booth is.
SACRED BRIDGE
Walk round to the balcony at the back of the building
BALCONY
Look at the door at the back of the building - still locked. Look at the glass window - you can see the bridge controls. Open your Inventory (I), scroll down to the BRICK (Up & Down Arrow Keys), and use that to smash the window. Now open the door, and enter the Bridge Control Building.
BRIDGE CONTROL BUILDING
Look at the box on top of the filing cabinet on the right, to see a close-up.
__large.png)
Take the CUSTOMS OFFICER’S FLASK from the box. You automatically exit the close up.
Look at the Control Desk on the left - someone has to stay on this side, in order to operate the Bridge, so that the Youkols can cross. But you can think about that later. Take the CUSTOMS OFFICER’S PILE OF PAPERS from the table.
__large.png)
When you’re ready, leave the building through the door you entered.
BALCONY
Follow the balcony round a few steps, and climb down the ladder.
Follow the balcony right. The cart should still be here, waiting for you. Look at the cart to see a close-up.
__large.png)
Open your Inventory (I), scroll down to the CUSTOMS OFFICER’S FLASK (Up & Down Arrow Keys), and place that in the cart. Exit the close-up.
Enter the Store Room.
STORE ROOM
Press the button in the back wall. Watch the cut scene as the vodka gets sent over to the Watcher on the other side of the Bridge.
BALCONY
In return, the Watcher sends back a cart full of bags of sawdust. Take BAGS OF SAWDUST from the top of the cart, then exit the close-up.
Follow the balcony round, and climb up the ladder.
Walk up to the front of the building.
SACRED BRIDGE
Walk left a few steps, and head down into the stone circle area.
__large.png)
STONE CIRCLE
Look at the pipes on the left, to see a close-up.
__large.png)
This is actually an oven. Number the pipes like so.
__large.png)
Look at Pipe 3 to see a close-up.
The camera pans round to the back of the pipe. Take FUNNEL 02. Exit the close-up.
Look at Pipe 5 to see a close-up.
Press the button at the top, to open the pipe. Look inside the pipe to zoom in.
Take QUARTER PART OF YELLOW RESIN and QUARTER PART OF BLUE RESIN, then exit the close-up 2 times.
Look at Pipe 7 to see a close-up.
Press the button at the top, to open the pipe. Look inside the pipe to zoom in.
Take QUARTER PART OF YELLOW RESIN, then exit the close-up 2 times.
Look at the indent on top of the oven.
__large.png)
__large.png)
Remember that the symbols are coloured Red, Blue, Blue, Yellow. Exit the close-up.
Click on the bottom part of the oven to get a close-up.
__large.png)
Click on the handles in the middle, to open the doors. Take QUARTER PART OF RED RESIN, ROUND CHUNK OF BLUE RESIN, FUNNEL 01, FUNNEL 03, and FUNNEL 04 from the left side. Take LOG from the right side. Now focus on the middle section. Open your Inventory (I), scroll down to the LOG (Up & Down Arrow Keys), and place that in the middle section. Again, open your Inventory (I), scroll down to CUSTOMS OFFICER’S PILE OF PAPERS (Up & Down Arrow Keys), and place that on top of the LOG. For a 3rd time, open your Inventory (I), scroll down to the LIGHTER (Up & Down Arrow Keys), and use that to light the fire. The LOG and the PAPERS burn beautifully. Click on the top part, to close the doors again. Exit the close-up 2 times.
Walk right a few steps, and look at the tree stump to get a close-up. Open your Inventory (I), scroll down to the ROUND CHUNK OF BLUE RESIN (Up & Down Arrow Keys), and place that on the tree stump. Open your Inventory again (I), scroll down to the KNIFE (Up & Down Arrow Keys), and use that to cut the BLUE RESIN. You automatically take the QUARTER PART OF BLUE RESIN. Walk left, back to the oven. Click on the oven to get a close-up.
Look at Pipe 5 to zoom in on it.
If necessary, push the button at the top to open the pipe. Rotate the handle at the bottom, so that it is vertical. Pull the top lever upwards, to raise up the top section inside the pipe. Now pull the lower lever (above the handle), so that it is facing towards you. It will probably take a few attempts to do this, as it has a tendency to spin too far. Pull the top lever down again. Click on that top section to zoom in on it.
Open your Inventory (I), scroll down to the QUARTER PART OF RED RESIN (Up & Down Arrow Keys), and place that in the in the bottom left quarter.
__large.png)
Zoom out of the close-up.
Press the button at the top, to close the pipe. Exit the close-up.
Look at Pipe 6 to zoom in on it.
Push the button at the top to open the pipe. Rotate the handle at the bottom, so that it is vertical. Pull the top lever upwards, to raise up the top section inside the pipe. Now pull the lower lever (above the handle), so that it is facing towards you. It will probably take a few attempts to do this, as it has a tendency to spin too far. Pull the top lever down again. Click on that top section to zoom in on it.
Open your Inventory (I), scroll down to the QUARTER PART OF BLUE RESIN (Up & Down Arrow Keys), and place that in the in the bottom left quarter.
__large.png)
Zoom out of the close-up.
Press the button at the top, to close the pipe.
Look at Pipe 7 to zoom in on it.
If necessary, push the button at the top to open the pipe. Rotate the handle at the bottom, so that it is vertical. Make sure both lever at facing towards you. Click on that top section to zoom in on it.
Open your Inventory (I), scroll down to the QUARTER PART OF BLUE RESIN (Up & Down Arrow Keys), and place that in the in the bottom left quarter.
__large.png)
Zoom out of the close-up.
Press the button at the top, to close the pipe. Zoom out of the close-up.
Look at Pipe 8 to zoom in on it.
If necessary, push the button at the top to open the pipe. Rotate the handle at the bottom, so that it is vertical. Pull the top lever upwards, to raise up the top section inside the pipe. Now pull the lower lever (above the handle), so that it is facing towards you. It will probably take a few attempts to do this, as it has a tendency to spin too far. Pull the top lever down again. Click on that top section to zoom in on it.
Open your Inventory (I), scroll down to the QUARTER PART OF YELLOW RESIN (Up & Down Arrow Keys), and place that in the in the bottom left quarter.
__large.png)
Press the button at the top, to close the pipe. Zoom out of the close-up.
Look at each of the 4 drawers below the pipes. Click on each drawer, in turn, to see the close-up.
Pull the drawer open. Open your Inventory (I), scroll down to the BAGS OF SAWDUST (Up & Down Arrow Keys), and pour that into the drawer. Push the drawer close, then exit the close-up.
Do this with all 4 drawers.
Look at Pipe 1. The camera pans round to the back of the pipe. Press the button at the top to open the pipe. Open your Inventory (I), scroll down to FUNNEL 01 (Up & Down Arrow Keys), and insert that into the pipe. Press the button at the top to close the pipe again. Exit the close-up.
Look at Pipe 2. The camera pans round to the back of the pipe. Press the button at the top to open the pipe. Open your Inventory (I), scroll down to FUNNEL 02 (Up & Down Arrow Keys), and insert that into the pipe. Press the button at the top to close the pipe again. Exit the close-up.
Look at Pipe 3. The camera pans round to the back of the pipe. Press the button at the top to open the pipe. Open your Inventory (I), scroll down to FUNNEL 03 (Up & Down Arrow Keys), and insert that into the pipe. Press the button at the top to close the pipe again. Exit the close-up.
Look at Pipe 4. The camera pans round to the back of the pipe. Press the button at the top to open the pipe. Open your Inventory (I), scroll down to FUNNEL 04 (Up & Down Arrow Keys), and insert that into the pipe. Press the button at the top to close the pipe again. Exit the close-up.
Make sure both doors on the oven are closed. Click on the pipe on the left of the oven, to get a close-up.
__large.png)
Rotate the handle, so that it is vertical. Exit the close-up 2 times.
You see coloured smoke rising up from the pipes.
Now sit back, and enjoy the final, dramatic cut scene.
The End!
CHAPTER 9: AN AUTOMATON WITH A PLAN
============================================================
CAMPSITE
INTRO
Watch all the cut scenes. Eventually, you, Oscar, tell Kate the story of how you found and rescued her after she was abducted by Cantin.
CAMP
Walk right a few steps, and climb up into the yurt on top of the snow ostrich.
__large.png)
YURT
Look at the floor. You quickly realise that someone has attacked Kate. Leave the yurt.
CAMP
Walk right, and find Kurk. He’s standing next to the (extinguished) campfire.
__large.png)
Talk to Kurk and decide how you want to respond to him. He gives you permission to borrow a Youki. Walk left a few steps, to the snow ostrich pen. Talk to the Youki and decide how you want to respond. Hmm, Youki’s have great tracking skills. Maybe if you had an item belonging to Kate, the Youki could track her. Head left a few steps, until you see the Stadium.
__large.png)
Go through the gate, and enter the Stadium.
ABANDONED STADIUM
GROUND FLOOR
Walk left a few steps, and you’ll an escalator, and graffiti on the wall. Climb up the escalator.
1ST FLOOR
At the top of the escalator, the path is leading in both directions.
__large.png)
Follow the red carpet left.
Go forward a few steps, then take the short path on the left.
__large.png)
Open the door, and enter the Observation Room.
OBSERVATION ROOM
Pick up KATE WALKER’S SCARF from the floor. Look at the smashed glass panel on the Trophy Display cabinet next to the door. Now leave the room.
1ST FLOOR
Follow the red carpet up & left, back to the escalator.
Climb back down the escalator.
GROUND FLOOR
Walk right a few steps, and leave the Stadium.
CAMPSITE
CAMP
Head right a few steps, then down & right a few steps, back to the snow ostrich pen. The Youki is still here waiting for you. Open your Inventory (I), scroll down to KATE WALKER’S SCARF (Up & Down Arrow Keys), and show it to the Youki. Watch the cut scene, as the Youki leads you to the entrance to the subway.
OUTSIDE THE SUBWAY
Try to open the subway doors, but they are blocked from the inside. Go left a few steps, and talk to the Youki again. Watch the short cut scene as he finds a CROWBAR for you. Make your way back to the front door of the subway entrance. Now continue right a few steps, and go round to the right side of the subway entrance. There’s another door here - try to open it, but it’s stuck. Click on the side door, and watch the cut scene as you force the door open. Go through the door, and enter the lift.
LIFT
Press the button near the lift door to ride down to the Subway.
SUBWAY
CONTROL ROOM
Watch the cut scene, as you find Kate Walker. Examine Kate Walker - she’s been drugged, and you can’t wake her.
Head down, past Kate, and on to the door at the end of the Control Room.
PLATFORM
You find yourself on the platform, near Cantin. Climb down the stairs, onto the railway line.
__large.png)
Talk to Cantin and watch the cut scene. Decide how you want to respond to him. Watch another cut scene, as you concoct your plan with the chandelier.
CAMPSITE
CAMP
Watch another cut scene. You tell Kate that your plan was well executed, and that’s the end of the story. She’s disappointed, but she believes you, so she goes to bed. However, you haven’t exactly told her what really happened…
SUBWAY
BALCONY
Walk up a few steps, then climb down the escalator.
CORRIDOR
Climb up the stairs at the top of the screen.
__large.png)
PLATFORM
Follow the red carpet down, and continue along the platform, until you reach the stairs leading up.
__large.png)
Climb up the stairs, back up to the Control Room.
CONTROL ROOM
Walk down to where Kate is lying on the floor. Look at the Control Desk on the right, to see a close-up.
__large.png)
Look at the yellow warning label on the bottom left corner. Try to flip the lever on the left, but it’s rusty, and it doesn’t work. Open your Inventory (I), scroll down to BURETTE OF OIL (Up & Down Arrows), and use that on the base of the lever. Now flip up the lever on the left. This time it works. Watch the cut scene with the chandeliers. Cantin won’t be bothering you any time soon! Walk up a few steps, open the door, and leave the Control Room.
PLATFORM
Walk down the steps leading off the platform, onto the railway line.
Go left a few steps, and look at the unconscious Canting under the chandelier, to see a close-up.
Check on Cantin - he’s still breathing. Look at the duffel bag to zoom in on it.
Take NIC CANTIN’S KEYS from the duffel bag. Zoom out 2 times.
Climb up the stairs, onto the platform on the right. Climb up the longer stairs on the right, leading up to the Control Room.
CONTROL ROOM
Walk down a few steps, to where Kate is lying on the floor. Now open your Inventory (I), scroll down to NIC CANTIN’S KEYS (Up & Down Arrow Keys), and use them on Kate to unlock her shackles. Watch a short cut scene.
BALCONY
You’re on a balcony, at the entrance to the subway. Look at the door to get a close-up.
There’s a huge chain & padlock on the door, preventing it from opening. Open your Inventory (I), scroll down to NIC CANTIN’S KEYS (Up & Down Arrow Keys), and use them on the padlock. Rotate the key to unlock the door. You automatically exit the close-up.
Open the door and leave the Subway.
Watch the cut scene as you rejoin the Youkols. You must always have a plan!
The End!
Contributed by
Freaky Hobbit


