


Tex Murphy: Under a killing moon
TEX MURPHY: UNDER A KILLING MOON
WALKTHROUGH – PART 1
WRITTEN BY FREAKY HOBBIT
*******************************************
~~~~~~~~~~~~~~~~~~~~~~~~~~~~~~~~~~~~~~
DAY 1: CUFFIN UP FLEMM
~~~~~~~~~~~~~~~~~~~~~~~~~~~~~~~~~~~~~~
INTRO
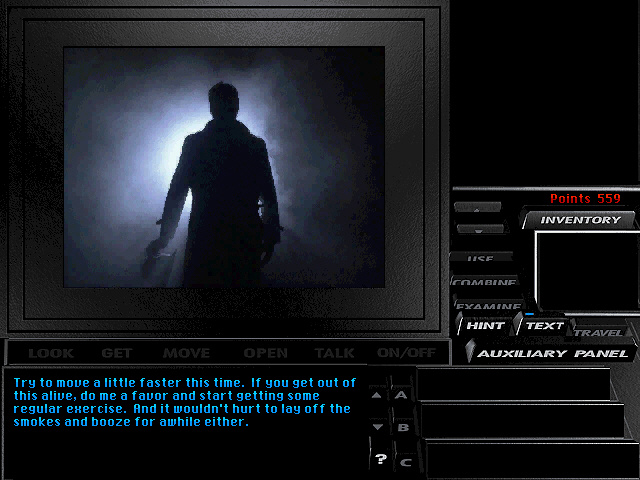
Watch the intro, as Tex Murphy’s old colleague, Mac Malden, comes to deliver a warning – Mac is working on a case, and he heard through the grapevine that there are some very dangerous people after Tex. So he wants Tex to be careful.
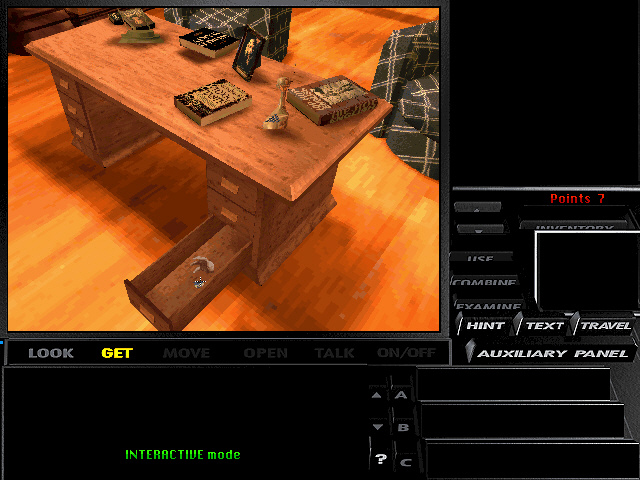
TEX’S OFFICE
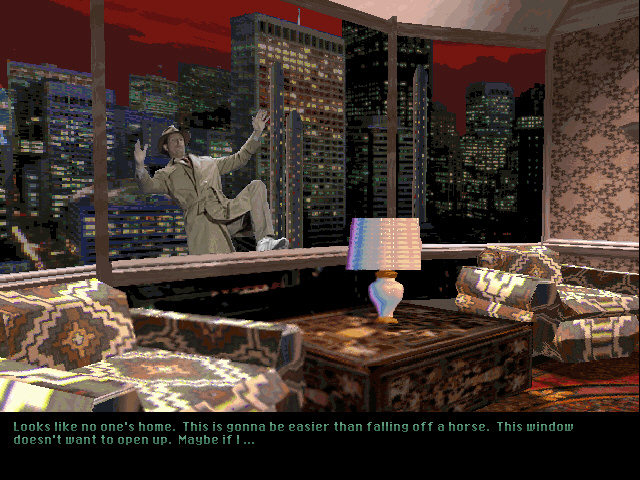
After Mac leaves, look around the office. Look at photo on the desk. Walk round to the back of the desk. Open bottom left drawer and get PEN. Open bottom right drawer and get STAMP. Look at filing cabinet in the back corner, and look at fax machine on top of the filing cabinet. Looks like you need a new fax machine, Tex. Look at Crime Link Computer on the table behind your desk. Look at footprints on the floor. Get GUN from the credenza next to the door, and enjoy the funny cut scene. Get SALES FLYER and get SURGERY GIFT CERTIFICATE – your mail – from behind the door. Look at the MAIL in your Inventory to realise that you now have a SALES FLYER for the Electronics Shop, and a SURGERY GIFT CERTIFICATE. Also look at the CREDIT CARD APPLICATION in your Inventory. Just needs to be signed, stamped and mailed. Okay, combine PEN and CREDIT CARD APPLICATION to get a FILLED-OUT APPLICATION, then use FILLED-OUT APPLICATION with the STAMP to get READY-TO-MAIL APPLICATION. When you’ve finished exploring your office, head through door out to the street.
CHANDLER AVENUE
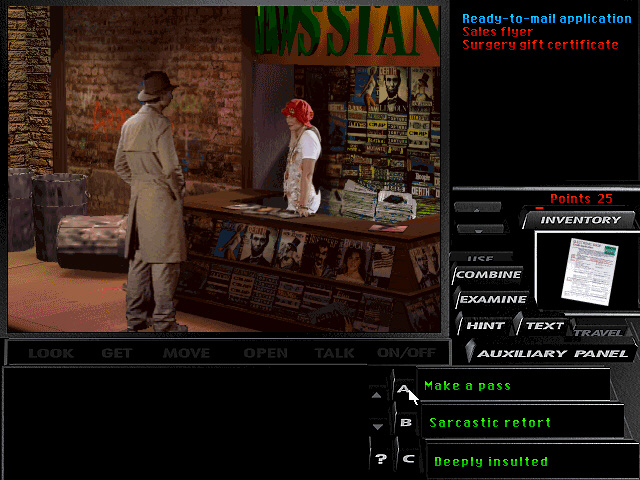
Climb down the fire escape stairs, into Chandler Avenue. Cross the street, and talk to Chelsee Bando at the News Stand. Choose any dialogue options with her, but I suggest you try and be nice to her. She tells you about Rook Garner’s Pawn Shop getting robbed. When you get the chance, Ask About everything. Take note of what she says about the burglar having bright green eyes, and an anchor tattoo on his arm. When you’re ready, End Conversation with her. Now look for the mail box, and post your READY-TO-MAILAPPLICATION. Now enter Rook’s Pawn Shop, which is next to Chelsea’s New Stand.
ROOK’S PAWN SHOP
Talk to Rook, choosing any dialogue options you feel like. When conversation is over, Rook takes you out to the back of his pawn shop to show you where the robbers broke in.
BACK ALLEY
Look at the footprint outside Rook’s back door, and note that it’s a Size 14. Move the rubbish bin next to the back door, and get the KEY that was hidden underneath the bin. Look at GLASS SHARD to the right of the steps, and examine GLASS SHARD to see the red hair. Turn around and face the wire fence. For a bit of fun, look at basketball at corner of the wire fence and the wall, and then get the basketball. Now walk through the wire fence, into the next area of the alley.
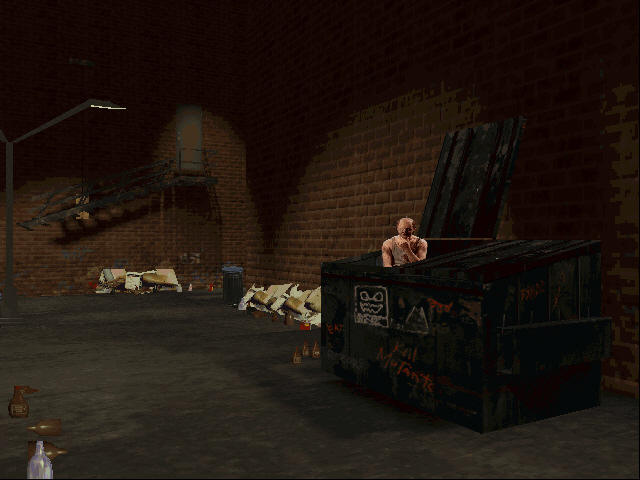
Look at the dumpster, then open the dumpster. There’s evidence that someone’s been living here. Maybe he witnessed Rook’s robbery. Get RADIO that’s sitting next to the dumpster, and examine RADIO to find some BATTERIES. Now look for the wooden fence, and go through the wooden fence, back to Chandler Avenue.
CHANDLER AVENUE
Look at Slice O Heaven Pizza Bar, and enter the Pizza Bar.
SLICE O HEAVEN PIZZA BAR
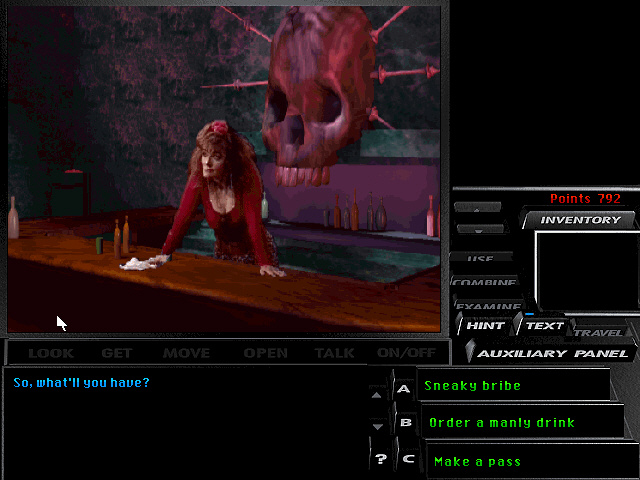
Talk to Francesca, and choose any dialogue options. When you’re able, ask about everything. Poor Francesca is unhappily married to Sal. If you could find evidence of Sal’s adultery, Francesca would be able to divorce him, and finally move on with her life. When the conversation is over, leave the Pizza Bar.
CHANDLER AVENUE
Cross the street, and look at the Brew & Stew. Look at NEWSPAPER on the pavement in front of the Brew & Stew, and get NEWSPAPER. Now examine NEWSPAPER – read the Burglaries Baffle Police article to learn that Lt Mac Malden is leading the investigation. You can also read other articles if you like. When you’re ready, enter the Brew & Stew.
BREW & STEW
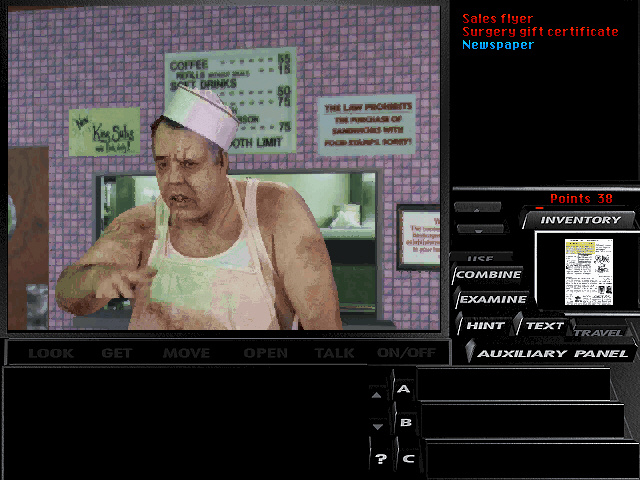
Talk to Louie, using any dialogue options. When you’re able, Ask About everything. When the conversation is over, leave the café.
CHANDLER AVENUE
Go to the other end of the street. Look for the Golden Gate Hotel, and enter it.
GOLDEN GATE HOTEL
Talk to Ardo, using any dialogue options. When you’re able, Ask About everything. Learn that he’s a huge fan of the Inspector Burns Fire Safety Show, and use that to your advantage. When conversation is over, leave the hotel.
CHANDLER AVENUE
Look for the wooden fence near Golden Gate Hotel. Go through the fence, into Coit Tower.
COIT TOWER
There’s nobody here right now, so you automatically leave.
CHANDLER AVENUE
Look for Rusty’s Funhouse. Try to enter it, but it’s locked. Move the doormat, and get KEY TO RUSTY’S. Use KEY TO RUSTY’S in Rusty’s door, then enter the Funhouse.
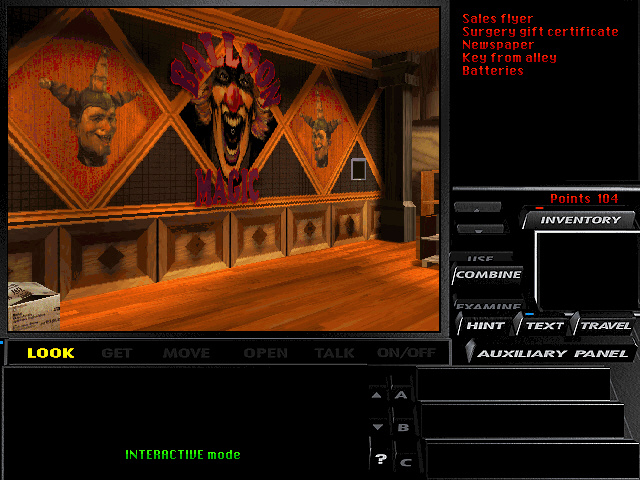
RUSTY’S FUNHOUSE
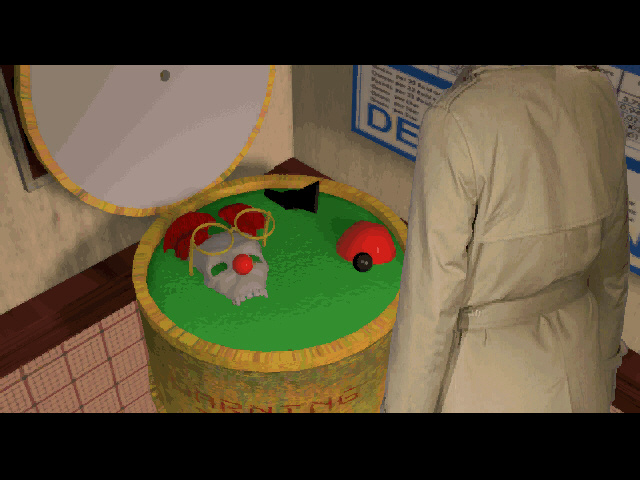
Look around the shop. Get SUCTION DART CROSSBOW from the display shelves. Look at the television screen, and turn it on to see Inspector Burns. Move the cardboard box that’s behind the counter. Now take RUSTY CLOWN DOLL from the box that was underneath. Look at INSPECTOR BURNS MASK on the floor behind the counter, and take the MASK. Take RING TOSS RING from the wall behind the counter. Look carefully a the corner of the back wall, and get KEY TO RUSTY’S BACK ROOM. Look at the Employee’s Only door, and use KEY TO RUSTY’S BACK ROOM in the door to unlock it. Now walk through the door, into the Back Room.
In the Back Room, get BALLOON from the sink. Take SUCTION DART from the wall. Look at the barrel of toxic acid, and open the barrel. Gulp! So THAT’S what happened to Rusty! Leave the Back Room and return to the shop area. Look carefully at the Balloon Magic clown painting on the wall, and notice something in the mouth of the painting. Look at the nozzle in mouth of the Balloon Magic clown painting. Use BALLOON with the nozzle to get HELIUM-FILLED BALLOON. Now when you’re ready, leave the Funhouse.
CHANDLER AVENUE
Look at the Speeder car. This is your car, and you use it to travel around the city. Travel to Police Station.
POLICE STATION
Talk to Mac Maldon, using any dialogue options. When the topic of conversation turns to the Pawn Shop Robberies, Mac tells you that the suspect is a Norm, male, Caucasian, and has AB Negative blood. That’s more clues for you. That’s all the information Mac will give you right now, so leave the Police Station, and return to Chandler Avenue.
CHANDLER AVENUE
Go through the wooden fence next to Rook’s Pawn Shop, so you are in the Back Alley.
BACK ALLEY
Look at the homeless bum in the dumpster. Talk to him using any dialogue options. He refuses to help you until you give him some chocolate. Leave the alley.
CHANDLER AVENUE
Enter the Brew & Stew.
BREW & STEW
Talk to Louie, and Ask About Rusty Clown and Chocolate. Louie gives you a slice of CHOCOLATE PIE. Leave the café.
CHANDLER AVENUE
Head to the Back Alley next to Rook’s Pawn Shop.
BACK ALLEY
Give CHOCOLATE PIE to the homeless bum in the dumpster. Now Ask About everything. Make sure you ask about the burglary, to learn that the robber was about 6’3” or 6’4, and about 300 pounds. When conversation is over, leave the alley.
CHANDLER AVENUE
Make your way back to your office in the top floor of Ritz Hotel.
TEX’S OFFICE
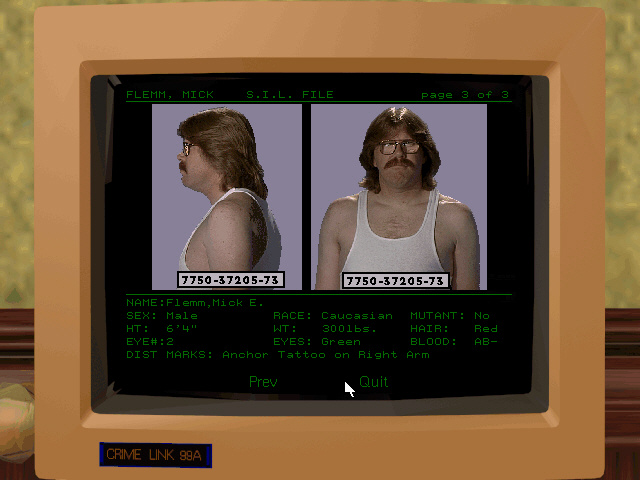
Let’s put together all the clues you have regarding the robbery of Rook’s Pawn Shop. Use the Crime Link Computer on the desk at the back of the office. Now enter the following clues.
– RACE: Caucasian
– SEX: Male
– HEIGHT: 6’0” – 6’4”
– WEIGHT: 281 – 320 lbs
– MUTANT: No
Click on ‘Next’, then enter the following clues.
– HAIR COLOUR: Red
– EYES: Two
– EYE COLOUR: Green
– BLOOD TYPE: AB-
– SHOE SIZE: 14
Again, click on ‘Next’, then enter the following clues.
– DISTINCT MARKS: Leave blank
– TATTOOS: Anchor
– SCARS: Leave blank
– LIMBS: Leave blank
This brings the list of Possible Suspects down to 1. So choose ‘Yes’, you want to View Suspect File. The suspect is Mick Flemm. Read through his criminal record, pressing ‘Next’ when necessary. Wow, he’s got quite the rap sheet! Now quit the Crime Link session. Leave your office, and return to Chandler Avenue.
CHANDLER AVENUE
Talk to Chelsee at the News Stand again. Ask About Rusty Clown and Beek Nariz. She tells you that Beek usually hangs out at Coit Tower. Go there now – it’s at the end of the street.
COIT TOWER
Talk to Beek using any dialogue options. He’s very distinctive, with his long elephant nose. Try to ask him about the robbery of Rook’s Pawnshop, but he won’t tell you anything for nothing. He wants a reward first. Give him SURGERY GIFT CERTIFICATE. Now Ask About everything. When asking about Rusty Clown, you learn about Mick Flemm’s fear of clowns. Hmmm, that’s interesting! When conversation is over, leave Coit Tower and return to Chandler Avenue.
CHANDLER AVENUE
Look for the Acme Warehouse, and enter it.
ACME WAREHOUSE
SAVE YOUR GAME HERE. This is where Mick Flemm operates from. The warehouse is empty right now, but Mick could be back at any moment. You better set a trap for him. Look at crate beneath the sheet of plywood, and open crate to find FIREMAN’S UNIFORM. Take the FIREMAN’S UNIFORM. In your Inventory, combine RUSTY CLOWN DOLL with the BATTERIES to get LIVE RUSTY DOLL. Climb up the stairs, and get KEY FROM WAREHOUSE that’s hanging from the wall. Look up at the ceiling, and see the hook. Attach LIVE RUSTY DOLL to the hook in the ceiling. Climb back down the stairs. Look at power box on the wall, and use KEY FROM WAREHOUSE to unlock it. Pull lever in the power box to activate the pulley hook. This makes it seem like the Rusty Doll is alive. Now hide behind the crate near the power box – Use Ctrl to duck down behind the crate, and ‘E‘ to stand up again afterwards. When Mick Flemm returns, he sees the Rusty Doll coming for him, and flees in terror. Hee hee! Now that Mick Flemm has gone, let’s explore the warehouse. Take FLEMM’S KEYS from the table. Take BRACELET from the table. Look at storage box on the wall, and use FLEMM’S KEYS to unlock the storage box. Take STRONGBOX from inside the storage box. In your Inventory, combine KEY FROM ALLEY with the STRONGBOX to get UNLOCKED STRONGBOX. Now examine UNLOCKED STRONGBOX to find some JADE. Now leave the warehouse.
Watch the cut scene with the Chameleon and a mysterious figure.
~~~~~~~~~~~~~~~~~~~~~~~~~~~~~~~~~~~~~~
DAY 2: COOKED EGGS AND HAMM
~~~~~~~~~~~~~~~~~~~~~~~~~~~~~~~~~~~~~~
TEX’S OFFICE
Watch the cut scene as Tex decides to get a new fax machine. Look at the mail that’s on the floor next to your door. Pick up mail to receive your CREDIT CARD – you can now get into the Electronics Shop. Leave your office.
CHANDLER AVENUE
Look at the Electronics Shop. Use your newly-acquired CREDIT CARD on the door to the shop, and then enter it.
ELECTRONICS SHOP
Talk to Hamm Underwood, using any dialogue options. Look at all the merchandise if you want. Look at the Blue Light Special Box to see the fax machine. Use CREDIT CARD to access the Blue Light Special Box, then take the FAX MACHINE. Now leave the Electronics Shop.
CHANDLER AVENUE
Return to your office.
TEX’S OFFICE
As soon as you return to your office, you hook up your new fax machine. And as soon as you do, you receive a FAX. Take FAX from the fax machine, and examine it in your Inventory. It’s from Countess Renier, who wants to hire you. Yippee! Leave your office.
CHANDLER AVENUE
Use your Speeder car, and travel to Countess’s Mansion.
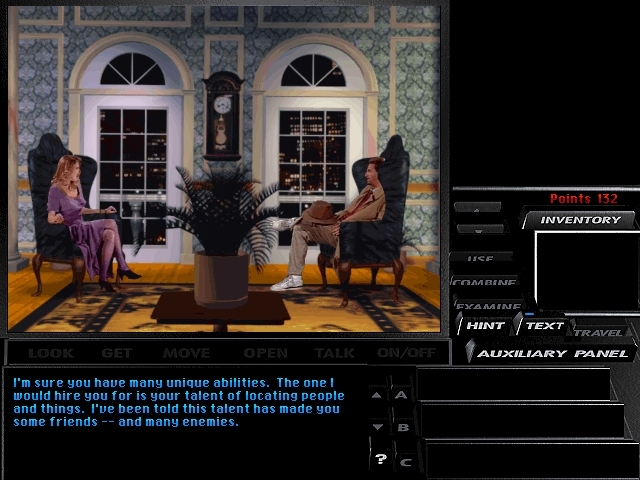
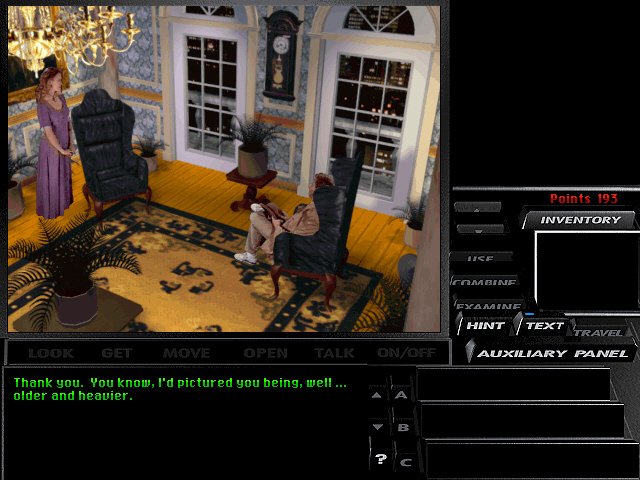
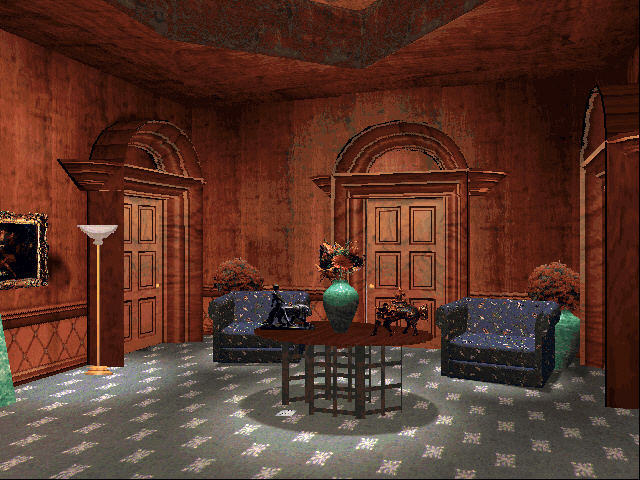
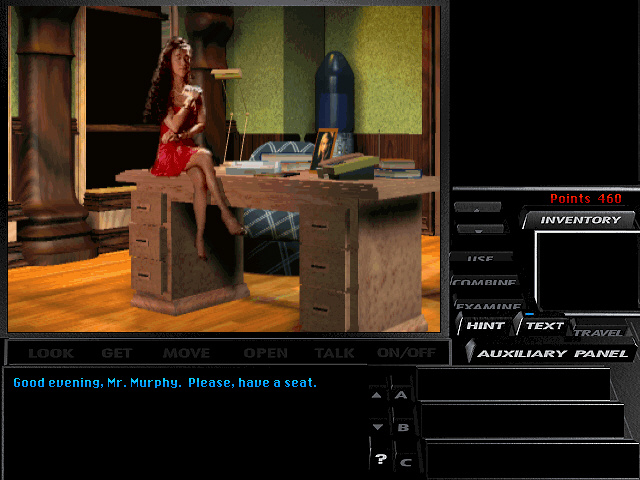
COUNTESS’S MANSION
Watch the cut scene with Countess Renier. She wants you to find a CRYSTAL BIRD STATUETTE – a valuable family heirloom that was stolen from her. You have one week to find it. Then you leave her mansion. Travel to Chandler Avenue.
CHANDLER AVENUE
Talk to Chelsee at the News Stand, using any dialogue options. When you’re able, Ask About Statuette. She gives you a lead – a man known as Franco Franco either has the statuette, or he knows who has it. Ask About Franco Franco. When conversation is over, travel to the Police Station.
POLICE STATION
Mac Malden is in a much better mood now, because apparently Mick Flemm turned himself in and confessed to the Pawn Shop robberies, after you scared him with the clown doll. Talk to Mac, and Ask About everything. When conversation is over, leave the station. Travel to Chandler Avenue.
CHANDLER AVENUE
Enter Rook’s Pawn Shop.
ROOK’S PAWN SHOP
Talk to Rook. He’s a lot friendly, now that you solved his robbery case and returned his stolen bracelet. Ask About everything, including Franco Franco, and Jade. When conversation is over, exit to the Alley behind Rook‘s Pawn Shop.
BACK ALLEY
Walk through the wire fence to the next section of the alley.
Look for the Recycle Bin. Open the bin, and take JEWELRY WEEK trade paper that Rook mentioned. Examine JEWELRY WEEKLY to learn that Franco Franco is looking to acquire pieces of jade. Now return to Chandler Avenue.
CHANDLER AVENUE
Use your Speeder car, and travel to Alhambra Theatre.
ALHAMBRA THEATRE
You’re introduced to Franco Franco himself. Talk to him using any dialogue options. When you’re able, Ask About everything. Give JADE to Franco Franco. He’s very pleased with the Jade Specimen and agrees to answer one question. You have to make this count, Tex. Ask About the mysterious artifact. He tells you that Eddie Ching has the BIRD STATUETTE, then tells you to leave his theatre.
Travel to your office.
TEX’S OFFICE
As soon as you arrive in your office, you’re informed that you have a FAX. Take FAX from the fax machine, and examine it in your Inventory. It’s from Franco Franco. He tells you Eddie Ching’s address, but he doesn’t know which apartment Eddie lives in. Leave your office, and travel to the Police Station.
POLICE STATION
Talk to Mac Malden and ask about Franco Franco, Eddie Ching, and Knickerbocker. You learn that Eddie Ching lives in the top floor of the Knickerbocker apartment building. When conversation is over, leave the Police Station, and return to Chandler Avenue.
CHANDLER AVENUE
Now you want to enter Eddie Ching’s apartment in the Knickerbocker building. However, you’re not prepared yet. Enter the Electronics Shop.
ELECTRONIC SHOP
Talk to Hamm Underwood, and nudge the conversation towards ‘Moonlighting In Security Systems’. Hamm brags about the latest security system he’s just installed (which just happens to be Eddie Ching’s security system), boasting that absolutely no-one could get through it. Hmmm, this is gonna be hard! When conversation is over, look at the Blue Light Special Box. Use your CREDIT CARD to access the Blue Light Special Box, and take the LASER BLADE. Now leave the shop.
CHANDLER AVENUE
Use your Speeder car, and travel to Knickerbocker (Eddie Ching’s apartment).
KNICKERBOCKER (EDDIE CHING’S APARTMENT)
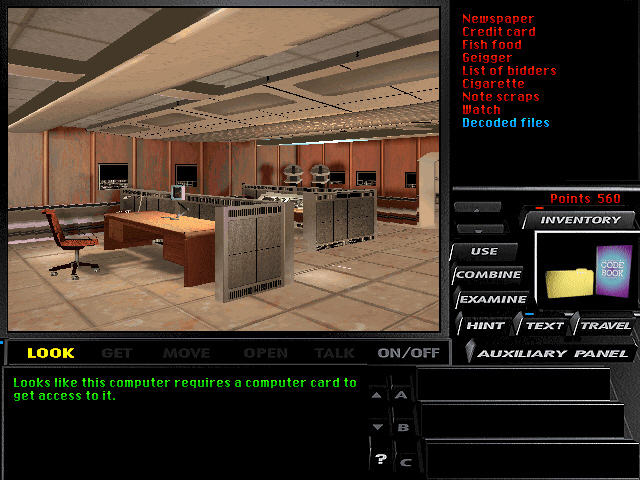
Thanks to your LASERBLADE, you can cut through Eddie’s glass window, and climb straight into her library. SAVE YOUR GAME HERE. Explore the room. Open her wardrobe, and have a look inside. Take GEIGGER TRAP from the wardrobe. Take FISH FOOD from the wardrobe. Look at the bookcase, and notice the BOOK lying on top of the bookcase. Take BOOK, and examine it in your Inventory to find EDDIE CHING’S KEY. Look at the aquarium in the back of the room. Open aquarium, and pour FISH FOOD into the aquarium. Use RING TOSS RING with aquarium to get WATER FILLED RING. Open the door into the Hallway.
In the Hallway, look at the laser nets. There’s a power box at the end of the Hallway, with a button flashing. Maybe if you hit that button, it would turn the laser nets off. In your Inventory, combine SUCTION DART CROSSBOW with the SUCTION DART to get LOADED DART CROSSBOW. Now use LOADED DART CROSSBOW with the power box at the end of the Hallway. Well, it didn’t turn off the laser nets, but it DID open the power box. You can see a lever inside the power box – toss your WATER FILLED RING on to the lever. Bingo! The laser nets are disabled, giving you free reign of the apartment. Walk forward a few steps, and enter through door on the left, into the Study.
Explore the Study. Pick up BIRTHDAY FAX from the floor behind the table. Examine the BIRTHDAY FAX – it’s from Eddie Ching’s mum, wishing a Happy 30th Birthday. Note the date is 101442. Look at geigger in the geigger tank. Isn’t it illegal to own one of these critters? Pick up GEIGGER CHOW that’s on the floor behind the green marble obelisks. In your Inventory, combine GEIGGER CHOW with GEIGGER TRAP to get BAITED GEIGGER TRAP. Now use BAITED GEIGGER TRAP with the geigger tank to acquire the vicious GEIGGER. Now move painting on the wall, and look at the hidden wall-safe. Use the wall-safe, and use the code 101412 (date on the birthday fax is 101442… It‘s a 30th birthday fax, so subtract 30 years) to open the wall-safe. Take LIST OF BIDDERS from the safe. Take SECURITY CARD from the safe. Examine LIST OF BIDDERS and examine SECURITY CARD in your Inventory. Now explore the study a bit more, and take the CAPTURE NOOSE that’s lying against a wall near the chairs. Look at small mirror on the wall next to the CAPTURE NOOSE, and move small mirror to reveal a steel switch lock. Use EDDIE CHING’S KEY in the steel switch lock – you heard something moving in the library. Let’s go and take a look. Return to the Library.
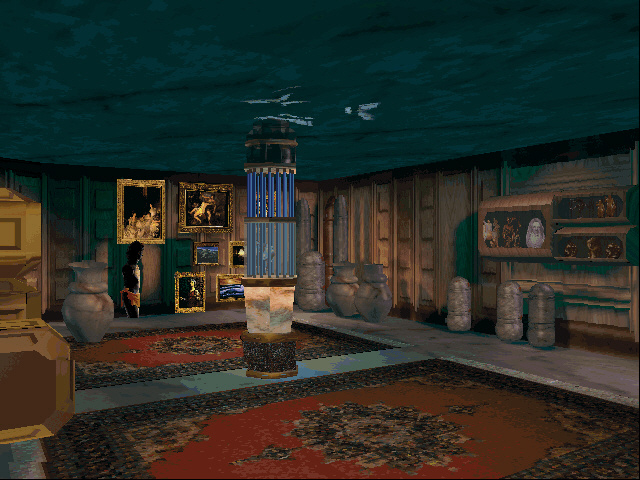
Back in the Library, notice that the bookcase has moved along the wall, revealing a hidden entrance. Walkthrough the hidden entrance, into a secret room.
Explore the secret room. Look at the laser-guarded pedestal in middle of the room. The Countess’s BIRD STATUETTE is in here. Look at the statue of David, and take BANDANA from the statue. Look at the dirty sign on the left side of a display case on the wall. Look at paintings on the wall, and move one of the paintings to reveal a security card slot. Use SECURITY CARD in the security slot to turn the lasers off. Now move one of the crates to slide it over to the BIRD STATUETTE, then use CAPTURE NOOSE on the BIRD STATUETTE to hook it, and gain possession of the valuable family heirloom. Well, that’s enough excitement for one day. Leave Eddie’s apartment, and return to your office.
TEX’S OFFICE
Watch the cut scene as you are attacked by The Chameleon.
~~~~~~~~~~~~~~~~~~~~~~~~~~~~~~~~~~~~~~
DAY 3: COLONEL, FRAN AND ALLEY
~~~~~~~~~~~~~~~~~~~~~~~~~~~~~~~~~~~~~~
TEX’S OFFICE
You wake up in your office, with the dreadful knowledge that someone has stolen the BIRD STATUETTE from you. And after all the trouble you went through to get it! You NEED to find out who took it. And you NEED to get it back. ASAP!!! Leave your office, and go outside.
CHANDLER AVENUE
Go to Slice O Heaven Pizza Bar.
SLICE O HEAVEN PIZZA BAR
Talk to Francesca, using any dialogue options. She witnessed your attack last night, and she’s willing to give you vital information about it… but only if you can find evidence of her husband’s, Sal, latest affair. She gives you everything she has on Sal so far – a coded NOTE FROM FRANCESCA. Examine NOTE FROM FRANCESCA in your Inventory. It’s not much, but that’s all you have to work with, to find Sal’s mistress. When the conversation is over, leave the bar.
CHANDLER AVENUE
Go to Brew & Stew.
BREW & STEW
Talk to Louie, and ask about Sal Lucido. He tells you that there’s a torn-up note from Sal outside in the rubbish bin. Hmm, I wonder what the note says. Let’s go and investigate. Leave the café.
CHANDLER AVENUE
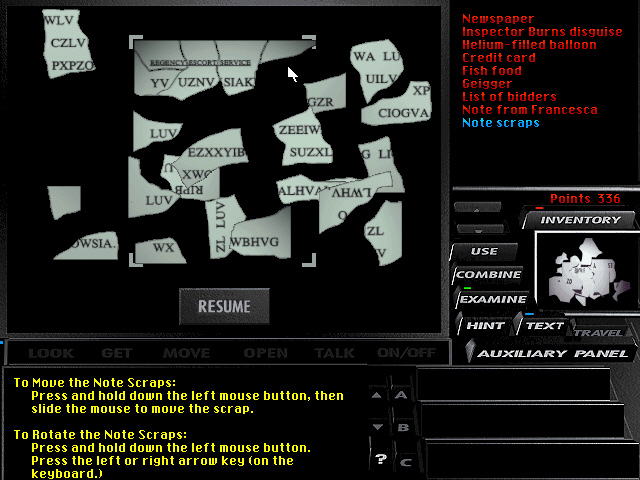
Walk round the corner, and look for the rubbish bin. Open the bin, and take NOTE SCRAPS form the bin. Examine NOTE SCRAPS in your Inventory, and put the note back together. It looks like this.
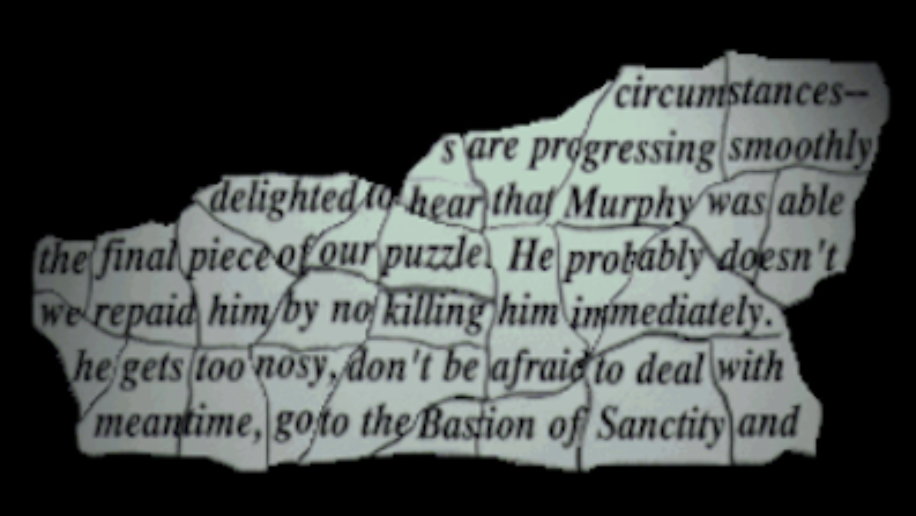
It’s coded. Dang! Luckily, you have the NOTE FROM FRANCESCA. In your Inventory, combine ASSEMBLED NOTE with NOTE FROM FRANCESCA to get ENCODED NOTE. Now examine ENCODED NOTE to decipher the message. It says:
WE HAVE CONFIRMED
YOUR APPOINTMENT
WITH CHASTITY AT
THE SUITE IN THE
GOLDEN GATE HOTEL
AT THE USUAL TIME.
THE PASSWORD TODAY
IS SILICON.
It seems, you have to get into the Golden Gate Hotel, Tex. Okay, walk to other end of the street, and enter Golden Gate Hotel.
GOLDEN GATE HOTEL
Ardo won’t let you in. Apparently someone (Sal, perhaps?) has bribed him to keep you out.
CHANDLER AVENUE
Okay, YOU can’t get in… but maybe Ardo would let someone else in? Someone he greatly admires, perhaps? Someone like Inspector Burns? So if you could convince Ardo that YOU are Inspector Burns, he would let you in. In your Inventory, combine INSPECTOR BURNS MASK with FIREMAN’S UNIFORM to get INSPECTOR BURNS DISGUISE. Now enter the Golden Gate Hotel again.
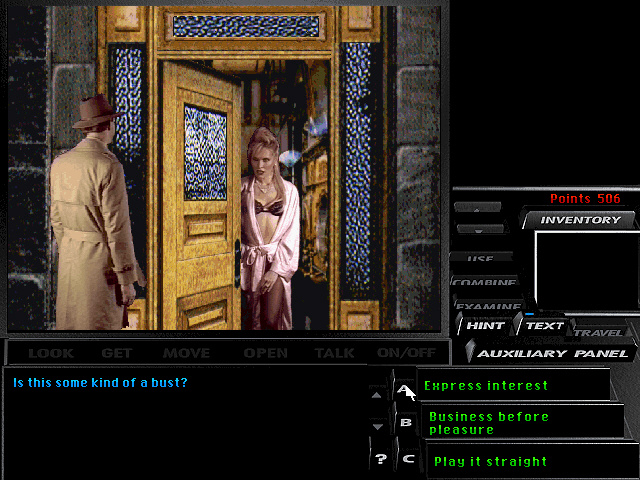
GOLDEN GATE HOTEL
You automatically wear your disguise, as you enter the hotel, including inhaling helium from your balloon to make your voice higher. Talk to Ardo using any dialogue options. Ardo takes you up to the hotel rooms, then leaves you alone to carry out your inspection. You soon find the suite that Sal Lucido used. But the room requires a password. Thankfully, you already know the password – SILICON.
GOLDEN GATE HOTEL – SAL’S SUITE
Okay, you’re looking for evidence of Sal’s affair. Explore the main room, and take GOLD FOIL from the table. Move painting above the table, and look at the Twistee Board Game in the hidden recess. Move yellow painting on the back wall, and look at list of female names. Sal must be a regular here! Walk through French Doors, to the hot tub area.
Look at the hot tub, and look at shorts in the hot tub. Look at vase next to the door – there’s a CORK inside it, but you can’t reach the CORK. Look at towel on floor next to the hot tub, and move the towel to reveal a drain. Look at the drain to see SCREWDRIVER and ROLL OF FILM. Unfortunately, the drain cover is screwed down. Damn! Leave the hot tub, and return to the main room.
Find the Music Room, and enter it.
Look at the piano, and for a bit of fun, start playing the piano. Well, you’re not gonna win any awards for ‘Best Musician Of The Year’, Tex! Take MAGNET deodoriser from wall next to one of the windows. When you’re ready, return to the main room.
Enter bedroom at back of the main room.
Explore the bedroom. Look at the desk, and note that the upper-left drawer is locked. Open the other drawers, and look at the camera and the bible. Open wardrobe and take CHAMPAIGNE GLASS from the shelf. Now leave the bedroom and return to the main room.
Go back to the hot tub area.
Use CHAMPAGNE GLASS with the hot tub, then use FILLED CHAMPAGNE GLASS with the vase next to the door. You automatically repeat this action a few times, until the vase is full, then you take the CHAMPAGNE CORK from the vase. Examine CHAMPAGNE CORK in your Inventory to get WIRE. Make your way back to the bedroom.
In the bedroom, use WIRE on the top-left drawer in the desk to pick the lock. Get SHOELACE from the top-left drawer. In your Inventory, combine SHOELACE with MAGNET to get MAGNET ON A STRING. Return to the hot tub.
Look for the drain next to the hot tub, and use MAGNET ON A STRING with the drain to get SCREWDRIVER. Use SCREW-DRIVER on the drain to unscrew it. Now take ROLL OF FILM from the drain. What could this ROLL OF FILM possibly reveal? If you could develop the pictures, you could find out.
Leave the suite, leave the hotel, and return to Chandler Avenue.
CHANDLER AVENUE
Go to the Electronics Shop.
ELECTRONICS SHOP
Look at the Blue Light Special Box to see FILM DEVELOPING KIT. Just what you need right now. Use your CREDIT CARD with the Blue Light Special Box, then pick up FILM DEVELOPING KIT. Leave the shop.
CHANDLER AVENUE
In your Inventory, combine FILM DEVELOPING KIT with ROLL OF FILM to get INCRIMINATING PHOTOS OF SAL. Examine the INCRIMINATING PHOTOS OF SAL. Go to Slice O Heaven Pizza Bar.
SLICE O HEAVEN PIZZA BAR
Talk to Francesca, and give her INCRIMINATING PHOTOS OF SAL. She’s thrilled with the evidence you found, because it means she can now divorce Sal. Ask About Mugging and Ask About Pug. Leave the bar.
CHANDLER AVENUE
Go to Coit Tower.
COIT TOWER
Talk to Beek using any dialogue option. Ask About Pug. When you’re ready, leave Coit Tower.
CHANDLER AVENUE
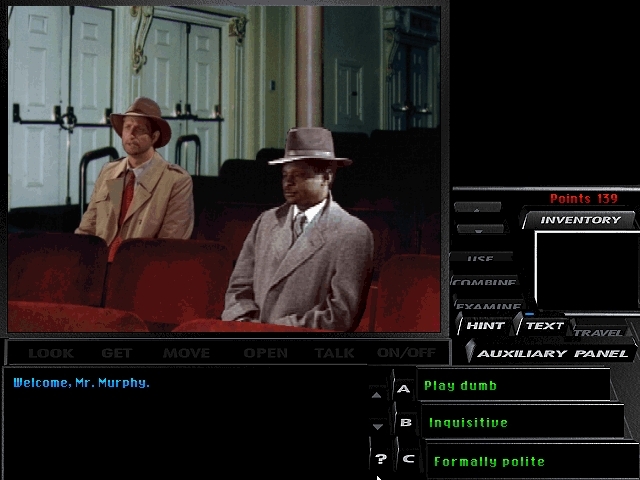
You automatically find Pug outside the Warehouse. Talk to him using any dialogue options. When the conversation is over, travel to the Colonel’s Office.
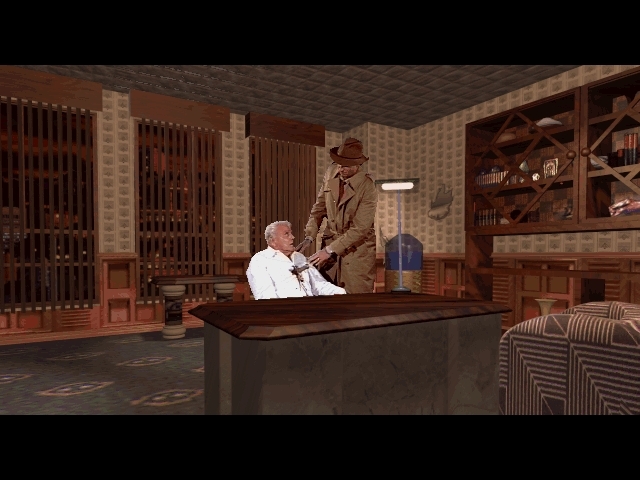
COLONEL’S OFFICE
You haven’t seen the Colonel for 15 years, but you’re shocked to find his apartment trashed, and the Colonel himself with a knife in his chest! He tells you that the Chameleon stabbed him. He also tells you about the Winter Chip, and C.A.P.R.I.C.O.R.N. You rush the Colonel to the hospital, but you have no idea if he will make it or not. Afterwards, you return to your office.
TEX’S OFFICE
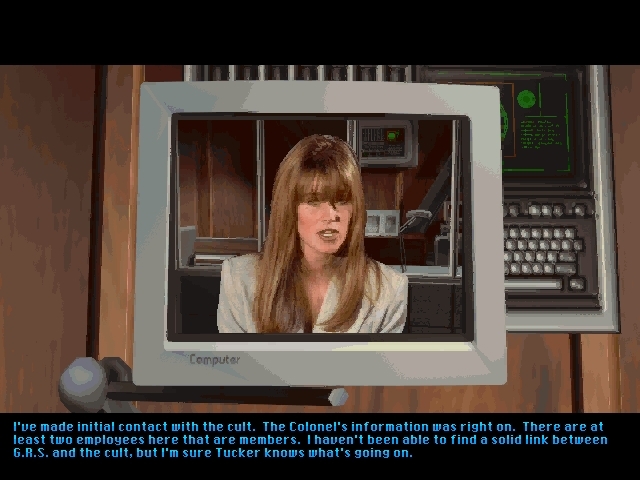
Watch the cut scene with Eddie Ching. Wait… Eddie Ching is a WOMAN!!! Talk with her using any dialogue options.
Watch a cut scene with the Chameleon.


A superb game that excels in just about every area, held back only by one or two notable flaws or a collection of smaller ones that prevent the game from earning full marks.
One of the best detective games available. Revolutionary at its time, and still stands up to the best of today. All adventure fans should own it.


Top Adventure Games
More