Walkthrough for Synnergist
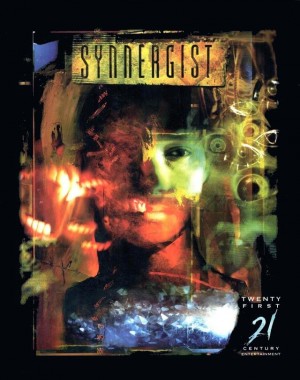
SYNNERGIST
WALKTHROUGH
WRITTEN BY FRODO
********************************************
~~~~~~~~~~~~~~~~~~~~~~~~~~~~~~~~~~~~~
Chapter 1
~~~~~~~~~~~~~~~~~~~~~~~~~~~~~~~~~~~~~
NEW ARHUS CHRONICLE
You begin in your boss’s office. Have a look around the office. Take LETTER KNIFE from file cabinets at the bottom right. Open the door and leave the office.
Talk to Hillary. Talk to Doug. Look at the green filing cabinet, to see the first story you ever wrote for this newspaper. Look at the dartboard to get DARTS. Search your desk to find NOTEPAD. Open the drawer and get ADHESIVE TAPE. Open your WALLET to find MONEY and your DRIVER’S LICENSE. Now leave the building.
You’re now on the pavement, outside the New Arhus office building of the newspaper where you work. Go right to the subway, and then make your way to Ambrose Foundation.
AMBROSE FOUNDATION
Impressive building! A far cry from your own office building! Notice that cardboard box in the lobby - use your LETTER KNIFE to open the box, and take FOOD SHELTER TICKET from inside the box. Talk to the Receptionist, and convince her you have an appointment with Victor Ambrose. When Victor arrives, talk to him about everything.
In Victor’s office, he excuses himself, and leaves you for a while. But you won’t be able to explore his office. As soon as you try to do anything, he will return. Talk to him about everything. When Victor sits down at his desk, leave his office and go back to the lobby. Now leave the building.
SUBWAY
Go back to New Arhus Chronicle.
NEW ARHUS CHRONICLE
Enter the building. Look at the answer machine on your desk, and play back the message from Nick. Now leave the building again.
Outside your office, go right to the subway, and head for Heisenberg Park.
HEISENBERG PARK
Look at the body on the ground. YIKES! IT’S NICK!!! You were just talking to him on the phone an hour ago! A man appears in the bushes on the left. Talk to the man - he gives you NICK’S WALLET. Open NICK’S WALLET to find MATCHBOOK, BLUE DUST PACKET, and (fake) FBI BADGE. Look at the MATCHBOOK to see the address for Last Chance Bar - a place Nick visited recently. Let’s go there.
Leave the park, and head to Last Chance Bar.
LAST CHANCE BAR
There’s a bum rummaging through the bins. Talk to the bum - he’s not very friendly. Walk down the stairs to the bar.
Knock on the wooden door. The bouncer, from behind the door, asks you for the password. Of course, you have no idea what the password is, so you climb back up the stairs.
Talk to the bum again. He won’t help you unless you can give him something. Give him FOOD SHELTER TICKET, and he’ll tell you how to get into the bar. Walk back down the stairs again.
Knock on the wooden door. Tell the bouncer the password and then give him some MONEY. He lets you into the bar now.
Talk to the Darts Player - he‘ll challenge you to a game of darts. Make sure you use your own DARTS when you play. You’ll beat him, and he’ll try to start a fight with you, but you quickly put a stop to that. Jessica approaches you and starts to talk to you. DO NOT go back to her place - she has to remain at the bar after you leave! So leave the bar now (alone). You’ll be mugged outside the bar, and knocked unconscious.
End of Chapter 1.
~~~~~~~~~~~~~~~~~~~~~~~~~~~~~~~~~~~~~
Chapter 2
~~~~~~~~~~~~~~~~~~~~~~~~~~~~~~~~~~~~~
JESSICA’S APARTMENT
Talk to Jessica about everything. When conversation is over, Frankie, her pimp, will burst into the apartment and threaten you. He’ll kill you if you get near him, so the best way to escape is to climb out the window.
After you climb down the fire escape, go right to the subway, and head for New Arhus Chronicle.
NEW ARHUS CHRONICLE
Enter the building.
Open the green filing cabinet, and read the old article about Captain Barberelli. Now leave the building again.
Head right to the subway and go to New Arhus Police Department.
NEW ARHUS POLICE DEPARTMENT
Enter the police station.
Talk to the Desk Sergeant, and ask to speak to Captain Barberelli. The Desk Sergeant tells you to wait in Barberelli’s office. So head left to the office.
Look at the fax machine on Barberelli’s desk, and read the fax about the murder of Officer Karen Rizzo. Notice there is a lot of shredded paper lying around the rubbish bin next to Barberelli’s desk. Use ADHESIVE TAPE on the shredded paper to stick it back together, then pick up TAPED PAPER. Look at the TAPED UP LETTER in your inventory - it’s a note from Barberelli’s mistress. So Barberelli’s, been a naughty boy! Leave the office.
Leave the building.
Go left to the subway, and head over to the murder scene.
MURDER SCENE
Show the fake FBI BADGE you got from Nick’s body, to Officer Estrada. He lets you through, so walk up into the alley.
There is a Forensics Officer dealing with the crime scene - talk to her about everything. After the conversation, leave the alley.
Go left to the subway, and head for the morgue.
MORGUE
Enter the morgue.
Look at the janitor’s cart, and then look at the book (diary) which is on top of the car. Read the diary to learn that he’s lost a photo of his beloved Sandy. Leave the morgue.
Outside, search through the pile of rubbish on the left to find a PHOTOGRAPH. Take the PHOTOGRAPH, and look at it. This must be Sandy. Enter the morgue again.
Give PHOTOGRAPH to the janitor. Talk to the janitor, then after a moment, you can go down the corridor.
Talk to the mortician about everything. When conversation is over, he takes you to see Officer Rizzo’s body. Unfortunately, the state of Officer Rizzo leaves you feeling quite ill, and you have to leave the room.
After you’ve been sick, enter the locker room again.
Oh no! Now the mortician has been brutally murdered! Look at the dead mortician. Look at the open locker - the body inside has been stolen. Take UV GOGGLES from the floor, and then leave the locker room. Unfortunately, you suddenly realise that your muggers stole the KEYS to your apartment.
Go through door on the left that leads to the stairs.
Outside the morgue, go right to the subway, and head back to the New Arhus Chronicle.
NEW ARHUS CHRONICLE
Enter the building.
Look at your desk, and notice the wad of gum under it. Examine the wad of gum, and take the spare APARTMENT KEY. Okay, it’s been a very taxing day for you. You automatically head home to get some rest. Tomorrow will be a fresh start.
~~~~~~~~~~~~~~~~~~~~~~~~~~~~~~~~~~~~~
Chapter 3
~~~~~~~~~~~~~~~~~~~~~~~~~~~~~~~~~~~~~
YOUR APARTMENT
Look at VidPhone on the table, and answer the call. Look at the newspaper on the table. Look at PAGER on the table, and take it. Open drawer under the sink, look in the drawer, and take a PLASTIC BAG. That’s all you can do here for now, so leave your apartment.
Outside your apartment, go down to the subway, then head for the Murder Scene.
MURDER SCENE
The police and the crowd have all gone now. Enter the alley.
Use your UV GOGGLES on anything in the alley, so you’ll wear them. You now see some ORGANIC TISSUE near the wall. Maybe you could get it analyzed? Try to pick it up, but you quickly realise this is not a good idea. You need something to put the ORGANIC TISSUE in. Wear the UV GOGGLES again, and use PLASTIC BAG on the ORGANIC TISSUE. Now at this point, look at your SUBWAY TOKENS to realise you are running low, and you need to buy some more. Go right, back to entrance of the alley.
Go to the subway.
You’re in the subway station now. Use the Ticket Machine to buy some more SUBWAY TOKENS. Now continue left through the turnstile, and onto the train. Head for New Arhus Police Department.
NEW ARHUS POLICE DEPARTMENT
Enter the police station.
Walk up the corridor, into Barberelli’s office.
Barberelli should be in his office now. Talk to him about everything. Steer the conversation to him being unfaithful to his wife. Show him the TAPED UP LETTER you got here earlier, and he’ll grant you access to the Forensics Lab. Leave his office.
Walk right, into the Forensics Lab.
Unfortunately, the Lab is empty, so you can’t get your ORGANIC TISSUE analysed. Use your PEN AND PAD on the door, to write a note for the Forensics Officer. Make sure you stick it to the door with ADHESIVE TAPE so it doesn‘t blow away. Leave the Lab.
Leave the police station.
Go left to the subway, and head back to New Arhus Chronicle.
NEW ARHUS CHRONICLE
Enter the building.
Talk to Dave if you like - he’s looking for something in the filing cabinet. Now use your computer monitor to finish writing the article on Victor Ambrose. But you realise you’re missing some important information. Stand up, and leave the building.
Go right to the subway, and head for the Last Chance Bar.
LAST CHANCE BAR
Search through the rubbish bin, and you find a PAMPHLET that was wrapped around the food ticket you gave to the bum. The PAMPHLET has the information you were looking for, so you can finally finish your article. Since you’re here, climb down steps into the bar.
Talk to the drunk woman sitting at the bar, and ask if she‘s seen a friend of yours. She wants another drink. Talk to the bartender about everything. When you get the chance, ask for a beer… unopened! He gives you a BOTTLE OF BEER. Now leave the bar.
Go down to the subway.
Return to New Arhus Chronicle.
NEW ARHUS CHRONICLE
Enter the building.
Use your monitor, to finish you article on Victor Ambrose. Stand up - you automatically take the finished article to your boss. But being the not-so-nice guy that he is… he doesn’t appreciate all the hard work you poured into this article! Leave the building. Oh - you get a page message from Jim and the Forensics Lab, saying he has returned. That’s good to know.
Go right to the subway, and head for the New Arhus Police Department.
NEW ARHUS POLICE DEPARTMENT
Enter the building.
Go right to the Forensics Lab.
True to his word, Jim is here. Talk to him about everything. When conversation is over, leave the lab.
You get a page message from Jessica - she’s got reservations for the Skyline Restaurant. Leave the building.
Go left to the subway and head for the Skyline Revolving Restaurant.
REVOLVING RESTAURANT
Enter the restaurant.
This restaurant is amazing! Look at Reservations Computer on the right, and use the computer. Ask about the skyline, and read the information. Now ask about reservations, and tell it you have a reservation. Use your DRIVER’S LICENSE in card slot on the right. Now take your DRIVER’S LICENSE back, and back out of the computer close-up. Enter the elevator and go up to the eating deck.
Talk to the Matre’D, and he’ll take you to your table. Watch the cutscene. It starts off well, but soon goes down-hill. After you call your boss from the lobby, you witness a shooting. Yikes! The power has been cut off, and you can’t get back in the elevator to get back to your table. Enter Security Room on the right.
Untie the guard. She plays back the security tape to see what happened - it looks bad! You want to check on Jessica, but the guard won’t let you leave the room. When the police arrive, they take you in for questioning, and keep you there all day.
~~~~~~~~~~~~~~~~~~~~~~~~~~~~~~~~~~~~~
Chapter 4
~~~~~~~~~~~~~~~~~~~~~~~~~~~~~~~~~~~~~
NEW ARHUS POLICE DEPARTMENT
Jim is standing in the lobby. Talk to him, then follow him to the Forensics Lab.
The report on that tissue sample is ready. Take the REPORT from next to the sink on the left, near Jim, and read through it. Read monitor at the bottom-right, to get information about what happened at the Revolving Restaurant yesterday. Look at shelves of bottles at the bottom-right, and get a BOTTLE OF ACID. Talk to Jim about everything. Now leave the lab.
Leave the police station.
An angry mob has formed outside the station. Talk to the protesters to learn that they are protesting against the recent spate of murders, and want the police to catch the killer. Talk to the police officer to realise how understaffed they are. Go left to the subway, and head for Primax Pharmaceuticals.
PRIMAX PHARMACEUTICALS
Talk to Eddie the repairman. He asks you to get his TOOLKIT from the van. Open the vat, look at the repairman’s suit that’s hanging in there, and search the suit to get MAINTANENCE ID. Now take the TOOLBOX and give it to Eddie. Now open the glass door and try to enter the building. The security guard stops you - show her the MAINTANENCE ID you got from the repair van, and she lets you through.
Inside Mr Felden’s office, take the spool of wire on the floor to acquire some WIRECUTTERS. Look at the fish tank, and tap the fish tank - it’s a hologram. Look at his desk and read the memo. Now look at the small pyramid sitting on the desk. Open the pyramid and push the red button. This turns off the holographic fish tank, revealing a hidden safe. Look at the safe - you need to enter the correct number-code in order to open it. Well, the code is ‘FELDON’, as it would be entered on a mobile phone. So press digits 3, 3, 5, 3, 3, 6. You hear a loud buzzing noise, and the safe clicks. Pull the handle to open the safe. Now look inside the safe and examine all the items. Read the RED BOOK, then open the ENVELOPE to read the letter. JoeTV (he’s famous for being on TV) will appear behind you. Talk to JoeTV about everything. He has a lot of useful information for you. When conversation is over, leave the office.
As you leave, you receive a page message from Jessica. It seems Frankie has gone crazy, and she’s really scared he’ll hurt her. Go to subway on the right, and head for Jessica’s Apartment.
JESSICA’S APARTMENT
Jessica is waiting for you outside her apartment building. Talk to her about everything, then enter the apartment.
Frankie is lying here in the bed, but he’s already decomposed! Poor Jessica is terrified. You send her to see Captain Barberelli at the police station. When you’re ready, leave the apartment.
Go right to the subway then head for Noxytech Imports.
NOXYTECH IMPORTS
Have a look around. Don’t try to enter the door, or you will be caught. Look at alarm box on the left, next to the door, and try to disarm the alarm. Use HYDROCHLORIC ACID on the alarm box to dissolve the casing. Look at the 4 wires inside, then use WIRECUTTERS on the wires, and cut them in this order:
Red wire
Yellow wire
Green wire
Blue wire
Exit the close-up.
Now, look at the bum here. He’s sober, and he will turn you in unless you can distract him. Give BOTTLE OF BEER to the bum then enter building on the left.
This is a large warehouse. Look at round biotech container on the right. Open it, and take a HYPODERMIC INJECTOR. Now talk to Dr Steinman about everything. It seems Victor Ambrose is not such a nice guy after all. When conversation is over, leave the warehouse.
Go up to the subway then head for the Psychiatric Hospital.
PSYCHIATRIC HOSPITAL
Talk to Dr Bouker - he’s completely out of it. He sees the HYPERDERMIC INJECTOR in your pocket, grabs it, injects himself, then collapses. Take his LAB COAT. In your Inventory, search the lab coat to find KEYS and a DIARY. Read the DIARY. Use KEYS to unlock basement entrance on the right, then enter down into the basement.
Look at the Security Panel on the right, and open the Security Panel. Look at the Security Panel to get a close-up, and enter the Reference Number you saw on the page edge in Dr Bouker’s DIARY - 313, then right-click on ENTER. You may have to press the Clear button to clear any previous attempts at the code. When done correctly, a door will open. Climb down the newly-revealed staircase.
MUTANT LABS
You’re hiding in the bottom-right corner, in a room full of scientists. You need to blend in. Wear the LAB COAT to disguise yourself, then take the TRANQUILIZER GUN, which is next to the books on your left. Now walk up through the sliding doors at top of the screen.
Look at the laser beams and the examination table and look at JoeTV on the examination table - this can’t be good! Look at the potted tree, then take the FLOWERPOT. There is a red security box at entrance to the room - use LETTER KNIFE to pry off the cover of the security box, then use MATCHBOOK on the security box to melt the plastic tubes inside. You’ve managed to disarm the security system. Now look at puddle on the ground and use the FLOWERPOT on the puddle to collect water that is leaking from the ceiling. Pick up the (full of water) FLOWERPOT again, and throw it at control panel on the left. This short-circuit’s the laser beams around the examination table. Look at JoeTV on the examination table - he’s still restrained, so use WIRE CUTTERS to free him.
~~~~~~~~~~~~~~~~~~~~~~~~~~~~~~~~~~~~~
Chapter 5
~~~~~~~~~~~~~~~~~~~~~~~~~~~~~~~~~~~~~
SIDE ENTRANCE
You’re at the side-entrance of the secret Mutant Lab, which is actually a fallout shelter. Look at doorway to see a CROWBAR, then use doorway to pick up the CROWBAR. Dave will climb out of his van now, so talk to him about everything. He’ll take you to the Revolving Restaurant.
REVOLVING RESTAURANT
Take ROCK from top of the stairs then open the door and enter the restaurant.
Enter Security Room on the right.
Look at the large monitor, and then view the display. You witness Victor in a ‘Business’ meeting, which ends in the murder of his colleagues. Look at Control Panel below the row of monitors, and use your CROWBAR on the Control Panel to pry off the cover. Use WIRE CUTTERS on the Control Panel to cut the wires, then use LAB COAT on the Control Panel to pull out the WIRE. The LAB COAT acts as insulation so you don’t get electrocuted. Leave the Security Room.
Back in the Lobby, use the small Reservations Computer (next to the elevator). Look at the gadget, and use STONE to smash the gadget. Now use WIRE from the Security Room on the gadget to hotwire it, and use ADHESIVE TAPE to secure it to the contact. Now exit the close-up.
Try to leave the building by the front door. The elevator doors will now open so enter the elevator and head up to the eating deck.
This is where Victor’s ‘Business’ meeting took place. Use CROWBAR on the podium to detach it from the floor, then slide podium closer to the archway. Climb up onto the archway. Look carefully at the ceiling, and find the hatchway in between the chandeliers. Try to open the hatch, but it has no power. Use your UV GOGGLES on the hatch to give it the power supply. That still doesn’t work, because you need to find something to connect the UV GOGGLES to the hatch. Climb down from the archway, and go back down to the lobby.
Use CROWBAR with the elevator to prop the doors open. Now use the Reservations Computer again, and use the gadget to take back the WIRE. Take the elevator back up to the eating deck.
Climb up onto the archway. Use UV GOOGLES with the hatchway, open the hatchway, and climb up onto the roof.
On the roof, use tranquiliser GUN to shoot the two goons. Use WIRE CUTTERS on the emitters to disconnect the power supply. Look at the cardboard box and get a SCREWDRIVER from the box. Climb down the central hub.
Look at the grill, and try and remove the grill, but the screws are keeping it in place. Unscrew all four screws with the SCREWDRIVER and remove the grill.
Now sit back and watch the final cutscene as you confront Victor Ambrose and save the world.
You’re a hero, Tim Machin!
I hope you found this Walkthrough helpful.
Please Note, if you reproduce this Walkthrough, it must remain intact and unchanged, including the credit to me, Frodo, as the author.


_capsule_fog__medium.png)
