


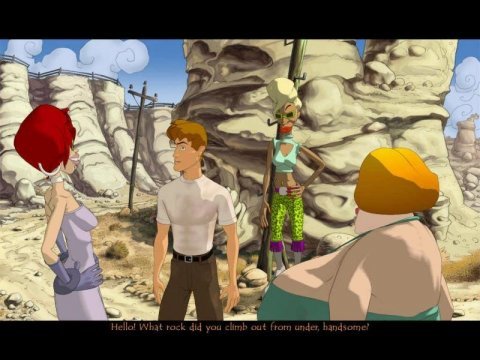
Runaway: A Road Adventure
Runaway: A Road Adventure
iPad
iPhone
PC
By: Pendulo Studios
CaliMonk
Senior Content Writer
Updated on
===============================================================================

                               FAQ/Walkthrough for
                            RUNAWAY: A ROAD ADVENTURE

===============================================================================


GUIDE INFORMATION
-----------------

Author:   Tom Hayes
E-mail:   thayesguides(at)gmail(dot)com
System:   PC
Updated:  19th June, 2008
Version:  1.1


CONTENTS
--------

1. Introduction
2. Walkthrough
     2.1. Chapter 1
     2.2. Chapter 2
     2.3. Chapter 3
     2.4. Chapter 4
     2.5. Chapter 5
     2.6. Chapter 6
3. Item List
     3.1. Chapter 1
     3.2. Chapter 2
     3.3. Chapter 3
     3.4. Chapter 4
     3.5. Chapter 5
     3.6. Chapter 6
4. Copyright Information


VERSION HISTORY
---------------

1.1:  19th June, 2008     (Format update)
1.0:  21st January, 2007  (First version)


===============================================================================

1.                                Introduction

===============================================================================


On the way to California, college student Brian Basco rescues a dancer named
Gina who has witnessed a mafia murder. He takes her to a hospital to recover,
but after a while he realises that two thugs from the mafia are following the
girl and want to kill him as well. After narrowly escaping the hospital, Brian
and Gina escape to the desert to try and lose the trail of the thugs. Runaway
is a classic 2D adventure game made at a time when 3D adventures were becoming
more popular. The graphics work really well and the environments are extremely
detailed. Though none of the characters are particularly memorable, the plot
drives along nicely and the puzzles remains fun until the end of the game.


===============================================================================

2.                                Walkthrough

===============================================================================


-------------------------------------------------------------------------------
2.1.                   Chapter 1 - Wake Me Before Dying
-------------------------------------------------------------------------------


The game starts in the hospital bedroom. Use the door at the right side of the
bed to enter the bathroom. Open the wastebasket at the left side of the sink to
get a marker pen. Get the bottle of alcohol on the shelf below the mirror. Exit
the bathroom. Look at the map on the bathroom door to see a hospital storeroom.
Walk to the left side of the room and go out the window. Brian will refuse to
go out the window unless he has looked at the map on the bathroom door first.

Walk to the left side of the room and get the pillows at the side of the bottom
shelf, a syringe from the box of syringes on top of the box of medicine on the
second shelf and the spray bottle on the third shelf. Get the piece of paper
from the file cabinet, the book on top of the file cabinet and the head from
the human body. Go out the window to return to the hospital bedroom.

Get Gina's bag on top of the locker, the sheet on the left bed and the glass
and package of pills on the table at the left side of Gina. Open the inventory
and combine the syringe with the bottle of alcohol. Combine the alcohol-filled
syringe with the marker pen. Combine the alcohol-filled marker pen with the
blank medical chart to make the fake medical chart. Look at Gina's bag twice to
find a matchbox and a wig. Combine the wig with the head. Exit the inventory.

Use the sheet on the left bed. Brian will arrange the bed to make it look like
someone is sleeping in it. Use the fake medical chart with Gina's medical chart
and then use Gina's medical chart with the chart at the bottom of the left bed.
Enter the bathroom. The thugs enter the bedroom and shoot the dummy in the left
bed. Brian now needs to find a way of getting Gina out of the hospital. Look at
the vademecum in the inventory to discover that Gina can be woken up by a cold
shower. Use the flammable spray can on the fire sprinkler on the ceiling.


-------------------------------------------------------------------------------
2.2.                  Chapter 2 - The Mysterious Crucifix
-------------------------------------------------------------------------------


Say "I'll just let you work." to end the conversation with Susan. Get the
strange brush on the shelf near the tank and the colorless varnish from the
briefcase. Use the crucifix on the shelf at the left side of the room to swap
it for the strange Mayan object. Exit the room. Go downstairs and talk to the
janitor, Willy. Say "I don't want to take up any more of your time, Willy. See
you later!". Willy will walk upstairs to the analysis laboratory door to enter
a code on the panel. Walk east to the Mayan exhibition room and then return to
the hall to see that Willy has returned. Walk upstairs and use the colorless
varnish on the panel that Willy used. Use the telephone on the wall and Willy
will enter the analysis laboratory, leaving his fingerprints on the panel.

Enter the restoration laboratory and then return to the hall. The fingerprints
are on the panel but we need a way to see them. Use the talcum powder brush on
the panel. Enter the combination 8137 and then press enter on the panel to open
the door to the restoration laboratory. Look at the glass display case to see
that it is a thermal chamber holding a Mayan mask. Try to open the chamber and
then use the button. Select any option to be told that access has been denied.
Get the golden object on the desk below the fire extinguisher. Brian finds a
note that explains that the golden object is an Aztec key. Get the ladle at the
left side of the tank at the right side of the room. Exit the room.

Go through the left door to enter Clive's office. Get the pair of books on the
desk and then use the strange key on the crack to open a secret compartment.
Get the device. Use the strange key on the crack to close the compartment and
then exit the room. Enter the restoration laboratory and use the voice recorder
on Susan to record her saying her name. Exit the room and enter the analysis
laboratory. Use the voice recorder on the thermal chamber to discover that the
battery in the voice recorder has run out of power. Combine the battery with
the ladle and then use the ladle with battery on the tank at the right side of
the room. Combine the frozen battery with the voice recorder and use the voice
recorder on the thermal chamber. Get the Mayan mask and then exit the room.

Enter the restoration laboratory. Combine the strange Mayan object with the
Mayan mask to get the ruby. Use the ruby on the laser to strengthen the beam.
After Susan breaks the mask when she attempts to restore it, she tells Brian
that she wants some coffee. Exit the room and walk left. Use the coffee machine
to find that it is out of coffee. Walk downstairs and talk to Willy. Say "I
noticed the coffee machine upstairs is out of coffee...". Say "I don't want to
take up any more of your time, Willy! See you later!". Walk east to the Mayan
exhibition and look at the Mayan objects to get the bowl full of coffee beans.
Enter the hall and show the bowl full of coffee beans to Willy. He says that he
needs ground coffee. Walk upstairs and enter the restoration laboratory.

Use the bowl full of coffee beans on the electric lathe at the left side of the
table. Exit the room and walk downstairs to give the bowl full of ground coffee
beans to Willy. He says that he wants the coffee to be in the package of coffee
that he normally buys. Get the package of cofee from the wastebasket below the
fire extinguisher. Combine the bowl full of coffee beans with the package of
coffee. Walk downstairs and show the package of coffee to Willy. Use the coffee
machine and then enter the restoration laboratory to give the cup of coffee to
Susan. Exit the room and enter the analysis laboratory to complete the chapter.


-------------------------------------------------------------------------------
2.3.                     Chapter 3 - The Great Escape
-------------------------------------------------------------------------------


THUGS' CABIN
------------

Get the bellows near the safe, the bottle on the shelf near the telephone, the
crowbar and the rag at the right side of the shelves and the round piece of
wood at the bottom-right corner of the shelves. Combine the bottle of cleanser
with the chamois and then use the wet chamois on the small window. Open the
freezer lid and then unplug the freezer to melt all of the ice. Open the drain
of the freezer and all of the water will pour out. Push the freezer to reveal a
trapdoor. Use the crowbar on the padlock. Open the trapdoor and exit the cabin.
Return to the thugs' cabin and get the bucket below the chair. Exit the area.


DRAG QUEEN BUS
--------------

Search in the trunk to find a basketball. Enter the bus and get the lipstick
from the right-hand shelf, the sunglasses below the right-hand shelf and the
item under the bottom bed to get the handheld vacuum cleaner. Walk to the back
of the bus and get the needle and thread on the stool with the boots on it.
Talk to Carla and say "You look exhausted...". Say "I just happen to have a bit
of heartburn. You wouldn't let me try one of those pills you take, would you?".
She says that she dropped her last pill down the grating. Say "Speaking of
which...". Say "I'll let you get some rest, Carla. See ya'!". Use the handheld
vacuum cleaner on the grating to get the pill. Exit the bus. Exit the area.


OIL WELL
--------

Use the sunglasses on the puddle of oil to tint them. Exit the area.


HANGAR
------

Try to open the barn doors to walk to the window in the barn. Use the pill on
the can. Brian will say that the man needs to be distracted. Exit the area.


DRAG QUEEN BUS
--------------

Combine the basketball with the needle and thread and then combine the bellows
with the basketball. Switch the tinted sunglasses with Mariola's sunglasses.
Get the tanning bottle. Throw the basketball to Lula to go to the hangar.


HANGAR
------

While Lula is distracting Rocko, use the pill on the can. Use the crowbar on
the motorcycle and get the foot rest that falls off. Get the bottle. Rocko says
that the ants are attracted to the peanut butter. Exit the area.


AIRPLANE GRAVEYARD
------------------

Get the bullet belt near the gun and the helmet on the wing. Exit the area.


OLD ABANDONED TRAIN CAR
-----------------------

Enter the train car and get a screw from the bucket. Combine the coat rack peg
with the screw to make the makeshift corkscrew. Use the crowbar on the barrels
to get the package of shelled peanuts. Use the makeshift corkscrew on the XXX
barrel. Brian says that he needs something to catch the gunpowder. Use the
bucket on the XXX barrel and use the makeshift corkscrew on the XXX barrel
to fill it with gunpowder. Get the bucket. Exit the train car. Exit the area.


DRAG QUEEN BUS
--------------

Enter the bus and combine the motorcycle foot rest with the axle that is just
down from the grating. Turn the makeshift crank to close the door. Look at the
pocket on the door to get the refrigerator key. Go to the back of the bus and
use the refrigerator key on the refrigerator to get the tub of butter. Return
to the front of the bus and use the crank again to open the door. Combine the
bucket of gunpowder with the lipstick to make the makeshift bullet. Get the
pile of lipstick from the right-hand shelf. Exit the bus. Exit the area.


THUGS' CABIN
------------

Enter the cabin through the trapdoor exit just left of the tires. Combine the
tub of butter and the package of shelled peanuts with the World War II helmet.
Use the World War II helmet on the freezer. Exit the cabin. Exit the area.


OLD ABANDONED TRAIN CAR
-----------------------

Use the World War II helmet on the shed. Get the explosives and exit the area.


AIRPLANE GRAVEYARD
------------------

Combine the bucket of gunpowder with the pile of lipstick. Combine the bullet
belt with the pile of makeshift bullets. Try to use the machine gun to find
that it is not working any longer because it has rusted. Use the tanning oil on
the machine gun and then use the bullet belt on the machine gun. Exit the area.


OIL WELL
--------

Use the dynamite and detonation equipment on the well to complete the chapter.


-------------------------------------------------------------------------------
2.4.            Chapter 4 - Close Encounters of the Fourth Kind
-------------------------------------------------------------------------------


DOUGLASVILLE
------------

Brian enters the hotel to talk to Sushi. Say "So, do you think that I could get
to the Hopi village by going through the mine?". Say "I thought you might have
an old map of the mine.". She says that there might be a map in the town bank.
Say "Well, forget about the mine for a minute.". Say "I'm gonna continue on my
search." to exit the hotel. Enter the saloon and get the flower pot below the
stairs. Look in the small room at the right side of the stairs to find pruning
shears. Walk upstairs to talk to Saturn. Say "By the way...". Say "I'll let you
get back to work, Saturn. Au revoir!". Push the lever on the wood and metal
device to send the bucket of paint flying into the bank. Exit the saloon.

Walk to the street and look at the wagon at the side of the sheriff's office.
Use the pruning shears on the wagon to get the strap. Enter the sheriff's
office and get the firewood at the right side of the cell. Exit the sheriff's
office and enter the bank. Get something from the desk near the bucket of paint
to get the bank stamp. Look at the shelves near the cash register and get the
metal object below the shelves to get the ancient stapler. Exit the bank and
leave town. Select the unknown place at the bottom-right corner of the map.


MAMA DORITA'S HOUSE
-------------------

Get the vessel at the left side of the ladder. Walk away from the house and get
the stone with the hole in it at the left side of the well. Exit the area.


ABANDONED MINE
--------------

Get the oil can. Select the unknown place at the top-right corner of the map.


CRATER
------

Brian walks down to the ledge to talk to Joshua. Say "Something you said when
we first met...". Say "What is the communication machine exactly?". Say "Why
did you tell me to help you make it run? Is it broken?". Say "How can I help
you make the communication machine work?". Say "Okay then, let's move on to a
new topic...". Say "Forget about it. It doesn't matter.". Say "Well, I'll let
you get back to work. We can talk later.". Use the strap on the motorcycle to
find that the ends of the strap have to be joined together. Combine the ancient
stapler with the strap and then use the mended strap on the motorcycle. Exit
the crater and then return to it to find that the machine is still not working.
Joshua says that he needs a number ten wrench. Exit the area.


DOUGLASVILLE
------------

Enter the saloon and go upstairs to talk to Saturn. Say "You see, "mon ami",
there's something I wanted to ask you...". Say "Could you lend me a number ten
wrench?". Say "Getting back to what we were talking about...". Say "I'll let
you get back to work, Saturn. Au revoir!". Try to get the number ten wrench
from the tool board to find out that the wrench is missing. Saturn throws the
wrench to Brian but it misses and goes out the window. Exit the saloon to see
that the wrench has fallen into the trough. Enter the saloon and go upstairs.
Walk onto the balcony and throw the flower pot at the street. Exit the saloon
again to get the wrench. Walk into the street and then exit the area.


CRATER
------

Give the wrench to Joshua. Exit the crater and return to it to see that the
strap is on the motorcycle. Joshua says that he needs gasoline. Exit the area.


DOUGLASVILLE
------------

Enter the saloon and go upstairs to talk to Saturn. Say "You see, "mon ami",
there's something I wanted to ask you...". Say "Can I take that tank you've got
over there? It's filled with gasoline, isn't it?". He wants a piece of art in
exchange for the tank. Say "I'll let you get back to work, Saturn. Au revoir!".
Walk onto the balcony and get the object on the floor near the door to get the
sanding block. Return to the saloon and give the stone to Saturn. He says that
it is not polished enough. Combine the sanding block with the stone and then
give the polished stone to Saturn. He says that something is still missing.

Combine the piece of amber with the polished stone and then give the stone of
light to Saturn to get the bottle, container of gasoline and measuring tubes.
Use the oil can on the water machine. Brian says that he should ask Saturn
first. Talk to Saturn and say "You see, "mon ami", there's something I wanted
to ask you...". Say "Can I take a bit of water from the machine?". Say "Getting
back to what we were talking about...". Say "I'll let you get back to work,
Saturn. Au revoir!". Use the oil can on the water machine.

Combine the oil can with the one-liter bottle to fill it. Combine the container
of concentrated gas with the 50-C.C. measuring tube to fill it. Combine the
50-C.C. measuring tube holding 50 C.C. with the 30-C.C. measuring tube. Combine
the 30-C.C. measuring tube holding 30 C.C. with the container of concentrated
gas. Combine the 50-C.C. measuring tube holding 20 C.C. with the 30-C.C.
measuring tube. Combine the container of concentrated gas with the 50-C.C.
measuring tube. Combine the 50-C.C. measuring tube holding 50 C.C. with the
30-C.C. measuring tube holding 20 C.C. Combine the 50-C.C. measuring tube
holding 40 C.C. with the one-liter bottle full of water to complete the puzzle.
Go downstairs and exit the saloon. Walk to the street and then exit the area.


CRATER
------

Use the one-liter bottle full of gasoline on the motorcycle. Press C, G, E, B
and then A. Get Joshua's telepathic helmet and then leave the crater. Open the
camping tent to find a miner's light and a climbing rope. Exit the area.


DOUGLASVILLE
------------

Enter the hotel and say "It's about the safe in the bank...". Say "I've been
sifting around the ruins of the bank, and I didn't find it anywhere.". Say
"I'm gonna' continue on my search.". Enter the saloon and go upstairs. Give
the telepathic helmet to Saturn and he will leave. Use the oil can on the water
machine and get the blowtorch at the right side of the statue. Use the crane
controls to fire the statue into the bank. Walk downstairs and look in the shed
to find some tobacco leaves. Exit the saloon and to the locomotive.


DERAILED LOCOMOTIVE
-------------------

Use the oil can on the tank opening at the left side of the smokestack. Go to
the Douglasville saloon to fill the oil can with water and then return to the
locomotive to use the oil can on the tank opening again. Do this three more
times to fill the water tank. Enter the driver's cabin and use the firewood on
the boiler. Use the blowtorch on the boiler. Turn the boiler pressure wheel and
then use the steam outlet lever above the gauges to make a key blast out from
the smokestack. Exit the driver's cabin. The key is difficult to see, but can
be found by moving the cursor to the right side of the big rock and then slowly
moving up to the top of the bush. Get the key and return to the town.


DOUGLASVILLE
------------

Enter the bank to see that the statue that was fired from the saloon has made a
hole in the floor. Climb down to the basement and look at the safe. Exit the
bank and enter the sheriff's office. Use the key on the cell door. Enter the
cell and get the briefcase to get liniment and a stethoscope. Exit the office
and return to the basement in the bank. Use the stethoscope on the safe and
turn the dial right to 85, left to 29 and then right to 54. Brian opens the
safe and finds a map of the mine. Exit the bank and exit the area.


MAMA DORITA'S HOUSE
-------------------

Approach the house and try to combine the liniment with the tobacco leaves.
Combine the bank stamp with the vessel and then combine the tobacco leaves with
the makeshift mortar and pestle. Give the chewing tobacco to Oscar. Talk to
Oscar and say "I need your help." to travel to the abandoned mine.


ABANDONED MINE
--------------

Enter the mine after Oscar moves the stone to complete the chapter.


-------------------------------------------------------------------------------
2.5.                   Chapter 5 - Gifts from the Crypt
-------------------------------------------------------------------------------


Get the long piece of wood, the head of a mining tool and a bone from the
skeleton. Combine the femur with the head of mining tool and then use the
makeshift mining tool on the nail at the left side of the mine entrance. Use
the large nail on the cliff edge and then use the rope on the nail to climb
down to the Hopi village. Enter the cave and get the tomahawk leaning on the
rock. Exit the cave. Go through the left doorway, right doorway, left doorway
and right doorway to arrive at the top of the building. Use the tomahawk on the
rope and then get the rope near Gina. Walk left to the unexplored area.

Try to use the crucifix on the mouth of the monolith. Get a branch from the
bush and use the branch on the mouth of the monolith to clear the sand. Use
the crucifix on the mouth of the monolith again to open the crypt. Enter the
cave. After the cutscene with Wupuchim, exit the area and return to the Hopi
village. Combine the tomahawk with the long piece of wood. Use the two small
pieces of wood on Gina to put a splint on her leg and complete the chapter.


-------------------------------------------------------------------------------
2.6.            Chapter 6 - The Indian, the Nun and the Finger
-------------------------------------------------------------------------------


MAMA DORITA'S HOUSE
-------------------

Say "I need to speak with a dead person.". Say "I think I could be a medium.".
Dorita says that Brian is not ready to become a medium. Say "Okay, I see what
you mean.". Say "Well, I won't bug you anymore... goodbye!". Exit the area.


DERAILED LOCOMOTIVE
-------------------

Enter the driver's cabin and use the steam outlet lever to make a badge blast
out of the smokestack. Exit the cabin and get the badge. Exit the area.


DOUGLASVILLE
------------

Enter the saloon to talk to Rutger. Say "I was thinking... you wouldn't happen
to know of a plant or something like that, that would help a person go into a
trance, would ya'?". Say "I'll just go on my way, Rutger.". Give the tomahawk
to Rutger and he will let Brian smoke on the pipe. Brian returns to the house.


MAMA DORITA'S HOUSE
-------------------

Mama Dorita says that Brian has improved but still isn't ready to enter a
trance. Say "Well, I won't bug you anymore... goodbye!". Exit the area.


DOUGLASVILLE
------------

Enter the saloon and talk to Rutger. Say "That stuff you put in the pipe didn't
work.". He says he needs yawaskel seeds. Brian realises that there are yawaskel
pods on the branch he took from the Hopi sanctuary but that they are too tough
to open. Exit the saloon and enter the sheriff's office. Enter the cell and use
the briefcase to find a scalpel. Exit the sheriff's office and enter the hotel
to talk to Sushi. Walk downstairs. Try to combine the scalpel with the pods to
find that the scalpel isn't sharp enough to open them. Use the scalpel on the
fireplace to heat it and then combine the scalpel with the pods again to open
them. Exit the hotel. Enter the saloon and give the seeds to Rutger.


MAMA DORITA'S HOUSE
-------------------

Repeat the three lines that Mama Dorita tells Brian to say. After a long scene
where Johnny is contacted and Gina explains her story, exit the area.


DOUGLASVILLE
------------

Brian enters the hotel to talk to Sushi. Walk downstairs and get the poker at
the right side of the fireplace. Exit the hotel and enter the saloon. Walk
upstairs to talk to Saturn. Say "Hey, when you've gone out looking for raw
materials, did you happen to see a trailer?". Say "We'll discuss that later,
Saturn. See ya' soon!". Exit the saloon and walk to the street. Exit the area.


JOHNNY'S TRAILER
----------------

Use the poker on the door of the trailer to open it. Exit the trailer and get
the bank brochure from the tray on the door. Exit the area.


DOUGLASVILLE
------------

Enter the hotel and walk upstairs to show the bank brochure to Sushi. Exit
Douglasville and then return to it. Enter the hotel and Sushi will call Brian
upstairs to explain to him about the bank. Exit the hotel and exit the area.


JOHNNY'S TRAILER
----------------

Enter the trailer and get the nun's habit. Exit the trailer to see Feodor and
Gustav arrive in their car. Brian automatically leaves the area.


MAMA DORITA'S HOUSE
-------------------

Approach the house and give the sheriff's badge to Oscar to make him sheriff.
He leaves to catch Feodor and Gustav and then drives to Douglasville.


DOUGLASVILLE
------------

Exit the hotel and enter the sheriff's office. Get the bag holding the thugs'
stuff on the desk. Exit the hotel and return to the hotel to give the bag to
Sushi. Exit the hotel and return to it. Walk upstairs to talk to Sushi. Say
"Have you taken a look at Gustav and Feodor's things?". Answer "Woody Allen."
and "Manhattan Murder Mystery" to her questions. She explains her plan to
Brian and tells him to record the voices of the thugs on her MP3 recorder. Exit
the hotel and enter the sheriff's office. Use the MP3 recorder on Gustav and
Feodor's voices in the cell to record them. Exit the office and exit the area.


MAMA DORITA'S HOUSE
-------------------

Enter the house and use the MP3 recorder on Gina. Exit the area.


DOUGLASVILLE
------------

Enter the hotel and give the MP3 recorder to Sushi to complete the game.


===============================================================================

3.                                Item List

===============================================================================


-------------------------------------------------------------------------------
3.1.                   Chapter 1 - Wake Me Before Dying
-------------------------------------------------------------------------------


ALCOHOL-FILLED MARKER PEN
  Made by combining the alcohol-filled syringe with the marker pen. It is
  combined with the blank medical chart to make the fake medical chart.


ALCOHOL-FILLED SYRINGE
  Made by combining the bottle of alcohol with the syringe. It is combined with
  the marker pen to make the alcohol-filled marker pen.


BLANK MEDICAL CHART
  Found in the left file cabinet in the hospital storeroom. It is combined with
  the alcohol-filled marker pen to make the fake medical chart.


BOTTLE OF ALCOHOL
  Found on the shelf below the mirror in the hospital bathroom. It is combined
  with the syringe to make the alcohol-filled syringe.


CAR KEYS
  Available at the start of the game. They are not used.


FAKE MEDICAL CHART
  Made by combining the alcohol-filled marker pen with the blank medical chart.
  It is used on the medical chart at the bottom of Gina's bed.


FLAMMABLE SPRAY CAN
  Found on the shelf near the window in the hospital storeroom. It is used on
  the fire sprinkler in Gina's room after the vademecum has been read.


GINA'S BAG
  Found on top of the locker in Gina's room. It is looked at in the inventory
  twice to find the matchbox and the wig.


GINA'S MEDICAL CHART
  Found by using the fake medical chart on the medical chart at the bottom of
  Gina's bed. It is used on the chart at the bottom of the empty bed.


GLASS
  Found on the table at the side of Gina's bed. It is not used.


HEAD
  Found by getting the human body in the hospital storeroom. It is combined
  with the wig to make the head with wig.


HEAD WITH WIG
  Made by combining the head with the wig. It is automatically used on the bed
  after Brian uses the pillow on Gina's bed.


MARKER PEN
  Found in the wastebasket in the hospital bathroom. It is combined with the
  alcohol-filled syringe to make the alcohol-filled marker pen.


MATCHBOX
  Found by looking at Gina's bag in the inventory. It is not used.


ORDER FORM
  Available at the start of the game. It is not used.


PACKAGE OF PILLS
  Found on the table at the side of Gina's bed. They are not used.


PIECE OF AMBER
  Available at the start of the game. It is used in chapter 4.


PILLOWS
  Found between the shelves at the left side of the hospital storeroom. They
  are used on the empty bed in Gina's room after making the head with wig.


RECEIPT
  Available at the start of the chapter. It is not used.


SHEET
  Found on the empty bed in Gina's room. It is used on the left bed in the
  hospital bedroom when Brian has collected all of the items for the dummy.


SYRINGE
  Found in the box of syringes on the shelf in the hospital storeroom. It is
  combined with the bottle of alcohol to make the alcohol-filled syringe.


VADEMECUM
  Found on top of the left file cabinet in the hospital storeroom. It is
  looked at in the inventory to learn how to wake Gina.


WALLET
  Available at the start of the game. It is not used.


WIG
  Found by looking at Gina's bag in the inventory for the second time. It is
  combined with the head to make the head with wig.


-------------------------------------------------------------------------------
3.2.                  Chapter 2 - The Mysterious Crucifix
-------------------------------------------------------------------------------


BATTERY
  Found after the voice recorder with Susan's voice has been used on the glass
  display case in the analysis laboratory. It is combined with the ladle to
  make the ladle with battery.


BOWL
  Found by using the bowl full of ground coffee beans on the package of coffee.
  It is not used.


BOWL FULL OF COFFEE BEANS
  Found by getting the mayan objects in front of the statue in the Mayan
  exhibition. It is shown to Willy. It is used on the electric lathe in the
  restoration laboratory to get the bowl full of ground coffee beans.


BOWL FULL OF GROUND COFFEE BEANS
  Found by using the bowl full of coffee beans on the electric lathe in the
  restoration laboratory. It is shown to Willy. It is combined with the package
  of coffee to fill it with the ground coffee beans.


COLORLESS VARNISH
  Found in the briefcase at the right side of the restoration laboratory. It
  is used on the panel at the right side of the analysis laboratory door after
  Brian has talked to Willy.


CRUCIFIX
  Available at the start of the chapter. It is used on the shelf in the
  restoration laboratory to get the strange mayan obejct. It is found after
  Susan is given the cup of coffee. It is taken to the analyis laboratory.


CUP OF COFFEE
  Found by using the coffee machine after giving the full package of coffee to
  Willy. It is given to Susan in the restoration laboratory.


FROZEN BATTERY
  Found by using the ladle with battery on the tank in the analysis laboratory.
  It is combined with the voice recorder.


LADLE
  Found at the left side of the tank in the analysis laboratory. It is combined
  with the battery to make the ladle with battery.


LADLE WITH BATTERY
  Made by combining the battery with the ladle. It is used on the tank in the
  analysis laboratory to get the frozen battery.


MAYAN MASK
  Found after opening the thermal chamber in the analysis laboratory. It is
  combined with the strange mayan object to get the ruby.


PACKAGE OF COFFEE
  Found by looking in the waste basket outside Clive's office after showing
  the bowl full of ground coffee beans to Willy. It is combined with the bowl
  full of ground coffee beans. It is given to Willy.


PAIR OF BOOKS
  Found on the desk in Clive's office. They are taken to reveal the crack in
  the desk.


RUBY
  Found by combining the strange mayan object with the mayan mask. It is used
  on the laser in the restoration laboratory.


STRANGE KEY
  Found on the desk in the analysis laboratory. It is used on the crack in
  the desk in Clive's office after the pair of books have been taken. It is
  used on the crack in the desk after the voice recorder has been taken.


STRANGE MAYAN OBJECT
  Found by using the crucifix on the shelf in the restoration laboratory. It
  is combined with the mayan mask to get the ruby.


TALCUM POWDER BRUSH
  Found on top of the desk at the right side of the water dispenser in the
  restoration laboratory. It is used on the panel at the right side of the
  analysis laboaratory door after the colorless varnish has been used on it.


VOICE RECORDER
  Found in the hidden compartment in Clive's desk after the strange key has
  been used on the crack in the desk. It is used on Susan in the restoration
  laboratory. It is used on the thermal chamber in the analysis laboratory. It
  is combined with the frozen battery. It is used on the thermal chamber.


WILLY'S BUSINESS CARD
  Found by talking to Willy in the museum. Brian dials the number on the card
  when he uses the phone on the top floor of the museum.


-------------------------------------------------------------------------------
3.3.                     Chapter 3 - The Great Escape
-------------------------------------------------------------------------------


BASKETBALL
  Found in the trunk outside the bus. It is combined with the needle and
  thread. It is combined with the bellows. After trying to put the pill in the
  can at the barn and talking to Lula, the basketball is thrown to Lula.


BELLOWS
  Found on the box at the left side of the cabin. It is combined with the
  basketball after the needle and thread have been used on it.


BOTTLE OF CLEANSER
  Found on the shelf near the telephone in the cabin. It is combined with the
  chamois to make the wet chamois.


BUCKET
  Found under the thugs' cabin. It is used on the XXX barrel in the train car
  after the makeshift corkscrew has been used on the barrel. It is combined
  with the lipstick to make the makeshift bullet. It is combined with the pile
  of lipstick to make the pile of makeshift bullets.


BULLET BELT
  Found near the machine on the plane at the airplane graveyard. It is combined
  with the pile of makeshift bullets. It is used on the machine gun in the
  plane at the plane graveyard after the tanning oil has been used on the gun.


CHAMOIS
  Found on the barrel at the right side of the shelves in the cabin. It is
  combined with the bottle of cleanser to make the wet chamois.


COAT RACK PEG
  Found at the bottom-right corner of the shelves in the cabin. It is combined
  with the screw to make the makeshift corkscrew.


CROWBAR
  Found at the right side of the shelves in the cabin. It is used to break the
  padlock on the trapdoor after the freezer has been moved in the cabin. It is
  used on the motorcycle outside the barn. It is used on the barrels in the
  train car to get the package of shelled peanuts.


DYNAMITE AND DETONATION EQUIPMENT
  Found outside the train car after the ants have eaten the shed. It is used on
  the oil well.


HANDHELD VACUUM CLEANER
  Found by getting the under the bed in the front of the bus. It is used on the
  grating in the back of the bus after talking to Carla about heartburn.


JAR OF PEANUT BUTTER
  Found at the left side of Rocco outside the barn. It is not used.


LIPSTICK
  Found on the right-hand shelf in the front of the bus. It is combined with
  the bucket when it has gunpowder in it to make the makeshift bullet.


MAKESHIFT BULLET
  Made by combining the bucket with the gunpowder in it with the lipstick.


MAKESHIFT CORKSCREW
  Made by combining the coat rack peg with the screw. It is used on the XXX
  barrel in the train car before and after the bucket has been used.


MOTORCYCLE FOOT REST
  Found on the floor outside the barn after the crowbar has been used on the
  motorcycle. It is used on the axle in the front of the bus.


NEEDLE AND THREAD
  Found on the stool with the boots in the back of the bus. It is combined with
  the basketball.


PACKAGE OF SHELLED PEANUTS
  Found by using the crowbar on the barrels in the train car. It is combined
  with the World War II helmet.


PILE OF LIPSTICK
  Found on the right-hand shelf in the front of the bus after Brian has made
  the makeshift bullet. They are combined with the bucket with the gunpowder in
  it to make the pile of makeshift bullets.


PILE OF MAKESHIFT BULLETS
  Made by combining the bucket with the gunpowder in it with the pile of
  lipstick. It is combined with the bullet belt.


PILL
  Found by using the handheld vacuum cleaner on the grating in the back of the
  bus after talking to Carla about heartburn. It is used on the can after Brian
  enters the barn. After Luca distracts Rocco, it is used on the can again.


PLAN
  Available after Brian escapes from the cabin. It can be examined in the
  inventory to show the steps that are needed to rescue Gina from the house.


REFRIGERATOR KEY
  Found in the pocket in the front of the bus after Brian has used the crank to
  shut the door. It is used on the refrigerator in the back of the bus.


SCREW
  Found in the bucket in the train car. It is combined with the coat rack peg
  to make the makeshift corkscrew.


SUNGLASSES
  Found on top of the chest in the front of the bus. They are used on the
  puddle of oil at the oil well. They are switched with Mariola's glasses at
  the bus. She will then allow Brian to take her tanning oil.


SUNGLASSES
  Found by switching Mariola's sunglasses with the sunglasses from the front of
  the bus that have been used on the puddle of oil at the oil well.


TANNING OIL
  Found near Mariola on the bus. She will allow Brian to take it after he has
  switched her sunglasses with the sunglasses that have been dipped in the
  puddle of oil at the oil well. It is used on the machine gun in the plane
  at the plane graveyard after Brian has tried to use it.


TUB OF BUTTER
  Found by unlocking the refrigerator in the back of the bus. It is combined
  with the World War II helmet.


WET CHAMOIS
  Made by combining the bottle of cleanser with the chamois. It is used on the
  small window at the right side of the cabin.


WORLD WAR II HELMET
  Found on the airplane at the airplane graveyard. It is combined with the tub
  of butter and the package of shelled peanuts. It is used on the freezer in
  the thugs' cabin. It is used on the shed outside the train car.


-------------------------------------------------------------------------------
3.4.            Chapter 4 - Close Encounters of the Fourth Kind
-------------------------------------------------------------------------------


30-C.C. MEASURING TUBE HOLDING ?? C.C.
  Made by combining the 50-C.C. measuring tube with the empty 30 C.C. measuring
  tube. It is used in the puzzle where Brian has to make 40 C.C. of gasoline.


50-C.C. MEASURING TUBE HOLDING ?? C.C.
  Made by combining the concentrated gasoline with the empty 50 C.C. measuring
  tube. It is used in the puzzle where Brian has to make 40 C.C. of gasoline.


50-C.C. MEASURING TUBE HOLDING 40 C.C.
  Made by finishing the gasoline puzzle in the saloon. It is combined with the
  one-liter bottle full of water to make the one-liter bottle full of gasoline.


ANCIENT STAPLER
  Found below the right shelves in the Douglasville bank. It is combined with
  the strap after agreeing to help Joshua.


BANK STAMP
  Found on the desk in the Douglasville bank. It is combined with the vessel
  after Brian has tried to use the tobacco leaves on the vessel.


BLOW TORCH
  Found in the Douglasville saloon after Saturn has been given the telepathic
  helmet. It is used on the boiler in the derailed locomotive driver's cabin
  after the firewood has been put in the boiler and the tank has been filled.


CHEWING TOBACCO
  Made by combining the liniment with the tobacco leaves when Brian has the
  makeshift mortar and pestle. It is given to Oscar at Mama Dorita's house.


CONTAINER OF CONCENTRATED GASOLINE
  Available after giving the stone of light to Saturn.


CRUCIFIX
  Available at the start of the chapter.


EMPTY 30 C.C. MEASURING TUBE
  Available after giving the stone of light to Saturn. It is combined with the
  50-cc measuring tube to make the 30-C.C. measuring tube.


EMPTY 50 C.C. MEASURING TUBE
  Available after giving the stone of light to Saturn. It is combined with the
  container of concentrated gasoline to make the 50-C.C. measuring tube.


FIREWOOD
  Found at the left side of the stove in the Douglasville sheriff's office. It
  is used on the boiler in the dereailed locomotive driver's cabin.


FLOWER POT
  Found below the stairs in the Douglasville saloon. After Saturn throws the
  wrench at Brian, it is thrown onto the street from the saloon balcony.


KEY
  Found by turning the boiler pressure wheel and using the steam outlet lever
  in the dereailed locomotive driver's cabin after the boiler has been lit. It
  is used on the cell door in the Douglasville sheriff's office.


LINIMENT
  Found by looking in the briefcase in the Douglasville sheriff's office cell.
  It is combined with the tobacco leaves after Brian has the makeshift mortar
  and pestle to make the chewing tobacco.


MAKESHIFT MORTAR AND PESTLE
  Made by combining the bank stamp with the vessel after Brian has tried to use
  the tobacco leaves on the vessel. When Brian combines the liniment with the
  tobacco leaves, the mortar and pestle is used to make the chewing tobacco.


MAP OF THE MINE
  Found by opening the safe in the Douglasville bank basement.


MENDED STRAP
  Made by combining the ancient stapler with the strap. It is used on the
  motorcycle at the crater.


MINER'S LIGHT
  Found in Joshua's tent at the crater after Joshua leaves. It is not used.


OIL CAN
  Found at the left side of the area outside the abandoned mine. It is used on
  the water machine in the Douglasville saloon to fill the can with water. It
  is used on the one-liter bottle to make the one-liter bottle full of water.
  The oil can is again filled with water and is used on the tank opening at the
  derailed locomotive five times.


ONE-LITER BOTTLE
  Available after giving the stone of light to Saturn. It is combined with the
  oil can with the water in it to make the one-liter bottle full of water.


ONE-LITER BOTTLE FULL OF GASOLINE
  Made by combining the 50-C.C. measuring tube holding 40 C.C. of gasoline. It
  is used on the motorcycle at the crater.


ONE-LITER BOTTLE FULL OF WATER
  Made by combining the oil can with the water in it with the one-liter bottle.
  It is combined with the 50-C.C. measuring tube holding 40 C.C. of gasoline to
  make the one-liter bottle full of gasoline.


PIECE OF AMBER
  Available at the start of the chapter. It is combined with the polished stone
  to make the stone of light.


POLISHED STONE
  Made by combining the sanding block with the stone. It is given to Saturn. It
  is combined with the piece of amber to make the stone of light.


PRUNING SHEARS
  Found by looking in the gardening shed in the Douglasville saloon.


ROPE
  Found in Joshua's tent at the crater after Joshua leaves. It is used in
  chapter 5.


SANDING BLOCK
  Found on the Douglasville saloon balcony floor. It is combined with the stone
  after trying to give the stone to Saturn in the Douglasville saloon.


STETHOSCOPE
  Found by looking in the briefcase in the Douglasville sheriff's office cell
  after Brian has looked at the numbered dial in the bank basement. It is used
  on the safe in the bank basement to find the combination to the safe.


STONE
  Found near the well outside Mama Dorita's house. It is given to Saturn in the
  Douglasville Saloon. It is combined with the sanding block after Saturn says
  Brian needs to work on the stone to make the polished stone.


STONE OF LIGHT
  Made by combining the piece of amber with the polished stone. It is given to
  Saturn in the Douglasville saloon.


STRAP
  Found by using the pruning shears on the strap on the Douglasville wagon. It
  is combined with the ancient stapler after agreeing to help Joshua.


TELEPATHIC HELMET
  Found in the crater after Joshua leaves the area. It is given to Saturn in
  the Douglasville saloon.


TOBACCO LEAVES
  Found by looking in the shed in the Douglasville saloon after Saturn has been
  given the telepathic helmet. They are combined with the liniment after Brian
  has the makeshift mortar and pestle to make the chewing tobacco.


VESSEL
  Found near the ladder outside Mama Dorita's house. It is combined with the
  bank stamp after Brian has tried to use the tobacco leaves on the vessel.


WRENCH
  After Saturn throws the wrench at Brian in the Douglasville saloon and Brian
  Brian has thrown the flower pot onto the street from the balcony, the number
  ten wrench can be found at the side of the trough outside the saloon. It is
  given to Joshua at the crater.


-------------------------------------------------------------------------------
3.5.                   Chapter 5 - Gifts from the Crypt
-------------------------------------------------------------------------------


BOTTLE HOLDING THE FINGER
  Found in the crypt. It is not used.


BRANCH FROM THE BUSH
  Found on the bush outside the crypt after the crucifix has been used on the
  mouth of the monolith. It is used on the mouth of the monolith.


CRUCIFIX
  Available at the start of the chapter. It is used on the mouth of the
  monolith outside the crypt before and after using the branch on the mouth.


FEMUR
  Found on the skeleton outside the mine. It is combined with the head of
  mining tool to make the makeshift mining tool.


HEAD OF MINING TOOL
  Found on the ground outside the mine under the long piece of wood. It is
  combined with the femur to make the makeshift mining tool.


LARGE NAIL
  Found by using the makeshift mining tool on the nail at the left side of the
  entrance to the mine. It is used on the edge of the cliff.


LONG PIECE OF WOOD
  Found outside the mine. It is combined with the tomahawk to make the two
  small pieces of wood.


MAKESHIFT MINING TOOL
  Made by combining the femur with the head of mining tool. It is used on the
  nail at the left side of the entrance to the mine.


MAP OF THE MINE
  Available at the start of the chapter. It is not used.


PIECE OF ROPE
  Found by using the tomahawk on the rope at the top of the building in the
  Hopi village. It is used as part of the splint for her leg.


ROPE
  Available at the start of the chapter. It is used on the nail after it has
  been used on the edge of the cliff.


TOMAHAWK
  Found in the cave at the Hopi village. It is used on the rope at the top of
  the building in the Hopi village. It is combined with the long piece of wood
  to make the two small pieces of wood. It is used in chapter 6.


TWO SMALL PIECES OF WOOD
  Made by combining the long piece of wood with the tomahawk. It is used as
  to create a splint for her leg.


-------------------------------------------------------------------------------
3.6.            Chapter 6 - The Indian, the Nun and the Finger
-------------------------------------------------------------------------------


BAG HOLDING GUSTAV AND FEODOR'S STUFF
  Found on the desk in the sheriff's office after Feodor and Gustav have been
  put in the cell. It is given to Sushi in the saloon.


BANK BROCHURE
  Found in the tray of the door to Johnny's trailer after the poker has been
  used on the door. It is given to Sushi in the Douglasville hotel.


BRANCH
  Available at the start of the chapter. Brian tears the pods off the branch
  after telling Rutger that the stuff in the pipe didn't work.


MP3 RECORDER
  Found by talking to Sushi about movies after giving her the bag holding
  Gustav and Feodor's stuff. It is used on Feodor and Gustav in the cell and
  is also used on Gina at Mama Dorita's house. It is given to Sushi.


NUN'S HABIT
  Found in Johnny's trailer after Sushi has been given the brochure and has
  explained to Brian about Johnny.


POKER
  Found at the right side of the fireplace in the hotel. It is used on the door
  to Johnny's trailer.


PODS
  Found on the branch after telling Rutger that the stuff in the pipe didn't
  work. It is combined with the scalpel after it has been used on the fireplace
  in the hotel to get the seeds.


SCALPEL
  Found by looking in the briefcase in the Douglasville sheriff's office cell
  after telling Rutger that the stuff in the pipe didn't work. After trying to
  combine the scalpel with the pods, the scalpel is used on the fireplace in
  the hotel. It is used on the pods again to get the seeds.


SEEDS
  Found by combining the scalpel with the pods after the scalpel has been used
  on the fireplace in the hotel. They are given to Rutger in the saloon.


SHERIFF'S BADGE
  Found by using the steam outlet lever in the driver's cabin of the derailed
  locomotive. It is given to Oscar outside Mama Dorita's house.


TOMAHAWK
  Available at the start of the chapter. It is given to Rutger in the saloon
  after talking to him about the trance.


===============================================================================

4.                          Copyright Information
===============================================================================


This file is Copyright 2007-2008 Tom Hayes. As it can be difficult to keep
track of websites that haven't posted the latest version of this file, please
do not distribute it without my permission. Send an e-mail to me if you would
like to post this file on your website and you will likely receive a positive
response. If you do post the file, please keep it in its original form with all
of the sections intact and credit the author (Tom Hayes) as the writer of the
file.


Our Verdict
Excellent
A superb game that excels in just about every area, held back only by one or two notable flaws or a collection of smaller ones that prevent the game from earning full marks.
There’s no way around it: Runaway is an instant classic, and an absolute must-own for all adventure game fans.


Top Adventure Games
More
Cantaloupe Chronicle
Today marks the beginning of your internship at the Cantaloupe Chronicle! Step into the shoes of a young reporter in a classic Point & Click Adventure as you uncover the mysteries of the small town. Write compelling articles, snap intriguing photos, and talk to the quirky townsfolk.
Linux
PC

Incremental Island
Build and expand a vibrant civilization on a procedurally generated island. Trade and conquer with other island nations to grow your wealth.
PC
Danger in Pompeii
Danger in Pompeii is an adventure puzzle game where you relive the city’s final day. Explore its streets, help its people, and solve the mystery of Mercury. Can you escape the eruption of Mount Vesuvius and save your friends?
PC

Beyond The Board
A single-player puzzle game that transforms traditional chess into a minimal, immersive journey. Every move is a step deeper into the world Beyond the Board, where shifting tiles and puzzles reveal the hidden fractures within the game’s very foundations.
PC

Kejora
When Kejora realizes that her peaceful village has been reliving the same day over and over, she and her friends seek out to try and uncover the origin of the mysterious time loop cursed on her village
PC