===============================================================================

                            FAQ/Walkthrough for
                        PEPPER'S ADVENTURES IN TIME

===============================================================================


GUIDE INFORMATION
-----------------

Author:   Tom Hayes
E-mail:   thayesguides(at)gmail(dot)com
System:   PC
Updated:  29th January, 2010
Version:  1.1


CONTENTS
--------

1. Introduction
2. Walkthrough
     2.1. Act I
     2.2. Act II
     2.3. Act III
     2.4. Act IV
     2.5. Act V
     2.6. Act VI
3. Item List
     3.1. Act I
     3.2. Act II
     3.3. Act III
     3.4. Act IV
     3.5. Act V
     3.6. Act VI
4. Point List
5. Credits
6. Copyright Information


VERSION HISTORY
---------------

1.1:  29th January, 2010  (Added dozens of walkthrough, item list and
 point
                           list additions which were contributed by JLR)
1.0:  16th July, 2005     (First version)


===============================================================================

1.                                Introduction

===============================================================================


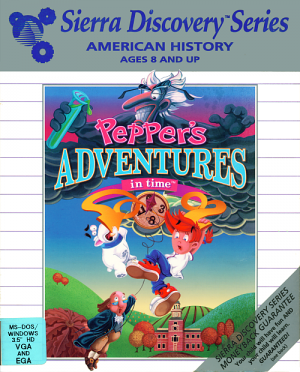
This is an educational adventure in the style of the EcoQuest games. The game
features a girl named Pepper and her dog Lockjaw. Being seen by her evil uncle
one day, Pepper and Lockjaw are both thrown into a time machine which sends
them back to Philadelphia in 1764. Time has been altered, and various things
from the future are now being seen in the past. It's up to Pepper and her dog
to try and put things back the way they were.


===============================================================================

2.                                Walkthrough

===============================================================================


-------------------------------------------------------------------------------
2.1.                   Act I: Pepper Travels Through Time
-------------------------------------------------------------------------------


The game starts in the front garden. Use the tap to fill the dog bowl. Get the
gum from the path and give it to Lockjaw. Get the soft gum and use it on the
piece of drainpipe on the grass. Get the piece of drainpipe and use it on the
drainpipe on the house. Use the drainpipe to try to climb up to the roof.
Lockjaw won't let Pepper climb up. As Lockjaw, use the paw icon on the
flowerbed to find the harness. As Pepper, get the harness and use it on Lockjaw
to climb up to the drainpipe. Select the roof to climb off the drainpipe. Use
the window to clean it. Look through the window to see Fred. Pepper and Lockjaw
will fall through into the room with Fred, and he will throw Lockjaw into the
time machine. Use the time machine to travel back to the year 1764.

[JLR note: If you use the tap twice, Lockjaw will drink a second time and then
walk over and "use" the tree as a place to relieve himself.
If Pepper and/or Lockjaw look at the bird 3 times, the bird lays a giant Easter
Egg.  She looks a bit stressed out from it all.  Luckily that's the only way
this game lays an egg...
Touch the flowers to get Mrs. O'Brien to pop her head out her window, and then
talk to her.  You can do this multiple times, but you only get points for the
first iteration.
Don't touch the spinning wheel where you see Lockjaw's tail until you want to
depart.  Take a little time and check out the room.  There's nothing to pick
up, but you can discover Uncle Fred has stolen a world globe from the school
and has a can of red paint he has plans for...  Click the microphone on the
microwave to find out how hefty a microwave Uncle Fred is using.]

Talk to the man in the stocks twice. Get the dipper from the bucket and use it
on the bucket to fill it with water. Give the dipper to the man in the stocks
and then use the stocks to free the man. A watchman will arrest Pepper for
freeing the man and will throw her into the storage shed. Get the hammer on top
of the crate. Use the hammer on the nails on the window. Get the canvas at the
right side of the shed. Use the hammer, nails and canvas on the window to block
the view of the guard.
[JLR note: After you put up the canvas, get the herbs on the right side of the
ceiling.]

Move the crate at the left side of the shed and Pepper will fall asleep.
[JLR note: Smell the dirt before using the paw icon.]

As Lockjaw, use the paw icon on the dirt to dig a hole. As Pepper, use the hole
to escape the shed. Get the pebbles from the alley Get the bone on the floor.
Use the bone on the baby clothes and the boy clothes. Get the clothes from the
floor. Use the boy clothes on Pepper and the baby clothes on Lockjaw. When the
watchman appears, walk to the alley to hide from the watchman. Answer the quiz
questions to complete the act.

1: (c)
2: (b)
3: (d)
4: (a)
5: (c)


-------------------------------------------------------------------------------
2.2.                  Act II: Pepper Explores Philadelphia
-------------------------------------------------------------------------------


West. Talk to either guard in front of the bridge. Get the string from the
tree. East. Talk to the man playing frisbee. East. Talk to the man playing
frisbee. Talk to the people on the bench. Get the bag near the tree. East. Use
the pebbles on the top window of the sewing shop and talk to the woman. Knock
on the door of the millinery shop and talk to the woman. Enter the bakery and
talk to the woman. Exit the bakery. West. Walk up the top-left path to the
street. Knock on the door of the pub and talk to the man. Talk to the man on
the bench and he will ask for marbles. Open the bag in the inventory and then
give the bag to the man to receive a shilling.

Knock on the door of the shop and talk to the woman. Enter the post office and
talk to both men. Try to get the package from the left side of the counter.
Answer the three questions to get the package. Exit the post office. South.
Walk up the top-right path. Give the shilling to the guard to walk up the path
to Ben Franklin's house.

[JLR note: he seems to assume you will know the answers to questions about Ben
Franklin.  I didn't.  You need a copy of the manual.  Mark Seibert has a web
site that had it at https://www.markseibert.com/.  (He also has what seems to be
the original script or plan for the game.  There are several variations from
what actually got produced.)  You get a random selection from the following.
True: Ben was born on Milk St. in Boston.
Say false: Ben was NOT the oldest child in his family.
Say false: Ben did NOT like soap making.
Say false: Silence Dogwood is NOT his cousin.
True: Ben did run away at 17 to Philadelphia.
Say false: The Leather Apron members did NOT work with leather.
True: The King of France did congratulate Ben on electricity experiments.
True: Ben was planning on going to England this year.
Say false: Ben did NOT meet his future wife Deborah in Boston when just a boy.]

As Lockjaw, smell the window sill, the dog bed, the water dish, the dresser,
the bookcase, the bone and the door. Drink from the bowl. Eat the dresser, the
sweets, the key and the bone. Use the key on the dog bed to hide it. Use the
mouth icon on the butler when he enters the room. Use the dog bed to get the
key. Bite the clock to open the secret tunnel and then walk north to enter the
closet.

[JLR note: Also use the bone on the dog bed to hide it in addition to the key.
To get the key back you can use the paw on the bed or bite the bed, but
apparently you cannot get the bone back out of the bed.  Lockjaw keeps losing
bones. Instead of biting the butler, use Lockjaw's fleas on the butler to get
4 points. This needs to be done fairly promptly after the butler shows up, or
the program takes over and does a bite.
You can use the fleas on just about everything in this room, although you only
get points for the butler.  Try using the fleas on the water bowl to find out
they have life preservers...
If he drinks twice from the bowl, he'll relieve himself on the clothes
dummy.  Bite the dummy to shred the dress (apparently not needed, but fun...)
The seamstress later makes a comment about suggesting Ima Pugh dye the dress
yellow when the girl wants it fixed.  Lockjaw gave it a permanent stain?
(this comment shows up when Pepper talks to the seamstress about the Pughs.)]

Use the paw icon on the shroud to move it. Smell the rat hole and then bite the
rat hole. Walk east to enter the tunnel. Walk to the fire at the end of the
tunnel to see the general. As Pepper, walk south. Talk to either guard three
times and they will both leave. Get the piece of tin on the grass. North. Knock
on the door and talk to Deborah. Knock on the door again and show the package
to Deborah. Use the package in the inventory to find the electricity book. Open
the book in the inventory and then look at it to find out how to make a Leyden
jar. Knock on the door again and show the book to Deborah. Answer the quiz
questions to complete the act.

[JLR note: The book directs you to the user manual for a diagram.
By the way, you can walk south and talk to the guards in Act III if you don't
do it here.]

1: (d)
2: (b)
3: (b)
4: (d)
5: (c)


-------------------------------------------------------------------------------
2.3.               Act III: Pepper and the Kite/Key Experiment
-------------------------------------------------------------------------------


Get the tomato from the tomato patch. Talk to Ben to receive a string and a
doctrine of personal mellowness. East.
[JLR note: If you click the truth icon on Ben's notes on his desk, you get a
remark about how he liked to write to pretty young women.  Ahem, this may be a
veiled reference to his pursuit of females.  Apparently he was well-known for
his amorous adventures while in France.]

Get the schematic from the printing press.
[JLR note: Look at the schematic in your inventory.]

Get the rubber stopper and magnet from the bin at the right side of the room.
West. Show the schematic to Ben and he will ask Pepper for hot water. East.
South. Try to get the matches from the stove. Talk to Sally. Use the tomato on
Pepper and Sally will heat the water in Ben's bath.
[JLR note: If you really want to kill time, before you use the tomato here,
take it over to the guards at the river at Penn mansion (Pugh house) and use it
on them.  Don't worry, you won't lose it, but the guards have an interesting
discussion about how tomatoes are in the deadly nightshade family and therefore
are poisonous.]

East. South. Open the sideboard at the left side of the room and get the recipe
card. South. Pepper will be transported back to Ben Franklin's boyhood.
[JLR note: Talk to young Ben, the guy in the pond.]

Get the picnic cloth and then use it on Pepper to scare Darcy. Get the clothes
and give them to Ben to travel to the candle and soap shop. Wait for Ben to
enter the room. Give him the string to receive the kite. Pepper will return to
1764.
[JLR note: While in the soap shop, you only have a limited amount of time to
look around before you leave.  There's nothing you have to pick up, but if
you are trying to cover all of the quiz questions you should click the truth
icon on the blue ball that you can see through the doorway.  No points lost if
you don't.  If you don't give the cotton string to Ben, his father gives him
a whipping.]

South. South. Talk to Richard in the stall. Try to get the key to get three
proverbs. Talk to both people on the bench and then give the quarreling proverb
to the woman. East. Enter the bakery and talk to the woman. Give her the recipe
card to receive the jar of cabbage. Exit the bakery. West. Walk up the top-left
path to the street. Knock on the pub door and talk to the man. Give him the
food proverb. Give the jar of cabbage to the goat to get the empty jar. Enter
the post office and talk to both men. Give the laziness proverb to the right
man. South. South. Talk to Richard to receive three more proverbs. Talk to the
man with the frisbee.
[JLR note: Throckmorton says he feels the "need to fling".  I feel the urge to
hurl...]

West. Talk to Marty and then give him the work proverb. East. East. Knock on
the door of the millinery shop and talk to the woman. Give her the gossip
proverb. West. Walk up the top-left path to the street. Knock on the shop door
and talk to the woman. Give her the money proverb. South. Talk to Richard to
receive two more proverbs.

East. Use the pebbles on the top window of the sewing shop and talk to the
woman. Give her the words proverb. West. Walk up the top-left path to the
street. Talk to the man on the bench and then give him the honesty proverb.
South. Get the key and the carpetbag from the remains of the stand. Walk up the
top-right path. North. Open the door to enter the house. North. West. Combine
the sheet of tin with the empty jar in the inventory. Use the jar on Ben's bath
to fill it with water. Combine the stopper with the jar in the inventory. Get
the iron rod from the cabbage patch.
[JLR note: That rod doesn't exactly jump out at you does it?  It's just to the
left of the hot tub.  ]

Combine the iron rod with the jar to complete the Leyden jar. Give the Leyden
jar, the schematic, the kite, the string and the key to Ben. Answer the quiz
questions to complete the act.

1: (d)
2: (c)
3: (b)
4: (d)
5: (b)


-------------------------------------------------------------------------------
2.4.                    Act IV: Lockjaw and the Stamp Tax
-------------------------------------------------------------------------------


Get the backscratcher, fan, lever, paddles and the stepstool. East. Use the
stepstool on the ladder and then use the ladder to climb up. Open the window
and then open the cage to free the pigeon. As Lockjaw, walk north. East. North
to the fireplace. North to the study.
[JLR note: Look at the slippers before biting them.]

Bite the slippers to hide under the desk. Bite Pugh and then get the letter
from the desk.
[JLR note: OR, instead of biting Pugh, put the paw icon on the jar of wig
powder that is on the desk for extra points.  Then get the letter and vamoose.]

East.
[JLR note: Smell the pigeon.  Lockjaw detects Pepper's scent, thus giving him
a bit more motive for his next action.]

Give the letter to the pigeon. As Pepper, get the letter. Down. South. Talk to
Sally. South. South. South. East. Enter the bakery and talk to the woman. Give
her the fan and she will agree to make Pepper a cake when she has chocolate.
Exit the bakery. Knock on the door of the millinery shop and talk to the woman.
Use the pebbles on the top window of the sewing shop and talk to the woman.
West. Walk up the top-left path to the street. Knock on the door of the pub and
talk to the man. Talk to the man on the bench. Knock on the door of the shop
and talk to the woman. Enter the post office and talk to the both men. Exit the
post office.

South. South. Talk to both people on the bench. Move the stamp act sign on the
tree and [JLR note: Look at the heart on the tree, and then] pull the knob on
the carved writing to open a secret door. Get the puzzle box and then use it in
the inventory. Solve the puzzle to get the love letters from the box.
[JLR note: I never could solve the puzzle completely.  I was always stuck with
2 pieces I couldn't swap, so I always click the "Help" button to finish it.
Doesn't seem to hurt the point score.  After solving the puzzle, go into your
inventory and use the finger icon on the bundle of love letters.  This gives
you a point, but I've no idea why.]

West. Talk to Marty and Throckmorton. Talk to either guard and then show them
the king's letter to enter the storage shed. Talk to Richard. Show him the love
letters. Open the carpetbag in the inventory and give the carpetbag to Richard.
Answer the quiz questions to complete the act.
[JLR note: There are no extra points for it, but you can milk a bit more
dialogue from Poor Richard by first showing him the King's letter and then the
carpetbag BEFORE showing him the love letters.  (You could skip this, but you
miss all the names Deborah calls Ben...  It adds motive as to why you had to
drag those love letters in here.)  You will then have to repeat showing him the
carpetbag.  Don't forget to open the carpetbag in your inventory before showing
it.]

1: (c)
2: (d)
3: (b)
4: (a)
5: (c)


-------------------------------------------------------------------------------
2.5.           Act V: Pepper Visits the Constitutional Convention
-------------------------------------------------------------------------------


Talk to Ben and show him the king's letter. Use the lever and get the letters.
South. South. South. South. East. Enter the bakery and talk to the woman. Give
her a letter. Exit the bakery. Knock on the door of the millinery shop and talk
to the woman. Give her a letter. Use the pebbles on the top window of the
sewing shop and talk to the woman. Give her a letter. West. Walk up the
top-left path to the street. Knock on the door of the pub and talk to the man.
Give him a letter. Talk to the man on the bench. Give him a letter. Knock on
the door of the shop and talk to the woman. Give her a letter. Enter the post
office and talk to both men. Give Billy a letter. Exit the post office. South.
[JLR note: As you pass out letters, people ask Pepper for her name.  She is
giving the names (slightly mangled) of famous newscasters, of course, like
Dan Rather, Ed Bradley, Connie Chung, Walter Cronkite, Lou Grant (fictional
character on TV), Barbara Walters, etc.  I thought I'd better mention it since
younger folk may not recognize some of these dinosaurs.]

Talk to both people on the bench. Give a letter to the woman. West. Talk to
Marty and Throckmorton. Give a letter to Marty. East. Walk up the top-right
path. Walk north to travel to the constitutional convention. Talk to Ben and
get his glasses on the floor. Give the glasses to Ben.
[JLR note: Talk to Ben again.]

Move the papers on the table and get the herbs. Give the herbs to Ben to travel
to the Washington house.
[JLR note: If you picked up the herbs way back in Act I in the storage
shed/prison, then you are not allowed to move the papers here.  Just give Ben
the herbs from the shed. After you're on the door step, be sure to look at the
door knob, which is not the same as the entire door.]

Get the stick and use it on the door to push the key out. Use the magnet
on the door to get the key. Use the key on the door to get a bar of chocolate.
Pepper will return to 1764. Answer the quiz questions to complete the act.
[JLR note: the game gets a bit sentimental here.  If you talk to Ben on his
doorstep, he'll be worried about missing his nap.  If you touch him, there's
a message about you patting Ben reassuringly on the arm.  And the house is
falling apart, along with Ben's health.  Yep, time does all of us in,
eventually.  Deborah Read Franklin died of a stroke in 1774, so she had passed
away before the revolution really started and well before the Constitution
was written.  By the way, it was a common-law marriage, because she had
previously married a man who left the country and deserted her, making it
impossible to remarry legally due to bigamy laws.  I suppose they figured
it would be a real downer to mention her dying in ten more years or the
common-law marriage in a kiddy game.  Common-law marriage doesn't exactly
have the scandalous note to it that it did when I was a kid, anyway.]

1: (c)
2: (b)
3: (a)
4: (d)
5: (c)


-------------------------------------------------------------------------------
2.6.               Act VI: Pepper and Lockjaw In Penn Mansion
-------------------------------------------------------------------------------


Talk to Ben to get the kite. South. South. South. South. East. Enter the bakery
and talk to the woman. Give the chocolate to the woman and she will make
bonbons. Pepper will get the bonbons from the table. Exit the bakery. West.
West. West. Give the bonbons to the guard. Use the kite on the river to float
to the back garden. Use the first bush, second bush, third bush, fourth bush
and then the window to enter the house. Get the pencil and paper from the desk.
Combine the pencil with the paper in the inventory to reveal the code for the
safe. Use the painting at the left side of the room to find the safe.
[JLR note: also use the pencil on the painting; Pepper draws a mustache on
Ima.  No points for it, but fun.
Goody's bonbons seem to be even better than "magic" brownies.  If you talk to
the guards, it seems they have a really good "sugar rush".  I assume there's
a veiled reference here to various hippie substances.  I was kind of
disappointed that the mudhole in the road wasn't a source for the "chocolate"
for the bonbons, since you're feeding it to the guards.  Oh, well...]

Use the safe and turn the dial to 5, 30, 75 to open it. Get the bag of money
and then close the safe. Use the painting to hide the safe. Walk west to be
caught by the butler, who will take Pepper to the kitchen.
[JLR note: Whoa, here.  No, don't just walk west.  Instead, use the musical
instrument, the armonica, to make a whiny noise that Lockjaw starts howling
along with, thus revealing his presence in the house.  It does get the butler
to come in, too.  You get points for playing the armonica, plus it's more
dramatic...]

Get the broom and the fan. Get the mitt on the left side of the fireplace. Use
the mitt on the iron near the cauldron. Use the iron on the dress. Get the
dress and then use the dress on Pepper. Pepper passes the butler and continues
up to the second floor of the house. Walk north to the hall maze.
[JLR note: before leaving the stairs area, you might want to click the truth
icon on the butler.  No points, but it's one of the quiz questions, about
flea control.  Not an obvious place to put the answer, eh?  This factoid
inspired me to do a second pass through the game and use the fleas on the
butler when he tries to give Lockjaw a bath, for extra points.  They mention
backscratchers in the truth icon message, but I never found a use for the
backscratcher in the game.  I later noticed Mark Seibert's walkthrough shows
what was originally intended.]

North. North. East. North. West. Open the door. North. East. Open the door.
West. North. West. North. East. North. North. West. North. North. North. North.
West.
[JLR note: DON'T click the finger icon on the door first.  Instead, click the
Look icon on it and then the talk icon and THEN the finger icon.]

Use the door to find Lockjaw.
[JLR note: along the way in the maze there are rooms with a woman dressing
(or undressing), what look like modern blowup toys for the beach, a purple cat,
Ima, complaining maids, and ELVIS!  (Well, technically Elvisantro.) There may
be a bit of a naughty joke involving Elvis.  If you look at the door before
opening it, you hear "Ooh baby baby! uh-huh, uh-huh, uh-huh.  Oh yeah!" or
something of the sort.  Any adult might wonder what is on the other side, but
let's keep our minds out of the gutter. It's just Elvis.  Pepper doesn't want
to talk to him; she's not a fan. Another door leads outside, but with no steps
down... Most of these extras aren't on the main path.  I just found them by
wandering lost.  No extra points seem to be involved. This is a tough maze for
a kiddy game, isn't it?]

As Lockjaw, get the key and use it on the door. As Pepper, use the magnet on
the key to get it. Use the key on the door to open it. As Lockjaw, smell the
hall.
[JLR note: At least they give you a break on the way out.  Lockjaw can sniff
out the right direction to go.]

Walk south. East. North. East. North. North. West. North. East. North. East.
North. West. North. North to exit the hall maze. Use the paw icon on the closet
to hide. Use the pot of blue dye to pour it over Ima. As Lockjaw, bite the
butler. As Pepper, use the charged Leyden jar on general Pugh. Open the doors
to let everyone in. Show the bag of money to Ben. Answer the quiz questions to
complete the game.

1: (a)
2: (c)
3: (b)
4: (d)
5: (c)

[JLR note: 564 points total. Who knows what the REAL total is...
If you hang on to the end of the credits, there's one last laugh as the red
coat guards show up in wigs for the "General's ball".
Hmmm, they rather leave Pepper and Lockjaw hanging at the mercy of Uncle Fred,
don't they?  And I don't think any sequels ever got made?  Maybe Pepper needs
to travel in time to the glory days of Sierra and solve their unfortunate
money problems...  Give the kiddies a lesson in business and economics, but I
guess that might be considered more of a horror game.]


===============================================================================

3.                                 Item List

===============================================================================


-------------------------------------------------------------------------------
3.1.                            Act I Item List
-------------------------------------------------------------------------------


BABY CLOTHES
  Found on the washing line in the alley outside the shed. They are used on
  Lockjaw.


BONE
  Found on the floor in the alley outside the shed. It is used on the baby
  clothes and the boy clothes on the washing line.


BOY CLOTHES
  Found on the washing line in the alley outside the shed. They are used on
  Pepper.


CANVAS
  Found in the shed. After getting the hammer and nails, the canvas is used on
  the window in the shed.


DIPPER
  Found in the bucket outside the shed. It is used on the bucket and is then
  given to the man in the stocks.


FLEAS
  Found on Lockjaw.

  [JLR note: Well, they aren't used in Act I.  Later, in Ima's bedroom, you can
  use them on all sorts of things to generate amusing remarks, plus even extra
  points if you use them on the butler who is trying to give Lockjaw a bath.]


GUM
  Found on the path in Pepper's garden. It is given to Lockjaw to get the soft
  gum.


HAMMER
  Found in the shed. It is used on the nails on the window in the shed. It is
  automatically combined with the canvas and nails in the inventory.


HARNESS
  As Lockjaw, the harness is found by using the paw icon on the flowerbed
  outside Pepper's house. It is used on Lockjaw.
  [JLR note: HERBS, Found in the shed on the right side near the ceiling. You
  can use them on Ben Franklin later at the Constitutional Congress.]


NAILS
  Found in the shed. It is automatically combined with the canvas and hammer in
  the inventory.


PEBBLES
  Found in the alley outside the shed. They are used on the top window of the
  sewing shop.


PIECE OF DRAINPIPE
  Found on the grass outside Pepper's house. After the soft gum has been used
  on the piece of drainpipe, it is used on the drainpipe on the house.


SOFT GUM
  Found by giving the gum to Lockjaw outside Pepper's house. It is used on the
  piece of drainpipe on the grass.


-------------------------------------------------------------------------------
3.2.                            Act II Item List
-------------------------------------------------------------------------------


BAG
  Found near the people on the bench near the tree. It is opened in the
  inventory to find marbles. It is given to the man on the bench in the street.
  [JLR note: BONE, found on floor in Ima's bedroom.  It is used on the dog bed.
  This is a different bone from the one in Act I, at least I assume it is.]

BOOK
  Found by opening the package in the inventory. It is shown to Deborah in the
  Washington house.


IMA'S ROOM KEY
  Found on floor in Ima's bedroom in the Pugh's house. It is used on the dog
  bed.


PACKAGE
  Found on the counter in the post office. It is shown to Deborah in the
  Washington house. It is used in the inventory to get the book.


PIECE OF TIN
  Found on the grass after the guards leave near the Washington house. It is
  combined with the empty jar in the inventory in act III.


SHILLING
  Found by giving the bag to the man on the bench in the street. It is given to
  the guard near the Washington house.


STRING
  Found on the tree near the people on the bench. It is not used.
  [JLR note: Eh? Are we talking about the string found on the tree next to the
  guards at the Pugh mansion?  This would be the silk kite string used in the
  kite/
key experiment.  This string is different from the cotton string given
  to Pepper by Ben
 in Act III and later given to young Ben.]


-------------------------------------------------------------------------------
3.3.                           Act III Item List
-------------------------------------------------------------------------------


CARPETBAG
  After giving all of the proverbs to the people, the carpetbag is found in the
  remains of the stand. It is given to Richard in the shed in act IV.


CLOTHES
  Found at the side of the river in Ben Franklin's boyhood. They are given to
  Ben.


DOCTRINE
  Found by talking to Ben in the garden at the Washington house. It is not
  used.


EMPTY JAR
  Found by giving the jar of cabbage to the goat in the street. It is combined
  with the sheet of tin in the inventory.


IRON ROD
  Found in the cabbage patch in the garden at the Washington house. It is one
  of the items used on the jar in the inventory to make the Leyden jar.


JAR OF CABBAGE
  Found by giving the recipe card to the woman in the bakery. It is given to
  the goat in the street to get the empty jar.
  [JLR note: In Mark Seibert's script, there was an alternative solution where
  you gave the cabbage to the guards, but this was not fully implemented.  In
  the game as I have it, the guards turn down the offer with a couple of
  "Yuck!"
 remarks.]


KEY
  After giving all of the proverbs to the people, the key is found in the
  remains of the stand. It is given to Ben in the garden at the Washington
  house.


KITE
  Found by giving the string to Ben in the candle and soap shop in Ben
  Franklin's boyhood. It is given to Ben in the garden at the Washington house.


LEYDEN JAR
  Found by using the sheet of tin, Ben's bath water, stopper and iron rod on
  the jar. It is given to Ben in the garden at the Washington house.


MAGNET
  Found in the bin in the room with the printing press in the Washington house.
  It is used to get the key from under the door outside the Washington house in
  act V. It is used to get the key from under the door in the hall maze in act
  VI.


PICNIC CLOTH
  Found at the side of the river in Ben Franklin's boyhood. It is used on
  Pepper.


PROVERB ABOUT FOOD
  Found by talking to Richard in the stall. It is given to the man in the pub.


PROVERB ABOUT GOSSIPING
  Found by talking to Richard in the stall. It is given to the woman in the
  millinery shop.


PROVERB ABOUT HONESTY
  Found by talking to Richard in the stall. It is given to the man on the bench
  in the street.


PROVERB ABOUT LAZINESS
  Found by talking to Richard in the stall. It is given to the right man in the
  post office.


PROVERB ABOUT MONEY
  Found by talking to Richard in the stall. It is given to the woman in the
  shop on the street.


PROVERB ABOUT QUARELLING
  Found by talking to Richard in the stall. It is given to the woman on the
  bench near the tree.


PROVERB ABOUT WORDS
  Found by talking to Richard in the stall. It is given to the woman in the
  sewing shop.


PROVERB ABOUT WORK
  Found by talking to Richard in the stall. It is given to Marty.


RECIPE CARD
  Found in the sideboard in the Washington house. It is given to the woman in
  the bakery to get the jar of cabbage.


SCHEMATIC
  Found on the printing press in the Washington house. It is given to Ben in
  the garden at the Washington house.


STOPPER
  Found in the bin in the room with the printing press in the Washington house.
  It is one of the items used on the jar in the inventory to make the Leyden
  jar.


STRING
  Found by talking to Ben in the garden at the Washington house. It is given to
  Ben in the candle and soap shop in Ben Franklin's boyhood to get the kite. It
  is given to Ben in the garden at the Washington house.
  [JLR note: Eh?  What's that last sentence?  Maybe this last sentence was
  meant for the silken string, not this cotton string.]


TOMATO
  Found in the tomato patch in the garden at the Washington house. It is used
  on Pepper in the room with Sally in the Washington house.


-------------------------------------------------------------------------------
3.4.                            Act IV Item List
-------------------------------------------------------------------------------


BACKSCRATCHER
  Found in the garden at the Washington house. It is not used.


FAN
  Found in the garden at the Washington house. It is given to the woman in the
  bakery.


LETTER
  As Lockjaw, the letter is found on the desk in the Pugh's study. It is given
  to the pigeon in the bedroom. As Pepper, the letter is found in the
  Washington house. It is shown to the guard outside the shed. It is given to
  Ben in act V.


LEVER
  Found in the garden at the Washington house. It is used on the printing press
  in the Washington house in act V.


LOVE LETTERS
  Found by solving the puzzle on the puzzle box. They are shown to Richard in
  the shed.


PADDLES
  Found in the garden at the Washington house. They are not used.
  [JLR note: Mark Seibert's walkthrough indicates they can be used in a failed
  attempt to swim the river.  I tried this, and it's just like clicking the
  finger icon
 on the river; you splash too much and the guards catch you.]


PUZZLE BOX
  Found by opening the secret door in the tree. It is solved in the inventory
  to get the love letters.


STEPSTOOL
  Found in the garden at the Washington house. It is used on the ladder in the
  Washington house.


-------------------------------------------------------------------------------
3.5.                            Act V Item List
-------------------------------------------------------------------------------


CHOCOLATE
  Found by using the key on the door outside the Washington house after the
  constitutional convention. It is given to the woman in the bakery in act VI
  to get the bonbons.


GLASSES
  Found on the floor in the constitutional convention. They are given to Ben.


HERBS
  Found under the papers on the table in the constitutional convention. They
  are given to Ben.
  [JLR note: alternatively, the HERBS can be the ones you picked up in the
  storage shed.  They are still given to Ben.]


KEY
  Found by using the stick and the magnet on the door to the Washington house
  after the consitutional convention. It is used on the door to get the
  chocolate.


LETTERS
  Found by using the lever on the printing press in the Washington house. They
  are given to the woman in the bakery, the woman in the millinery shop, the
  woman in the sewing shop, the man in the pub, the man on the bench in the
  street, the woman in the shop on the street, the man in the post office, the
  woman on the bench near the tree and to Marty.


STICK
  Found outside the Washington house after the constitutional convention. It is
  used on the door to the Washington House.


-------------------------------------------------------------------------------
3.6.                            Act VI Item List
-------------------------------------------------------------------------------


BAG OF MONEY
  Found in the safe in the study in the Pugh house. It is shown to Ben in the
  hall.


BONBONS
  Found by giving the chocolate to the woman in the bakery. They are given to
  the guard outside the Pugh house.


BROOM
  Found in the kitchen in the Pugh house. It is used as part of the Ima
  disguise.


DRESS
  Found in the kitchen in the Pugh house. It is used on Pepper.


FAN
  Found in the kitchen in the Pugh house. It is used as part of the Ima
  disguise.


IRON
  Found in the kitchen in the Pugh house. It is used on the dress in the
  kitchen.


KEY
  As Lockjaw, the key is found in the bedroom in the Pugh house. It is used on
  the door. As Pepper, the key is found by using the magnet on the door to the
  bedroom. It is used on the door.


KITE
  Found by talking to Ben in the Washington house. It is used on the river
  outside the Pugh house.


MITT
  [JLR note: Found in kitchen, used on the IRON in your inventory to avoid
  burns.]


PENCIL AND PAPER
  Found on the desk in the Pugh house. They are combined in the inventory to
  reveal the code for the safe.


===============================================================================

4.                                 Point List

===============================================================================


             ACT I
             -----
1      1     Use the tap.
2      1     Get the gum.
4      2     Get the soft gum.
6      2     Use the soft gum on the piece of drainpipe.
7      1     Get the piece of drainpipe.
10     3     Use the piece of drainpipe on the house drainpipe.
11     1     Use the drainpipe.
[JLR note: 1 point if you Use the flowers in Mrs. O'Briens flowerbed and 1 more
point if you talk to Mrs. O'Brien when she pops her head out the window.  You
can repeat this several times but you only get points for the first iteration.]

13     2     Use the paw icon on the flowerbed.
14     1     Use the harness on Lockjaw.
16     2     Climb up the drainpipe.
18     2     Select the roof.
21     3     Use the window.
23     2     Use the time machine.
24     1     Talk to the man in the stocks.
25     1     Talk to the man in the stocks.
26     1     Get the dipper.
27     1     Use the dipper on the bucket.
28     1     Give the dipper to the man in the stocks.
30     2     Use the stocks.
31     1     Get the hammer.
33     2     Use the hammer on the nails.
36     3     Use the hammer, nails and canvas on the window.
[JLR note: the 3 points are two operations, get the canvas for 1 point, then
use the hammer, nails, and canvas on the window for the next 2 points. For 3
more points, get the herbs (on the right side) AFTER canvas is nailed up.]

37     1     Move the crate.
[JLR note: 2 points for smell the dirt.]

40     3     Use the paw icon on the dirt.
41     1     Use the hole.
43     2     Get the pebbles.
44     1     Get the bone.
46     2     Use the bone on the baby clothes.
48     2     Get the boy clothes.
[JLR note: I.e., use the bone on the boy
 clothes.]

50     2     Use the boy clothes on Pepper.
52     2     Use the baby clothes on Lockjaw.
55     3     Walk to the alley.
80     25    Correctly answer the five quiz questions.
[JLR note: I had 87 points at this point.]


             ACT II
             ------
81     1     Talk to either guard.
83     2     Get the string.
84     1     Talk to the left man playing frisbee.
85     1     Talk to the right man playing frisbee.
86     1     Talk to the people on the bench near the tree.
[JLR note: Actually this is 2 points, 1 for talking to the vicar and 1 for
talking to Quibble Quabble.]

88     2     Get the bag.
90     2     Talk to the woman in the sewing shop.
91     1     Talk to the woman in the sewing shop.
92     1     Knock on the door of the millinery shop.
93     1     Talk to the woman in the millinery shop.
94     1     Talk to the woman in the bakery.
95     1     Knock on the door of the pub.
96     1     Talk to the man in the pub.
97     1     Talk to the man on the bench in the street.
98     1     Open the bag.
99     1     Give the bag to the man on the bench in the street.
101    2     Knock on the door of the shop.
[JLR note: Actually it is 2 points for giving the bag and only 1 point for
knocking on the door of the shop.  And if one wants to get REALLY picky, it's 1
point for giving the bag, 1 point when he tosses you a coin, and 1 point for
knocking, but we all know what you mean here.  I only mention it because I
sometimes get fooled when the program breaks the points up like that, giving
you 1 point immediately and then adding on another point later before handing
control back.]

102    1     Talk to the woman in the shop.
103    1     Talk to the left man in the post office.
104    1     Talk to the right man in the post office.
105    1     Try to get the package.
107    2     Get the package.
108    1     Give the shilling to the guard.
109    1     Smell the dresser.
110    1     Drink from the bowl.
112    2     Eat the dresser.
113    1     Eat the sweets.
114    1     Eat the key.
115    1     Eat the bone.
117    2     Use the key on the dog bed.
[JLR note: Plus 2 more points if you Use the bone on the dog bed.]

119    2     Use the mouth icon on the butler.
[JLR note: Instead of the mouth icon for 2 points, use Lockjaw's fleas on the
butler for 4 points.  I was inspired to try this by later discovering that
using the truth icon on the butler got a message about flea treatments.]

121    2     Get the key.
[JLR note: I.e., either use the paw on the bed or bite the bed to regain the
key.  You apparently can't retrieve the bone from the bed.]

125    4     Bite the clock.
127    2     Move the shroud.
128    1     Smell the rat hole.
130    2     Bite the rat hole.
133    3     Walk to the fire.
134    1     Talk to either guard.
135    1     Talk to either guard.
136    1     Talk to either guard.
137    1     Get the piece of tin.
138    1     Knock on the door of the Washington house.
139    1     Talk to Deborah.
140    1     Show the package to Deborah.
141    1     Use the package.
142    1     Open the book.
143    1     Look at the book.
146    3     Show the book to Deborah.
171    25    Correctly answer the five quiz questions.
[JLR note: I had 183 points at this point.]


             ACT III
             -------
173    2     Get the tomato.
174    1     Talk to Ben.
175    1     Get the string.
176    1     Get the doctrine of personal mellowness.
177    1     Get the schematic.
178    1     Get the rubber stopper.
179    1     Get the magnet.
[JLR note: You get 1 point if you look at the schematic in your inventory.]

181    2     Show the schematic to Ben.
182    1     Try to get the matches.
183    1     Talk to Sally.
186    3     Use the tomato on Pepper.
187    1     Open the sideboard.
188    1     Get the recipe card.
[JLR note: One point if you Talk to young Ben.]

189    1     Get the picnic cloth.
192    3     Use the picnic cloth on Pepper.
193    1     Get the clothes.
194    1     Give the clothes to Ben.
196    2     Give the string to Ben.
197    1     Get the kite.
198    1     Talk to Richard.
199    1     Try to get the key.
200    1     Get the three proverbs.
201    1     Talk to the woman on the bench near the tree.
202    1     Talk to the man on the bench near the tree.
204    2     Give the quarelling proverb to the woman near the tree.
205    1     Talk to the woman in the bakery.
208    3     Give the recipe card to the woman.
209    1     Talk to the man in the pub.
211    2     Give the food proverb to the man.
213    2     Give the jar of cabbage to the goat.
214    1     Talk to the left man in the post office.
215    1     Talk to the right man in the post office.
217    2     Give the laziness proverb to the right man.
218    1     Talk to Richard.
219    1     Get the three proverbs.
220    1     Talk to the right man with the frisbee.
221    1     Talk to the left man with the frisbee.
223    2     Give the work proverb to the left man.
224    1     Talk to the woman in the millinery shop.
226    2     Give the gossip proverb to the woman.
227    1     Talk to the woman in the shop.
229    2     Give the money proverb to the woman in the shop.
230    1     Talk to Richard.
231    1     Get the two proverbs.
232    1     Talk to the woman in the sewing shop.
234    2     Give the words proverb to the woman.
235    1     Talk to the man on the bench in the street.
237    2     Give the honesty proverb to the man.
238    1     Get the key.
239    1     Get the carpetbag.
240    1     Combine the sheet of tin with the empty jar.
241    1     Use the jar on Ben's bath.
242    1     Combine the stopper with the jar.
243    1     Get the iron rod.
247    4     Give the Leyden jar to Ben.
[JLR note: Actually 1 point when you combine the iron rod with the jar and then
3 points for giving the jar to Ben, instead of 4 points.]

248    1     Give the schematic to Ben.
249    1     Give the kite to Ben.
250    1     Give the string to Ben.
251    1     Give the key to Ben.
276    25    Correctly answer the five quiz questions.
[JLR note: I had 290 points at this point.]


           ACT IV
           ------
278    2     Get the backscratcher.
280    2     Get the fan.
282    2     Get the lever.
284    2     Get the paddles.
286    2     Get the stepstool.
288    2     Use the stepstool on the ladder.
289    1     Use the ladder.
290    1     Open the window.
291    1     Open the cage.
294    3     Walk to the fireplace.
[JLR note: Look at the slippers for 1 point.]

296    2     Bite the slippers.
298    2     Bite Pugh.
[JLR note: OR, instead of biting Pugh, click the paw icon on the jar of wig
powder on the desk for 4 points.]

300    2     Get the letter.
[JLR note: Smell the pigeon for 1 point.]

302    2     Give the letter to the pigeon.
303    1     Get the letter.
304    1     Talk to Sally.
305    1     Talk to the woman in the bakery.
308    3     Give the fan to the woman in the bakery.
309    1     Talk to the woman in the millinery shop.
310    1     Talk to the woman in the sewing shop.
311    1     Talk to the man in the pub.
312    1     Talk to the man on the bench near the tree.
[JLR note: Um, I think you mean the man on the bench in the street, NOT near
the tree.  This is the gambler.]

313    1     Talk to the woman in the shop.
314    1     Talk to the left man in the post office.
315    1     Talk to the right man in the post office.
316    1     Talk to the woman on the bench near the tree.
317    1     Talk to the man on the bench near the tree.
318    1     Move the stamp act sign.
[JLR note: Look at the heart carved on the tree for 1 point.]

320    2     Open the secret door.
321    1     Get the puzzle box.
324    3     Solve the puzzle.
[JLR note: After solving the puzzle, go into your inventory and click the
finger icon on the bundle of love letters.  This gets you a point, but I've no
idea why.  Maybe they had originally meant to open the letters?]

325    1     Talk to Marty.
326    1     Talk to Throckmorton.
327    1     Talk to either guard.
330    3     Show the king's letter to the guard.
331    1     Talk to Richard.
333    2     Show the love letters to Richard.
334    1     Open the carpetbag.
335    1     Give the carpetbag to Richard.
360    25    Correctly answer the five quiz questions.
[JLR note: I had 380 points total at this point.]


             ACT V
             -----
361    1     Talk to Ben.
363    2     Show the king's letter to Ben.
365    2     Use the lever on the printing press.
366    1     Get the letters.
367    1     Talk to the woman in the bakery shop.
369    2     Give the letter to the woman.
370    1     Talk to the woman in the millinery shop.
372    2     Give the letter to the woman.
373    1     Talk to the woman in the sewing shop.
375    2     Give the letter to the woman.
376    1     Talk to the man in the pub.
378    2     Give the letter to the man.
379    1     Talk to the man on the bench in the street.
381    2     Give the letter to the man.
382    1     Talk to the woman in the shop.
384    2     Give the letter to the woman.
385    1     Talk to the left man in the post office.
386    1     Talk to the right man in the post office.
388    2     Give the letter to the right man.
389    1     Talk to the woman on the bench near the tree.
390    1     Talk to the man on the bench near the tree.
392    2     Give the letter to the woman.
393    1     Talk to Marty.
394    1     Talk to Throckmorton.
396    2     Give the letter to Marty.
397    1     Talk to Ben.
398    1     Get the glasses.
399    1     Give the glasses to Ben.
[JLR note: Talk to Ben again for 1 point.]

400    1     Move the papers.
401    1     Get the herbs.
[JLR note: If you have already gotten some herbs from the storage shed, then
you will not be allowed to move the papers and get these herbs.  Since getting
the herbs in the shed gets you 3 points, you will still be ahead 1 point.  I
guess they put this bit in here just in case you missed getting the herbs in
the shed.]

403    2     Give the herbs to Ben.
[JLR note: After you are on the door step, be careful to look not at the door
in general, but the door knob area to get 2 points.]

404    1     Get the stick.
406    2     Use the stick on the door.
408    2     Use the magnet on the door.
409    1     Use the key on the door.
410    1     Return to 1764.
435    25    Correctly answer the five quiz questions.
[JLR note: I had 456 points total at this point.]


             ACT VI
             ------
436    1     Talk to Ben.
437    1     Get the kite.
438    1     Talk to the woman in the bakery.
440    2     Give the chocolate to the woman.
441    1     Get the bonbons.
444    3     Give the bonbons to the guard.
447    3     Use the kite on the river.
449    2     Use the first bush.
451    2     Use the second bush.
453    2     Use the third bush.
455    2     Use the fourth bush.
457    2     Use the window.
458    1     Get the pencil.
459    1     Get the paper.
461    2     Combine the pencil with the paper.
462    1     Use the painting.
463    1     Use the safe.
466    3     Open the safe.
468    2     Get the bag of money.
[JLR note: Before exiting, I clicked the finger icon on the empty safe and got
1 point, presumably for closing the safe.]

469    1     Use the painting.
[JLR note: Use the armonica for 2 points and more drama.]

471    2     Get the broom.
472    1     Get the fan.
473    1     Get the mitt.
474    1     Use the mitt on the iron.
475    1     Use the iron on the dress.
477    2     Get the dress.
481    4     Use the dress on Pepper.
485    4     Walk past the butler.
488    3     Find Lockjaw.
[JLR note: Finding Lockjaw has 5 points involving 3 actions after Pepper is
standing in front of the right door:
1 point when you Look at the door.
1 point when you talk to the door (or maybe I should say to Lockjaw through the
door.)
3 points when you click the finger icon on the door.]

489    1     Use the key on the door.
491    2     Use the magnet on the key.
493    2     Use the key on the door.
496    3     Smell the hall.
498    2     Use the paw icon on the closet.
502    4     Use the pot of blue dye.
504    2     Bite the butler.
[JLR note: The fleas won't work here like they did before.]

508    4     Use the charged Leyden jar on the general.
[JLR note: If you oppose electrocutions, you can click the finger icon on the
general to remove his wig, but it's only worth 3 points instead of 4.]

510    2     Open the doors.
513    3     Show the bag of money to Ben.
538    25    Correctly answer the five quiz questions.
[JLR note: I had 564 points total at the end of the game.  I have no idea if
this is all of them.]


===============================================================================

5.                                  Credits

===============================================================================


John Romine (JLR): John was kind enough to send in dozens of new walkthrough,
item list and point list additions for this guide.


===============================================================================

6.                           Copyright Information

===============================================================================


This file is Copyright 2005-2010 Tom Hayes. As it can be difficult to keep
track of websites that haven't posted the latest version of this file, please
do not distribute it without my permission. Send an e-mail to me if you would
like to post this file on your website and you will likely receive a positive
response. If you do post the file, please keep it in its original form with all
of the sections intact and credit the author (Tom Hayes) as the writer of the
file.


