


King’s Quest IV: The Perils of Rosella
King's Quest IV: The Perils of Rosella
PC
By: Sierra On-Line
CaliMonk
Senior Content Writer
Updated on
===============================================================================
FAQ/Walkthrough for
KING'S QUEST IV: THE PERILS OF ROSELLA
===============================================================================
GUIDE INFORMATION
-----------------
Author: Tom Hayes
E-mail: thayesguides(at)gmail(dot)com
System: PC
Updated: 21st August, 2008
Version: 1.1
CONTENTS
--------
1. Introduction
2. Walkthrough
2.1. Exploring Tamir
2.2. Finding the Unicorn
2.3. Finding the Hen
2.4. Finding the Magic Fruit
2.5. Finding Pandora's Box
2.6. Finding the Talisman
2.7. Journey to Genesta
3. Character List
4. Item List
5. Point List
6. Maps
7. Easter Eggs and Secrets
8. Debug Information
9. Copyright Information
VERSION HISTORY
---------------
1.1: 21st August, 2008 (Format update)
1.0: 7th April, 2003 (First version)
===============================================================================
1. Introduction
===============================================================================
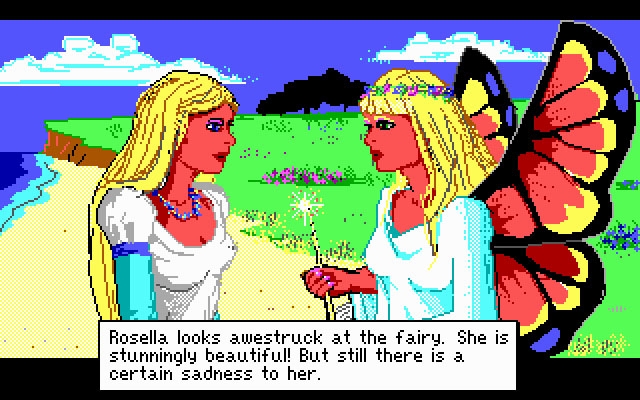
Rosella has travelled to the land of Tamir to help her father, who has become
terribly ill and requires a magic fruit to help him recover. Genesta is the
kind fairy of Tamir and has brought Rosella to her land using the last of her
magic. Her talisman was stolen from her by the evil fairy Lolotte, and she asks
Rosella to recover it for her as she will die without it. She warns that the
magic fruit will be difficult to find, as it is guarded by a snake on the other
side of a dangerous swamp. Rosella sets out to find the fruit that will save
her father, and the talisman which will enable Genesta to send her home.
===============================================================================
2. Walkthrough
===============================================================================
-------------------------------------------------------------------------------
2.1. Exploring Tamir
-------------------------------------------------------------------------------
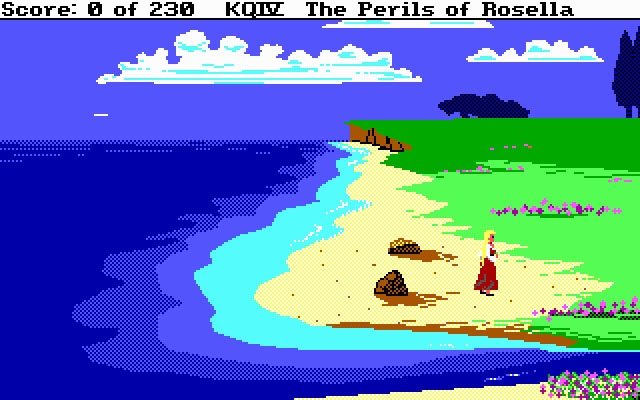
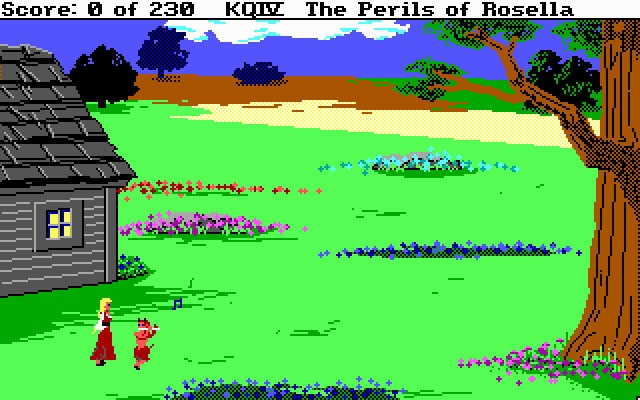
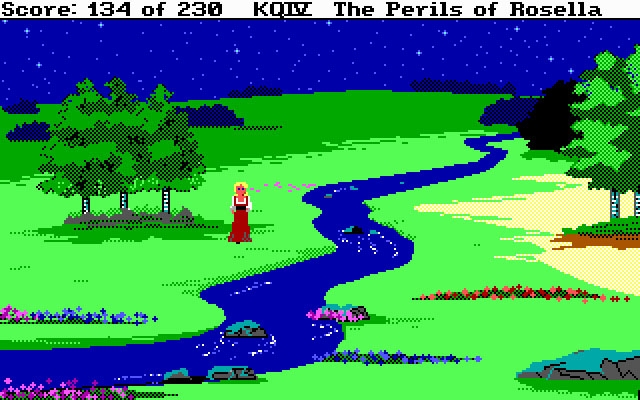
The game starts in the land of Tamir, where Rosella begins her search for the
magic fruit that will save her father. Walk one screen north and two screens
east to see a bridge. On the way you may pass a unicorn, but it is too scared
to come near Rosella at the moment. Stand at the left side of the bridge and
LOOK UNDER BRIDGE to find a gold ball. Walk north and east twice to arrive
outside an old house. OPEN DOOR to enter the house. Walk west to the parlor.
Stand in front of the shelf at the right side of the portrait and GET BOOK.
Walk east to the entry room and south to exit the house.
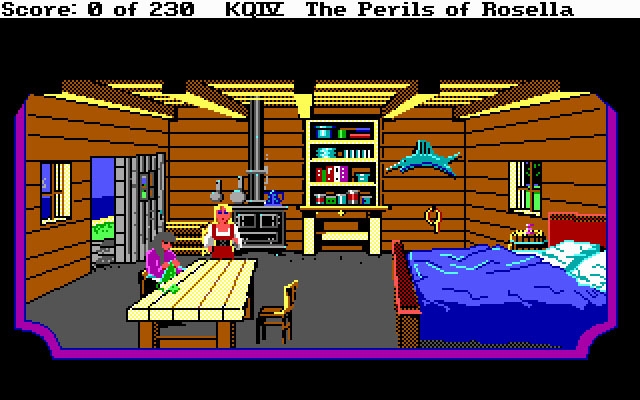
Walk west one screen and south one screen to see a small house built into the
base of a large tree. OPEN DOOR to enter the kitchen of the house. CLEAN HOUSE,
and after a while the seven dwarfs will return. They will initially ignore
Rosella, but after seeing the improved state of their house they invite her to
sit with them at the table to eat soup. After a while, the dwarfs finish their
soup and tell Rosella that they have to return to work. They all leave, but one
of them forgets a pouch on the table. GET POUCH and exit the house. Walk south
one screen and go through the doorway to enter the mine.
Drop off the edge of the path in the mine and Rosella will land safely on the
floor. Continue east to the next screen to see more dwarves working busily in
the mine. Try to GIVE POUCH to the dwarf with the green hat at the right side
of the screen and he will allow Rosella to keep it. He also gives an oil
lantern to Rosella in return for her honesty. Walk west one screen and walk up
the path to exit the mine. Head east one screen after exiting the mine to see a
worm on the ground. If the worm is not there, just exit and return to the area
until it is. GET WORM. From here, walk west four times and north once.
Rosella should now be in an area with a minstrel on a rock. If the minstrel is
not there, exit and return to the area until he is. The minstrel is a fan of
old music, but it seems he can't play any of his songs well at all. GIVE BOOK
TO MINSTREL and he will be so inspired by it that he decides to become an
actor. He gives Rosella his lute and then leaves the area. Walk two screens
north and one screen west onto an old pier. A fisherman will be fishing from
the end of the pier, but he will leave after Rosella has waited for a few
seconds. Walk east one screen and OPEN DOOR to enter the fisherman's house.
Walk to the table and GIVE POUCH TO FISHERMAN. He gives the fishing pole to
Rosella in return. Exit the house and walk west to the end of the pier. PUT
WORM ON HOOK. FISH from the end of the pier to catch a fish. Walk east twice to
the meadow where a creature named Pan should be playing a flute. Exit and
return to the area if he is not there. Try as Rosella might, there seems to be
no way to get Pan's attention by talking to him. PLAY LUTE and Pan will be so
fascinated that he stops playing his flute and walks over to watch Rosella
play. GIVE LUTE TO PAN and he will give the flute to Rosella.
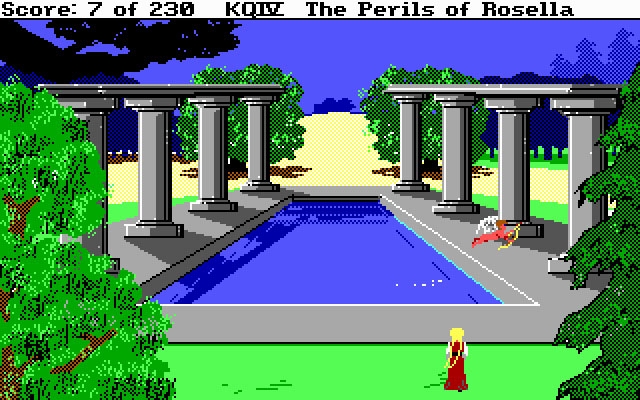
From the meadow, walk east one screen and north one screen to see a pool with
columns at either side. Cupid should fly down and land in the water, but if he
doesn't appear just exit and return to the area. Walk into the pool and Cupid
will be so startled that he flies away, leaving his bow behind. GET BOW. Walk
south two screens to arrive at a pond, where a big frog wearing a crown is
sitting on one of the lily pads. Walk to the bottom-right corner of the pond
and DROP BALL. The frog picks the gold ball up in its mouth and swims toward
Rosella to return it to her. Move around to the top-right corner of the pond to
GET FROG. KISS FROG and he will change into a prince. Annoyed that Rosella
isn't a princess, he gives Rosella his gold crown and leaves.
Walk east three screens and south one screen to arrive at a waterfall. WEAR
CROWN and after transforming into a frog, Rosella will automatically swim
through the waterfall and return to human form on the other side. GET BOARD
near the cave opening and then enter the cave. The bones near the start of the
cave are a good clue that we shouldn't venture too far in. We will be returning
here later on, so just GET BONE from the pile for now and then exit the cave.
Walk west through the waterfall to return safely to the other side. Walk south
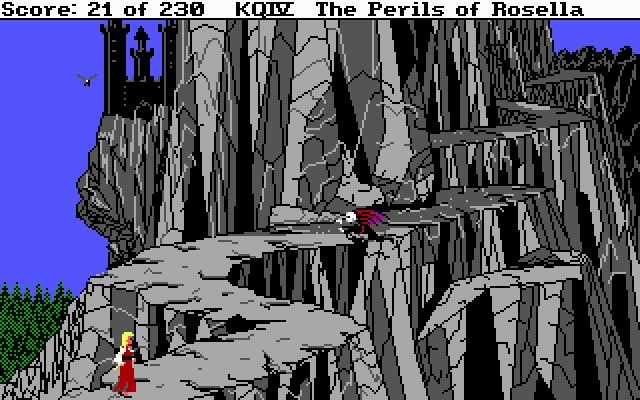
one screen and walk east up the mountain to see Lolotte's goons.
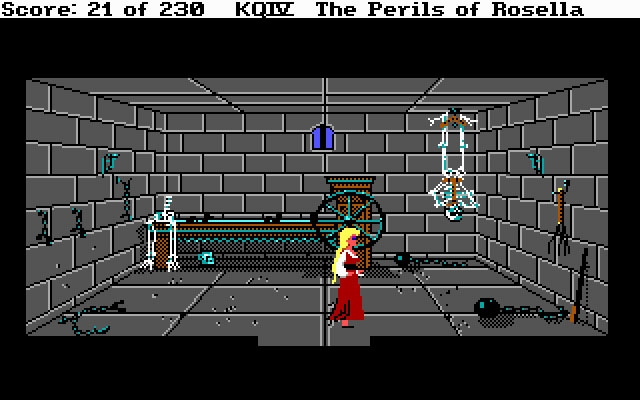
They take Rosella to Lolotte's castle, where she suspects Rosella of being a
spy sent from Genesta and puts her in a cell. You can walk around in here but
there are no items to collect. After a while, the henchmen will return to take
Rosella back to the throne room. Lolotte tells Rosella that her son Edgar has
convinced her to give one chance to Rosella to prove her innocence. She asks
Rosella to catch a unicorn that roams free in the meadows down in Llewdor, and
promises that Rosella will be set free after completing this task. After being
given this quest, the henchmen return Rosella to the bottom of the mountain.
-------------------------------------------------------------------------------
2.2. Finding the Unicorn
-------------------------------------------------------------------------------
Walk west five screens and south two screens to return to the fisherman's house
near the beach. Move west one screen into the ocean and save the game. Swim
west to the next screen and Rosella with either encounter a shark or avoid it
completely. If the shark does attack, just restore the game. Continue swimming
west through the ocean to arrive on an island. A peacock will be walking around
on one of the areas on the island, so walk around until you find it and then
wait for it to drop a feather. GET FEATHER and walk back to the south-east
corner of the island to return to the ocean. Swim east one screen and wait for
the whale to appear. Keep swimming and Rosella will be swallowed by the whale.
A bottle will be floating around in the whale's mouth that contains a note. The
note contains lots of references to other Sierra games, but reading it doesn't
increase the score at all. The aim in this location is to climb up the whale's
tongue, although that can be quite tricky as Rosella will slide off unless she
climbs up the correct path. Start at the far left side of the tongue, and then
keep alternating between climbing right and up until Rosella starts walking on
the top of the tongue. It's still possible to fall off at this point, so walk
right and up once again until Rosella is standing under the uvula at the top of
the screen. TICKLE UVULA WITH FEATHER to escape the whale.
Rosella still isn't safe from the shark after landing back in the ocean, so
swim north to the small desert island in the distance. You may want to save
if the shark is not around so that the game can be restored if he does appear.
After making it safely to the island, walk into the middle of the wrecked boat
at the right side of the island and LOOK GROUND to find a golden bridle. THROW
FISH to the pelican and he will drop a whistle that he was holding. GET WHISTLE
and then BLOW WHISTLE. A dolphin appears at the south shore and waits for
Rosella, so RIDE DOLPHIN across the ocean to return to Tamir.
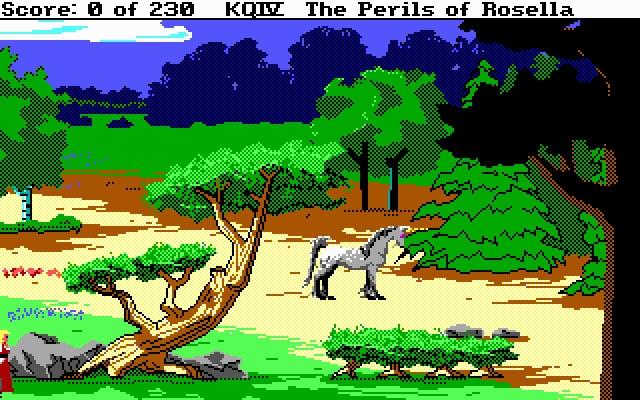
Walk north one screen and east two screens to the wood. If the unicorn is not
there, exit and return to the area until he is. Before he walks into the next
screen, quickly SHOOT ARROW at the unicorn. The unicorn will not be afraid of
Rosella any longer, so approach the unicorn and PUT BRIDLE ON UNICORN. RIDE
UNICORN and Rosella will set off for Lolotte's castle, where her henchman once
again bring her to the throne room. Lolotte tells Rosella that she wants the
hen that can produce golden eggs, which is currently being kept in the ogre's
house. Rosella is returned to the bottom of the mountain.
-------------------------------------------------------------------------------
2.3. Finding the Hen
-------------------------------------------------------------------------------
Walk west two screens and south one screen to the ogre's house. If either the
ogre or the ogress sees Rosella, quickly exit and return to the area until they
are gone. OPEN DOOR but don't enter the house yet. If you are playing the AGI
version of the game, type the THROW BONE TO DOG command before entering the
house, as the game will not pause when commands are entered. The SCI version of
the game pauses when you type in commands, so there is no need to type in the
command outside the house on this version. Enter the house and THROW BONE TO
DOG, who will be so content with the bone that he forgets about Rosella.
With the dog out of the way, walk up the steps to the first floor of the house
and GET AXE from the right side of the room. Walk down the steps to the closet
and OPEN DOOR to hide under the steps. Wait in here until a message appears
about the ogre being in the house. LOOK KEYHOLE and watch him. He will eat his
dinner and then tell his wife to bring him his hen. Keep watching until Rosella
looks away from the keyhole. OPEN DOOR to exit the closet. GET HEN from the
table. Walk toward the front door to the house and the hen will squawk, which
wakes the ogre from his sleep. Quickly OPEN DOOR to escape the house.
On the AGI version, escaping from the house can be difficult as the game will
not pause when you try to open the door. The best way seems to be to approach
from the south side of the door, as the door opens very slowly and Rosella is
able to move through the gap if she approaches from the south. From the east
the exit is blocked by the door until it is fully open, by which time the ogre
will have caught up with Rosella. After escaping from the house, Rosella still
isn't safe from the ogre as he will continue to pursue her.
Quickly walk east one screen to be safe from the giant. Rosella finds herself
in a creepy forest where the trees will kill her if she walks too close.
Fortunately we obtained the axe from the first floor of the giant's house, so
USE AXE to cut the trees here and they will be so frightened that they won't be
a danger to Rosella any more. Walk north one screen and east two screens to
return to Lolotte's castle. She tells Rosella that she still doubts Rosella and
wants her to recover Pandora's box, though she doesn't know its location.
Rosella is once again returned to the bottom of the mountain.
-------------------------------------------------------------------------------
2.4. Finding the Magic Fruit
-------------------------------------------------------------------------------
Pandora's box can only be found at night, so we can take some time away from
Lolotte's quest to find an important item that will help King Graham. Walk west
one screen, south one screen and then east one screen. Enter the cave to see
three witches. The left witch will slowly chase after Rosella, so let's try and
avoid her first of all. Walk to the bottom-right corner of the cave and wait
for the witch to walk past the bottom of the cauldron. Now walk north-west to
the top of the cauldron and the witch should not be able to get past. The other
two witches will be passing a glass eye between them so that they can watch
Rosella. Walk between the witches and GET EYE as they pass it to each other.
Quickly exit the cave before the other witch catches Rosella.
Walk back into the cave to see that all three witches are crouched at the back
of the cave. They plead with Rosella for their glass eye, and throw a scarab
toward her saying that it will protect her from the undead. GET SCARAB and then
GIVE EYE back to one of the witches. The witches are still dangerous, so exit
the cave before they have a chance to catch Rosella. Walk south three screens
to return to the waterfall. WEAR the CROWN and Rosella will again transform
into a frog to pass through the waterfall. Walk east into the cave and LIGHT
LANTERN to start walking through the dark cave.
Save in each new room of the cave, so that you can exit and return to the room
if the troll does appear. Walk south one screen, then walk down to the bottom
of the room and walk east two screens. A very small opening can be seen at the
right side of the cave, although be careful as there is a chasm in this area.
Enter the command to PUT BOARD OVER CHASM. When Rosella says that she is not
close enough, walk a small distance to the right and try again. Keep doing this
until Rosella finally puts the board down near the middle of the area. Walk
across the board and Rosella will pick it up on the other side. Walk north one
screen and then go through the opening to exit the cave.
Outside the cave, walk toward the edge of the swamp and JUMP onto the grass
platform. JUMP ten more times and Rosella will land on the final grass platform
before an island with a snake on it. PUT BOARD DOWN but don't cross over it
just yet. The snake on the island is currently protecting the magic fruit on
the tree, so we need to find some way of distracting it first of all. PLAY
FLUTE and the snake will become temporarily hypnotised. Walk across the board
to the island and walk around the snake to GET FRUIT. The snake will return to
normal after a while, so quickly walk back over the board.
-------------------------------------------------------------------------------
2.5. Finding Pandora's Box
-------------------------------------------------------------------------------
After avoiding the snake, JUMP back across the grass platforms to return to the
entrance of the cave. Enter the cave and walk south one screen. PUT BOARD OVER
CHASM and walk across it. Continue west for two screens and once again remember
to save after entering each new area in case the troll appears. Walk north one
screen and go through the opening to return to the area behind the waterfall.
Walk into the pool of water and Rosella will return safely to the other side of
the waterfall. Walk north one screen and the night will begin. Zombies try to
catch Rosella in the graveyard at nighttime, though fortunately the scarab that
Rosella took from the three witches will protect her from them. Walk west one
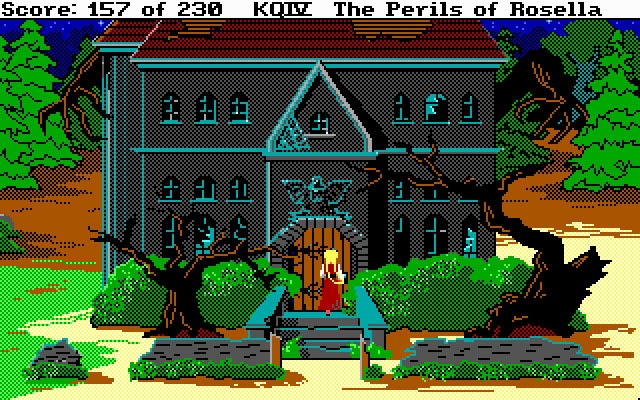
screen and OPEN DOOR to enter the old house.
The house has a number of ghosts that have left items in the graveyard and need
Rosella to bring them back. The first ghost is a baby that has lost his rattle.
Walk west to the parlor and LOOK GIRL in the portrait to see that her eyes seem
to be looking at the left wall. Walk to the left wall and LOOK WALL to see a
small latch. FLIP LATCH and walk west through the doorway into the tower. GET
SHOVEL leaning against the wall. Walk east two screens and south one screen to
exit the house. Walk west one screen to the graveyard and approach the grave at
the top-left corner of the area. DIG in front of this grave to find a baby
rattle. Walk east one screen and OPEN DOOR to return to the house.
Walk upstairs and go through the left doorway into the master bedroom. Walk
west one screen to the nursery and GIVE RATTLE to the ghost. Walk east and then
south to see a new ghost walk through the right doorway on the ground floor.
Instead of following him, walk south to exit the house and then west to return
to the graveyard. Approach the grave at the bottom-left corner of the area and
DIG to find the bag of gold coins. Walk east one screen and OPEN DOOR to return
to the house. Wait until the ghost enters the room and then GIVE COINS to him.
The new ghost is crying upstairs because she has lost her locket. Walk south to
exit the house and then go east to another section of the graveyard. Approach
the grave at the left side of the cross and DIG to find a locket. Walk west and
OPEN DOOR to return to the house. Walk upstairs and go through the right
doorway to enter an old bedroom where the ghost of a woman is sitting in a
rocking chair. GIVE LOCKET to the ghost and she will disappear. Walk south
twice to exit the house and then walk west to return to the graveyard. DIG in
front of the left grave at the bottom-right corner of the area to find a medal.
Walk east one screen and OPEN DOOR to return to the house.
Walk west one screen to the parlor and GIVE MEDAL to the ghost. Walk east and
south to exit the house and then walk east to return to the graveyard. DIG in
front of the grave at the top of the area to find a toy horse. The shovel will
break after Rosella has used it for the fifth time, but she won't need to use
it again. Walk west one screen and OPEN DOOR to return to the house. Walk
upstairs and go through the right doorway to enter the bedroom. CLIMB LADDER to
the attic. GIVE TOY HORSE to the ghost on the chest. After the fifth ghost in
the house disappears, Rosella is free to explore the house.
OPEN CHEST. LOOK IN CHEST to find a set of sheet music. Climb down the ladder
and walk south to exit the room. Go downstairs and walk west two screens to
return to the tower. Climb up two screens, making sure to save frequently as
the top screen has very narrow steps. You may find it easier to use the page up
key when walking up the steps. When the steps curve around to face south, it
can seem confusing as the up arrow is actually used to make Rosella walk up
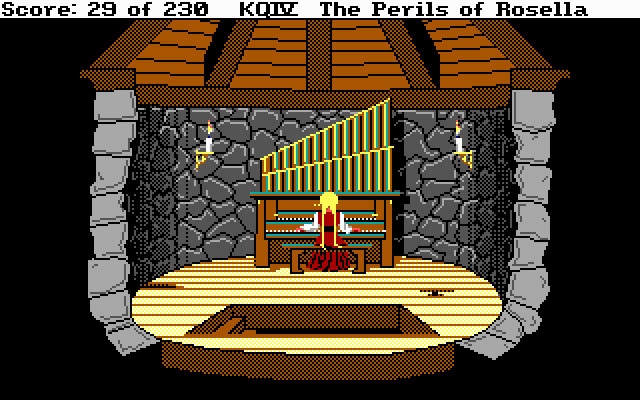
them. At the top of the steps, SIT down on the bench in front of the organ.
PLAY SHEET MUSIC to open a small drawer. GET KEY from the drawer.
STAND up and walk back down the narrow spiral steps to the bottom of the tower.
Use the end key when walking down the steps to reduce the chance of falling.
Walk east two screens and then south to exit the house. Walk east one screen
and UNLOCK DOOR of the crypt using the key from the organ. OPEN DOOR and enter
the crypt. Walk east to the edge of the platform and GET LADDER to lower it
down to the floor. CLIMB down the ladder and a mummy will exit the coffin to
try and catch Rosella. She will be safe as long as she has the scarab. Walk to
the bottom-right corner of the crypt to see Pandora's box. GET BOX.
-------------------------------------------------------------------------------
2.6. Finding the Talisman
-------------------------------------------------------------------------------
CLIMB back up the ladder and go through the doorway to exit the crypt. Walk
south two screens and east one screen to return to Lolotte's castle. Lolotte
wants Rosella to marry her son, Edgar. The henchmen take all of Rosella's items
away and she is then taken to Edgar's room. After a while, Edgar will walk up
the steps outside the room to push a rose under the door. Walk toward the door
and GET ROSE. GET KEY from the rose. UNLOCK DOOR and then OPEN DOOR. Walk down
the stairs to exit the tower. Carefully walk down to the bottom of the spiral
steps and then go east one screen to the dining room.
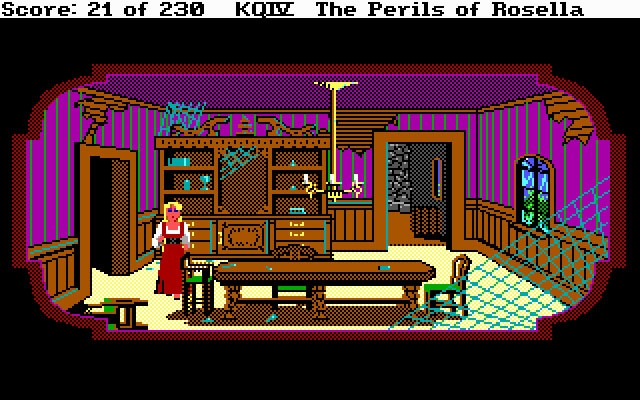
Go through the top-right door to enter the kitchen. Walk to the right cabinet
and OPEN CABINET. GET INVENTORY. Walk west one screen and go through the
bottom-right door. Walk east one screen and then walk up the spiral steps to
the top of the tower. USE GOLD KEY ON DOOR. OPEN DOOR to enter Lolotte's room.
SHOOT LOLOTTE with one of Cupid's arrows to kill her. Edgar enters the room and
tells Rosella that she can now walk freely around the castle. Before exploring
any further, GET TALISMAN from the table at the left side of the room.
-------------------------------------------------------------------------------
2.7. Journey to Genesta
-------------------------------------------------------------------------------
Walk down the spiral steps to the middle of the tower and then go west to the
hall, where the henchmen no longer try to catch Rosella. OPEN DOOR. GET HEN.
GET BOX. Exit the storage room and walk east one screen. Walk down the spiral
steps to the bottom of the tower. Go west one screen and then walk south to
exit the castle. Enter the stable and OPEN GATE to free the unicorn. Exit the
stable. Walk south two screens to return to the bottom of the mountain path.
Walk north two screens and enter the crypt. CLIMB down the ladder. DROP BOX on
the floor. CLIMB up the ladder and go through the doorway to exit the crypt.
CLOSE DOOR. LOCK DOOR. Rosella kicks the key under the door, preventing anyone
else from entering the crypt. Walk west five screens, north one screen and west
three screens to return to the island. Walk west one screen, north one screen
and OPEN DOOR to enter Genesta's castle. Walk west one screen and up one screen
to enter Genesta's bedroom. Walk to the side of the bed and GIVE TALISMAN to
Genesta to complete the game. In the ending, Genesta congratulates Rosella for
saving the land of Tamir. Rosella returns to Daventry and gives the magic fruit
to Graham on his bed, who immediately recovers and tells Rosella to keep the
adventurer's hat as her adventures aren't over yet.
===============================================================================
3. Character List
===============================================================================
BETTY COWDEN
Found in the bedroom on the top floor of the haunted house. Cowden is the
third ghost that appears in the house. She has lost her locket.
CUPID
Found one screen west from the ogre's house, Cupid occasionally appears to go
swimming in the pool. He becomes scared and flies away when Rosella walks
toward him, leaving his bow and arrows at the side of the pool.
DOG
Found in the ogre's house, the vicious dog will rush toward Rosella as soon
as she enters the house. After he has been given the bone, the dog completely
ignores Rosella and she is then safe to walk around him.
DOLPHIN
Found by blowing the whistle on the small island in the ocean. Rosella is
able to ride the dolphin back to the beach at the left side of Tamir.
DWARVES
Found in the dwarf house after Rosella has tidied it, the dwarves eat their
soup before heading back to the mine to work. One of them leaves a pouch of
diamonds. When Rosella returns it to the dwarf, he gives her an oil lantern
in return for her honesty and also lets her keep the diamond.
EDGAR
Found in Lolotte's castle. Edgar is the son of Lolotte, and he takes a liking
to Rosella when she visits the castle. When Rosella is locked in the castle
later on, Edgar visits her room to help free her from the castle. In return
for his kindness, Genesta transforms him into a prince.
FISHERMAN
First found at the end of the pier, the fisherman heads back to his house
after Rosella has watched him fish for a few seconds. He gives Rosella his
fishing pole in exchange for the pouch of diamonds.
FISHERMAN'S WIFE
Found in the house at the start of the pier, she ignores Rosella and kneads
dough on a counter at the back of the house. The pouch of diamonds can be
given to her instead of the fisherman in exchange for the fishing pole.
FROG
Found in the pond one screen north-west from the dwarf house. The frog jumps
toward the gold ball when Rosella drops it at the corner of the pool. Rosella
is able to pick the frog up to kiss it, which transforms into the prince.
GENESTA
Found in the castle on an island at the left side of Tamir, Genesta is a kind
fairy who has brought Rosella to Tamir to find the magic fruit. She has asked
Rosella to find the magic amulet that was stolen from her by Lolotte.
HEN
After Rosella has found the hen in the ogre's house, it is given to Lolotte
in her castle. When Rosella visits Lolotte's castle later on, the hen can be
found in the storage room and is returned to Genesta in her castle.
HENCHMEN
Found in Lolotte's castle. The henchmen are the servants of Lolotte and they
obey every command that she gives. They transport Rosella to the castle.
HIRAM BENNET
Found in the nursery on the top floor of the haunted house. Bennet is the
first ghost that appears in the house. He has lost his rattle.
GRAHAM
Found in Daventry castle. Graham was the main character in the first two
games. He has become very sick at the start of this game and can only be
saved by a magic fruit that is found in the land of Tamir.
LOLOTTE
Found in the castle at the east side of Tamir, Lolotte is the evil fairy and
ruler of Tamir that has stolen Genesta's amulet. When Lolotte discovers that
Rosella has found the way into her land, she asks her to find a series of
items that she can use for evil. She wants her son Edgar to marry Rosella.
LORD CONINGSBY
Found in the parlor on the bottom floor of the haunted house. Coningsby is
the fourth ghost that appears in the house. He has lost his medal.
MINSTREL
Found one screen south from the fisherman's house. The minstrel can't play
music very well and needs a new hobby to divert his attention. When Rosella
gives him the book, he takes up acting instead and gives away his lute.
MUMMY
Found in the crypt. The mummy walks out of the coffin and tries to catch
Rosella, but is harmless as long as Rosella has the scarab.
NEWBERRY WILL
Found in various rooms on the bottom floor of the haunted house. Will is the
second ghost that appears in the house. He has lost his locket.
OGRE
Found outside the house one screen east from the pool where Cupid swims. The
ogre tries to catch Rosella when she gets too near his house. The ogre also
appears inside his house when Rosella is hiding in the closet.
OGRESS
Found in the house one screen east from the pool where Cupid swims. She puts
the hen on the kitchen table when the ogre asks for it. She will chase
Rosella if she enters the kitchen at the right side of the house.
PAN
Found one screen east and one screen south-east of the fisherman's house, Pan
is a satyr that plays a flute. Rosella plays the lute to gain the attention
of Pan, and she can then give him the lute in return for his flute.
PEACOCK
Found on the island at the west side of Tamir. Move to a different location
on the island if the peacock doesn't appear. The peacock drops a feather.
PRINCE
Found by kissing the frog after he has retrieved the gold ball for Rosella.
The prince is stunned to see a woman in maiden's clothes, not knowing that
Rosella is a princess. He gives her his golden crown and leaves.
ROSELLA
The main character of the game. Rosella travelled to Tamir to find a magic
fruit that would help her father King Graham recover from his illness. While
in Tamir she also has to help the kind fairy Genesta find her talisman.
SNAKE
Found at the right side of the swamp. The snake attacks Rosella if she gets
too near to it, but becomes distracted if she plays the flute. Rosella can
then get the fruit, but be quick as the snake will soon return to normal.
SWAMP MONSTER
Found in the swamp. This strange green creature only appears if Rosella wears
the crown near the swamp. It emerges from the swamp to eat the frog.
TROLL
Found in the cave behind the waterfall. The troll frequently appears in the
dark cave to chase after Rosella. Make sure that the game is saved before
entering the cave, so that it can then be restored if the troll appears.
UNICORN
Found two screens wast from the dwarf house, the unicorn is initially scared
of Rosella. After Cupid's arrow has been used on the unicorn, Rosella can put
a bridle on him to ride him back to Lolotte's castle. The unicorn can be
released from Lolotte's stable near the end of the game.
WHALE
Found in the ocean one screen east from Lolotte's island. The whale swallows
Rosella and she ends up in its mouth. Rosella must use the feather to tickle
the uvula at the top of the whale's tongue to escape.
WILLY
Found in the attic at the top of the haunted house. Willy is the fifth and
final ghost that appears in the house. He has lost his toy horse.
WITCHES
Found in the cave east of the evil forest. The three witches pass a glass eye
between them so that they can see Rosella. When Rosella steals their eye,
they beg her to have it back and give Rosella the scarab when it is returned.
ZOMBIES
Found in the graveyard at nighttime. The zombies try to catch Rosella as she
walks around in the graveyard. She is safe as long as she has the scarab.
===============================================================================
4. Item List
===============================================================================
AXE (SCI) / SHARP AXE (AGI)
Found on the top floor of the ogre's house. It is used to frighten the trees
in the evil forest so that Rosella can pass through the forest unharmed.
BAITED FISHING POLE
Found by using the worm on the fishing pole. It is used to catch a fish from
the end of the pier one screen west from the fisherman's shack.
BOARD (SCI) / SMALL BOARD (AGI)
Found behind the waterfall. It is used to cross over the chasm in the cave.
It is also used to cross from the platform to the island in the swamp.
BONE
Found at the left side of the cave behind the waterfall. It is thrown to the
dog in the ogre's house to prevent him from attacking Rosella.
BROKEN SHOVEL
Found by digging six times with the shovel. The broken shovel is useless and
Rosella will not be able to use it to recover the items for the ghosts.
CUPID'S BOW (SCI) / BOW AND ARROWS (AGI) / BOW AND ARROW (AGI) / BOW (AGI)
Found at the side of the pool two screens north of the frog pond after Cupid
has flown away. It is used to shoot arrows at the unicorn and Lolotte. In the
SCI version, this item does not change names if arrows are shot.
DEAD FISH
Found by using the fishing pole at the end of the pier near the fisherman's
shack. It is given to the pelican on the desert island for the whistle.
DIAMOND POUCH (SCI) / POUCH OF DIAMONDS (AGI)
Found in the seven dwarfs house after Rosella has cleaned the house. It is
returned to the dwarf at the right side of the the mine for the lantern.
FISHING POLE
Found by giving the pouch of diamonds to the fisherman in the shack near the
pier. The worm is used on the pole to make the baited fishing pole.
FROG (SCI ONLY)
Found at the right side of the pond after the golden ball has been dropped.
The frog is kissed so that it transforms into the prince. The frog is still
picked up in the AGI version but it doesn't appear as an inventory item.
GLASS BOTTLE / GLASS BOTTLE AND NOTE (AGI ONLY)
Found in the whale's mouth. The note can be found in the bottle. In the AGI
version, looking at the bottle gives the glass bottle and note item.
GOLD COINS (SCI) / BAG OF GOLD COINS (AGI)
Found by digging the bottom-left grave in the west graveyard. It is given to
the ghost in the entrance hall on the ground floor of the haunted house.
GOLDEN BALL
Found under the bridge one screen west from the dwarf house. It is dropped at
the bottom-right corner of the pond so that the frog returns it to Rosella.
GOLDEN BRIDLE
Found in the boat at the right side of the island after Rosella has escaped
from the whale. It is put on the unicorn so that Rosella can ride him.
GOLD KEY
Found in the rose that Edgar slides the under the door after Rosella has been
captured by Lolotte's. It is used to unlock the door to Lolotte's bedroom.
LANTERN (LIT) (SCI) / LIT OIL LANTERN (AGI)
Found by lighting the unlit oil lantern. It is used in the cave behind the
waterfall. Rosella can still be caught by the troll while using the lantern.
LANTERN (UNLIT) (SCI) / UNLIT OIL LANTERN (AGI)
The dwarf in the mines will give Rosella the lantern when she tries to give
him the pouch of diamonds. It can be lighted to make the lit oil lantern.
LOCKET
Found by digging the grave near the cross in the east graveyard. It is given
to the ghost in the right bedroom on the ground floor of the haunted house.
LUTE (SCI) / WOODEN LUTE (AGI)
Found by giving the book of Shakespeare to the minstrel that is playing his
flute on the rock. It is given to Pan to receive the flute.
MAGIC FRUIT
Found on the swamp island after the snake has been distracted. It is given to
Graham at the end of the game to help him recover from his illness.
MAGIC HEN
After Rosella has hidden in the closet until the ogre returns, the hen is
found on the ogre's table. It is given to Genesta at the end of the game.
MEDAL (SCI) / MEDAL OF HONOR (AGI)
Found by digging the bottom-right grave in the west graveyard. It is given to
the ghost in the parlor on the ground floor of the haunted house.
NOTE
Found in the glass bottle. The note is read by Rosella and gives references
to other Sierra games. No points are given for finding this item.
OBSIDIAN SCARAB
Found in the witch cave after Rosella has taken the glass eye. It is used to
protect Rosella from the mummy in the crypt and the zombies in the graveyard.
PANDORA'S BOX
Found in the crypt. The box is guarded by the mummy, but Rosella will be
safe is she has the scarab. Pandora's box is given to Lolotte.
PEACOCK FEATHER
Dropped by the peacock on the beach on Genesta's island. It is used to tickle
the uvula at the top of the tongue to escape from the whale's mouth.
ROSE (SCI) / RED ROSE (AGI)
Edgar slides the gold key under the door after Rosella has been captured in
Lolotte's castle. The gold key to Lolotte's bedroom is found in the rose.
SHEET MUSIC
Found in the chest after the toy horse has been given to the ghost in the
haunted house. It is played on the pipe organ to find the skeleton key.
SHOVEL
Found at the bottom of the secret steps in the haunted house. It is used to
in the graveyard to find the rattle, coins, locket, medal and toy horse.
SHAKESPEARE BOOK (SCI) / BOOK OF SHAKESPEARE (AGI)
Found on the shelf at the right side of the portrait in the parlor of the
haunted house. It is given to the minstrel to receive the flute.
SILVER BABY RATTLE
Found by digging the top-left grave in the west graveyard. It is given to the
ghost in the nursery on the ground floor of the haunted house.
SILVER FLUTE
Found by giving the minstrel's lute to Pan. It is played to distract the
snake on the swamp island so that Rosella can get the magic fruit.
SILVER WHISTLE
The pelican will drop the whistle that he was holding after Rosella throws
the dead fish toward it. The whistle is blown to make the dolphin appear.
SKELETON KEY
After playing the sheet music on the pipe organ, a secret drawer opens that
contains the skeleton key. It is used to unlock and lock the crypt.
SMALL CROWN (SCI) / GOLD CROWN (AGI)
Found at the side of the pond after Rosella has kissed the frog. It is worn
by Rosella so that she can travel to the other side of the waterfall.
TALISMAN (SCI) / MAGIC TALISMAN (AGI)
After Lolotte has been shot with one of Cupid's arrows, the talisman is found
on the table in Lolotte's bedroom. It is given to Genesta.
TOY HORSE
Found in front of the grave at the top of the area in the east graveyard. It
is given to the ghost in the attic at the top of the haunted house.
WITCHES' GLASS EYE (SCI) / GLASS EYE (AGI)
Found in the witches cave. They pass the eye between each other so that they
can watch Rosella. It is taken to stop the witch from chasing Rosella.
WORM (SCI) / LARGE EARTHWORM (AGI)
The worm randomly appears in the area one screen east from the dwarf mine. It
is used to bait the fishing pole so that Rosella can catch a fish.
===============================================================================
5. Point List
===============================================================================
EXPLORING TAMIR
---------------
2 2 Get the golden ball from under the bridge.
4 2 Get the book from the haunted house.
9 5 Clean the house of the seven dwarfs.
11 2 Get the pouch on the table.
14 3 Give the pouch to the dwarf in the mine.
16 2 Get the worm.
19 3 Give the book to the minstrel.
22 3 Give the pouch to the fisherman.
23 1 Put the worm on the fishing pole.
26 3 Catch a fish from the end of the pier.
29 3 Give the lute to Pan.
31 2 Get Cupid's bow from the side of the pool.
34 3 Kiss the frog.
36 2 Receive the crown from the prince.
41 5 Wear the crown near the waterfall.
43 2 Get the board from the cave.
45 2 Get the bone from the cave.
FINDING THE UNICORN
-------------------
47 2 Get the feather from the island.
52 5 Tickle the whale's uvula with the feather.
55 3 Get the bridle on the desert island.
59 4 Throw the fish to the pelican.
61 2 Get the whistle on the sand.
63 2 Blow the whistle on the desert island.
65 2 Ride the dolphin to the main island.
69 4 Shoot Cupid's arrow at the unicorn.
72 3 Put the bridle on the unicorn.
79 7 Ride the unicorn.
FINDING THE HEN
---------------
83 4 Throw the bone to the dog.
85 2 Get the axe from the ogre's house.
89 4 Get the hen from the ogre's house.
96 7 Bring the hen to Lolotte.
100 4 Use the axe on the trees.
FINDING THE MAGIC FRUIT
-----------------------
103 3 Get the glass eye from the witch cave.
105 2 Get the scarab from the witch cave.
108 3 Give the glass eye to the witches.
110 2 Put the board over the chasm in the cave.
112 2 Put the board over the swamp.
116 4 Play the flute to the snake.
126 10 Get the fruit from the tree.
FINDING PANDORA'S BOX
---------------------
128 2 Put the board over the chasm in the cave.
132 4 Move the latch in the haunted house.
134 2 Get the shovel from the haunted house.
137 3 Find the rattle in the graveyard.
139 2 Give the rattle to the ghost.
142 3 Find the gold coins in the graveyard.
144 2 Give the gold coins to the ghost.
147 3 Find the locket in the graveyard.
149 2 Give the locket to the ghost.
152 3 Find the medal in the graveyard.
154 2 Give the medal to the ghost.
157 3 Find the toy horse in the graveyard.
159 2 Give the toy horse to the ghost.
161 2 Look in the chest to find the music.
165 4 Play the sheet music at the organ.
167 2 Get the key from the organ drawer.
170 3 Unlock the door to the crypt.
172 2 Lower the ladder in the crypt.
176 4 Get Pandora's Box from the crypt.
FINDING THE TALISMAN
--------------------
183 7 Bring Pandora's Box to Lolotte.
185 2 Get the key from the rose.
187 2 Open Edgar's bedroom door.
191 4 Get the inventory from the cabinet.
193 2 Open Lolotte's bedroom door.
201 8 Shoot Cupid's arrow at Lolotte.
206 5 Get the talisman from Lolotte's bedroom.
JOURNEY TO GENESTA
------------------
208 2 Get the hen from the storage room.
210 2 Get Pandora's Box from the storage room.
214 4 Open the gate to free the unicorn.
216 2 Drop Pandora's Box in the crypt.
218 2 Lock the crypt door with the organ key.
228 10 Give the talisman to Genesta.
230 2 Give the hen to Genesta.
===============================================================================
6. Maps
===============================================================================
MAP 1: TAMIR
------------
_______ _______ _______ _______ _______ _______ _______
| | | | | | | | | Ogre | | Evil | | Witch |
| Ocean |--| Beach |--| Pan |--| Cupid |--| House |--|Forest |--| Cave |
|___ ___| |___ ___| |___ ___| |___ ___| |___ ___| |___ ___| |___ ___|
| | | | | | |
___|___ ___|___ ___|___ ___|___ ___|___ ___|___ ___|___
| | | | | | | | | Evil | | Evil | | |
*1| Pier |--| House |--| Pan |--|Forest |--|Forest |--|Forest |--|Forest |
|___ ___| |___ ___| |___ ___| |___ ___| |___ ___| |___ ___| |___ ___|
| | | | | | |
___|___ ___|___ ___|___ ___|___ ___|___ ___|___*2 ___|___
| | | | | | | | | | |Haunted| | |
*1| Ocean |--|Mnstrel|--|Mnstrel|--| Pond |--|Graveyd|--| House |--|Graveyd|
|___ ___| |___ ___| |___ ___| |___ ___| |___ ___| |___ ___| |___ ___|
| | | | | | |
___|___ ___|___ ___|___ ___|___ ___|___ ___|___ ___|___
| | | | | | | | | Dwarf | | | | |
| Ocean |--|Mnstrel|--|Unicorn|--|Bridge |--| House |--| Worm |--|Wtrfall|*3
|___ ___| |___ ___| |___ ___| |___ ___| |___ ___| |___ ___| |___ ___|
| | | | | | |
___|___ ___|___ ___|___ ___|___ ___|___ ___|___ ___|___
| | | | | | | | | | | | |Mountn |
| Ocean |--| Beach |--| River |--|Unicorn|--| Mine |--|Forest |--| Path |*4
|_______| |_______| |_______| |_______| |_______| |_______| |_______|
*1: Leads toward Genesta's island.
*2: Leads to the Entrance Room on map 2.
*3: Wear the crown to swim through the waterfall.
*4: Leads to the Mountain Path on map 5.
MAP 2: HAUNTED HOUSE - FIRST FLOOR
----------------------------------
_______
| Pipe |
| Organ |
|___ ___|
|
___|___ _______
|Spiral | | |
|Stairs | |Kitchen|
|___ ___| |___ ___|
| |
___|___ _______ _______ ___|___
|Spiral | | | |Entrnce| |Dining |
|Stairs |--|Parlor |--| Room |--| Room |
|_______| |_______| |___ ___| |_______|
|
*1
*1: Leads to the Haunted House on map 1.
MAP 3: HAUNTED HOUSE - SECOND FLOOR
-----------------------------------
_______
| |
| Attic |
|___ ___|
|
_______ _______ ___|___
| | |Master | | |
|Nursery|--|Bedroom| |Bedroom|
|_______| |_______| |_______|
__ __/
_______/
|Entrnce|
| Room |
|___ ___|
|
*1
*1: Leads to the Haunted House on map 1.
MAP 4: WATERFALL CAVE
---------------------
_______ _______ _______ _______ _______ _______
|Behind | | | | | | | | | | Magic |
*1-|Wtrfall|--| Cave |--| Cave | | Exit |--| Swamp |--| Fruit |
|_______| |___ ___| |___ ___| |___ ___| |_______| |_______|
| | |
___|___ ___|___ ___|___
| | | | | |
| Cave |--| Cave |--| Chasm |
|_______| |_______| |_______|
*1: Leads to the Waterfall on map 1.
MAP 5: LOLOTTE'S CASTLE
-----------------------
_______ _______ _______
| | |Storage| |Lolotes|
| Cell | | Room | |Bedroom|
|___ ___| |___ ___| |___ ___|
| | |
_______ ___|___ ___|___ ___|___
|Edgar's| | | | | | Tower |
|Bedroom| | Hall |--| Hall |--| Steps |
|___ ___| |_______| |_______| |___ ___|
| |
___|___ _______ |
| Tower | | | |
| Steps | |Kitchen| |
|___ ___| |_______| |
| __/ |
___|___ _______/ _______ ___|___
| Tower | |Dining | |Throne | | Tower |
| Steps |--| Room |--| Room |--| Steps |
|_______| |_______| |___ ___| |_______|
|
_______ ___|___
| | |Outside|
|Stable |--|Castle |
|_______| |___ ___|
|
___|___
|Mountn |
| Path |
|___ ___|
|
*1
*1: Leads to the Mountain Path on map 1.
===============================================================================
7. Easter Eggs and Secrets
===============================================================================
NOTE
----
The glass bottle from the whale's mouth has a note inside it. Rosella can read
the note to find references to other Sierra adventure games.
SPACESHIP
---------
In the AGI version of the game, type "beam me" in the west hall in Lolotte's
castle to transport to a spaceship where staff from Sierra can be seen. You can
also enter debug mode and teleport to room 152 to enter the room. Walk south
through the gap at the bottom of the room to return to the castle.
===============================================================================
8. Debug Information
===============================================================================
AGI version: Hold Alt + D to access debug mode. Type "Get object" followed by a
number to collect any item in the game, "Gimme gimme" to collect all items, or
"TP" followed by a number to teleport to a new location. You can set night or
day by typing "create dark" or "create day". "Time" gives the game time.
SCI version: Turn num lock off and hold both shift keys and the minus button.
A window will appear where you can view and change different variables. To
change location, type 13 and then change the number in the window. Hold the
shift key and press D to exit the menu and Rosella will change location.
ITEMS
-----
1 Golden Ball 16 Bow and Arrows 31 Small Board
2 Pouch of Diamonds 17 Book of Shakespeare 32 Magic Hen
3 Gold Crown 18 Sheet Music 33 Broken Shovel
4 Obsidian Scarab 19 Sharp Axe 34 Large Earthworm
5 Locket 20 Bone 35 Glass Bottle & Note
6 Silver Baby Rattle 21 Shovel 36 Note
7 Bag of Gold Coins 22 Fishing Pole 37 Bow and Arrow
8 Medal of Honor 23 Dead Fish 38 Bow
9 Toy Horse 24 Glass Eye 39 Lit Oil Lantern
10 Red Rose 25 Skeleton Key 40 Rose with Gold Key
11 Gold Key 26 Pandora's Box 41 Glass Bottle
12 Magic Talisman 27 Golden Bridle 42 Baited Fishing Pole
13 Magic Fruit 28 Silver Whistle 43 Glass Bottle
14 Silver Flute 29 Unlit Oil Lantern 44 Red Rose
15 Wooden Lute 30 Peacock Feather
LOCATIONS
---------
1 Beach north from fisherman's shack 49 Ogre's house living room
2 Meadow west from Cupid's pool 50 Ogre's house kitchen
3 Cupid's pool 51 Ogre's house closet
4 Ogre's house exterior 52 Ogre's house keyhole view
5 Forest east from ogre's house 53 Dwarf house bedroom
6 Witch cave exterior 54 Dwarf house main room
7 Fisherman's shack exterior 55 Dwarf mine west side
8 Meadow east from fisherman's shack 56 Dwarf mine east side
9 Forest south from Cupid's pool 57 Witches cave
10 Forest south from ogre's house 58 Haunted house pipe organ
11 Forest north from haunted house 59 Haunted house nursery
12 Forest north from witch cave 60 Haunted house bedroom
13 Beach south from fisherman's shack 61 Haunted house tower steps
14 Meadow west from frog pond 62 Haunted house master bedroom
15 Frog pond 63 Haunted house attic
16 Graveyard west from haunted house 64 Haunted house dining room
17 Haunted house exterior 65 Haunted house kitchen
18 Graveyard east from haunted house 66 Haunted house tower steps
19 Beach west from unicorn meadow 67 Haunted house parlor
20 Unicorn meadow 68 Haunted house entry room
21 Bridge over river 69 Crypt
22 Dwarf house exterior 70 Behind the waterfall
23 South from haunted house 71 Waterfall cave entrance
24 Waterfall 72 Waterfall cave north side
25 Beach west from river 73 Waterfall cave exit
26 Meadow with river 74 Waterfall cave south-west corner
27 Forest west from dwarf mine 75 Waterfall cave south side
28 Dwarf mine exterior 76 Waterfall cave south-east corner
29 Forest east from dwarf mine 77 Swamp west side
30 Mountain path 78 Swamp east side
31 Ocean west from beach with river 79 Mountain path
32 Ocean south from Genesta's island 80 Lolotte's castle stable exterior
33 Genesta's island north-west corner 81 Lolotte's castle west tower bedroom
34 Genesta's island north side 82 Lolotte's castle east tower bedroom
35 Genesta's island north-east corner 83 Lolotte's castle cell
36 Genesta's island west side 84 Lolotte's castle storage room
37 Genesta's island castle exterior 85 Lolotte's castle west tower steps
38 Genesta's island east side 86 Lolotte's castle hallway west side
39 Genesta's island south-west corner 87 Lolotte's castle hallway east side
40 Genesta's island south side 88 Lolotte's castle east tower steps
41 Genesta's island south-east corner 89 Lolotte's castle kitchen
42 Fisherman's shack interior 90 Lolotte's castle west tower bottom
43 Desert island 91 Lolotte's castle dining room
44 Whale's mouth 92 Lolotte's castle throne room
45 Genesta's bed chamber 93 Lolotte's castle east tower bottom
46 Genesta's tower stairway 94 Lolotte's castle stable interior
47 Genesta's tower entry hall 95 Pier west from fisherman's shack
48 Ogre's house bedroom 152 Spaceship easter egg room
===============================================================================
9. Copyright Information
===============================================================================
This file is Copyright 2003-2008 Tom Hayes. As it can be difficult to keep
track of websites that haven't posted the latest version of this file, please
do not distribute it without my permission. Send an e-mail to me if you would
like to post this file on your website and you will likely receive a positive
response. If you do post the file, please keep it in its original form with all
of the sections intact and credit the author (Tom Hayes) as the writer of the
file.

Our Verdict
Good
A solid adventure that is generally enjoyable, though it lacks enough polish or ambition to recommend without caution.
This game is groundbreaking for many reasons. It was the first game to use Sierra’s improved-technology SCI engine, to feature a female protagonist, and to offer sound card support. King’s Quest IV is a must-play if you like the other King’s Quest games, and worth trying out even if you’ve never played the others.


Top Adventure Games
More
Cantaloupe Chronicle
Today marks the beginning of your internship at the Cantaloupe Chronicle! Step into the shoes of a young reporter in a classic Point & Click Adventure as you uncover the mysteries of the small town. Write compelling articles, snap intriguing photos, and talk to the quirky townsfolk.
Linux
PC

Incremental Island
Build and expand a vibrant civilization on a procedurally generated island. Trade and conquer with other island nations to grow your wealth.
PC
Danger in Pompeii
Danger in Pompeii is an adventure puzzle game where you relive the city’s final day. Explore its streets, help its people, and solve the mystery of Mercury. Can you escape the eruption of Mount Vesuvius and save your friends?
PC
Beyond The Board
A single-player puzzle game that transforms traditional chess into a minimal, immersive journey. Every move is a step deeper into the world Beyond the Board, where shifting tiles and puzzles reveal the hidden fractures within the game’s very foundations.
PC
Kejora
When Kejora realizes that her peaceful village has been reliving the same day over and over, she and her friends seek out to try and uncover the origin of the mysterious time loop cursed on her village
PC