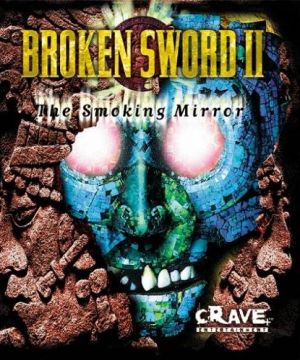
Walkthrough for Broken Sword: The Smoking Mirror
===============================================================================

                              FAQ/Walkthrough for
                       BROKEN SWORD 2: THE SMOKING MIRROR

===============================================================================


GUIDE INFORMATION
-----------------

Author:   Tom Hayes
E-mail:   thayesguides(at)gmail(dot)com
System:   PC
Updated:  19th June, 2008
Version:  1.1


CONTENTS
--------

1. Introduction
2. Walkthrough
3. Item List
4. Copyright Information


VERSION HISTORY
---------------

1.1:  19th June, 2008  (Format update)
1.0:  9th April, 2000  (First version)


===============================================================================

1.                                Introduction

===============================================================================


After the success of the original game, it was not surprising that a sequel
would be made. Broken Sword 2 begins shortly after the previous game. George,
the main character from Broken Sword 1, was forced to leave Nico, the photo
journalist from Broken Sword 1, in order to look after his dying father in
America. A few months later, George returns to Paris for a reunion.

While George was away, Nico was trying to expose a drugs smuggling ring, but
accidentally found something far more sinister when she gained possesion of a
strange obisidian stone. George and Nico go to visit the house of Mayan
archeologist Professer Oubier hoping to learn more about the stone, when they
are attacked. Nico is kidnapped, George is tied up, the house is set on fire
and to make things worse, he is left in the room with a tarantula which is
crawling slowly toward him. Welcome to Broken Sword 2.


===============================================================================

2.                                Walkthrough

===============================================================================


PROFESSER OUBIER'S HOUSE
------------------------

Right-click on the book case to find out that that it is being supported by a
block of wood. Use the block of wood, which is located at the bottom-right
corner of the book case. Use the metal bracket on the wall to get out of the
chair. Open the writing bureau, and get the tequila. A worm will fall onto the
floor. Get the worm. Open the drawer on the writing bureau to get a pot.
Right-click on the pot to get the house key. Get the dart from the floor, and
then get Nico's bag. Use the dart on the cabinet near the flames.

The cylinder is too hot to get by just picking it up, so use the panties on the
cylinder to get it. Use the cylinder with the syphon, and then use the syphon
on the flames. Use the door, and then go downstairs. Get the newspaper
clipping. Right-click the newspaper clipping to get Oubier's bank statement.
Right-click the handwritten note, and use the telephone to phone Andre
Lobineau. Use the house key with the front door and open the front door.


MONTFAUCON
----------

Wait for the waiter to come out of the cafe, and attempt to talk to him. He
will ignore you, and will go back into the cafe. When he comes out again, talk
to him. This time he will listen to you, and a moment later you will be given a
cup of coffee. Stop talking to the waiter, and Andre will show up. After a
short scene, you will start talking to Andre.

Ask him about the pot, and he will tell you about the Glease Gallery. Stop
talking to Andre. Talk to the man sitting down on the chair. Answer his first
question, and then ask him about himself. Ask him about himself once again.
While he is sulking, quickly grab the flask. Exit Montfaucon, and go to the
Glease Gallery.


GLEASE GALLERY
--------------

Walk over to the man standing by the cases. Use the flask with his glass. Use
the flask with his glass. The man will fall over, which means that you can
explore the gallery without Glease moaning at you. Walk left, and look at the
packing case to see that it has a label on it. Get the label. Walk over to
Glease, and talk to him.


MARSEILLES
----------

Look at the hut, and then look in the window of the hut. The man will drop
something down the trapdoor, and then will start talking to you.  Stop talking
to the man. Go down the steps, and get the hook that is floating in the water.
Go up the steps. Use the chimney to find out that it is too hot to touch. Use
the beer bottle with the chimney to cool it down. Use the chimney. Use the beer
bottle to block the chimney.

Go down the steps. Go up the trapdoor. Get the dog biscuits, and then go down
the trapdoor. Agh, that dog! Use the dog biscuits with the platform, and the
dog will walk onto the platform. Use the hook with the platform, and the dog
will fall into the water. Go up the steps, and climb over the fence. Walk left,
and climb up the ladder.

Open the left window, and use the hook with the fan. Go back through the window
and go down the ladder. Knock on the door nearest to the ladder, and a man will
answer. Ask him about the label. While he is unlocking the door, quickly go up
the ladder. When the man is standing outside, use the clamp. A barrel will
drop, and the man will walk over to see what is happening. While he is standing
there, quickly use the clamp again to knock the man over the side.

Go down the ladder, and go through the open door. Open the drawer to get a key.
Walk right, and a man will appear from behind the boxes. Talk to the man, and
ask him about the key. The man will run off. Push the button near the elevator.
To stop the elevator from closing, push the crate. Now that the elevator door
is stopped from closing, you can explore around the room.

Push the switch near the elevator to turn a light on. Walk to where the light
is shining, and look at the scratch marks. Open the secret door, and go through
it. Get the statue. Get the ropes from Nico. After a brief conversation with
Noco, she will leave the room. Get the masking tape from the floor. Exit the
room, and walk over to the elevator. Use the masking tape on the photoelectric
cell. Push the crate by the elevator.

Push the small crate that is on top of the left crate. Push the left crate. Use
the pallet carrier. Use the rope with the statue. Get the rope. Use the rope
with the pulley. Use the pallet carrier. Try and push the statue. Talk to Nico,
and ask her to help you push the statue. She will help you push it through the
door. Go through the newly opened door. Use the manacles with the cable. After
escaping, you will arrive back at the Glease Gallery, and after a brief
conversation you will arrive at Quaramonte.


QUARAMONTE
----------

Talk to the band, and ask about Miguel. Ask about music. Ask about the accident
at the mine. Stop talking to the band, and walk to the right. Pearl, a
character from Broken Sword 1, will start talking to you. Ask about Duane. Ask
about Duane. Ask about Duane. Stop talking to Pearl. Enter the police station,
and the general will start talking to you. Ask about Oubier. Ask about Oubier.
Stop talking to the general. Look at the chart on the wall. Leave the police
station, and Nico will start talking to you.

Stop talking to Nico, and walk right. Talk to Oubier. Ask about Oubier. Stop
talking to Oubier. Walk left, and go up the stairs into the office. After a
while, Conchita will talk to you. Ask about the accident at the mine. Ask about
the accident at the mine. Ask about the accident at the mine. Ask about Oubier.
Stop talking to Conchita, and then exit the office. Walk right until you get to
Duane. Talk to Duane. Ask about the truck. Ask about the truck. Ask about
music. Ask about Miguel twice. Walk left, and go up the stairs into the office.

Talk to Conchita, and ask about the detonator. Ask about the chart. Stop
talking to Conchita, and leave the office. Talk to Nico. Ask about the chart.
Ask about the chart. You will both walk into the police station. Talk to the
general. Ask about Nico. Talk to Renaldo. Ask about the ruins twice. Exit the
police station, and talk to Pearl. Ask about the ruins. Renaldo will leave.

Look at the chart on the wall. Exit the police station. Walk left, and go up
the stairs to the office. Talk to Conchita, and ask about the chart. Stop
talking to Conchita, and open the cupboard to get a detonator. Exit the office.
Walk right, and talk to Duane. Ask about the detonator. Ask about the
detonator. Enter the police station. Walk to the north to get to the cells.
Talk to Miguel.

As Nico, look at the lava lamp. Look at the television. Look at the portrait.
Look sword fish. Talk to the general. Ask about the lava lamp. Ask about the
television. Ask about the portrait. Ask about the sword fish.

As George, talk to Miguel. Ask about the noose. Ask about the noose. Use the
rope with the cell window. Get the noose, and use it with Duane. After a short
scene, you will arrive at Teoculcan.


TREEHOUSE
---------

Get the rope that is wrapped around the wheel. Use the bank statement with the
leaves. Use the statue with the waterwheel. Hubert will come out and speak to
you. Ask about Nico. Ask about root. Ask about root. Hubert says he needs his
collar pressed. Use the collar with the press. Use the rope with the press. Get
the cross. Use the cross on the press. Get the collar. Talk to Hubert. Ask
about the collar. Ask about the root.


VILLAGE
-------

The guard will talk to you. Ask about Nico. Ask about Hubert. Ask about the
shaman. Ask about the biscuits. Use the mayan stone with the biscuit box. Talk
to the guard, and ask about the biscuits. Enter the village, and talk to the
shaman. Ask about Nico. Ask about Nico. Ask about the root. Ask about the root.
Ask about the mayan stone. Ask about the jaguar stone. Ask about the jaguar
stone. Ask about the eagle stone. Ask about the eagle stone. Ask about the
mayan stone. Ask about the root.


TREEHOUSE
---------

Use the metal cone with the press. Use the root with the press. Get the cross.
Use the cross with the press. Get the cone. Go up the ladder.


KETCH'S LANDING
---------------

Look at the plans. Walk right, and talk to the boy, Rio. Stop talking, and go
up the steps. Use the ladder. Try to open the museum door. Talk to the ladies,
and ask about the cat. Answer their question how you like. Ask about the cat.
Ask about Rio. Ask about Rio. Ask about Rio. Ask about Emily. Stop talking to
the Ketch sisters, and go down the steps. Talk to Rio, and ask him about a
fish. Show him the worm. Talk to Rio. Ask about Emily. Stop talking to Rio.
Talk to Rio. Ask about the fish. Ask about the fish. Stop talking to Rio. Get
the inner tube from the bicycle.

Go up the steps and talk to the Ketch sisters. Ask about Emily. Ask about
Emily. The Ketch sisters will go down to the beach. Climb the ladder. Use the
inner tube with the right flagpole. Go down the ladder. Go down the steps. Talk
to Rio. Go up the steps. Use the fish with the inner tube. Get the red ball.
Climb the ladder. Get the inner tube. Climb down the ladder.

Use the inner tube with the tree. Use the red ball with the inner tube. Use the
ladder, to leave Bronson hanging from the flagpole. Get the marker. Go down the
steps. Get the plans. Get the theodolite. Go up the steps. Talk to Bronson. Ask
about the plans. Ask about the plans. Stop talking to Bronson. Show the plans
to the Ketch sisters.


BRITISH MUSEUM
--------------

Walk right, and look at the cabinet near the girls. Talk to the attendant, and
ask him about the Jaguar stone. Aha, Professer Oubier is here! Ask Oubier about
the Jaguar stone. Oubier will leave, and the attendant will start talking to
you again. Ask about the Jaguar stone, to find out that it has been stolen. Get
the key from the cabinet near the attendant.

Use the key with the cabinet near the phone. Open the cabinet. Get the key from
the cabinet. In the inventory, right-click the handbag to get a hairclip. Talk
to the attendant. Ask him about the ship. Show him the key. Use the curtain to
reveal a door. Use the dagger with the door.


KETCH'S LANDING
---------------

Open the sea chest, and Emily will come out and start talking to you. Stop
talking to Emily. Get the quill from the desk. Look at the portrait. Talk to
Emily. Ask about the cross. Ask about the cross. Stop talking to Emily. Exit
the museum. Give the quill to the cat. Get feather shreds. Go down the steps.
Talk to Rio, and ask about Emily. Ask about Rio's sister. Ask about the feather
shred. Stop talking to Rio, and go up the steps.

Open the door. Talk to Emily. Ask her about the conch, and she will give you a
cross. Stop talking to Emily. Get the lantern. Put the lantern on the ink well.
Get the chart. Put the chart on the desk. Put the cross on the pen holder. Exit
the museum. Go down the steps. Talk to Rio. Ask about the treasure. Ask about
the treasure. Ask about the zombie. Rio will take you to Zombie Island.


ZOMBIE ISLAND
-------------

Look at the boat to find out that it has got a net in it. Look at the rock
outcrop. Talk to Rio, and ask about the net. Use the net with the rock outcrop.


LONDON UNDERGROUND STATION
--------------------------

Walk over to the vending machine. Use the hairclip with the coin slot. Get the
coin from the coin reject slot. Use the coin with the coin slot. Get the
chocolate from the vending slot. Get the coin from the coin reject slot. Use
the coin with the weighing machine to get a card. Use the dagger with the
cupboard. Use the card with the crack. Push the red button.


ZOMBIE ISLAND
-------------

You start this part of the game on top of Zombie Island. There are two paths
leading off to the right, an upper path and a lower path. Exit this area, by
walking along the upper path. You will arrive at an area with a swamp. Get the
reeds. Exit this area to the right. Use the reed with the lair. Exit left. Exit
left. Exit this area, by walking along the lower path.

Walk right until you see a boar. In the inventory, use the dart with the reed.
Use the dart + reed with the boar, and then quickly click on the branch. The
boar will make a secret path to the north. Walk right, and go up the path that
the boar was previously blocking. Get the creeper that is wrapped around the
rock needle. In the inventory, use the sensor with the net. Use the sensor +
net with the creeper. Get the creeper with net and marker, and use it on the
rock needle. Exit this area to the left and go up the path that the boar made.

Use the theodolite with the holes in the ground. Look through the theodolite.
Move the theodolite right, until you can see a group of pillars. Around this
area, you should notice something sparkling. This is the marker. Look at the
marker, and then look at the pillar which is in front of the marker. Stop
looking through the theodolite. Exit this area to the right.


DOCKS
-----

Click on the other crate on the left, so Nico can hide closer to the ship. From
here, click on the ladder to hide on top of the ship. Wait until the guard
starts talking to Pablo, and then climb down the ladder, open the cupboard and
quickly climb up the ladder again.

The guard will go to investigate the cupboard, so climb down the ladder and
close the cupboard. Get the mop, and use the mop on the cupboard. Look in the
porthole. After a scene in which Oubier dies, you will be able to play again.
Talk to Oubier. Get the Jaguar Stone. Quickly use the dagger on Karzac.


ZOMBIE ISLAND
-------------

Talk to the boy, Haiku. Ask about Haiku. Ask about Haiku. Walk over to the
table, and get the buns, pancakes and syrup. In the inventory, use the syrup
with the pancake. Talk to the stuntman, and ask about the pancake. Stop talking
to the stuntman. Use the bun with the bush.

Get another bun from the table. Use the bun with the bush. You will arrive down
on the beach. Talk to Hawks, and ask about the cave. Stop talking to Hawks. Try
to get the handheld camera. Talk to Hawks. Ask him about the cameraman. A short
scene will play where you get the Eagle Stone.


VILLAGE
-------

Talk to Titipoco, and ask him about the shades. Ask about George. Stop talking
to Titipoco. Walk right until you get to the entrance of the village. Get the
underpants, and then head back to the big barrel near Titipoco. Try to get the
mayan Stone, to find out that it is too hot. Try to push the big barrel. Talk
to Titipoco, and ask him to help you push the barrel. Get the mayan Stone. Exit
the village to the left.


OUTSIDE THE PYRAMID
-------------------

Look at the gantry. Get the rope. Talk to Titipoco, and ask him about the rope.
Titipoco will climb up the gantry and throw the rope over the top. Get the
rope, and use the rope on the engine. Get the cylinder from the generator. Use
the dagger on the fuel line. Use the cylinder with the fuel line. Use the
cylinder with the fuel cap. Pull the lever, and then push the button. Talk to
Titipoco, and ask him about the lever.

Walk onto the elevator, and talk to Titipoco. Get the ammunition belt. Go down
in the elevator. Walk left, and the guards will speak to you. They will ask you
what you are doing at the pyramid, so answer their question as you like. Get
the torch, and then talk to Titipoco. Use the ammunition belt with the fire.
Talk to the general. Talk to George.


INSIDE THE PYRAMID
------------------

On the pattern on the wall, there are two levers. Pull the left lever. Pull the
right lever. Talk to George, and ask about the lever. After George and Nico
both pull the levers, Nico will fall down into a strange room with a machine.
This puzzle is pretty difficult, so here's how to solve it:

Okay, when you first fall into the room, there is a mayan machine with sixteen
pictures on it, a set of ten tiles, and a set of four tiles. If you look at the
mayan machine, there are sixteen different pictures on it. Walk over to the set
of ten tiles. One of these tiles has a combination of two of the pictures from
the machine. Walk over to the machine, and turn the wheels so that the pictures
line up opposite each other. Walk over to the tile whose pictures you lined up
by using the machine, and push it.

Walk over to the set of four tiles. One of these tiles has a combination of
four of the pictures from the machine. Walk over to the machine, and line the
picture up according to the picture on the tile. Walk over to the set of ten
tiles, and push the tile which you have lined up with the machine. Walk over to
the set of four tiles, and push the tile. If all goes well, the tile should
move. Repeat this process for the rest of the four pieces.

When you complete this frustrating puzzle, the game will continue. Go through
the revealed exit. George will continue the game from here. Get the torch. Talk
to Titipoco. Pull the lever on the wall. Exit to the left. Pull the left lever.
Pull the right lever. Go through the door. Go through the other door. Walk down
the steps on the right. Pull the lever. Go down the steps to complete the game.


===============================================================================

3.                                Item List

===============================================================================


AMMUNITION BELT
  Found after going up in the elevator outside the pyramid. It is used in the
  fire near the pyramid.


BEER BOTTLE
  Found floating in the water near the hut in Marsielles. It is used to cool
  the chimney inside the hut, and is also used to block the chimney.


BUN
  Found on the table at the film set on Zombie Island. It is thrown into the
  bush near the film set.


CARD
  Bought from the weighing machine in the London underground station. After the
  dagger has been used on the cupboard near the weighing machine, the card is
  used in the crack.


CHART
  Found in the museum in Ketch's Landing. It is used on the desk in the museum.


CHOCOLATE
  Bought from the vending machine in the London underground station. It is not
  used.


COIN
  Found in the coin slot on the vending machine in the London underground
  station. It is used on the coin slot of the vending machine to buy the
  chocolate. It is also used on the weighing machine to buy the card.


COLLAR
  Hubert will give George the collar near the treehouse. It is used in the
  press, and is then given back to Hubert.


CREEPER
  The creeper is found on the rock needle on Zombie Island.


CROSS
  Emily will give George the cross in the museum in Ketch's Landing. It is used
  on the pen holder in the museum.


CYLINDER
  The cylinder is found in the cabinet of Oubier's house. It is used with the
  syphon to extinguish the flames.


DAGGER
  The dagger is found in the cabinet of the museum. It is used in the door of
  the museum. It is used in the cupboard of the London underground station. It
  is used on Karzac on the ship at the docks. It is also used on the fuel line
  outside the pyramid.


DART
  The dart is found on the floor of Oubier's house. It is used to unlock the
  cabinet in the house. It is also used with the reed in Zombie Island to
  create the dart + reed.


DART + REED
  Created by combining the dart and the reed in the inventory. It is used to
  shoot the boar on Zombie Island.


DETONATOR
  The detonator is found in the cupboard of Conchita's office in Quaramonte.
  Duane will help George use the detonator to escape from the cell.


DOG BISCUITS
  The dog biscuits are found inside the hut in Marsielles. They are used to
  trick the dog into walking on the platform outside the hut.


FEATHER SHREDS
  The cat outside the museum in Ketch's Landing will create the feather shreds
  when he is given the quill. The shreds are given to Rio.


FISH
  Rio will catch the fish after he has been given the worm in Ketch's Landing.
  It is used in the inner tube.


FLASK
  Andre will bring the flask to the cafe in Montfaucon. It is used twice on the
  glass in Glease Gallery to distract Glease.


HAIRCLIP
  The hairclip is found in the handbag. It is used on the coin slot on the
  vending machine in the London underground station.


HOOK
  The hook is dropped into the water by the man inside the hut in Marsielles.
  It is used to retrieve the beer bottle from the water near the hut, to make
  the dog fall into the water, and also to break the fan in the warehouse.


HOUSE KEY
  The house key is found in the pot from Oubier's house. It is used to unlock
  the front door of the house.


KEY
  The key is found in the drawer of the warehouse in Marsielles. It is given to
  Titipoco in the warehouse.


LABEL
  The label is found on the packing case at the left side of the Glease
  Gallery. It is shown to the man behind the door to the warehouse in
  Marsielles.


LANTERN
  The lantern is found in the museum in Ketch's Landing. It is used on the ink
  well in the museum.


MANACLES
  Titipoco will leave the manacles after George gives him the key in the
  warehouse. They are used to slide down the cable from the warehouse.


MARKER
  Bronson will drop the marker after George has taken away his ladder in
  Ketch's Landing. The marker is one of three items used on the rock needle on
  Zombie Island.


MASKING TAPE
  The masking tape is found on the floor of in the secret room with Nico in
  Marsielles. It is used on the photoelectric cell of the elevator.


MOP
  Found in the ship at the docks. It is used on the cupboard of the ship.


MUSEUM KEY
  The museum key is found in the cabinet near the attendant in the British
  Museum. The key is used to unlock the cabinet in the museum.


NET
  Rio will give George the net near Zombie Island. It is used on the rock
  outcrop.


NEWSPAPER CLIPPING
  The newspaper clipping is found on the table on the first of Oubier's house.
  It contains Oubier's bank statement.


NICO'S BAG
  Nico's bag is found on the floor of Oubier's house. The panties are found
  inside.


OUBIER'S BANK STATEMENT
  The bank statement is found in the newspaper clipping from Oubier's house. It
  is used with the leaves near the treehouse.


PANCAKE
  The pancake is found on the table at the film set on Zombie Island. It is
  given to the stuntman near the film set.


PANTIES
  The panties are found in Nico's bag. They are used to pick up the cylinder
  from the cabinet in Oubier's house.


PLANS
  The plans is found on the beach after George has taken away Bronson's ladder
  in Ketch's Landing. The plans are shown to the Ketch sisters.


POT
  The pot is found in the drawer on the writing bureau of Oubier's house. It is
  shown to Andre in the Glease Gallery.


QUILL
  The quill is found on the desk in the museum in Ketch's Landing. It is given
  to the cat outside the museum, who will tear the quill into shreds.


REEDS
  The reeds are found near the swamp on Zombie Island. It is used in the lair
  on the island. It is also combined with the dart to create the dart + reed.


SENSOR
  The sensor is found on the end of the flagpole in Ketch's Landing. It is used
  on the rock needle in Zombie Island.


SENSOR + NET
  Created by combining the sensor and the net in the inventory. It is combined
  with the creeper and used on the rock needle.


STATUE
  The statue is found in the secret room with Nico in Marsielles. It is used on
  the waterwheel near the treehouse.


SYRUP
  The syrup is found on the table at the film set on Zombie Island. It is used
  on the pancake.


TEQUILA
  The tequila is found in the writing bureau of Oubier's house. A worm will
  fall out of the tequila.


THEODOLITE
  The theodolite is found on the beach after George has taken away Bronson's
  ladder in Ketch's Landing. It is used on the hill on Zombie Island to locate
  the marker on the rock needle.


WORM
  The worm is found in the tequila from Oubier's house. It is given to Rio in
  Ketch's Landing.


===============================================================================

4.                          Copyright Information

===============================================================================


This file is Copyright 2000-2008 Tom Hayes. As it can be difficult to keep
track of websites that haven't posted the latest version of this file, please
do not distribute it without my permission. Send an e-mail to me if you would
like to post this file on your website and you will likely receive a positive
response. If you do post the file, please keep it in its original form with all
of the sections intact and credit the author (Tom Hayes) as the writer of the
file.
Contributed by
Tom Hayes
All Walkthroughs
Game information
Available at


_capsule_fog__medium.png)
