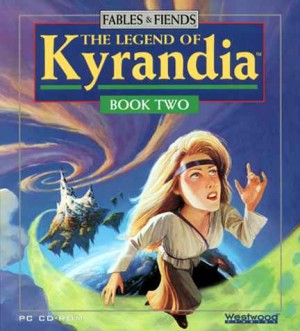
Walkthrough for Legend Of Kyrandia: Book 2 - The Hand of Fate | Part 1/2
LEGEND OF KYRANDIA: BOOK 2
HAND OF FATE
WALKTHROUGH - PART 1
*******************************************
~~~~~~~~~~~~~~~~~~~~~~~~~~~~~~~~~~~~~~
KYRANDIA
~~~~~~~~~~~~~~~~~~~~~~~~~~~~~~~~~~~~~~
INTRO
Kyrandia is disappearing. Rock by rock… landmark by landmark… everything is slowly disappearing. How can this be stopped? An emergency meeting is held, and it’s decided that you, Zanthia, must travel to The Centre Of The World and retrieve an ANCHOR STONE. That’s the only thing powerful enough to stop this catastrophe.
INSIDE ZANTHIA’S LABORATORY
You arrive home, only to find that your home has been ransacked! Explore your humble home. Talk to Faun a few times, and enjoy his responses. Take EMPTY FLASK from the bookshelf. Pick up BLUEBERRY from the floor. Take FLASK OF WATER from under the purple rug. Well, there’s no putting it off any longer. You have to go out, and begin your journey to Centre Of The World. Leave your home. After a couple of wardrobe changes, you finally get going.
OUTSIDE ZANTHIA’S LABORATORY
Have some fun with the Swamp Monster. Pick up BLUEBERRY from the ground. Walk up to the Dock.
DOCK
Uh-oh… that tree just disappeared! Take MUSHROOM from tree on the right. Walk left to Weed Patch.
WEED PATCH
Search the tree stump to find your spell book. Hey, wait a minute… who ripped out all the pages? I guess you’ll have to start looking for them, Zanthia. Have a look in your spell book to see which spells you DO have. Now walk up to Gnarlwood Tree.
GNARLWOOD TREE
Take some GNARLYBARK from the roots of the tree. Take ONION from the ground. Walk up to the Ferry.
FERRY
Talk to Brueth the Ferryman. He won’t ferry you across the water, unless you pay him. The trouble is… you were robbed, and you don’t have any money. Walk right to Natural Bridge.
NATURAL BRIDGE
Talk to the men in the boat if you like - they’re not very helpful. Walk right to Cave Entrance.
CAVE ENTRANCE
Another tree disappears. Watch the scene with Marko, and his assistant, Mr Hand. Take ONION from the ground. Walk right into Twisty Tunnel.
TWISTY TUNNEL
Wake up the sleeping rat. Notice that he is afraid of snakes - remember that. Also notice that he has a passion for cheese. Unfortunately, he won’t let you go any further. All you can do, is go back left to Cave Entrance.
CAVE ENTRANCE
Walk down to Firefly Tree.
FIREFLY TREE
SAVE YOUR GAME HERE. Notice all the pretty fireflies in the tree. Now you have to play a game of Musical Bugs with them. Meaning, you have to click on the fireflies in the correct order. Click on any bug - that bug will flash, and then another bug will flash immediately afterwards. That second firefly is you ‘Starting Point’. Take a note of which colour firefly just flashed. Click on firefly - it will flash, followed by another firefly. Click on the first firefly, then the second firefly. Repeat this, until all the fireflies sing a song for you. The order is random, and changes with every game, so pay attention. Make sure you have a note of the order of colours in which they flashed, since you’ll need that later.
When you’ve finished playing Musical Bugs, walk up to Cave Entrance.
CAVE ENTRANCE
Walk left 3 screens to Dark Swamp.
DARK SWAMP
That rock just disappeared. Search nest in the tree to find a FEATHER. Walk left to Quicksand Bog.
QUICKSAND BOG
Don’t try and cross the quicksand - you will die! Notice that SKELETON KEY in the skeleton’s hand. You want that SKELETON KEY. Push the tree to knock it over. Now walk across it like a bridge, and take SKELETON KEY from the skeleton’s hand. Now go left to Lagoon.
LAGOON
You are confronted by an angry crocodile. But you’re not scared. Use FEATHER to tickle the crocodile. He starts crying tears of laughter. Use EMPTY FLASK to collect REPTILE TEARS. Search hole in the tree to find your camping cauldron. Walk up to Hot Sulphur Springs.
HOT SULPHUR SPRINGS
Take the SULPHUR ROCK. Walk down to Lagoon.
LAGOON
Walk right 2 screens to Dark Swamp.
DARK SWAMP
Go up to Outside Herb’s Shack.
OUTSIDE HERB’S SHACK
Try to take FIREBERRIES from the bush, but it’s too hot. Pour FLASK OF WATER onto the fireberry bush to cool it down, then take all 3 FIREBERRIES from the bush. Enter Herb’s Shack.
INSIDE HERB’S SHACK
Talk to Herb, who’s sitting behind the desk, and ask about gold. He doesn’t have any, but his friends suggest you look for the pirate treasure. Take EMPTY FLASK from the desk. Take TOAD STOOL that’s lying on the crate. Take bag of PLANT FOOD. Now leave the shack.
OUTSIDE HERB’S SHACK
Walk down to Dark Swamp.
DARK SWAMP
Go left 2 screens to Lagoon.
LAGOON
Walk up to Hot Sulphur Springs.
HOT SULPHUR SPRINGS
Use an EMPTY FLASK to collect some HOT WATER. Now you’re ready to mix your first potion - Swampsnake Potion. Open you’re spell book to the correct page, and read the list of ingredients you need. Place the following items into your cauldron, in this order.
- GNARLYBARK (Windy woof)
- SULFUR ROCK (Smell of eggs)
- ONION (Onion)
- REPTILE TEARS (Lizard tears)
- STOOL (Toadstool)
- HOT WATER
Fill your 3 EMPTY FLASKS with the SWAMPSNAKE POTION, then flush the cauldron. Walk down to Lagoon.
LAGOON
Walk right 2 screens to Dark Swamp.
DARK SWAMP
Head right, and continue right, until you reach Twisty Tunnel.
TWISTY TUNNEL
The rat is still sleeping here. Remember, he is afraid of snakes. Maybe you could scare him into letting you past. Wake the rat, then drink a SWAMPSNAKE POTION. Your hair turns into Medusa’s snake-hair, and scares the rat away. You automatically walk right to Dark Cavern.
DARK CAVERN
Take MUSHROOM from the ground. Notice the giant skull. Click on his teeth, and notice that each tooth is a different colour. Do these colours look familiar? How about the fireflies. I hope you kept a note of which order the coloured fireflies flashed, cos you need it again here. Click on the coloured teeth in the same order as the coloured fireflies.
The coloured teeth are arranged like so.
Green Purple Orange
Light Blue Red Yellow Dark Blue
When done correctly, the mouth will open revealing a locked chest. Use SKELETON KEY in the chest to unlock it, then take ALCHEMIST’S MAGNET from the chest. This enables you to change lead into gold. Also take MOULDY CHEESE from the chest. Walk left 3 screens to Natural Bridge.
NATURAL BRIDGE
Talk to men in the boat, and tell them you need their lead anchor. They refuse to give it to you, until they catch a fish. Give them MOULDY CHEESE - they use the cheese as bait, immediately catch a fish, then they row away, taking their lead anchor with them! Oh well! Walk left to Ferry.
FERRY
Go down to Gnarlwood Tree.
GNARLWOOD TREE
Take some more GNARLYBARK from the root. Walk down to Weed Patch.
WEED PATCH
Well, well, well! Marko is in a bit of a predicament with the weeds. Feed bag of PLANT FOOD to the lower weed. It will bite the other weed, making it release it’s grip on Marko. Walk right to Dock.
DOCK
Ah-ha! The boatmen have docked here, and left their boat. Pick up LEAD ANCHOR. Use ALCHEMIST’S MAGNET on the LEAD ANCHOR to turn it into a GOLD ANCHOR. Walk left to Weed Patch.
WEED PATCH
Marko must have wandered off somewhere. Hope he doesn’t get into any more trouble. Go up 2 screens to Ferry.
FERRY
Oops! The Postman has accidentally burned the ferry to ashes. Talk to him a few times to find out how it happened. The postman agrees to fly you to Morningmist Valley, if you find, and return, the 4 LETTERS he lost. Let’s get started then. Head right 2 screens to Cave Entrance.
CAVE ENTRANCE
Go down to Firefly Tree.
FIREFLY TREE
Pick up LETTER. Click LETTER on yourself to read who it’s addressed to. Walk up to Cave Entrance.
CAVE ENTRANCE
Walk left 2 screens to Ferry.
FERRY
Go down 2 screens to Weed Patch.
WEED PATCH
Walk right to Dock.
DOCK
Walk down to Outside Zanthia’s Laboratory.
OUTSIDE ZANTHIA’S LABORATORY
Take LETTER from the roof. Click LETTER on yourself to read who it’s addressed to. Walk up to Dock.
DOCK
Walk left to Weed Patch.
WEED PATCH
Go up 2 screens to Ferry.
FERRY
Walk left 2 screens to Quicksand Bog.
QUICKSAND BOG
Take LETTER from the skeleton’s hand. Click LETTER on yourself to read who it’s addressed to. Walk left to Lagoon.
LAGOON
Walk up to Hot Sulphur Springs.
HOT SULPHUR SPRINGS
Take LETTER from the ground. Click LETTER on yourself to read who it’s addressed to. Now if you want to make things interesting, click each of the LETTERS over a steaming sulphur vent, to steam the letter open, and read it, hee hee! When you’re ready, head down to Lagoon.
LAGOON
Go right 3 screens to Ferry.
FERRY
Give all 4 LETTERS to the postman. As promised, he takes you to Morningmist Valley. He asks you to deliver one of the LETTERS for him.
~~~~~~~~~~~~~~~~~~~~~~~~~~~~~~~~~~~~~~
MORNINGMIST VALLEY
~~~~~~~~~~~~~~~~~~~~~~~~~~~~~~~~~~~~~~
MEADOW
You land in a meadow, and all your possessions have been lost. Pick up LETTER from the ground. Click LETTER on yourself to read who it’s addressed to - Farmer Greenberry. Search haystack to find an EMPTY FLASK. Pick up WHEAT GRAIN STALKS on the ground. Walk down to Outside Farmhouse.
OUTSIDE FARMHOUSE
Awww, what a cute dragon. Talk to the man, and give him the LETTER. So this is Farmer Greenberry. He gives you his secret recipe for mustard. Pick up WATER BOWL that’s lying next to the dragon. He’ll cry for a while, but he’ll soon stop, and go back to sleep. Take flask of VINEGAR from the window ledge. Walk left to Water Wheel.
WATER WHEEL
Watch the scene with Marko scolding Mr Hand for finding Zanthia’s stirring paddle.
Hmm, the water wheel isn’t moving. Notice there is a stick jamming the wheel. Pull out the stick - there, that’s better. The grinder hand is also working now. Place WHEAT GRAIN STALKS into the grinder hand to grind them up, then use the WATER BOWL to scoop out the WHEAT GRAIN STALKS, so you’re left with GROUND GRAIN. Since you’re here, turn the small wheel, to open a valve… somewhere. Walk right to Outside Farmhouse.
OUTSIDE FARMHOUSE
A delivery man has just delivered a shipment of mustard to the farmer. Try to enter the cellar, but the farmer won’t let you. Walk right to the Garden.
GARDEN
Take ALCHEMIST’S MAGNET from the ground. Notice the elephant’s head here. This head is controlled by the valve in Water Wheel, and since you opened the valve in that screen, water is flowing from the elephant’s trunk. Pick up the trunk, and water the soil. Some lettuces and radishes immediately sprout up from the ground. Wow, that is some VERY fertile soil! Take a LETTUCE and take a RADISH from the ground. Talk to the Scarecrow if you like. Walk left, to Outside Farmhouse.
OUTSIDE FARMHOUSE
Walk up to the Meadow.
MEADOW
Talk to the ghost a few times (he won‘t appear until you‘ve spoken to the scarecrow). He wants a new body, but somebody has to carry him in a bottle. Use EMPTY FLASK on the ghost to get BOTTLED GHOST. If you don’t have an EMPTY FLASK, simply drink the reptile tears - you can easily get more when you need to. Anyway, walk right to Outside City Gate.
OUTSIDE CITY GATE
Hmm, the gate to the city is locked. Talk to the guards, but they refuse to let you in. Their excuses are extremely bizarre! Maybe if you could find something to bribe them, you would be able to get in. Something like a sandwich, perhaps? Open your Spell Book, and look at the Sandwich Spell. You need mustard, ground wheat, lettuce, and cheese. Empty the bowl of GROUND GRAIN into the cauldron, leaving you with an empty WATER BOWL. Throw LETTUCE into the cauldron. Now walk left to Meadow.
MEADOW
Take WHEAT GRAIN STALK. Walk down to Outside Farmhouse.
OUTSIDE FARMHOUSE
Walk right to Garden.
GARDEN
Use BOTTLED GHOST with the Scarecrow - he comes alive, and runs away. Walk left to Outside Farmhouse.
OUTSIDE FARMHOUSE
Watch Scarecrow taunt the farmer, who then chases after him. Walk left to Water Wheel.
WATER WHEEL
Place RADISH into the grinder hand to grind it up, then use the WATER BOWL to scoop out the RADISH, so you’re left with GROUND RADISH. Add flask of VINEGAR to the GROUND RADISH to create a bowl of MUSTARD. Add MUSTARD to the cauldron. Walk right to Outside Farmhouse.
OUTSIDE FARMHOUSE
Walk up to Meadow. Notice the sheep here. Use EMPTY FLASK with the sheep to get flask of MILK. Walk down to Outside Farmhouse.
OUTSIDE FARMHOUSE
Now the farmer is gone, climb down into the cellar.
INSIDE CELLAR
Explore the cellar, and look at the cheese machine. Pour flask of MILK into the cheese machine, then use cheese machine to make some cheese. Pick up the CHEESE, then throw CHEESE into the cauldron. You should have made the Sandwich Potion now. Use EMPTY FLASK with the cauldron to get SANDWICH POTION, then use flask of SANDWICH POTION on yourself to get SANDWICH. Now resist the temptation to eat it! Make sure you pick up the EMPTY FLASK from the floor. Take SHEARS that are hanging from the shelf. Take all 4 HORSESHOES from the shelf. When you’re ready, leave the cellar.
OUTSIDE FARMHOUSE
Place empty WATER BOWL on the ground next to the dragon. Pick up the WATER BOWL again. The dragon will start crying, but he’ll quickly go back to sleep. Use EMPTY FLASK to collect some REPTILE TEARS from the small puddle on the ground. Walk left to Water Wheel.
WATER WHEEL
Look at the electricity sparks. Use one of the HORSESHOES (doesn’t matter which one) with the electricity sparks to create a MAGNET. Now walk right to Outside Farmhouse.
OUTSIDE FARMHOUSE
Walk up to Meadow.
MEADOW
Walk right to Outside City Gate.
OUTSIDE CITY GATE
Show SANDWICH to the guards. They’ll rush out from their posts to get to the sandwich… and you sneak into the city.
INSIDE THE CITY GATE
Flush the cauldron to empty it. Look at the seahorse fountain, and notice that it’s blocked. Take STICK from the seahorse fountain, so the water runs freely. Walk up into the Store.
STORE
Explore the store. When you’re ready, go left to the Alley.
ALLEY
Look at the dragon statue. Try to enter the tavern, but the door is locked. Look at cluster of lights next to the door. Seem familiar? Yep, you need to click on the coloured lights in the same order as the coloured fireflies back in Kyrandia. Hope you still have a note of the correct order. The coloured lights are arranged like so.
Light Blue
Green Red Yellow
Orange Dark Blue Purple
When done correctly, the door will unlock. Click on the door, and enter the Drunk Dragon Inn.
INSIDE THE DRUNK DRAGON INN
Explore the inn. Notice the Scarecrow is here. Talk to each of the men (and Scarecrow) a few times to learn how to get to Volcania. Pick up MUG from the table in the foreground, and fill it from the keg that‘s hanging from the ceiling next to the window, so you have some ROOTBEER. Drink the ROOTBEER - it‘s very sweet. Now refill your MUG from the keg. Pour some ROOTBEER into your empty WATER BOWL, then add flask of VINEGAR to create SWEET & SOUR SAUCE. Take some TAFFY from barrel on the left. Now try to leave the inn, but you are told that it’s Poetry Night, and no-one can leave without reciting a poem. The man with the green hat recite’s a poem. When he is finished, click on the podium, and recite your own poem. Now leave the inn.
ALLEY
A squid-hustler invites you to play his game of ‘Find The Pea’. The idea is simply to guess which shell the pea is hidden under. The only problem is, you need to give him some gold to start playing. Enter the Drunk Dragon Inn again.
INSIDE THE DRUNK DRAGON INN
Watch the brawl between the sailors. Click on the sailor with the blue & white striped t-shirt a few times, and he will lose his GOLD TOOTH. Quickly use you ALCHEMIST’S MAGNET on the GOLD TOOTH to change it into lead, then pick up LEAD TOOTH. Leave the Inn.
ALLEY
Use ALCHEMIST’S MAGNET on the LEAD TOOTH to change it back into a GOLD TOOTH. Now SAVE YOUR GAME HERE. Give GOLD TOOTH to the squid-hustler. Place an upturned HORSESHOE down on the ground (for good luck), then pick any of the shells. Since you used your lucky HORSESHOE, you should win, so pick up both GOLD TEETH. If you lost your GOLD TOOTH, simply go back into the Drunken Dragon Inn, and get another tooth from the brawling sailors. Now again, give a GOLD TOOTH to the squid-hustler. Make sure your upturned HORSESHOE is on the ground, then pick any shell. Pick up both GOLD TEETH. You should have 3 GOLD TEETH at this point. The squid-hustler will refuse to play with you again. Pick up your HORSESHOE, then head down to Inside The City Gate.
INSIDE THE CITY GATE
Walk right to Street.
STREET
Look at the bizarre fish-shaped building. Look at the sheriff, who is standing guard outside the building - he appears to be in a trance. Notice the litter in the left foreground, and take WRAPPER, ORANGE PEEL, EMPTY FLASK, and PARCHMENT. The PARCHMENT is actually a page from your Spell Book, so place it back into your book. Now take upper-right path to Forge.
FORGE
Look at the giant bunny statue. Use TAFFY on the bunny’s giant foot, to get TAFFY FOOTPRINT. Look at the small puddle of water, and take some MUD from the puddle. Walk right to the Gorge.
GORGE
Use STICK with the hanging rope, so you can swing across the gorge. Now right to Altar Of Doubt.
ALTAR OF DOUBT
SAVE YOUR GAME HERE. Open your Spell Book, and read the Skeptic Spell. Now add the following ingredients to your cauldron.
- UPTURNED HORSESHOE (Lucky horseshoe)
- TAFFY FOOTPRINT (Rabbit footprint)
- BOWL OF SWEET & SOUR (Sweet & sour sauce)
- FLASK OF REPTILE TEARS (Lizard tears)
Use EMPTY FLASK on the cauldron to get flask of SKEPTIC SERUM. Place flask of SKEPTIC SERUM onto the altar to complete the SKEPTIC POTION. You don’t have enough EMPTY FLASKS, so you need to return here every time you want to complete another SKEPTIC POTION. Now head right 3 screens to the Street.
STREET
The Sheriff is still in a trance, outside the strange fish-shaped building. Give him SKEPTIC POTION to break his trance. Now enter the building, into the Jail.
JAIL
SAVE YOUR GAME HERE. Marko is locked up in a jail cell. What trouble has he got himself into now? Talk to him - apparently, him and his assistant Mr Hand, were on their way to help you. Something hit Marko on the head and knocked him out. When he woke up, he was in this cell. Marko also tells you that the Sheriff has a habit of throwing keys into the water. Well, you need a key to unlock Marko’s cell. When you’re ready, leave the jail.
STREET
SAVE YOUR GAME HERE. Notice that grey, shiny thing in the water. Use your horseshoe MAGNET with the item to get a KEY. Make sure you pick up the MAGNET again. Now enter the Jail again.
JAIL
Use KEY to unlock Marko’s cell. But the Sheriff isn’t having it! He locks you up in the cell next to Marko, then hangs the KEY up on the wall under the window. Use MAGNET on the key. The Sheriff throws the KEY out of the window. Notice that rug in your cell - click on the rug a few times to get THREAD. Marko gives you a hook, and you automatically create FISHING RIG. Now using FISHING RIG with the window to fish for the KEY. Use KEY to unlock your own cell, and then Marko’s cell. Leave the Jail.
STREET
Walk left to Inside The City Gate.
INSIDE THE CITY GATE
Go up into the Store.
STORE
Give SKEPTIC POTION to the shop owner. Talk to him to ask about passage on his ship - he charges 3 GOLD COINS. He won’t accept your GOLD TEETH. Walk down to leave the store.
INSIDE THE CITY GATE
Walk left 2 screens to Meadow.
MEADOW
Go down to Outside Farmhouse.
OUTSIDE FARMHOUSE
Head left to Water Wheel.
WATER WHEEL
Place each of the GOLD TEETH into the grinder, to turn them into GOLD PIECES. Walk right to Outside Farmhouse.
OUTSIDE FARMHOUSE
Go up to Meadow.
MEADOW
Walk right 2 screens to Inside The City Gate.
INSIDE THE CITY GATE
Head up into the store.
STORE
Give all 3 of your GOLD PIECES to the Shop Owner. He gives you a TRAVEL VOUCHER. Walk down to leave the shop.
INSIDE THE CITY GATE
Walk right to the Street.
STREET
Take the lower-right path to the Wharf.
WHARF
Look at the Captain - he’s also in a trance. Give him SKEPTIC POTION to wake him up. Talk to him, and give him your TRAVEL VOUCHER. He invites you onto his ship.
Continued In Legend Of Kyrandia Book 2: Part 2
Credit
This Walkthrough was written by Freaky Hobbit.


