Walkthrough for Legend Of Kyrandia Book 1: Part 1/2
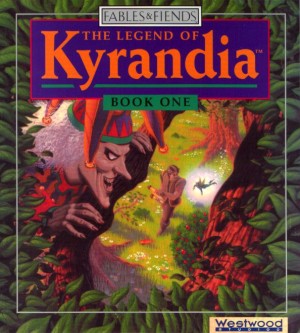
LEGEND OF KYRANDIA: BOOK 1
FABLES AND FIENDS
WALKTHROUGH - PART 1
*******************************************
~~~~~~~~~~~~~~~~~~~~~~~~~~~~~~~~~~~~~~
BRANDON’S FOREST
~~~~~~~~~~~~~~~~~~~~~~~~~~~~~~~~~~~~~~
INTRO
Watch the intro, as the evil jester Malcolm wreaks havoc across the land of Kyrandia.
BRANDON’S HOME
You arrive home, unaware that Malcolm has broken free from his prison. You’re shocked to see your Grandfather turned to stone. Talk to your Grandfather, but he’s unable to respond. Pick up GARNET from the table. Pick up SAW from below the table. Pick up NOTE from the table. Use NOTE on yourself, but it appears to be blank. Maybe Brynn will be able to use her magic to read it. Take APPLE from the cauldron. Try to walk down, to leave your home. The tree house comes to life, and tells you all about Malcolm. Now walk down to leave your home.
OUTSIDE BRANDON’S HOME
Step on the tree branch, and ride it down to the ground.
BELOW BRANDON’S HOME
Walk right 2 screens to Pool Of Sorrow.
POOL OF SORROW
The trees are crying, because of the destruction that Malcolm is causing. Click on the pool, so you catch a TEARDROP. Walk left, and continue left, until you reach A Rotting Tree.
A ROTTING TREE
What happened here? The willow tree looks half-dead. Notice there is a teardrop-shaped dent in the trunk of the tree. Use your TEARDROP in the dent. The tree heals itself. Your friend Merith appears, and wants to play. He tells you that he found a MARBLE, and he’ll give it to you if you can catch him. Start chasing Merith right. Continue right, until you see the leaf fall to the ground.
DARK FOREST
The leaf changes into a PERIDOT when it touches the ground. Pick up the PERIDOT. Walk up to the next screen.
DARK FOREST
Merith is here. He thinks you will approach from a different direction, so he’s not expecting you to catch him. Sneak up behind him, and give him a fright. He storms off in a huff, leaving his precious MARBLE for you. Pick up the MARBLE. Walk right to A Forest Altar.
A FOREST ALTAR
Click on the altar twice. Is it broken? It used to glow. Take a ROSE from the bush at the side of the altar. Now look at the top of the altar, and notice the 2 purple marbles. But it looks like it should have 3 marbles. Hmmm, I wonder if YOUR purple marble (that you got from Merith) would fit here. Place MARBLE on top of the altar. Ahhh, now it’s glowing! You fixed it! Walk left to the next screen.
DARK FOREST
Walk down one screen.
DARK FOREST
Head left, and continue left, until you reach A Southern Cliff.
A SOUTHERN CLIFF
Walk up to The Temple Of Kyrandia.
THE TEMPLE OF KYRANDIA
Enter the Temple.
INSIDE THE TEMPLE
Your sister Brynn is here. Talk to her, and give her the NOTE from your Grandfather. She tells you that the NOTE is enchanted, then she removes the enchantment, so that you can read the NOTE. She asks you to find her a LAVENDER ROSE. Now burn NOTE in the fire, since you won‘t need it again. Give ROSE to Brynn. Brynn casts a spell that changes the LAVENDAR ROSE into a SILVER ROSE, which you automatically take. Then she tells you to place the SILVER ROSE on the altar, to activate your amulet. Now leave the Temple.
THE TEMPLE OF KYRANDIA
Now, you’ll see several precious gemstones scattered throughout Kyrandia. Pick up any gemstones you see. Walk down to A Southern Cliff.
A SOUTHERN CLIFF
Head right, and continue right, until you reach Pool Of Sorrow.
POOL OF SORROW
Walk right to the next screen.
DARK FOREST
Walk up one screen.
DARK FOREST
Walk right to A Forest Altar.
A FOREST ALTAR
Place SILVER ROSE on the altar. The power of the altar draws energy from the SILVER ROSE, and activates your amulet. Unfortunately, none of the amulet stones are working yet. Take another ROSE from the rose bush, since you are here, then walk left to the next screen.
DARK FOREST
Walk down one screen.
DARK FOREST
Head left, and continue left, until you reach A Southern Cliff.
A SOUTHERN CLIFF
Walk up to The Temple Of Kyrandia.
THE TEMPLE OF KYRANDIA
Enter the Temple.
INSIDE THE TEMPLE
Call out for Brynn, to let her know that you’ve got your amulet. But Brynn has gone! Oh well, she must be busy. Leave the temple.
THE TEMPLE OF KYRANDIA
Walk down to A Southern Cliff.
A SOUTHERN CLIFF
Head right, and continue right, until you reach Pool Of Sorrow.
POOL OF SORROW
Walk right to the next screen.
DARK FOREST
Head down 2 screens, to A Cavernous Entrance.
A CAVERNOUS ENTRANCE
Walk left, into the cave.
A RUINED BRIDGE
Talk to Herman. He needs to repair the bridge. Give him your SAW, and he’ll leave to go and cut some trees down to get planks for the bridge. Walk right to A Cavernous Entrance.
A CAVERNOUS ENTRANCE
Walk up to A Rocky Outcropping.
A ROCKY OUTCROPPING
Herman is here, busily sawing the tree down. Talk to him if you like. Leave the screen, and then immediately return.
Herman has finished cutting the tree down. Walk down to A Cavernous Entrance.
A CAVERNOUS ENTRANCE
Walk left, back into the cave.
A RICKETY BRIDGE
Herman has fixed the bridge. That was quick! Now cross left over the bridge, and out the other side of the cave.
THE TIMBERMIST WOODS
Hmm, you decide you want to find Malcolm. Feeling brave, are we? Walk left to A Strange Hut.
A STRANGE HUT
Enter the hut.
INSIDE DARM’S ABODE
That’s a HUGE dragon! Talk to the Wizard Darm, and ask for help to defeat Malcolm. Darm tells you that he needs a QUILL. Leave the hut.
A STRANGE HUT
Walk down to A Large Statue.
A LARGE STATUE
Look at the statue. Walk right to Songbird’s Nest.
SONGBIRD’S NEST
Look at the injured bird in the nest. If only you could help him. Pick up WALNUT from the ground. Walk left 3 screens to A Grove Of Oaks.
A GROVE OF OAKS
Pick an ACORN from the tree. Walk down to A Southern Cliff.
A SOUTHERN CLIFF
Walk right to A Dark Forest.
A DARK FOREST
Pick up PINECONE from the ground. Walk right to The Oldest Tree In Kyrandia.
THE OLDEST TREE IN KYRANDIA
Talk to Nolby, the old man on the bench, and ask about a QUILL. He tells you that in order to harvest, you must sow. Walk right to An Ancient Well.
AN ANCIENT WELL
Click on the well if you like. Walk right to A Bubbling Spring.
A BUBBLING SPRING
Take a yellow TULIP from the bush. Walk down 2 screens to Dark Forest.
DARK FOREST
Walk left to Deadwood Glade.
DEADWOOD GLADE
Notice the hole in the ground here. Remember what the Nolby said? Okay, plant the PINECONE in the hole. The ground rumbles slightly. Plant the WALNUT in the hole. The ground rumbles again. Plant the ACORN in the hole. A giant yellow flower grows out from the hole, and starts talking to you. To show appreciation for restoring life to Deadwood Glade, the giant flower actives the first stone in your amulet - the yellow Healing Stone. That could come in handy! Head up, and continue up, until you reach Songbird‘s Nest.
SONGBIRD’S NEST
Stand under the bird’s nest, and use your yellow Healing Stone to heal the bird. The bird sheds a FEATHER, then flies away. Pick up the FEATHER. Walk left to A Large Statue.
A LARGE STATUE
Walk up to A Strange Hut.
A STRANGE HUT
Enter the hut.
INSIDE DARM’S ABODE
Give FEATHER to Darm. He writes you a SCROLL to aid in your quest. Take FROST SCROLL from his desk. Now Brandywine, the dragon, tells you about your Birthstones - you must find all your Birthstones, and place them, in the correct order, on the altar. When you’re ready, leave the hut.
A STRANGE HUT
Walk down to A Large Statue.
A LARGE STATUE
Head left 2 screens to A Grove Of Oaks.
A GROVE OF OAKS
Walk up to A Ruby Tree.
A RUBY TREE
Notice the Danger Sign here. Try and pick a RUBY from the tree. You will be bitten, and poisoned, by a snake in the tree. Quickly pick a RUBY from the tree. Now use your yellow Healing Stone to heal yourself from the poison. Amazing! Walk down to A Grove Of Oaks.
A GROVE OF OAKS
Walk right to A Marble Altar.
A MARBLE ALTAR
Drop all your items here, then SAVE YOUR GAME HERE. This is where you must complete your Birthstone Quest. But you need to prepare for it, first. Walk right 2 screens to Songbird’s Nest.
SONGBIRD’S NEST
Walk down to An Ancient Well.
AN ANCIENT WELL
Walk right a A Bubbling Spring.
A BUBBLING SPRING
Search the water (the stream part, not the pool part) for a SUNSTONE. Now search both sections of the forest (on either side of the bridge), until you’ve found 12 different gemstones. The gemstones you must find are:
- Garnet
- Peridot
- Amethyst
- Ruby
- Sapphire
- Topaz
- Diamond
- Pearl
- Onyx
- Opal
- Sunstone
- Aquamarine
When you find all the stones, make your way back to A Marble Altar.
A MARBLE ALTAR
SAVE YOUR GAME HERE. You have to place your 4 Birthstones, in the correct order, in the Altar Plate. If you place a stone correctly, a light will indicate on the altar. If you place a stone in the wrong order, it will burn up. The order is random, and changes for every play through. But it always starts with the SUNSTONE. So place the SUNSTONE into the altar plate. Now use SAVE\RESTORE to figure out which other stones you need.
When all 4 stones are placed correctly, the altar plate transforms into a FLUTE. Pick up the FLUTE. Also pick up the FROST SCROLL that you dropped here earlier. Drop any unused gemstones here. Now walk right to A Large Statue.
A LARGE STATUE
Walk up to A Strange Hut.
A STRANGE HUT
Enter the hut.
INSIDE DARM’S ABODE
Talk to Darm, and tell him you’ve completed the Birthstone Quest. Brandywine tells you that you must cross a deadly labyrinth, in order to find Zanthia, and continue your quest of stopping Malcolm’s rampage of terror. Leave the hut, and make your way back to A Marble Altar.
A MARBLE ALTAR
Pick up APPLE, ROSE, and TULIP that you left here earlier. Now, to save you some time later, I’ll tell you that you need to search the forest, and find SAPHIRE, RUBY, and TOPAZ. The RUBY is on the Ruby Tree (beware of the snake). The TOPAZ and SAPHIRE could be anywhere in the forest. When you have those 3 gemstones, return here. Walk right 2 screens to Songbird’s Nest.
SONGBIRD’S NEST
Head down 3 screens to Deadwood Glade.
DEADWOOD GLADE
Walk right 2 screens to Serpent’s Grotto.
SERPENT’S GROTTO
SAVE YOUR GAME HERE. Walk right, and try to enter the Grotto. Malcolm emerges from his hiding place in the grotto, and taunts you. After a quick trade of insults, he throws a knife at you, and it lands in the tree behind you. Click on the knife in the tree, and only that knife, so you can throw it back at him. Don’t click anywhere else, or Malcolm will turn you into a block of ice. Malcolm retreats back into the grotto, but he creates a wall of ice, to prevent you from entering. Ha! As if that would stop you! Simply play your FLUTE, and the wall of ice will shatter. Now walk right into the grotto.
~~~~~~~~~~~~~~~~~~~~~~~~~~~~~~~~~~~~~~
THE LABYRINTH
~~~~~~~~~~~~~~~~~~~~~~~~~~~~~~~~~~~~~~
A NATURAL MINERAL POOL
Walk right into the cave.
CAVE
SAVE YOUR GAME HERE. You have to find your way through a nasty labyrinth. There’s a fireberry bush here. These FIREBERRIES light up a dark cave, so that the monsters don’t get you. But they only last for 3 screens, so you have to plan things carefully. Make sure you have FLUTE, FROST SCROLL, APPLE, ROSE, TULIP, SAPPHIRE, RUBY, and TOPAZ. Take 2 FIREBERRIES from the bush, then walk right to the next screen.
A NATURAL MINERAL POOL
Walk right to A Treacherous Crossing.
A TREACHEROUS CROSSING
Walk right a few steps. The iron gate behind you slams shut, as soon as you step into the circle. Oh dear! If you had some rocks, you could throw them into the hanging dish, and trigger the counterweight. But… you don’t have any rocks! The only option now, is to get through the labyrinth ahead of you. The best way to get through the labyrinth, is shown below. Remember to SAVE often!
- Drop all your items on the path here
- SAVE YOUR GAME HERE
- Walk right one screen
- Take 3 FIREBERRIES from the bush
- Walk up one screen
- Drop a FIREBERRY
- Walk right one screen
- Drop a FIREBERRY
- Walk down one screen
- Drop a FIREBERRY
- Walk down one screen
- Take 3 FIREBERRIES from the bush
- Walk down one screen
- Drop a FIREBERRY
- Walk right one screen
- Drop a FIREBERRY
- Walk right one screen
- Take 3 FIREBERRIES from the bush
- Walk down one screen
- Drop a FIREBERRY
- Walk left one screen
- Drop a FIREBERRY
- Walk up one screen (there should be a FIREBERRY here)
- Walk left one screen (there should be a FIREBERRY here)
- Walk up one screen
- Take 3 FIREBERRIES from the bush
- Walk right one screen
- Drop a FIREBERRY
- Walk up one screen
- Drop a FIREBERRY. Pick up HEAVY ROCK
- SAVE YOUR GAME HERE
- Walk up one screen
- Drop a FIREBERRY
- Walk right one screen
- Take 3 FIREBERRIES from the bush
- Walk up one screen
- Drop a FIREBERRY
- Walk left one screen
- Drop a FIREBERRY
- Walk up one screen
- Drop a FIREBERRY
- Walk right one screen
- Take 3 FIREBERRIES from the bush
- Walk right one screen
- Drop a FIREBERRY
- Walk down one screen
- Drop a FIREBERRY
- Walk right one screen, to Pantheon Of Moonlight
- Talk to the Will-O-Wisps
- SAVE YOUR GAME HERE
- Walk right one screen
- Take 3 FIREBERRIES from the bush
- Walk down one screen
- Drop a FIREBERRY. Pick up HEAVY ROCK
- SAVE YOUR GAME HERE
- Walk right one screen
- Drop a FIREBERRY
- Walk right one screen
- Take 3 FIREBERRIES from the bush
- Walk right one screen
- Drop a FIREBERRY
- Walk right one screen
- Drop a FIREBERRY
- Walk right one screen
- Take 3 FIREBERRIES from the bush
- Walk right one screen
- Drop a FIREBERRY
- Walk up one screen
- Drop a FIREBERRY. Pick up HEAVY ROCK
- SAVE YOUR GAME HERE
- Walk down one screen
- Walk left one screen
- Take 3 FIREBERRIES from the bush
- Walk left one screen
- Walk down one screen to Cavern Of Emeralds
- Take 2 EMERALDS
- SAVE YOUR GAME HERE
- Walk down one screen
- Drop a FIREBERRY
- Walk left one screen
- Take 3 FIREBERRIES from the bush
- Walk up one screen
- Drop a FIREBERRY
- Walk left one screen
- Drop a FIREBERRY
- Walk left one screen
- Drop a FIREBERRY. Pick up HEAVY ROCK
- SAVE YOUR GAME HERE
- Walk down one screen
- Take 3 FIREBERRIES from the bush
- Walk down one screen
- Drop a FIREBERRY
- Walk right one screen
- Drop a FIREBERRY
- Walk right one screen
- Take 3 FIREBERRIES from the bush
- Walk down one screen
- Drop a FIREBERRY
- Walk left one screen
- Drop a FIREBERRY
- Walk left one screen
- Take 3 FIREBERRIES from the bush
- Walk left one screen, to Cavern Of Twilight
- Pick up GOLD COIN. Pick up HEAVY ROCK
- SAVE YOUR GAME HERE
- Make sure you still have 2 FIREBERRIES
- Walk left one screen
- Drop a FIREBERRY
- Walk up one screen
- Drop a FIREBERRY
- Walk up one screen
- Take 2 FIREBERRIES from the bush
- Walk left one screen
- Drop a FIREBERRY
- Walk down one screen
- Drop a FIREBERRY
- Walk left one screen
- Take 2 FIREBERRIES from the bush
- Walk left 2 screens
- Walk up 3 screens
- Walk left one screen
- Walk down one screen
- Walk left one screen
You’re back at the start of the labyrinth. Throw all 5 HEAVY ROCKS onto the hanging dish. One will fall, but the remaining 4 will be enough to trigger the counterweight. You’re free! Head left, and continue left, until you reach Serpent’s Grotto.
~~~~~~~~~~~~~~~~~~~~~~~~~~~~~~~~~~~~~~
BRANDON’S FOREST
~~~~~~~~~~~~~~~~~~~~~~~~~~~~~~~~~~~~~~
SERPENT’S GROTTO
Walk left 2 screens to Deadwood Glade.
DEADWOOD GLADE
Head up 2 screens to An Ancient Well.
AN ANCIENT WELL
Toss your GOLD COIN into the well. The well fills with water, and you gain a MOONSTONE. Go down 2 screens to Deadwood Glade.
DEADWOOD GLADE
Head right, and continue right, into the grotto, until you reach A Treacherous Crossing.
~~~~~~~~~~~~~~~~~~~~~~~~~~~~~~~~~~~~~~
THE LABYRINTH
~~~~~~~~~~~~~~~~~~~~~~~~~~~~~~~~~~~~~~
A TREACHEROUS CROSSING
Yep, you have to take another trip through the labyrinth. Thankfully, it will be easier this time, since most of the rooms are now lit with FIREBERRIES. Drop both EMERALDS here. Pick up FLUTE, FROST SCROLL, APPLE, ROSE, and TULIP that you left here earlier. Make sure you also have MOONSTONE, SAPPHIRE, RUBY, and TOPAZ.
- SAVE YOUR GAME HERE
- Walk right one screen
- Walk up one screen
- Walk right one screen
- Walk down one screen
- Walk right one screen
- Walk up one screen
- Walk right one screen
- Take 2 FIREBERRIES from the bush
- Walk down one screen
- Drop a FIREBERRY
- Walk down one screen
- Drop a FIREBERRY
- Go all the way up to the top
- Take 2 FIREBERRIES from the bush
- Walk right 2 screens
- Drop a FIREBERRY
- Walk right one screen
- Drop a FIREBERRY
- Walk down one screen
- Take 2 FIREBERRIES from the bush
- Walk right one screen
- Drop a FIREBERRY
- Walk right one screen
- Drop a FIREBERRY
- Walk down one screen
- Take 2 FIREBERRIES from the bush
- Walk right 2 screens
- Drop a FIREBERRY
- Walk right one screen
- Take 2 FIREBERRIES from the bush
- Walk left 4 screens
- Walk up one screen
- Walk left 2 screens to Pantheon Of Moonlight
- Place MOONSTONE in the altar
- Will-O-Wisps activate your purple Will-O-Wisp Stone
- SAVE YOUR GAME HERE
- Walk left 2 screens
- Walk down 4 screens
- Take 2 FIREBERRIES from the bush
- Walk down one screen
- Walk right one screen
- Drop a FIREBERRY
- Walk right one screen
- Drop a FIREBERRY
- Walk right one screen, to Cavern Of Twilight
- SAVE YOUR GAME HERE
- Walk right 3 screens
- Walk up one screen
- Take 2 FIREBERRIES from the bush
- Walk right one screen
- Drop a FIREBERRY
- Walk down one screen
- Drop a FIREBERRY
- Walk right one screen, to Volcanic River
- Use FROST SCROLL on yourself
- Walk up one screen
- Pick up IRON KEY
- Walk down one screen, to Volcanic River
- SAVE YOUR GAME HERE
- Walk left one screen
- Walk up one screen
- Walk left one screen
- Take a FIREBERRY from the bush
- Walk down one screen
- Walk left, all the way to the end
- Walk up one screen
- Walk left one screen
- Walk up 3 screens
- Walk left one screen
- Walk down one screen
- Take FIREBERRY from the bush
- Walk up 2 screens, to Chasm Of Everfall
- SAVE YOUR GAME HERE
- Activate your purple Will-O-Wisp Stone
- Float across the chasm, and up to the next screen
- Drop a FIREBERRY
- Float right one screen
A CAVERNOUS ENTRANCE
You’ve found your way out of the labyrinth. Walk right 2 screens to A Dark Forest.
~~~~~~~~~~~~~~~~~~~~~~~~~~~~~~~~~~~~~~
ZANTHIA’S DOMAIN
~~~~~~~~~~~~~~~~~~~~~~~~~~~~~~~~~~~~~~
A DARK FOREST
You are knocked out by a falling branch. You wake up in Zanthia’s Laboratory.
Continued In Legend Of Kyrandia Book 1: Part 2
Credit
This Walkthrough was written by Freaky Hobbit.


