===============================================================================

                              FAQ/Walkthrough for
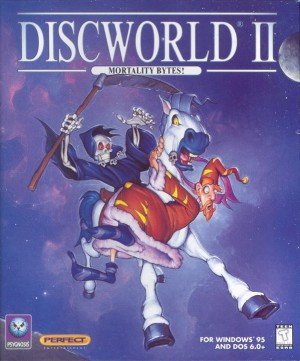
                          DISCWORLD 2: MORTALITY BYTES

===============================================================================


GUIDE INFORMATION
-----------------

Author:   Tom Hayes
E-mail:   thayesguides(at)gmail(dot)com
System:   PC
Updated:  19th June, 2008
Version:  1.1


CONTENTS
--------

1. Introduction
2. Walkthrough
     2.1. Act I
     2.2. Act II
     2.3. Act III
     2.4. Act IV
     2.5. Epilogue
3. Item List
     3.1. Act I
     3.2. Act II
     3.3. Act III
     3.4. Act IV
     3.5. Epilogue
4. Copyright Information


VERSION HISTORY
---------------

1.1:  19th June, 2008   (Format update)
1.0:  14th March, 2000  (First version)


===============================================================================

1.                               Introduction

===============================================================================


In Discworld 2, Death has gone missing from Ankh-Morpork (the main city in this
game), and it is up to Rincewind the wizard to find him. There are five acts to
complete in this game, and each part will require you to accomplish a set of
tasks in order to progress, such as finding three sticks, or trying to get some
glitter dust. You can tell right from the start that a huge amount of effort
was put into this game. However, the clues to some of the puzzles just seem a
bit too vague and difficult in places. Overall, Discworld 2 is a well made
adventure game which matches the style of the Discworld books extremely well.


===============================================================================

2.                                Walkthrough

===============================================================================


-------------------------------------------------------------------------------
2.1.                         Act I: The Rite Stuff
-------------------------------------------------------------------------------


HIGH ENERGY FACILITY
--------------------

Get the bellows. Get the magnet. Get the test tube. Leave the High Energy
Facility.


GARDEN
------

Walk east along the garden, and go behind the hedge maze. Use the magnet on the
imp to pull his boots off. Leave the garden. Leave the Unseen University.


FOOLS' GUILD
------------

Get the hooter that is lying conveniently on the ground. Get the brick. Talk to
the fool. Click on the question icon when you talk to him. Use the brick on the
fool. Go down the hole. Carry on straight down this wooden path, and you should
be in a screen with a grate. Use the bellows on the grate, and you will get
some glitter dust. Exit the Fools' Guild.


SHOP
----

Get the flamingo. Get the fish. Get the incense. Look at the candles that are
up on the shelf; Hmm... they're not real. Talk to the woman. Ask her about the
candles. Leave the shop.


DOCKS
-----

Use the fish that you got from the shop with the water. Get the stunned bird.
Leave the docks.


PLAZA
-----

Talk to the dibbler. Talk about the popcorn. Talk to the dibbler. Click the
joker icon to get a clickie brochure. Leave the plaza.


SHADES
------

Walk to the right-most part of the Shades, and enter Gimlet. Use the menu. Sit
down at the table, and then talk to Gimlet. He will rush over and start talking
to you. Click the mouth icon. Click the mouse burger icon. Get the chilli from
the table. Leave Gimlets. Get the pot and the saw that are near Duckman. Walk
to the left, and go through the door nearest to the dead collector. Get the
knife. Look at the witch. Exit this room. Enter the Trolls Head bar. Talk to
Casanunda. Click the question mark icon. Talk to him about ladders. Tell him
about the witch. You will get a ladder. Get the matches. Talk to the troll.
Leave the bar. Leave the Shades.


DOCKS
-----

Use the knife on the net. Get the hammerhead shark. Leave the docks, and head
to the Unseen University.


GARDEN
------

Walk over to the hedge maze. Open the inventory, and use the tankard on the
corn. Use the corn on the rooster. Leave the garden. Leave the Unseen
University.


SHADES
------

Go to where the three men are, and use the rooster on the can. Enter the Trolls
Head bar. Use the rooster on the vampire. Exit the bar. Walk to the left-most
part of the Shades. Enter the door. Look at the genie bottle. Walk as far left
as you can go in this room. Get the scissors. Get the petticoat. Use the saw on
the dummy. Open the closet. Get the ironing board. Talk to Mrs. Cake. Talk to
her in this order: joker icon, question icon, thought icon, mouth icon. Yippee,
Now we can speak to her! Talk to her about the genie bottle. Click the joker
icon. Talk to her about ectoplasm. Leave the room. Leave Shades. Enter the
Unseen University.


HIGH ENERGY FACILITY
--------------------

Use the brick with the accelerator. Leave the High Energy Facility.


GARDEN
------

Walk left to the beekeeper's area. Use the chilli on the flowers. Talk to the
beekeeper. Click on the mouth icon, and then stop talking to him. Give the
clickie brochure to the beekeeper. Use the petticoat on Rincewind. Use the
matches on the incense. Use the incense with the beehives. Get the hives, and
you will get some beewax. Use the pot on the hives. Leave the garden. Leave the
Unseen University.


SHOP
----

Give the beewax to the old woman, and she will make Rincewind some candles.
Leave the shop.


CEMETERY
--------

Get the pickaxe. Walk to the right-most part of the cemetery. Use the ladder on
the slab. Get the teeth. Open the luggage. Use the teeth on the mouse. Use the
teeth on the test tube, and you will get the mouse blood. Close the luggage.
Leave the cemetery.


SHADES
------

Enter Mrs Cake's shop. Give her the ectoplasm. Open the luggage. Use the genie
bottle on the boots. Close the luggage. Leave the shop. Walk up to the three
men. Use the genie bottle on the vile smell, and you will get the vile smell.
Leave Shades. Enter the Unseen University.


GARDEN
------

Use the shark on the Bursar. Use the flamingo on the Dean. Use the wading bird
on the librarian. You will get the three sticks - Leave the garden.


DINING HALL
-----------

Give the mallets to the Archchancellor. Give the test tube to the
Archchancellor. Give the vile smell to the Archchancellor. Give the glitter
dust to the Archchancellor. Give the dribbly candles to the Archchancellor.


-------------------------------------------------------------------------------
2.2.                        Act II: Come Die With Me
-------------------------------------------------------------------------------


GARDEN
------

Get the hoops. Leave the garden. Leave the Unseen University.


FOOLS' GUILD
------------

Go down the hole. Go right at the junction. Go up the ladder. Use the pick on
the ice. Go down the hole. Go left. Go up the ladder. Leave the Fools' Guild.


SHADES
------

Talk to the dead collector. Click the question icon. Enter the door near the
dead collector. Talk to the mortician. Click on the certificate icon. Get the
mirror. Use the mirror on the bunsen burner. Use the mirror on the bench. Use
the slab. Use the ice on Rincewind. Use the wooden arm on Rincewind. Talk to
the mortician. Leave the room. Use the certificate on the dead collector. You
will automatically leave Ankh-Morpork, and will arrive at a brand new map
screen. Click on the top-left corner of this new screen.


XXXX
----

Look at the sticks. Talk to Point-Me-Own-Bone Dibbjla, and you will get one of
the sticks. Look at the baskets. Talk to Point-Me-Own-Bone Dibbjla. Click the
basket icon. Leave XXXX.


DJELLIBEYBI
-----------

Walk over to the camel area. Talk to the salesman. Click the mouth icon. Click
the camel icon. Walk up the wooden path and enter the shop. Get the plans.
Leave the shop. Carry on up the wooden path. Look at the candy rock. Talk to
the rock seller. Click the candy rock icon. Talk to Uri Djeller. Click the
jingle icon. Talk to Uri Djeller. Click the question icon. Click the fountain
of youth icon. Give the hoops to Uri Djeller. Walk up the street to the stoning
area. Get the stake. Leave Djellibeybi.


CARTWHEEL
---------

Talk to the man. Click the jingle icon.


PYRAMID
-------

Get the pot. Use the scissors on the bandage. Leave the pyramid.


OASIS
-----

Open the luggage. Use the bandage on the wooden arm. Close the luggage. Use the
bandaged wooden arm with the rotten arm.


HILL
----

Talk to Bone Idle. Click the jingle icon. Use the knife on Bone Idle. Leave the
hill.


HOLY WOOD
---------

Enter the castle. Look at the horse suit. Talk to the dwarf. Click on the horse
suit icon. Open the luggage. Double-click the rotten arm. Close the luggage.
Give the ring to the dwarf. Exit the castle. Walk further to the right. Get the
mail box. Get the weight. Walk further to the right. Get the camera. Talk to
the trainer. Click on the imp icon. Use the stick with the paint. Use the
boomerang with the imp. Enter the room just to the right of the mail box.
Rincewind will leave the room. Enter the room again. Talk to the makeup girl.
Leave Holy Wood. Enter Ankh-Morpork.


DOCKS
-----

Open the luggage. Use the weight with the sticker. Close the luggage. Use the
weight with the hook. Use the weight. Get the snow storms. Leave the docks.


SHADES
------

Enter the room where the dead collector used to be. Talk to Casanunda. Talk to
the witch. Click the elf icon. Leave the room. Leave the Shades. Enter the
Unseen University.


GARDEN
------

Walk to the far-right of the garden, and go past the hedge maze. Use the stake
on the compost heap. Leave the garden.


DINING HALL
-----------

Use the basket on the food. Talk to the librarian. Click the horse suit icon.
Leave the dining room. Leave the Unseen University. Leave Ankh-Morpork.


XXXX
----

Open the luggage. Use the saw on the ironing board. Use the glue pot with the
surfboard. Close the luggage. Use the surfboard on the surf. Open the luggage.
Use the imp with the camera. Close the luggage. Use the camera with the
paintings. Leave the cave. Walk to the right, past the bush. Use the picnic
basket on the ant hill. leave XXXX. Enter Ankh-Morpork. Enter the Unseen
University.


HIGH ENERGY FACILITY
--------------------

Use the picnic basket with HEX. Use the honey pot with the basket. Open the
luggage. Use the wire with the plans. Close the luggage. Use the pyramid with
HEX. Talk to Skazz. Click the universe icon. Leave the High Energy Facility.
Leave the Unseen University. Leave Ankh-Morpork.


CARTWHEEL
---------

Give the answer to the man. Leave the cartwheel.


DJELLIBEYBI
-----------

Go to the stoning area. Use the suffrajester with the hole. Get the rope. Leave
Djellibeybi.


FOREST
------

Open Rincewind's inventory. Put the money pouch into the luggage. Open the
luggage. Use the librarian with the horse suit. Use the glue with the hooter.
Use the hooter with the horse suit. Put the horse suit in Rincewind's
inventory. Put the camera in Rincewind's inventory. Close the luggage. Use the
stones. Use the unicorn suit with Rincewind. Enter the castle. Use the camera
on the queen. Leave the castle. Put the unicorn suit in the luggage. Put the
camera in the luggage. Leave the forest.


HOLY WOOD
---------

Enter the room just to the right of the mail box. Give the film of the elf
queen to the makeup girl. Leave the room. Walk past all the imps until you get
to another screen. Use the candy rock on the troll. Look at the door. Talk to
the troll. Click the key icon. Use the key on the door. Use the rope on the
troll. Enter the room. Talk to the woman. Give the tooth to the woman. Leave
the room. Walk up the path. Give the band to dibbler. Give the babe to dibbler.
Give the snow storm to dibbler. Give the jingle to dibbler. and he will say
that we have to find a stunt double. Leave Holy Wood. Enter Ankh-Morpork. Enter
the left part of the Shades.


SHADES
------

Use the certificate on the door. Use the closet. Talk to the black sheep. Click
on the stunt icon. Give the sheep film to the black sheep.


CINEMA
------

After a long animation scene, you will start playing again. Get the reel. Put
the reel in the device. Use the elf queen film with the device. Use the reel
with the projector.


-------------------------------------------------------------------------------
2.3.                      Act III: The Grim Rincewind
-------------------------------------------------------------------------------


HOUSE
-----

Get the mat, and you will get a key. Enter the door. Go up the steps, and take
the exit nearest the golf bag. Get the bunny. Get the string. Leave the room.
Go over to the exit opposite the golf bag. Get the inkwell. Use the cord. Leave
this room. go downstairs, and go through the left door into the kitchen. Get
the sugar pot. Open the pot belly stove. Get the oily rag. Leave the room. Get
the scythe from the umbrella stand. Enter the right doorway (book room). There
are three books being written in this room, get the middle book. Leave the
room. Enter the kitchen. Rincewind will have a conversation with Albert. Give
the scythe to Albert. Leave the room. Get the curtains. Leave the house.


STABLE
------

Get the rope. Use the glue on the saddle. Give the sugar to Binky. Get the
saddle. Use Binky. Exit the stable.


GARDEN
------

Open the luggage. Double-click the bunny. Use the pyjamas on Rincewind. Open
the luggage. Use the matches with the oily rag. Use the burning rag with the
beehive. Get the beehive. Use the sugar pot with the beehive. Get the fishing
rod. Use the inkwell with the pond. Use the curtain with the pond. Look at the
toy cart. Talk to Susan. Click the toy cart icon. Give the book to Susan. Walk
over to the pit at the far right of the garden. Open the luggage. Use the honey
pot with the fishing rod. Close the luggage. Use the fishing rod with the dots.
Leave the garden.


HOUSE
-----

Enter the house. Enter the book room. Use the key with the alcove. Open the
luggage. Use the string with the beewax. Use the matches with the candle. Put
the lit candle in Rincewind's inventory. Enter the alcove. Use the lit candle
with the alcove. Get the tablet. Leave the house. Enter the garden.


GARDEN
------

Give the tablet to Susan. Use the scythe with the toy cart. Leave the garden.


CORNFIELD
---------

The cornfield is located around the bottom-right corner of the map. Use the
reaper with the corn. Go to the outside of the house.


HOUSE
-----

Open the luggage. Use the rope with the boomerang. Use the boomerang with the
chimney. Use the chimney. Use the chimney. Enter the house. Enter the kitchen.
Give the robe to Albert. Rincewind will leave the kitchen. Enter the kitchen.
Give the ant souls to Albert.


-------------------------------------------------------------------------------
2.4.                     Act IV: Till Death Us Do Part
-------------------------------------------------------------------------------


BONESTOCK
---------

Get the cork near the hat. Leave Bonestock.


DJELLIBEYBI
-----------

Wait for a while until the prospector shows up on his camel. Get the saddle
bags, and Rincewind will get a canteen. Use the rotten arm with the saddle
bags. A new location will show up on the map!


FOUNTAIN OF YOUTH
-----------------

Use the canteen with the fountain. Use the cork with the fountain. Use the
hour-glass with the sand.


-------------------------------------------------------------------------------
2.5.                         Epilogue: Queen Kong
-------------------------------------------------------------------------------


Talk to Dibbler. Click on the mouth icon. Click on the bladder icon. Open the
luggage. Use the canteen with the bladders. Look at the raven. Talk to Granny.
Click on the raven icon. Get the broom. Open the luggage. Put the bladders in
Rincewind's inventory. Use the broom on Rincewind to complete the game.


===============================================================================

3.                                Item List

===============================================================================


-------------------------------------------------------------------------------
3.1.                           Act I Item List
-------------------------------------------------------------------------------


BEEWAX
  Found in the hives at the Garden. It is given to the old woman in the shop to
  make candles.


BELLOWS
  Found in the High Energy Facility. They are used on the grate under the
  Fools' Guild to collect the glitter dust.


BOOTS
  The boots are pulled off the imp in the Garden by using the magnet. They are
  used in the genie bottle to collect the vile smell.


BRICK
  Found on the ground of the Fools' Guild. It is used on the fool in the
  Fools' Guild and the accelerator in the high energy facility.


CANDLES
  The woman in the shop will make Rincewind the candles after she is given the
  beewax. They are given to the Archchancellor in the dining hall.


CHILLI
  Found on the table in Gimlet's in the Shades. It is used on the flowers in
  the Garden.


CLICKIE BROCHURE
  The dibbler gives Rincewind the clickie brochure in the Plaza. It is given to
  the beekeeper in the Garden.


ECTOPLASM
  Found by throwing the brick with the fool in the accelerator at the High
  Energy Facility. It is given to Mrs. Cake in the Shades.


FISH
  Found in the shop. It is used with the water at the docks to find the stunned
  bird.


FLAMINGO
  Found in the shop. It is given to the Dean in the Garden for one of the
  three sticks.


GENIE BOTTLE
  Found in Mrs. Cake's shop in the Shades. It is used with the boots in the
  Shades, and is then used to collect the vile smell.


GLITTER DUST
  Found by using the bellows with the grate under the fools' guild. It is given
  to the Archchancellor in the dining hall.


HAMMERHEAD SHARK
  Found in the net at the docks. It is given to the bursar in the Garden for
  one of the three sticks.


HOOTER
  Found on the ground of the Fools' Guild. It is used on the horse suit in the
  forest.


INCENSE
  Found in the Shop. After being lit, it is used on the beehives in the Garden.


IRONING BOARD
  Found in the closet at the left side of Mrs. Cake's shop in the Shades. It is
  used with the saw to make the surfing board.


KNIFE
  Found on the table of the morgue in the Shades. It is used with the net at
  the docks to get the hammerhead shark. It is used on Bone Idle at the Hill
  to get the band.


LADDER
  Casanunda will give Rincewind the ladder in the Trolls Head bar when he hears
  about the witch. It is used on the slab in the cemetery.


MAGNET
  Found in the High Energy Facility. It is used on the imp in the Garden to get
  his boots.


MATCHES
  Found in the Trolls Head bar in the Shades. They are used to light the
  incense in the Garden in Act I, to light the oily rag in the Garden of Act
  III, and also to light the candle in the house.


MOUSE
  Gimlet will give Rincewind the mouse burger in the Shades when he sits at the
  table. The mouse is used on the teeth.


MOUSE BLOOD
  Found by using the teeth on the mouse, and then the teeth on the test tube.
  It is given to the Archchancellor in the dining hall.


PETTICOAT
  Found at the left side of Mrs. Cake's shop in the Shades. It is used on
  Rincewind near the beehives in the Garden.


PICKAXE
  Found in the cemetery. It is used to collect the ice under the Fools' Guild.


POPCORN
  The dibbler will give Rincewind the popcorn at the plaza. It is used with the
  rooster at the Garden.


POT
  Found near Duckman in the Shades. It is used with the hives in the Garden to
  collect the beewax.


ROOSTER
  Found near the hedge maze in the Garden. It is used with the vampire in the
  Trolls Head bar.


SAW
  Found near Duckman in the Shades. It is used on the dummy in Mrs. Cake's
  shop in the Shades. It is also used on the ironing board to create the
  surfing board.


SCISSORS
  Found in Mrs. Cake's shop in the Shades. They are used with the bandage in
  the pyramid.


STUNNED BIRD
  Found at the docks after it tries to get the fish. It is given to the
  librarian in the Garden for one of the three sticks.


TANKARD
  Found in the Trolls Head bar in the Shades. It is used on the popcorn in the
  Garden.


TEETH
  Found after climbing the ladder in the cemetery. They are used on the mouse
  to collect the mouse blood.


TEST TUBE
  Found in the High Energy Facility. It is used to collect the blood from the
  mouse.


VILE SMELL
  Found near the three men in the Shades. It is given to the Archchancellor in
  the Dining Hall.


WOODEN ARM
  Found at the left side of Mrs. Cake's shop by using the saw on the wooden
  dummy. It is one of the items used on Rincewind in the Shades to get the
  certificate from the mortician.


-------------------------------------------------------------------------------
3.2.                           Act II Item List
-------------------------------------------------------------------------------


ANTS
  Found in XXXX. They are put in the basket.


BABE
  Found in Holy Wood. She is given to the dibbler in Holy Wood.


BAND
  Found at the Hill. It is given to the dibbler in Holy Wood.


BANDAGE
  Found in the pyramid. It is used on the wooden arm.


BANDAGED WOODEN ARM
  Made by using the bandages from the pyramid on the wooden arm. It is swapped
  with the rotten arm at the Oasis.


BASKET
  Found at Dibbjla's shop in XXXX. It is used on the food in the dining hall.
  It used on the ant hill in XXXX, and is used on HEX in the High Energy
  Facility.


BOOMERANG
  Found at Dibbjla's shop in XXXX. It is used with the imp in Holy Wood. It is
  combined with the rope and used on the chimney at the House.


CAMERA
  Found near the mailbox at Holy Wood. It is used with the cave paintings in
  the cave in XXXX. It is used on the queen in the Forest castle.


CANDY ROCK
  Found in Djellibeybi. It is used on the troll in Holy Wood to get the tooth.


CERTIFICATE
  The mortician in the Shades gives the certificate to Rincewind. It is shown
  to the dead collector to exit Ankh-Morpork. It is also used to enter the door
  at the left side of the Shades.


ELF QUEEN FILM
  Found by taking pictures of the elf queen in the Forest castle. It is used in
  the device in the Cinema.


GLUE POT
  Found in the Pyramid. It is used with the surfboard in XXXX. It is used on
  the hooter. It is also used on the saddle in the Stable.


HEAVY WEIGHT
  Found near the mailbox at Holy Wood. It is used with the hook at the docks.


HOOPS
  Found in the Garden. They are given to Uri in Djellibeybi, who will make the
  wire.


HORSE SUIT
  Found in the castle at Holy Wood. It is used to enter the castle in the
  Forest. It is also used on the librarian in the Dining Hall.


ICE
  Found in the room under the Fools' Guild. It is one of the items used on
  Rincewind in the Shades to get the certificate from the mortician.


IMP
  Found in Holy Wood. He is used in the camera.


JINGLE
  The man at the Cartwheel will give Rincewind the jingle when he is talked to.
  It is given to the dibbler in Holy Wood.


KEY
  Found by talking to the troll in Holy Wood. It is used on the door in Holy
  Wood.


LIBRARIAN
  Found in the Dining Hall. He is used on the horse suit.


MIRROR
  Found in the morgue in the Shades. It is used with the bunsen burner and the
  bench.


PLANS
  Found in the shop in Djellibeybi. They are combined with the wire to make the
  pyramid.


PYRAMID
  Made by combining the hoops with the plans. It is used on HEX in the High
  Energy Facility.


REEL
  Found in the Cinema. It is used in the projector in the Cinema.


RING
  Found by double-clicking the rotten arm. It is given to the dwarf in Holy
  Wood.


ROTTEN ARM
  Found at the Oasis. It is used with the saddle bags of the prospector in
  Djellibeybi.


SNOW STORMS
  Found by using the weight on the hook at the docks. They are given to the
  dibbler in Holy Wood.


STAKE
  Found in the stoning area at the top of Djellibeybi. It is used on the
  compost heap in the Garden to get the suffrajester.


STICKER
  Found on the mailbox at Holy Wood. It is used on the weight.


SUFFRAJESTER
  Found on the compost heap in the Garden. She is used with the hole in the
  stoning area in Djellibeybi.


TOOTH
  Found in the mouth of the troll at Holy Wood. It is given to the woman in
  Holy Wood.


WIRE
  Uri Djeller will make the wire in Djellibeybi after he is given the hoops. It
  is used on the plans to make a pyramid.


-------------------------------------------------------------------------------
3.3.                           Act III Item List
-------------------------------------------------------------------------------


ANT SOULS
  Found in the pond of the Garden in Act III. They are given to Albert in the
  kitchen of the House.


BEEWAX
  Found in the hives at the Garden in Act III. It is used on the string.


BOOK
  Found in the right room at the top of the steps in the House. It is given to
  Susan in the Garden.


BUNNY
  Found in the left room at the top of the steps in the House. It is clicked
  twice to find the pyjamas.


CURTAINS
  Found in the main hall of the House. They are used with the pond in the
  Garden.


FISHING ROD
  The fishing rod is held by the gnome in the Garden. It is used to collect the
  ant souls from the pond in the Garden.


HOUSE KEY
  Found under the mat outside the House. It is used to unlock the front door
  of the house.


INKWELL
  Found in the right room at the top of the steps in the house. It is used on
  the pond in the Garden.


OILY RAG
  Found in the pot belly stove in the kitchen of the House. It is used with
  the matches, and is then used on the beehive.


PYJAMAS
  Found by clicking the bunny twice. They are used on Rincewind near the
  beehives in the Garden.


REAPER
  Made by combining the scythe with the toy cart. It is used with the corn in
  the Cornfield.


ROPE
  Found in the Stable. It is used with the boomerang.


SCYTHE
  Found in the umbrella stand in the House. It is used on the toy cart to make
  the reaper.


STRING
  Found in the left room at the top of the steps in the House. It is used with
  the beewax.


SUGAR POT
  Found in the kitchen on the first floor of the House. It is used with the
  beehive and is then used on the fishing rod.


TABLET
  Found in the alcove of the book room in the house. It is given to Susan in
  the Garden for the cart.


-------------------------------------------------------------------------------
3.4.                           Act IV Item List
-------------------------------------------------------------------------------


CANTEEN
  Found on the prospector's camel at Djellibeybi. It is used on the fountain
  at the Fountain of Youth. It is also used on the bladders.


CORK
  Found near the hat in Bonestock. It is used with the fountain at the
  Fountain of Youth.


-------------------------------------------------------------------------------
3.5.                          Epilogue Item List
-------------------------------------------------------------------------------


BLADDERS
  The dibbler gives Rincewind the bladders in the epilogue. They are used with
  the canteen.


BROOM
  Granny gives Rincewind the broom in the epilogue. It is used on Rincewind.


===============================================================================

4.                          Copyright Information

===============================================================================


This file is Copyright 2000-2008 Tom Hayes. As it can be difficult to keep
track of websites that haven't posted the latest version of this file, please
do not distribute it without my permission. Send an e-mail to me if you would
like to post this file on your website and you will likely receive a positive
response. If you do post the file, please keep it in its original form with all
of the sections intact and credit the author (Tom Hayes) as the writer of the
file.


_capsule_fog__medium.png)
