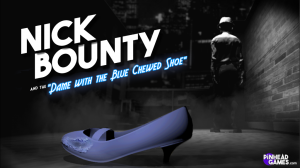
Walkthrough for Nick Bounty and the Dame with the Blue Chewed Shoe
NICK BOUNTY
AND THE DAME WITH THE BLUE CHEWED SHOE
WALKTHROUGH
*******************************************
SEWERS
Watch the intro as you, Nick Bounty, are chasing a suspected criminal for your latest case.
Talk to the Scumbag and choose any dialogue option. He drops his POLICE SCANNER into the water. You make a deal with him - if he lets you have the POLICE SCANNER, you’ll give him the incriminating photos of his bird-napping activities, and let him go. Feel beneath the water, and keep searching until Scumbag finds the POLICE SCANNER. Give him INCRIMINATING PHOTOS from your Inventory, and he gives you the POLICE SCANNER in return. Sweet! You hear a police call go out over the scanner, advising all police about a murder in the local park. You decide to investigate.
PARK
There’s a dead woman in the sandpit. Talk to Officer Wilmer and work through all the dialogue.
When conversation is over, look at legs of the woman in the sandpit, and take PHOTO OF LEGS as evidence. Look at wet sand in the sandpit, and get SWAB OF WET SAND. Look at spider on the edge of the sandpit - Office Wilmer shoots it.
Look at wooden train in the back left corner of the park. Look behind the wooden train, and look at dog collar on the ground. Take PHOTO OF DOG COLLAR.
Look at park benches. Notice the tree next to the benches, and look at the SHINY THING in the tree - it’s a handbag. Maybe you should tell someone.
Look at merry-go-round in the back right corner. Walk right a few steps, and talk to the cops next to the police car. Look at the police car. Search rubbish bins next to the police car. Look carefully in the shoot, and look at shoe in the shoot-tunnel. Take a SWAB OF FLUID ON SHOE.
Walk left again, talk to Officer Wilmer, and work through all the dialogue. Ask Officer Wilmer to help you get the SHINY THING out of the tree, but he refuses, since he has to stay where he is and guard the dead body. Okay, maybe you can trick him. Tell him there’s a spider in the tree. He shoots at the tree, knocking the bag from it’s branch. Go back to the tree, and look at the bag that’s now fallen to the ground. Examine the bag, and get FINGERPRINT ON BAG.
You’ve done all you can in the park, so head for the morgue.
MORGUE
Talk to Dr MacDonald Stuffings, and work through all the dialogue. When conversation is over, look at the woman’s body. Look at lockers on the left. Look at scales on the left. Look in bin next to the door. Look at sink on the back wall. Look at tools lying on the table. Look at chalkboard on the right. Now you need to distract those cops outside, so you can get a good look at the body. Leave the morgue room, and go out to the hallway.
Chat to cops in the hallway. Walk left into the Break Room.
Look at file cabinet next to the door. Take POLICE BATON from the table. Look at certificates on the wall. Look at donut vending machine. Walk right, back to the hallway.
Go through Exit door on the right to leave the building. Travel to your office.
NICK’S OFFICE
Before you go into your office, let’s explore outside. Have a chat with Street Steve outside your building, and work through the dialogue. Look at skis that are leaning against the shop window next to Street Steve. Look at graffiti on the window shutter. Look at pigeons. Walk right a few steps and look at the shop window. Look at dark alley. Now walk left a few steps. Look at broken parking meter. Use POLICE BATON to smash the broken parking meter, then pick up MANY QUARTERS from the ground, as they spill out from the parking meter. When you’re ready, enter through door into your office.
As you step into your office, you’re excited to see your brand new mail-order crime lab is here. Your crime lab consists of 3 computers that will help you analyse any evidence you come across. Okay, calm down Nick. Look at didgeridoo (hat rack) next to the door. Now let’s put your new crime lab to good use.
Look at Trace Evidence Analysis computer. Now use the Trace Evidence Analysis computer again, and analysis the WET SAND SWAB you found at the park. When analysis is complete, exit the close-up of the computer.
Next, look at Identity Analysis computer, then use the computer to analyse SWAB FROM PLAYGROUND SHOE and FINGERPRINTS FROM BAG.
Now look at Audio\Image Analysis computer, then use computer to analyse PHOTO OF VICTIM‘S LEGS and PHOTO OF DOG COLLAR.
Let’s explore your office. Look at bookcase next to the door, and look at books in the bookcase. Look at goat statue in the bookcase. Look at painting on the wall behind your desk. Look at your desk, and pick up TOY CRAB from your desk. Look at desk lamp. Look out window on the right. That’s all you can do here for now, so leave your office.
Walk right a few steps, and use Nick’s Car to travel back to the morgue.
MORGUE
Walk left into the Break Room.
Use MANY QUARTERS in the donut vending machine to get some donuts. You place a plate of donuts on the table, then call for the cops in the hallway. They eagerly come, and start munching away on the donuts. Walk right into the hallway.
Walk right into the morgue.
You’re now free to inspect the woman’s body. Walk over to her table to get a close-up. Examine her nose and get SNOTTY FUZZ. Examine her mouth and get VICTIM’S DNA. Examine her hands and get VICTIM’S FINGERPRINTS. Examine her feet - you don’t find anything useful. You automatically drive back to your office.
NICK’S OFFICE
Enter through door into your office.
Use Trace Evidence Analysis computer, and analyse NOSTRIL FIBRES. Use Identity Analysis computer, and analyse FINGERPRINTS FROM BAG. You have no fingerprints on file that match yet. Analyse VICTIM’S DNA. You find out the dead woman’s identity - her name is Sia Leyhter (See Ya Later, lol). Use Identity Analysis computer to analyse VICTIM’S FINGERPRINTS - you get her address. Now you finally have enough information to analyse FINGERPRINTS FROM BAG - the fingerprints from the bag do indeed belong to Miss Sia Leyhter.
Your case is getting interesting, so now is the time to hire a sidekick to help you. There are 3 applicants, and you can ask each applicant 3 questions. Each sidekick has their own personality, and their own agenda. So who will you pick?
After you choose your sidekick, travel to Sia’s apartment.
SIA’S APARTMENT
It’s a very modern apartment, and it‘s all open-plan. And first appearances show it to be very spick & span! Okay, let’s explore her apartment. Look at dead rat in the back left corner of the floor, and take SWAB OF DEAD WET RAT. Look at wine bottles in the display cabinet. Look at list that’s pinned to the cupboard door. Look at kettle that’s sitting on top of the oven in the kitchen area. Look at cat treats that are lying next to the sink. Look at fridge on the right. Look at bag of dog food on the counter in middle of the room, and take PHOTO OF TORN DOG FOOD BAG. Look at cat photos on the coffee table in the lounge area. Look at Datebook on the settee in the lounge area. Now climb upstairs to the 1st Floor.
In the bedroom, look at mirror on the dressing table. Take SMALL KEY from the dressing table. Look at the bed. Open wardrobe on the right, and look at safe in the wardrobe. It needs a pass code, but you have no idea what it could be. Dust it for prints to get FINGERPRINT ON SAFE. Look at the row of shoes - they‘re similar to the shoe you found at the park. Now enter through door into bathroom.
Look at litterbox on the floor next to the door. Look at bath tub. Look at rug. Look at toilet paper. Look at bathroom counter on the left. There’s nothing else you can do here, so leave the bathroom.
Leave the bedroom, and go back down to the Ground Floor.
You’ve done all you can here, so leave the apartment, and travel to the Woofing It Down offices.
WOOFING IT DOWN OFFICES
This is where Sia worked. Look at dog photos on the wall next to the door.
Talk to Teddy Novack and work through all the dialogue.
Talk to Liddy Bahms and work through all the dialogue. Look at plant in Liddy‘s cubicle.
Walk left a couple of steps, and look in the bin on the floor to see the remains of someone’s lunch.
Teddy calls you over, and accuses Liddy of frequently stealing other people’s lunches. Talk to Teddy again and work through all the dialogue.
Talk to Liddy again and work through all the dialogue.
Walk left a few steps, and look at fax machine. Also look at the dog food binders.
Look at desk on the left - Sia’s desk. Look at coffee cup on the desk. Look at desk plant. Look at computer monitor. Apparently Sia was investigating someone called ‘Max Fakename’, hehe. Take PHOTO OF INTERNET SEARCH RESULTS from Sia’s computer. Look at dog photos on the desk. Try to open desk drawer, but it’s locked. Use SMALL KEY in the desk drawer to unlock it. Look at note in the drawer - it would help to know who wrote this note. Take FINGERPRINT ON NOTE AT VICTIM’S DESK.
You’ve done all you can here, so travel back to your office.
NICK’S OFFICE
Enter door into your office. Sidekick gives you the TEDDY NOVACK SURVEILLANCE VIDEO.
Use Trace Evidence Analysis computer and analyse DEAD RAT SWAB.
Use Identity Analysis computer and analyse FINGERPRINTS FROM SAFE, and FINGERPRINTS FROM NOTE. Fingerprints on the note lead to Sia’s sister, Ally Leyhter. You also get Ally’s address.
Now use Audio\Image Analysis computer and analyse PHOTO OF DOG FOOD BAG, PHOTO OF COMPUTER SCREE, and SURVEILANCE VIDEO. There are lots of images on the surveillance video, so scroll through them, enhancing each photo in turn. You see someone in a puppy dog mask, dancing. When the dog mask is removed, you see that it was Teddy Novak who was wearing the dog mask. So his story checks you, and he’s not the one who killed Sia.
When you’re ready, leave your office and go outside.
Walk right a few steps and use Nick’s Car to travel to Ally’s Home.
ALLY’S HOME
Chat with Ally, Sia’s sister, and get invited into her home. She doesn’t seem very concerned about her sister’s death. In fact, she seems to care more about publicity and fame, than anything else. She’s even changed her surname to ‘Gheyter’. So she’s Ally Gheyter (alligator).
Let’s explore her house. Look at poster on the wall on the right. Look at victrola. Look at fireplace.
Walk up into the kitchen area. Look at Max’s notebook on the worktop on the left, and take NOTEBOOK WITH A MISSING PAGE. Look in the fridge. Ally and her boyfriend are definitely cohabitating. Open top drawer next to the sink. Open bottom drawer next to the sink, and take swab of BLOOD DROPS FOUND IN ALLY’S APARTMENT from the bottom drawer. Look at cookie jar in the corner. Now leave the kitchen area.
Look at trophies in the display cabinet on the left. Now talk to Ally, and work through all the dialogue. When conversation is over, head left into the hallway behind the display cabinet.
In the hallway, look at photos on the wall. Now enter guest room on the left.
In the guest room, look at picture frame on wall next to the door. Look at Max’s notebooks on the desk. Look through the window. Hmm, the window is nailed shut. Didn’t Ally say that the cats climb through the window sometimes? Open wardrobe, and look at trench coats in the wardrobe. Look at shoes at bottom of the wardrobe - the shoes are filthy! Take swab of DISGUSTING SHOE GOO, and take photo of MEN‘S SHOE TREAD. Look at TV in the corner. Look at bed. Now leave the guest room.
In the hallway, enter bathroom on the right.
In the bathroom, look at artwork on the wall. Look at mirror above the sink. That’s all you can do here, so leave the bathroom.
In the hallway, enter Ally’s bedroom. Well… TRY to enter the bedroom. But there are so many dolls in that room, it’s too creepy to enter! Return to the living room.
Talk to Ally again, and ask work through all the dialogue. Now Ally has to leave, to go dancing with her mysterious boyfriend Max. You and Sidekick automatically return to your office.
NICK’S OFFICE
Use Trace Evidence Analysis computer to analyse SWAB OF SHOE GOO. The evidence leads you to seagulls at a marina, so you acquire footage of LOCAL MARINA SURVEILANCE CAMS.
Use Identity Analysis computer to analyse BLOOD FROM ALLY’S DRAWER. There’s no match in the system.
Use Audio\Image Analysis computer to analyse PHOTO OF MAX’S SHOE and NOTEBOOK PAPER WITH IMPRINT. The notebook gives you a LIST OF NUMBERS. Also analyse FISHING MARINA SURVEILANCE to see several images from the marina. Enhance each image, but since you don’t really know what you’re looking for, you don’t get any results.
Now leave your office and go outside.
Walk right a few steps, and use Nick’s Car to travel to Sia’s apartment.
SIA’S APARTMENT
Let’s take another look round the apartment. Climb stairs up to Sia’s bedroom on the 1st Floor.
In the bedroom, look at safe in the cabinet on the right. It’s still locked. Use LIST OF NUMBERS with the safe to unlock it. You find a piece of paper inside the safe, and it has a name on it - El Pescado. You’ll need to remember that name. Return back downstairs.
Leave the apartment, and head back to your office.
NICK’S OFFICE
Enter into your office.
Use Audio\Image Analysis computer to analyse FISHING MARINA SURVELLIANCE footage. The name you found in Sia’s safe is a big help here. Enhance each image until you get a new lead. So El Pescado is the name of a fishing boat! You should follow up on it, before the trail goes cold. Leave your office and go outside.
Use Nick’s Car to travel to Berti Marina.
BERTI MARINA
Look at the El Pescado boat on the right. Start walking right… but you’re attacked by a bird, which prevents you from going any further. Stupid bird! However, look on roof of the boat, and look at the bird nest. Awww, there’s 3 baby birds here. So the mother bird was just protecting her babies! The poor babies must be hungry. Walk left, and look at the fishing boat.
Walk a bit further down the marina to the next ‘parking spots’. Walk left and look at large crates. For a bit of fun, use your POLICE BATON to try and break the crates. When you fail to open the crates, head right to the row boat. Look at row boat - nothing interesting hidden here!
Walk down to the end of the marina. Look at seagull perched on the post, and show TOY CRAB to the seagull to scare him away. Look at boxes in front of you, and you remember your old crab-friend Herbie.
You can’t do anything else here at the moment, so leave the marina for now, and return to Nick‘s office.
NICK’S OFFICE
Street Steve starts talking to you, since he realised you’ve been down to the marina. He also warns you that a strange woman has been looking for you. Talk to Street Steve and work through all the dialogue. You asks Steve for the pigeon food, but he won’t give it to you, since he wants to keep feeding the pigeons. Okay, let’s get rid of the pigeons then. Use TOY CRAB with the pigeons to scare them away. Talk to Street Steve again, and ask about the pigeon food. This time, he gives you PIGEON FOOD. Walk left a few steps, and look at SLIPPER on the ground. Take SWAB OF BALLET SLIPPER. Who do you know that likes to dance? Now enter into your office.
Use Identity Analysis computer to analyse SWAB OF SLIPPER SWEAT. The analyses confirms that the slipper belongs to Ally Gheyter. Now leave your office and go outside.
Talk to Street Steve again, and ask about the slipper. Now use Nick’s Car, and travel back to Berti Marina.
BERTI MARINA
Give PIGEON FOOD to the bird’s nest on El Pescado fishing boat. The mother gull uses the food to feed her babies. Now climb into the El Pescado fishing boat.
In the boat, look at table on the left to see the paw prints. Get PAW PRINTS scan from the table. Do these prints belong to Sia’s cats?
Look at bed on the right - it’s pretty cramped.
Walk forward to the kitchen area. Look at sink to see all the tuna cans. Look at ripped curtains hanging from the window, and take PHOTO OF RIPPED CURTAINS. Look at oven to see the burned paper. Take PHOTO OF BURNT PAPERS. Look in mini fridge to learn that it’s empty.
Walk forward a bit more to the bathroom area, and look at toilet. Look at wet spot on the floor beneath the toilet, and take SWAB OF BOAT PEE. Also, look at shoeprints on the floor, and take PHOTO OF SHOEPRINTS.
You’ve done all you can here, so you automatically return to your office.
NICK’S OFFICE
As soon as you step out of your car, you hear someone call for help. It sounds like Street Steve. But… where is he? Look at Steveless Boxes. Walk right a few steps, and enter the Dark Alley.
Uh-oh. It was a trap! Tim is lying in wait for you, and he’s going to beat you up. Kick him, then run to the right. From here, kick him again, to knock him down. Notice the petrol being spilled. Run right again, and kick him again. He stumbles into the lamp post, loosening it. Notice the sparks. Run to the left twice, so you are back in your starting position. Punch his face, and he double-punches you, making you stumble backwards towards the broken lamp post. Quickly push over the broken lamp post, so the sparks are touching the oil on the ground. If you take too long, simply punch his face again, and he’ll double-punch you again, knocking you back to the lamp post. Now run to the right, so you can see the sparking lamp post behind him. Kick him, so he’ll stumble backwards into the sparks, and get electrocuted. Unfortunately, while you are pondering your next move, someone whacks you from behind, knocking you out cold!
When you finally wake up, look at wet spot on the ground. Look at lamp post. Look at stairs. Look at barrels. Walk right a few steps, and look at boxes. Look at pile that’s leaning against the fence. You finally find Street Steve! He got jumped from behind, but he’s okay. You automatically head back to your office.
In your office, you’re confronted by Ally Gheyter, who asks you to stop investigating Sia’s murder. You refuse. She warns you to back off, threatens you with a gun, and then leaves.
Okay, back to work. Use Trace Evidence Analysis computer to analyse SWAB OF BOAT PEE. It’s from the same source as the stuff you found in the sandpit in the park.
Use Identity Analysis computer to analyse FINGERPRINTS FROM BOATHOUSE. It’s the same as the prints on Sia’s safe.
Use Audio\Image Analysis computer to analyse PHOTO OF BURNT PAPERS, PHOTO OF SHOE PRINTS, and PHOTO OF TORN CURTAIN. The burnt papers are Sia‘s puppy adoption papers - she was going to adopt one of the puppies from her photo shoot. The shoeprints match Ally’s boyfriend Max’s shoes. Something doesn’t quite add up here.
A call comes out over your POLICE SCANNER. It’s Max, Ally’s boyfriend. He threatens you to stop the investigation, or he’ll kill your Sidekick. He also demands that you meet him… somewhere. But there’s so much interference, you can’t really understand his message. Luckily, your surveillance system recorded the whole conversation, so you have RECORDING OF MAX‘S CALL.
Use Audio\Image Analysis computer to analyse RECORDING OF MAX’S CALL. You have to use the Audio Extraction Tool to isolate Max’s voice. Now since you have to isolate Max’s voice, that means you have to block out all the other sounds. Max’s voice is represented by the top-right box, so leave that box alone, and click on the other 3 boxes. You successfully clean up the message, so you can understand what Max said. He wants you meet you tonight at 8pm, at Café Le Chat. Now leave your office and go outside.
Use Nick’s Car to travel to Café Le Chat.
CAFÉ LE CHAT
You arrive at the café to find Sidekick tied to a table with a laser. Max challenges you to figure out what‘s going on. As silly as it sounds, tell him that Sia was murdered by cats, and you can prove it, since cat prints were everywhere. Wow, Max doesn’t seem surprised by your answer. In fact, he threatens to turn on the laser, thus killing Sidekick if you don’t stop. But you don’t back down. Then it’s revealed that… Max IS the cats! 3 of them, in fact! This is too weird for Ally, and she wants out. The laser is activated as the cats run off. You have to shut it down before it kills Sidekick.
Look around if you like. Sidekick is getting rather concerned at this point. You need to figure out how to turn the laser off. Now listen to what Sidekicks tells you. Your actions at this point change, depending on who your Sidekick is.
EMILY BLACKWATER
Run behind the bar on the left, and look at Panel on the wall on
the left. This Panel controls the laser. It needs a pass code to
shut it down, but you have no idea what the code is. You need
to unscrew the Panel in order to bypass the code. Look at cash
register, and use POLICE BATON to whack it. The register
moves. Pick up QUARTER that was underneath the register,
then use the QUARTER to unscrew Panel on the left. Choose
any colour for the blinking light. Press the flashing button\light.
Unfortunately, you don’t press it hard enough. Use POLICE
BATON on the flashing button\light to hit it… but this time, you hit
it TOO hard! The laser turns back on. It looks like it’s the end for
Emily… until she realises that the laser is just an oversized
pointer laser, The kind that cats like to hunt. Phew!
ZACK FORSYTHE
Explore the café if you like. When you’re ready, look at the
access panel behind the bar on the left. It needs a pass
code, but you have no idea what that code could be. Luckily,
Zack was watching Max, and noticed that Max looked at 3
items that told him what the pass code is. You should follow suit.
So look at WHISKY BOTTLE from the bar counter on the left (to
get the number 17. Look at MAGAZINE on a settee on the right
(to get the number 21). Look at the tables, until you find graffiti
about Steve (to get the number 4). You have the code for the
access panel now - 17-21-4. Run over to the access panel
behind the bar on the left. Use the access panel to enter the
code. But… nothing happens. You need the last number. Zak
tells you to zap into your psychic abilities. Choose any number
on the access panel. It works! The laser turns off… for a while.
But then it turns back on again. It looks like it’s the end for Zack…
until he realises that the laser is just an oversized pointer laser,
The kind that cats like to hunt. Phew!
WALTER WALTERMAN
Walter had seen Max enter the code on the access panel.
Except… he can’t quite remember what that code is. Walter
wants you to go old school to figure out the code, and that
means beating it out of him. Well, if that’s the only way to get the
code, that’s what you’ll have to do. Use your POLICE BATON to
whack him. It doesn’t work. Pick up EMPTY BOOZE BOTTLE
on the left, and smash it over Walter. That doesn‘t work either.
Pick up FOLDING CHAIR on the left and smash it over Walter.
That works! He tells you the code is 17-21-4. Now you just have
to find the access panel. Explore the café if you like. When
you’re ready, look behind bar on the left, and look at panel on the
wall. Use ACCESS PANEL CODE you beat out of Walter on the
panel. It works… the laser turns off… for a while. The back-up
generator kicks in, and the laser turns back on. It looks like it’s the
end for Walter… until he realises that the laser is just an over-
sized pointer laser, The kind that cats like to hunt. Phew!
STREET CHASE
Now that Sidekick is safe, you still have to stop Max\the 3 cats. You start chasing him in a truck. One of them has a gun, and shoots at you if you get too close. Look at trunk of Max’s car to see that it’s not securely shut. Throw POLICE BATON at the trunk to make it fly open. The cats can’t shoot you if they can’t see you. Look at can of GAS in the open trunk. When a truck pulls up along side you, take DRY BRANCH from the other truck. Now step towards front of your truck, and one of the cats will throw a firebomb at you. Use DRY BRANCH in the fire to get BURNING BRANCH, then throw BURNING BRANCH at can of GAS in the open trunk. The cats are defeated! You’re now officially a hard-core detective! Well done!
Another call goes out over the POLICE SCANNER. It’s a new case, involving people thinking they are chickens! Should you take the case? Choose any dialogue option.
Now sit back, and enjoy the ending.
Congratulations for completing Nick Bounty And The Dame With The Blue Chewed Shoe!
Credit
This Walkthrough was written by Freaky Hobbit.


