===============================================================================

                               FAQ/Walkthrough for
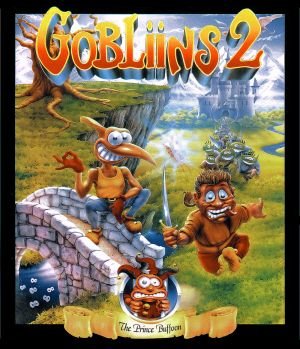
                          GOBLIINS 2: THE PRINCE BUFFOON

===============================================================================


GUIDE INFORMATION
-----------------

Author:   Tom Hayes
E-mail:   thayesguides(at)gmail(dot)com
System:   PC
Updated:  8th May, 2009
Version:  1.1


CONTENTS
--------

1. Introduction
2. Walkthrough
     2.1. Part 1
     2.2. Part 2
     2.3. Part 3
     2.4. Part 4
     2.5. Part 5
     2.6. Part 6
     2.7. Part 7
3. Item List
     3.1. Part 1
     3.2. Part 2
     3.3. Part 3
     3.4. Part 4
     3.5. Part 5
     3.6. Part 6
     3.7. Part 7
4. Credits
5. Copyright Information


VERSION HISTORY
---------------

1.1:  8th May, 2009       (Added credits)
1.0:  1st February, 2008  (First version)


===============================================================================

1.                                Introduction

===============================================================================


Made in 1992 by Coktel Vision, Gobliins 2 successfully mixes the puzzle and
point and click adventure game genres. In the original game, three characters
(each with different skills) could be controlled, and a new location would be
opened after all of the puzzles were solved in the current location. There are
only two characters to control in the sequel, although things are definitely
more difficult this time around. To name a few differences, more than one area
can be visited, the rooms are far more detailed with lots of things going on,
and there are many more red herrings to cope with. If you can manage to deal
with the high difficulty though, Gobliins 2 can be a fun and entertaining game.


===============================================================================

2.                                Walkthrough

===============================================================================


F = Fingus
W = Winkle


-------------------------------------------------------------------------------
2.1.                                Part 1
-------------------------------------------------------------------------------


VILLAGE
-------

F: Move up the steps and along to stand near the bottle at the right side of
   the old men.
W: Try to get the sausage at the right side of the notable.
F: While the old men are laughing, get the bottle.


FOUNTAIN
--------

W: Move to the left side of the fountain.
F: Push the statue.
W: While Fingus is pushing the statue, use the bottle on the jet of water. Use
   the bottle on the toad. Get the stone.
F: Use the stone on the mechanism at the right side of the roof.
W: Move to the left side of the ladder.
F: Pull the rung (Winkle will climb up to the roof). Use the door and the
   wizard will appear. Talk to the wizard.
W: Use the chimney. Enter the house.


WIZARD
------

F: Move to the head of the lizard.
W: Use the tail of the lizard.
F: While Winkle is pulling the tail, get the matches from the lizard's mouth.
   Use the bottle and the matches on the kettle. Wait until the steam from the
   kettle reveals the spring key. Use the kettle to put out the fire. Get the
   spring key. Use the spring key on the cuckoo clock. Use the cuckoo clock.
W: Throw the stone up at the big key to knock it down. Get the big key.


FOUNTAIN
--------

F: Use the big key on the cellar door. Get the wine.


VILLAGE
-------

W: Stand on the platform at the left side of the notable.
F: Use the bottle on the flowers. Get one of the flowers and give it to the
   notable to make him go to sleep. Push the switch at the left side of the
   notable and Winkle will be launched up to the roof.
W: Get the sausage.


GIANT
-----

W: Pick up the chicken.
F: While Winkle is holding the chicken, use the sausage on the head of the
   chicken to make an egg appear. Get the egg. Use the sausage on the first pot
   hole on the path.
W: While the dog is stunned, move past the dog. Use the hole in the tree to
   make a burrow in the wall. Move through the burrow.
F: Move through the burrow. Use the matches on the wood pile and then the egg
   on the fire to wake the giant. Give the sausage and the wine to the giant.
   Walk past the giant.


-------------------------------------------------------------------------------
2.2.                                Part 2
-------------------------------------------------------------------------------


TRENCH
------

F: Travel to Kael.


KAEL
----

W: Use the bottle on the nymph. Give the bottle to Kael. Move to Kael's hand to
   be launched up to the branch.
F: Move to the stone below the left side of the branch.
W: Use the branch and Fingus will catch a flower.
F: Move to the top of the rock at the bottom-left corner of the area. Use the
   flower on the stone at the left side of the mushrooms. Use the stone to get
   the honey from the bee. Move to the top of the rock at the left side of the
   area.
W: Use the stone.
F: Use the bee to ride up to the branch. Give the honey to the nymph.
W: Get the mushroom. Knock on the tree door and give the mushroom to Vivalzart.
   Enter the tree.


VIVALZART
---------

F: Move to the raised section of the platform below the vulture.
W: Get a worm from the jar. Push the switch to launch Fingus up to the vulture.
   Quickly throw a worm at the vulture and Fingus will get the meat. Use the
   mushroom on the machine.
F: Use the meat on the piranha and then get the bone. Use the machine to see
   that the tube is blocked by the clothes pin. Move to the top of the blue bin
   at Vivalzart's feet.
W: Use the bone on Vivalzart.
F: Get the elixir of kindness. Get the clothes pin. Use the bottle on the
   container.
W: Use the bottle on the container.


DREAM
-----

W: Use the left headlight to get the drumstick.
F: Use the spring.
W: While Fingus is bouncing on the string, use the left headlight to get the
   pump. Use the drumstick on the stocking cap above the hole to get the net.
F: Use the spring.
W: Use the spring at the same time as Fingus to open a door. Go through the
   door.
F: Use the clothes pin on the hose at the left side of the area. Go through the
   hole to land on the mushroom at the right side of the area.
W: Talk to the guitarist.
F: Use the net on the note.
W: Use the pump on the saxophonist to make the mosquito appear.
F: Use the net on the mosquito.
W: Go through the hole.
F: Use the pump on the saxophonist.
W: Use the net on the note.
F: Go through the hole.
W: Use the mosquito on the left headlight.
F: Use the net on the note to get the melody.


TOM
---

F: Use the stone on the ball.
W: Enter the bottom-left house.
F: Wait for the boy to appear and then enter the top-right house to get the
   ball.
W: Stand below the basket.
F: Use the ball on the player.
W: Wait for the ball to start bouncing and then use the basket. Talk to the
   mayor. Use the melody on the bottom-left house. Knock on the clockmaker's
   door and then talk to him to get the hourglass.


TRENCH
------

F: Use the hourglass on the trench. Go through the opening.
W: Go through the opening.


-------------------------------------------------------------------------------
2.3.                                Part 3
-------------------------------------------------------------------------------


GUARDS
------

W: Move to the left side of Grommelon.
F: Get the mayonnaise. Use the mayonnaise on the ground below the skull at the
   right side of Grommelon. Fingus will drop the mayonnaise on the floor. Climb
   up the ladder at the left side of the area to get on the roof. Use the
   mayonnaise and Fingus will jump on it.
W: While Gromelon is being sprayed by the mayonnaise, get his sword.
F: Get the mayonnaise. Move to Stalopicus.
W: Talk to Rustik.
F: Get the chewing gum from Stalopicus' mouth. Use the chewing gum on the
   cupboard to get the imprint.


FORGE
-----

F: Get the stool. Move below Focus.
W: Use the mayonnaise on Focus.
F: Use the stool on the meat held by Focus. Give the imprint and the sword to
   the blacksmith. Move to the right side of Otto.
W: Use the stool on Otto.
F: Use the lance to land on the left side of the ledge. Jump down to the
   bellows. Talk to the blacksmith to get the key. Get the anvil.


GUARDS
------

F: Use the meat on Amidal to get the false teeth. Use the key on the cupboard.
W: Use the cupboard to get the diving suit.
F: Use the cupboard to get the diving suit.


WELL
----

F: Move to the left side of the axe.
W: Go through the tunnel to reveal a door in the statue. Use the hatchet.
F: While Winkle is holding the hatchet, press the switch to open the statue
   door.
W: Move to the statue door.
F: Go through the tunnel to make the statue's mouth move.
W: While the statue's mouth is moving, go through the statue door to surprise
   Schwarzy.
F: Use the stool on the hoist at the left side of Schwarzy.
W: Use the false teeth on Schwarzy. Use the anvil on Schwarzy.
F: Use the diving suit on the well.
W: Use the diving suit on the well.


-------------------------------------------------------------------------------
2.4.                                Part 4
-------------------------------------------------------------------------------


WRECK
-----

F: Travel to the mermaid.


MERMAID
-------

W: Move to the shell.
F: Go through the hole at the top of the steps.
W: Use the shell to throw it up.
F: Catch the shell when Winkle throws it. Use the stool on the seahorse to ride
   up to the left ledge.
W: Go through the hole at the top of the steps.
F: Use the cavity near the mermaid.
W: Use the shell when the glove appears. Use the shell to get the glove. Winkle
   will also pick up the starfish that was hiding in the glove.


WRECK
-----

W: Climb up the ladder in the middle of the wreck.
F: Use the lantern and a lamp fish will appear.
W: Get the lamp fish. Use the lantern at the left side of the wreck and an eel
   will appear. Stand on top of the shell.
F: Use the rudder (Winkle will be launched up to the higher deck). Use the lamp
   fish on the ??? section at the top-right corner of the area to reveal a
   chest. Use the starfish on the chest.
W: While the starfish is on the chest, use the statue to get the sword. Move to
   the middle deck and go through the door to push the skull out of the hole.
   Use the sword on the skull. Get the diamond.


MERMAID
-------

F: Use the seahorse.
W: Use the seahorse.
F: Use the glove on the blob. Use the bottle to get the parchment.
W: Use the bottle to get the pearl.
F: Get the glove from the blob. Give the diamond and the pearl to the mermaid.
   Get the stool. Use the parchment on the octopus. Go through the hole.


-------------------------------------------------------------------------------
2.5.                                Part 5
-------------------------------------------------------------------------------


STOREROOM
---------

F: Press the eye of the swordfish to knock the salt down from the shelf. Get
   the salt. Climb back up to the swordfish.
W: Move to the right side of the bin.
F: Get the cover on the bin.
W: While Fingus is holding the cover, use the salt on the fellow in the bin.
   Use the pots to get the file. Move to the ledge at the top-left corner of
   the room.
F: Pull the rope at the right side of the room.
W: While Fingus is pulling the right rope, pull the left rope.
F: Use the file on the chain above the cage. Get a thumb tack from the wall.
   Move behind the cook.
W: Use the salt on the meat balls. Quickly climb up to the ledge above the
   cook and move to the bottom of the step.
F: Use the thumb tack on the case when the cook is grabbed.
W: When the cook throws the meatball up into the air, quickly use the kind
   elixir on the meat ball.


THRONE
------

W: Get the pepper. Use the stool on the cornice.
F: Use Winkle's hands to land on the top path.
W: Move to the eyeball at the right side of the area.
F: Press the switch on the right pillar.
W: Go through the door in the eyeball to arrive on the top path.
F: Go through the right ear.
W: This part can be quite tricky, as Winkle must walk through the right ear at
   the same that Fingus pulls the tongue on the left pillar. Start by moving
   Winkle to the right pillar and then have him walk toward the right ear.
F: Just before Winkle enters the right, ear, pull the tongue.
W: Winkle should appear from the left eye and get the crown from Amoniak. Move
   to the tongue.
F: Go through the left ear.
W: Just before Fingus enters the left ear, pull the tongue. A cockroach will
   appear from a hole at the bottom of the steps.
F: Drop down to the bottom path and move to the hole.
W: Use the orifice to distract Glotziok.
F: Use the glove on the hole to get the cockroach. Use the cockroach on the
   hole and then use the kind elixir on the cockroach. Move to the eyeball.
W: Climb back up to the top path, go through the left ear and press the switch
   on the right pillar to open the door in the eyeball.
F: Go through the eyeball door.
W: Walk through the right ear. Pull the tongue on the left pillar.
F: Walk through the right ear while Winkle pulls the tongue. Another cockroach
   will appear from the hole at the bottom of the statue. Go through the left
   ear and drop down to the lower path. Use the glove on the hole to get the
   cockroach. Move to the eyeball.
W: Walk through the left ear. Press the switch.
F: Go through the eyeball door. Walk through the right ear.
W: Walk through the right ear.


ARMOUR
------

F: Get a feather from the helmet. Use the feather on the can of red paint. Use
   the cockroach on the hole. Use the brush, pepper and kind elixir on the
   cockroach.


THRONE
------

F: Get the Prince Buffoon.


ARMOUR
------

F: Touch the stone on the tower to land on the window ledge. Open the helmet.
   Use the crown on the helmet. Go to the ledge below the machine at the left
   side of the area.
W: Go to the ledge below the machine at the left side of the area.
B: Use the machine.


MAP
---

W: Move to the point of the knife.
F: Get the match. Pick up the handle of the knife.
W: While Fingus is lifting the handle, pick up the point of the knife to move
   it.
F: Pick up the handle of the knife again.
W: Pick up the point of the knife again to move it.
F: Get the bookmark to cut it on the knife. Use the bookmark on the candle.
W: Use the match on the eye in the skull.
B: Kick the eye and it will break the glasses.
F: Get the glass shard. Use the glass shard on the ray to light the candle. Get
   the wax. Use the wax on the envelope seal. Use the imprint on the keyhole on
   the chest. Get the seed. Use the seed on the village on the map. Use the
   plant.
W: Use the plant.
B: Use the plant.


-------------------------------------------------------------------------------
2.6.                                Part 6
-------------------------------------------------------------------------------


OUTSIDE VILLAGE
---------------

W: Go through the hole in the beanstalk. Buffoon will hit Winkle and a bean
   will fall down. Get the bean.
F: Move to the left side of the stone.
W: Use the stone. Use the bean on the mole.
F: Get the mole's cap.
W: Use the match on the apples.
F: Use the cap on the bouncing apple.
W: Use the apple on the hole. Eat a mushroom.
F: Eat a mushroom.


DREAM
-----

W: Move to the left side of the star near the bowling pins.
F: Use the bowling pins.
W: Use the star when the bowling ball stops. Use the ball on the lid.
F: Stand on the right flagstone to make the safety pin appear. Use the bowling
   pins.
W: Use the star when the bowling ball stops. Use the ball on the lid. Stand on
   the right side of the see-saw.
F: Stand on the right flagstone to launch Winkle to the top of the rainbow.
W: Use the left feeler and a bubble will appear. Use the bubble.
F: Stand on the right flagstone after Winkle floats down to the lid.
W: Get the safety pin.
F: Use the bowling pins.
W: Use the star when the bowling ball stops. Use the ball on the lid. Stand on
   the right side of the see-saw.
F: Stand on the right flagstone to launch Winkle back up to the rainbow. Stand
   on the left flagstone.
W: Stand on the top flagstone to launch Fingus up to the rainbow.
F: Stand on the snail hat.
W: Press the switch above Buffoon.
F: Press the left feeler when Buffoon appears in the bubble blower.
W: Use the safety pin on the bubble.


PLANT
-----

B: Get on the right side of the catapult.
F: Move to the left side of the catapult.
W: Press the switch until the bird appears.
F: Use the left side of the catapult when the bird flies above Buffoon.


MOUNTAIN
--------

W: Pick up the stone.
F: Use the stone while Winkle holds it above his head.
W: Move to the top of the steps.
F: Pick up the stone.
W: Use the stone while Fingus holds it above his head.
F: Jump on the lion's head.
W: Throw the stone and Fingus will land on the giant's shoulder.
F: Move the head on top of the giant's staff. Drop down to the path and walk to
   the bottom of the steps.
W: Pick up the stone.
F: Use the stone while Winkle holds it above his head.
W: Jump on the lion's head.
F: Throw the stone and Winkle will land on the top-right platform. Jump on the
   lion's head.
W: Go through the hole in the giant's right shoulder. Throw the head.
F: Jump on the !!! section to bring it down to the same height as Winkle.
W: Jump on the rock. Use the rock on the left to make a bridge.
F: Walk across the bridge. Use the file on the cage. Get the key.


PLANT
-----

F: Use the key on the door. Enter the village.


-------------------------------------------------------------------------------
2.7.                                Part 7
-------------------------------------------------------------------------------


LABORATORY
----------

F: Use the fountain water on Buffoon. Use the pencil on the portrait.
W: Use the armchair to get the boomerang when Tazaar throws it. Use the pencil
   on the blackboard three times and Tazaar will drop the sponge. Get the
   sponge. Use the mug on Tazaar and a toothpick will appear.
F: Use the boomerang on the toothpick.
W: Get the toothpick. Use the toothpick on the skeleton. Use the sponge on the
   puddle to get the wet sponge. Use the pipe.
F: While Winkle is blowing the pipe, use the wet sponge on the smoke above the
   pipe to reveal the door. Go through the door.
W: Go through the door.


CAVE
----

F: Stand on the eyeball at the bottom-right corner of the area.
W: Move to the !!! section near the top-right corner of the area to launch
   Fingus up to the top of the skull.
F: Get the mouse.
W: Use the mouse on the mud to make the crocodile appear. Jump on the crocodile
   to land on the top-right ledge. Amoniak will reach out, so quickly use the
   boomerang on the teeth at the top of the area to make Amoniak drop Buffoon.
   A monster will appear from the hole, so quickly stand on the !!! section to
   save Buffoon. Use the wet sponge on the rock.
B: Stand on the eyeball at the bottom-right corner of the area.
F: Drop down from the skull and move to the left side of the rock.
W: Stand on the !!! section to launch Buffoon onto the sponge on the rock.
F: After Buffoon lands on the sponge, use the pencil on the rock to draw the
   door.
W: Quickly use the handle on the door to complete the game.


===============================================================================

3.                                Item List

===============================================================================


-------------------------------------------------------------------------------
3.1.                           Part 1 Item List
-------------------------------------------------------------------------------


BIG KEY
  While Fingus turns the spring key in the cuckoo clock in the wizard's house,
  Winkle throws the stone at the big key to knock it down. It is used on the
  cellar door in the fountain area.


BOTTLE
  After Winkle tries to take the sausage in the village, Fingus can take the
  bottle while the old men are laughing. After Fingus pushes the fountain,
  Winkle uses the bottle on the jet of water. It is used on the toad in the
  fountain area. Fingus uses the bottle on the kettle in the wizard's house.
  It is used on the flowers in the village to make them grow. In part 2, Winkle
  uses the bottle on the nymph in Kael's area. Winkle gives the bottle to Kael.
  After the mushroom has been used on the machine in Vivalzart's house and the
  clothes pin has been taken, Fingus and Winkle use the bottle on the container
  to transport to the dream.


EGG
  While Winkle is holding the chicken at the giant's area, Fingus uses the
  sausage on the head of the chicken to make the egg appear. After the matches
  have been used on the wood pile at the giant's area, Fingus uses the egg on
  the wood pile.


FLOWER
  Found in the village after the bottle has been used on the flowers. It is
  given to the notable in the village to make him sleep.


SAUSAGE
  After the flower has been used on the notable in the village to make him
  sleep, Winkle can collect the sausage from the roof. While Winkle is holding
  the chicken at the giant's area, Fingus uses the sausage on the head of the
  chicken to make an egg appear. It is used on the first pot hole in the path
  at the giant's area to distract the dog. After the giant is awake, the
  sausage is given to him.


SPRING KEY
  After Fingus has used the bottle and the matches on the kettle in the
  wizard's house, Fingus uses the kettle to reveal the spring key on the wall.
  It is used in the cuckoo clock in the wizard's house.


STONE
  Found at the fountain area after using the bottle of water on the toad.
  Fingus uses the stone on the mechanism at the right side of the roof. While
  Fingus turns the spring key in the cuckoo clock in the wizard's house, Winkle
  throws the stone at the big key to knock it down. In part 2, the stone is
  used on the ball in Tom's area.


WINE
  Found in the cellar at the fountain area after the door has been unlocked
  with the big key. It is given to the giant after he has been woken up.


-------------------------------------------------------------------------------
3.2.                           Part 2 Item List
-------------------------------------------------------------------------------


BALL
  After the boy at Tom's area has taken the ball, the ball is found when Winkle
  enters the bottom-left house and Fingus enters the top-right house. While
  Winkle stands below the basket at Tom's area, Fingus uses the ball on the
  player. Winkle then jumps to hit the ball when it is bouncing on the basket.


BONE
  Found in Vivalzart's house after Fingus has given the meat to the piranha.
  While Fingus is standing on the blue bin at Vivalzart's feet, Winkle gives
  the bone to Vivalzart.


CLOTHES PIN
  Found on the tube above the shelf in Vivalzart's house. Fingus uses the
  clothes pin on the hose at the left side of the area in the dream.


DRUMSTICK
  Found when Winkle uses the left headlight in the dream. Winkle uses the
  drumstick in the dream to get the stocking cap above the hole.


FLOWER
  While Fingus stands on the stone below the tree in Kael's area, Winkle uses
  the branch in the tree to send the flower down to Fingus. It is used on the
  stone at the left side of the mushrooms in Kael's area.


HONEY
  Found by using the stone in Kael's area after the flower has been used on the
  stone. After riding the bee, Fingus gives the honey to the nymph.


HOURGLASS
  Found by talking to Tom the clockmaker. It is used on the trench.


KIND ELIXIR
  Found on the shelf in Vivalzart's house. It is not used until part 5. After
  Winkle puts the salt on the meat balls in the storeroom, and Fingus uses the
  thumb tack on the case when the cook is grabbed, Winkle uses the kind elixir
  on the meat ball when the cook throws it into the air. After Fingus uses the
  cockroach on the hole at the throne area, Fingus then uses the kind elixir on
  the cockroach. It is used on the cockroach after it has been used on the hole
  at the armour area.


MATCHES
  While Winkle stands on the tail of the lizard in the wizard's house, Fingus
  can take the matches from the lizard's mouth. Fingus uses the matches on the
  kettle in the wizard's house. It is used on the wood pile at the giant's
  area.


MEAT
  After Fingus has been launched up to the chandelier below the vulture in
  Vivalzart's house, Winkle throws the worm at the vulture so that Fingus can
  drop down with the meat. Fingus uses the meat on the piranha.


MELODY
  Available when all three notes from the dream have been found. It is used on
  the bottom-left house in Tom's area to fix the clock.


MOSQUITO
  While Fingus is standing on the mushroom at the right side of the area in the
  dream, Winkle uses the pump on the saxophonist to make the mosquito appear,
  while Fingus catches the mosquito with the net. Winkle uses the mosquito on
  the left headlight in the dream to make the note from the drummer appear.


MUSHROOM
  After Fingus gives the honey to the nymph in Kael's area, Winkle gets the
  mushroom. Winkle gives the mushroom to Vivalzart. Winkle uses the mushroom on
  the machine in Vivalzart's house.


NET
  Found by using the drumstick on the stocking cap above the hole in the dream.
  It is used to catch the three notes in the dream. After Winkle uses the pump
  on the saxoponist in the dream, Fingus uses the net to catch the mosquito.


NOTE
  While Fingus is standing on the mushroom at the right side of the area in the
  dream, Winkle talks to the guitarist to make the first note appear, while
  Fingus catches the note with the net. The second note is found when Fingus
  uses the pump on the saxophonist and Winkle catches the note with the net.
  The third note appears when Winkle uses the mosquito on the left headlight.


PUMP
  While Fingus is bouncing on the spring in the dream, Winkle gets the pump by
  using the left headlight. It is used on the saxophonist in the dream.


TUNE
  Available when two notes from the dream have been found. It is not used.


WORM
  Found in the jar in Vivalzart's house. After Fingus has been launched up to
  the chandelier below the vulture, Winkle throws the worm at the vulture.


-------------------------------------------------------------------------------
3.3.                           Part 3 Item List
-------------------------------------------------------------------------------


ANVIL
  Found at the forge after the blacksmith has made the key. After Schwarzy at
  the well has been attached to the hoist by Fingus and scared with the false
  teeth by Winkle, the anvil is then used on Schwarzy to open the well.


CHEWING GUM
  After Winkle talks to Rustik at the guard's area, Fingus can quickly get
  the chewing gum from Stalopicus' mouth. Fingus uses the chewing gum on the
  cupboard at the guard's area to get the imprint.


DIVING SUIT - 1
  Found by Fingus in the cupboard at the guard's area after it has been
  unlocked using the key. It is used on the well after it has been opened.


DIVING SUIT - 2
  Found by Winkle in the cupboard at the guard's area after it has been
  unlocked using the key. It is used on the well after it has been opened.


FALSE TEETH
  Found when Fingus uses the meat on Amidal at the guard's area. After Fingus
  has attached Schwarzy to the hoist in the well area, Winkle uses the false
  teeth on Schwarzy.


IMPRINT
  Found by using the chewing gum on the cupboard at the guard's area. It is
  given to the blacksmith at the forge.


KEY
  After Fingus has given the imprint and the sword to the blacksmith, and has
  also jumped onto the bellows, the key is found by talking to the blacksmith.
  It is used on the cupboard at the guard's area.


MAYONNAISE
  Found in the guard's area. Fingus drops the mayonnaise on the ground at the
  right side of Grommelon. Fingus then climbs up to the roof and jumps onto the
  mayonnaise. After Winkle takes the sword, Fingus can get the mayonnaise
  again. Winkle uses the mayonnaise on Focus at the forge.


MEAT
  While Winkle uses the mayonnaise on Focus at the forge, Fingus uses the stool
  on the meat held by Focus. Fingus uses the meat on Amidal at the guard's area
  to get the false teeth.


STOOL
  Found at the forge. While Winkle uses the mayonnaise on Focus at the forge,
  Fingus uses the stool on the meat held by Focus. While Fingus stands at the
  right side of Otto at the forge, Winkle uses the stool on Otto. While Winkle
  talks through the moving statue's mouth at the well, Fingus uses the stool
  on the hoist at the left side of Schwarzy. Fingus uses the stool on the
  seahorse in the area with the mermaid. Winkle uses the stool on the cornice
  at the throne area.


SWORD
  While Fingus sprays Grommelon with the mayonnaise at the guard's area after
  jumping onto it from the roof, Winkle takes the sword. It is given to the
  blacksmith at the forge.


-------------------------------------------------------------------------------
3.4.                           Part 4 Item List
-------------------------------------------------------------------------------


GLOVE
  While Winkle goes through the cavity near the mermaid, Winkle can drop the
  shell from the top-right ledge so that it lands on the glove. The shell is
  then moved to find the glove. Fingus uses the glove on the blob at the area
  with the mermaid. After getting the parchment and the pearl from the bottle
  behind the blob, the glove is taken again. In part 5, after the cockroach has
  appeared at the throne area, Winkle uses the orifice to distract Glotziok and
  Fingus uses the glove on the hole to get the cockroach. When the second
  cockroach appears, the glove is used on the hole at the throne area.


LAMP FISH
  While Winkle is standing at the top of the ladder at the wreck, Fingus uses
  the lantern to make the lamp fish appear, which Winkle can then catch. It is
  used on the ??? section at the top-right corner of the wreck area to reveal
  the chest.


PARCHMENT
  After Fingus has used the glove on the blob at the area with the mermaid,
  Fingus can then use the bottle behind the blob to find the parchment. Fingus
  uses the parchment on the octopus in the area with the mermaid.


PEARL
  After Winkle has used the glove on the blob at the area with the mermaid,
  Fingus can then use the bottle behind the blob to find the pearl. It is given
  to the mermaid.


STARFISH
  While Winkle goes through the cavity near the mermaid, Winkle can then drop
  the shell from the top-right ledge so that it lands on the glove. The shell
  can then be moved to find the starfish. Fingus uses the starfish on the chest
  at the wreck area after it has been revealed by the lamp fish.


SWORD
  After the starfish has been used by Fingus on the chest at the wreck, Winkle
  uses the statue at the right side of the wreck to get the sword. After Winkle
  has been through the door in the wreck and pushed the skull out of the hole,
  the sword is used on the skull to remove the diamond.


-------------------------------------------------------------------------------
3.5.                           Part 5 Item List
-------------------------------------------------------------------------------


BOOKMARK
  After the knife has been moved twice at the map area, Fingus pulls the
  bookmark from the book to cut it on the knife. Fingus uses the bookmark on
  the candle.


BRUSH
  Made by using the feather on the can of red paint at the armour area. It is
  used on the cockroach after it has been used on the hole at the armour area.


COCKROACH
  After the cockroach has appeared at the throne area, Winkle uses the orifice
  to distract Glotziok and Fingus uses the glove on the hole to get the
  cockroach. Fingus uses the cockroach on the hole.


COCKROACH
  After Glotziok has eaten the first cockroach with the kind elixir on it, the
  second cockroach is found when Winkle pulls the tongue on the left pillar
  and Fingus walks through the ear of the statue. Fingus then uses the glove
  on the hole to get the cockroach. It is used on the hole at the armour area.


DIAMOND
  After Winkle has been through the door in the wreck and pushed the skull out
  of the hole, the sword is used on the skull to find the diamond. It is given
  to the mermaid.


FEATHER
  Found on the helmet at the armour area. It is used on the can of red paint at
  the armour area to make the brush.


FILE
  After the salt has been used on the fellow in the bin in the storeroom, the
  file is found by using the pots in the storeroom. Fingus uses the file on
  the chain above the cage. It is used on the cage at the mountain in part 6.


GLASS SHARD
  After Buffoon has kicked the eye from the skull at the map area, the glass
  shard can be found in front of the glasses. After the bookmark has been used
  on the candle, the glass shard is used on the ray to light the candle.


IMPRINT
  Found by using the wax on the seal of the envelope at the map area. It is
  used on the keyhole on the chest to make the seed appear.


MATCH
  Found at the map area. It is used on the eye of the skull at the map area.
  Winkle uses the match on Kael's apples outside the village.


PEPPER
  Found at the throne area. After the cockroach has been used on the hole at
  the armour area and the cockroach has been painted with the brush, the pepper
  is then used on the cockroach.


SALT
  Found by pressing the eye of the swordfish in the storeroom. While Fingus
  holds the cover of the bin in the storeroom, Winkle uses the salt on the
  fellow in the bin. It is used on the meat balls in the storeroom.


SEED
  Found by using the imprint on the keyhole on the chest at the map area. It is
  used on the village on the map to make the plant appear.


THUMB TACK
  Found on the wall in the storeroom. After Winkle puts the salt on the meat
  balls in the storeroom, Fingus uses the thumb tack on the case when the cook
  is grabbed.


WAX
  After the bookmark has been used on the candle in the map area and the glass
  shard has been used on the ray to light the candle, the candle will burn and
  the wax will appear. It is used on the seal of the envelope to make the
  imprint.


-------------------------------------------------------------------------------
3.6.                           Part 6 Item List
-------------------------------------------------------------------------------


APPLE
  After Winkle uses the match on Kael's apples outside the village, Fingus uses
  the cap on the bouncing apple to get it. Winkle uses the apple on the hole.


BALL
  After Fingus uses the bowling pins in the dream, Winkle uses the star near
  the bowling pins to get the ball. Winkle uses the ball on the lid.


BEAN
  After Winkle goes through the hole in the beanstalk outside the village,
  Buffoon will hit Winkle and the bean will fall down. It is used on the mole
  below the stone.


CAP
  While Winkle uses the bean on the mole outside the village, Fingus can take
  the cap from the mole. After Winkle uses the match on Kael's apples outside
  the village, Fingus uses the cap on the bouncing apple to get it.


CROWN
  While Fingus pulls the tongue on the left pillar at the throne area, Winkle
  walks through the ear of the statue to get the crown. After opening the
  helmet at the armour area, the crown is used on the helmet.


KEY
  Found at the mountain after the file has been used on the cage. It is used on
  the door at the area with the plant.


SAFETY PIN
  After Winkle uses the ball on the lid in the dream, Fingus stands on the
  right flagstone to make the safety pin appear. Winkle then uses the bubble
  to float down to the lid, while Fingus stands on the right flagstone. After
  Buffoon has been put in the bubble, Winkle uses the safety pin on the bubble.


-------------------------------------------------------------------------------
3.7.                                Part 7
-------------------------------------------------------------------------------


BOOMERANG
  After Fingus uses the pencil on the portrait in the laboratory, Winkle uses
  the armchair to catch the boomerang. After Winkle has used the mug on Tazaar
  in the laboratory, Fingus uses the boomerang on the toothpick. After Winkle
  has used the mouse on the mud in the final area, and has then stepped on the
  crocodile to land on the top-right ledge, the boomerang is thrown at the
  teeth at the top of the area to make Amoniak drop Buffoon.


FOUNTAIN WATER
  Available at the start of part 7. It is used on Buffoon. After the fountain
  water has been used, the mug will be left in the inventory.


MOUSE
  Found on top of the skull in the final area. Winkle uses the mouse on the mud
  at the bottom of the final area to make the crocodile appear.


MUG
  Available after Fingus has used the fountain water on Buffoon. It is used on
  Tazaar in the laboratory to make the toothpick appear.


PENCIL
  Found at the top-right corner of the laboratory. Fingus uses the pencil on
  the portrait in the laboratory to make Tazaar throw the boomerang. Winkle
  uses the pencil on the blacboard in the laboratory three times to make Tazaar
  drop the sponge. After the wet sponge has been used on the rock in the final
  area and Buffoon has landed on the rock, Fingus uses the pencil on the rock.


SPONGE
  Found in the laboratory after Winkle has uses the pencil on the blackboard
  three times. After Winkle has used the toothpick on the skeleton in the
  laboratory, he then uses the sponge on the puddle to get the wet sponge.


TOOTHPICK
  After Winkle has used the mug on Tazaar in the laboratory, Fingus uses the
  boomerang on the toothpick so that he can then pick it up. Winkle uses the
  toothpick on the skeleton in the laboratory.


WET SPONGE
  Found by using the sponge on the puddle in the laboratory after Winkle has
  used the toothpick on the skeleton. While Winkle is blowing the pipe in the
  laboratory, Fingus uses the wet sponge on the smoke to reveal the door. It is
  used on the rock in the final area to draw the door.


===============================================================================

4.                                 Credits

===============================================================================


Leandro Estellano: For a correction in the walkthrough.


===============================================================================

5.                          Copyright Information

===============================================================================


This file is Copyright 2008-2009 Tom Hayes. As it can be difficult to keep
track of websites that haven't posted the latest version of this file, please
do not distribute it without my permission. Send an e-mail to me if you would
like to post this file on your website and you will likely receive a positive
response. If you do post the file, please keep it in its original form with all
of the sections intact and credit the author (Tom Hayes) as the writer of the
file.


