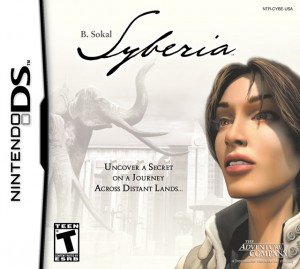
Walkthrough for Syberia (Nintendo DS)
Syberia Walkthrough for the DS by Mikekelly
Please post around the internet where it can be found and be helpful.
The DS version of Syberia is not the best version, but it is playable. This does give you Syberia on the go however.
CONTROLS! MAIN SCREEN! ICONS!
Quickly, I'm going to explain your main screen, and other controls that pop up often enough that you need to understand them. The DS is a touchscreen (obviously) and you'll be using only your stylus in this game. On the screen, along the top runs a procession of icons: [SAVE], [EYE], [PHONE], [ARROW]
Save-Saves your game. Click this often. Save every chance you get so you won't have to do anything again if you system's battery dies. [Eye]-Touch and drag it around and it will show what items/people you can interact with. If it turns into a gear, it's a mechanical item you can mess with. Lips mean you can talk to the person/automaton. An arrow means you can walk that way. This will help you when you get so aggravated because the game company behind moving this to a DS platform didn't bother to reprogram the graphics to suit and you're looking at crappy pixelated images of what used to be a good image on PC. Anyway.
[Phone]-Ocassionally you'll get phone calls from your boss or your mom. Sometimes you'll make phone calls. If you see lines coming downwards from the phone, that means it's ringing. Answer it. Most of the time I notate an incoming phone call, but I may have missed one or two as they aren't ever important. To place a call, tap the name and press the green button. To exit the phone press the red.
[Arrow/Inventory]-Pulls your inventory down, or pushes it back up. Click the down arrow once to pull the first row of your inventory down. These seven blocks will hold the most relevant items at the moment. Tap the spinning gear to bring the rest of the inventory down. Your bottom screen will now be the inventory and the top will be filled with the play screen.
In your inventory will be all the items you've found. With it fully down, you can read documents by dragging them to the right and placing them between 'read' and 'menu' and then tapping read. Once a document is up, it will show the page numbers in the bottom corner. Tap the enlarged document to flip through pages. When you're done reading tap the X. You can also tap items and hold them to see a description of them. This is how your inventory works.
PLACING ITEMS: Open your inventory by clicking the downward arrow. On this first row should be the item you need. Tap and hold, then drag to place it where it needs to go. Sometimes you'll need to do this a few times to get the placement perfect.
ICONS IN THE GAME: Occasionally you will see a:
BROWN CIRCLES pop up with a number in the middle and arrows running along the outside. Twirl your stylus around the circle in the direction the arrows point. The number represents how many circles you need to go. These show when you need to turn a wheel mechanism.
LEVERS are represented by slim 2D cylinders/ellipses with arrows running up or down inside them. Drag your stylus in the same direction, slowly! That's the trick: SLOW! And be sure to get all the arrows lit with your stylus.
BUTTONS on desks and etc are sometimes hard to see but they are always red. Pushing them may be the answer to why you're stuck.
TALKING TO PEOPLE: Tap a person/automaton. A new screen will come up with the person's face in the top screen and things to talk about in the bottom. There's always an introduction. Click next until the intro is over. Then click one of your options in the bottom screen. Click next to progress through the conversation. Going through all the talk options you are given will help to progress your game. When you're done talking (or if you're in the middle of a conversation you didn't mean to have or to skip the intro) tap 'quit.'
Here's the table of contents:
Chapter 1 Valadilene: The Legacy
- Hotel
- Village
- Church
- The Fountain Paths
- The Cave
- Factory
- The Station Chapter
2 Barrockstadt: University
- Guesswork
- Bandstand
- Barge
- Gatekeeper
Chapter 3 Komkolzgrad: The Mad Director
- Hand Thief
- The Mines
- Go Find Helena
Chapter 4 Aralbad: Yesterday's Past
- Getting In
- Ringing for the Valet
- The Blue Helena
Chapter 5 Komkolzgrad: Back Again
Chapter 6 Aralbad: And Again (FIN)
Now let the walkthrough commence!
Chapter 1. Valadilene: The Legacy
Welcome
You start your game with a cutscene of a parade/funeral procession. Your character, Kate, stands on the street (in white) watching. Afterward, she makes her way to the hotel. She is in the city to finish up the selling of the Voralberg factory.
Hotel
Walk across to the desk and pick up the little key in front of the automaton holding the small hammer. Place the key in the automaton's back, by opening your inventory (the down arrow in the right corner) and drag-dropping the key onto the back). Push the red button.
The hotel manager will appear. Tap him to talk about Kate, and then Mission. You'll meet Momo (the little boy) and learn that Anna Voralberg has died, which means that Kate being here won't do any good. Momo mentions that Hans is still alive...what's that about? Quit the conversation after he mentions your mail. Go up the stairs and around to the end of the hall. Your room is through the door on the right. Go around the bed to the little coffee table and pick up the mail on it. Read it (explained above). It's from Kate's boss who tells her that this account is very important. Press the arrow with a circle on its base (in the bottom right corner) to exit that screen. Call your boss by the [PHONE] icon. Press office and the green button. Press NEXT through the conversation. She'll tell Marson that Anna died. He'll fax her the notary's address (Anna's Lawyer). Go back downstairs and talk to the Hotel manager about Momo, Anna, and Mission. You'll get your fax. You can't read it, so don't bother trying. Go screen left past the manager to see some tables and a fireplace. On the backmost table are four gears. Pick them all up. On your way out the front door, you can tap on the bulletin board and get a welcome brochure. You can read it if you want. It only talks about the village and automatons. Leave the Hotel.
Village
The rain's stopped. Screen right up the hill is the church. Go left for the Notary's office, which is a couple of screens over. It has a colorful brown door and large windows. Walk up and see an automaton with his hand out. Place FAX2 in his hand. A lever appears. Pull slowly down. The robot will read it and you'll be allowed in. Tap bottom right and then go through the large round doors. Walk up to the lawyer/notary and talk to him. Don't bother to reintroduce yourself, it's pointless. The only thing you really need to talk about is the last option. He'll tell you that Hans is indeed still alive and as he is Anna's heir, you have to have his signature on the sales papers. Where is he? Who knows... The Notary throws you out so he can sleep, and you'll find yourself in the lobby again. Walk around the front of the desk, and next to the lamp is a T shaped key. Grab it and leave. Go back towards the hotel and get a phonecall from Bossman. He gets mad about there being an heir. Go past the hotel and up the hill, two more screens or so and into the church. You'll get a phone call from Mother Dearest. Anyway.
Church
Go all the way to the back of the Church by following the path on the right. The front doors are locked, don't bother. The back door leads into a room with a desk. Walk past the desk towards the bottom of the screen to see a room with an aclove and Christ on a cross. Walk there. To interact with the cross, touch the bottom of it and swing it sideways. Take the key from the niche.
Walk back and then over to the set of chester drawers at the far left of the room. Bring down your inventory and put the key to the keyhole on the left top corner of the first drawer. A brown column with arrows will appear to the left. Touch your stylus to it, and drag down to open the first drawer. Tap all over the drawer to get what you need. Put your stylus back to the arrows and drag all the way upwards slowly to close the drawer. Now drag your stylus back down to open the next drawer. Repeat the above steps until you have everything from the drawers. (You should find three items: Priest's Confession, Purple Punch Card, and Voralberg Key.)
Read the Priest's Confession to find out how Hans allegedly died.
Leave the way you entered. Go outside and back but stop at the door and steps in the middle of the side of the church. Here is where the gears you got from the table at the inn go. Place the gears/cogs/whatsits randomly until they click into place. (To be honest, I wasn't paying attention when I did it, and you can't look at the door again once you place the gears.) The door becomes an elevator and up you go. You come out in a small room with a window, pile of broken automatons, and one in the left bottom corner wearing a tophat. Tap slightly to the right of this tophat wearing machine to walk over. A new view appears. Walk over to the top hat-wearing thing and get a view of his back. Slip in the purple punch card. A cutscene happens. Notice the X in the hat of the machine atop Hans grave? Yeah. Obvious. Were you wondering why the key looked so strange? Leave the room and head back outside by way of the elevator.
Go around the front of the church and to the left of the screen. If you appear in the graveyard with many tombs and a large cross monument in the midst of it, you went too far upwards. Go back and tap a little way down and back on the screen. You should get a view of a broad cobblestone path with trees lining the way. Go forward (obviously). Walk up to the Top Hat and insert the key (if you're ever unsure of what item to use, the inventory automatically puts what you need in the front of the seven squares that appear when you touch the inventory arrow in the corner of your screen. By the way, to hide your inventory, just touch the arrow again.
A circle will appear with a number in it. I twirled my stylus around the circle until it disappeared. The screen backed up to show the tomb again. Walk forward to go inside. Walk forward again, and then again. Open drawer. Creepy. Not. Take the press cuts and the Valadilene music cylinder. Read the press cuts to hear of Hans falsified death, and of his other past injury, which permanently handicapped him apparently. One wonders how old Hans is now...it never mentions it. Anyway.
Go back towards the lawyer's office (Notary). When you reach it five eons later, if you're still alive and haven't passed on from annoyance at her slow (and sideways) walking, (I swear, couldn't they have given her a segway or something?), go back towards the inn, and then one screen past that, look along the wall on the right side and touch about halfway down it, where it looks like there's a break. She'll head over and reveal a gate. Go up to it and put the telescopic key in the hands of the big machine on the bottom. Walk forward once it swings open.
The Fountain Paths
Note - There are five paths leading away from the fountain in a circular pattern:
- The left path (from where Kate entered) leads to the Voralberg factory, machine floor, and Anna Voralberg's office.
- The second path to the left leads to an open warehouse/storage area.
- The third path to the left leads to the Voralberg train station.
- The fourth path leads to the Voralberg mansion and gardens.
- The last leg, where Kate is now standing, leads back to Valadilene.
Take the fourth path (the South East one) and walk up and around to the right of the mansion. (The front door is locked, so don't bother.) At the back of the mansion is a retractable ladder contraption which will need a key. Go screen right and you will come upon a maze. Go forward.
In front of you on the right is a broken statue that does nothing. Go left instead and then forward. You will see another gate at the far left of the screen and an opening in the maze in the middle of the screen. Go to the middle and get the key out of the wall fountain. Go out and back through the gate (towards the bottom of the screen) and then out of the maze.
Go back to the mansion to the retractable ladder I mentioned. Use the key. (Place to the left of her, near the circular wheel.) A ( 1 ) will appear. Trace your stylus clockwise until she begins to climb upwards (so very slowly). You'll now be in an attic.
Go left and walk up to the desk on the left of the next screen. Take the ink bottle and the diary. Read the diary. It's 59 pages long. It takes forever and it's boring. If you want to skip reading it, I'll summarize it below and spoil it for everyone.
Anna's Diary Tells of her brother's accidental fall after they discovered a cave with prehistoric drawings of mammoths. He hit his head and was in a coma for a week. After waking, doctors predict he will be mentally and physically disabled forever. The Father takes him to Paris but those doctors say the same thing. Hans (the brother) prefers Anna's company to all others. One day, Father takes Hans to the factory and Hans builds little robot mammonths and designs a new production line. Apparently Hans is gifted in building automatons.
Years later Anna is sad to leave but she goes off to University and Hans and Father build up the Voralberg factory's reputation for amazing toys and automatons. Anna comes home after four years at Uni in 1938, and Hans tells her he is leaving to hunt Mammoths. He doesn't know they are extinct. Father forbids Hans' leaving, so Hans runs away and Father fakes a funeral. Dr. Schmol is convinced to sign a death certificate without viewing the body.Anna knows her brother is alive somewhere and stays at the factory to care for her father and his crumbling sanity. The end.
Go back from the desk and to the right, then right again across the main room. In the next screen will be a huge clock. Walk to the back of the room to the next screen. You'll see two chairs in a little alcove. Go right one more time and you'll see a sketching of a mammoth done by Hans. Walk back to the main room again to meet Momo. Walk up to the boy after he scares you and talk about Mission and Help.
Go back to the sketch of the mammoth. Take the paper and pen that magically appeared in your invertory and lay it over the sketch. Drag your stylus back and foth over the paper to make a tracing. When you're finished, go back to Momo. Take the sketch from your inventory and drop it onto Momo. He'll tell you to follow him.
The Cave
Sadly, the game won't automatically take you there. You have to walk all the way back out to the street. Go back around the mansion and take the bottom-most path at the fountain. Go three screens left, over the bridge, across the random clearing (top of the screen) and over the wooden bridge, then one more screen (with the boat). After that you'll find Momo.
He won't tell you anything useful, so go left of him to see the stream to find you can't cross. Go up the steps to the right to find the lever on the dam is jammed. Go back to Momo and ask for Help. Take a minute to feel absolutely ashamed that a 12 year old boy is stronger than you. Now go back across the stream to the left of where Momo was standing. Walk across the stream and then down, and down, and down into the cave. Go around the stalagmite (or stalagcite, or etc.) in the middle. Go around some more. Pick up the doll. Exit the cave. Such a waste of time....
The Factory
Fifteen centuries later, when you finally get back out and across the stream and back to town, head to the factory. (From the first town screen, it's three screens to the right, and through the gate, where we came from.) When you get to the fountain take the NW (upper left) path. Go into the wall-less shed and to the very middle (back) post. It's got a miniscule lever on it. Pull down with your stylus and watch the magic unfold.
Go back to the fountain and take the SW path (left most) to the factory. Wow, an assembly line, look at it, you must. Walk over to it as well! Wow, excitement! Go back and up the stairs on the left and enter the left doorway.
Anyway, I had a hard time getting into Anna's office. Once you're in the middle of those three very big window doors (after you walk up the first flight of stairs) tap the top of the screen above the middle door. She should walk in. You can also attempt to walk a little bit past the farthest door (farthest right) then tap that door. Go across the room and to the back. Go to the book case and drag your stylus down over the little arrows that pop up. Put the voice cylinder into the thing that appears. Watch and be amazed. Now pick up the Hans and Anna toy, and go out and down the metal stairs. (I couldn't find anything on the desk, by the way, so I ignored it.)
Go left, left, left, then thru the door at the back. An automaton will catch your attention. Lower him with the lever in the upper right corner of the screen. Now talk to him and find out he needs parts to be finished. Be sure to get his punch card.
Go back out one screen and look at the small assembly line there. Touch the forklift looking thing and pull your stylus down. Watch the scene and then go right, right, to the big assembly line. Go through the door at the back and left. You'll be in a room with a pipe on the floor. Click bottom and middle and walk across the room. There's a chain on the right. Walk to it, pull your stylus down. Go left and pull the lever in the same fashion.
Go back out and two screens left. Go up the stairs, past the office, and to the end of the catwalk. You'll come to a control panel. Put in Oscar's punch card. Two levers will pop up with arrows next to them. It seems like the left one does nothing, and if you pull the right one she will tell you that it is jammed. This is fun (and also a major glitch many people are running into). Anyway, this is what you do: Slowly pull the left lever. The screen should black out for a second, then the panel will come back. Pull the right lever. Watch the scene.
Go down the stairs onto the main floor. Go right (you should see the assembly line in full) and then tap the right of the screen. You should see the two completed feet on this third screen. Go and pick them up. Tada! Take them to Oscar. Pull down your mini-menu, pick up the feet and drop them on Oscar. Then talk to him. He'll leave. You should too. Exit the factory.
Go back to the fountain and take the North East path (top right) and good luck with it too because your little icons are in the way!! Enter the Station. It's three screens away.
The Station
Walk down a screen and you will see stairs and the train across from a ticket booth. Enter the train by climbing aboard and then going through the door. HEY LOOK! OSCAR!! Talk to him and he'll tell you that you're in luck. The ticket booth is open. Go get a ticket at the ticket booth. Hey, look! It's OSCAR! YAY! And he's so good at sarcasm! So am I! Anyway. Get back on board to see....OSCAR! How does he do that? Whatever. Give him your ticket (drag and drop) and then your release papers.
He won't take them. He will tell you, though, that you must have the papers signed by the notary. Before you do that (or before you scream, chunk down the DS, and stamp the game cartridge to pieces) go back out the door and go right off the train instead of left. Walk two screens down and you'll see a wheel lever on the bottom right of the screen. It can be hard to find the exact spot, so spend some time with perfecting the touching of the screen to get Kate to walk up to the wheel lever. Drag your stylus down and then in circles as the screen bids.
Now, go to the Notary. (And just a reminder, you need remember to save a lot. You don't want to have to do any of this tedious stuff again, believe me.)
Back up a screen, left, left, and out of the station. Go back out, back past the fountain, and take the bottom-most path. Go down the street and then up to the Notary. But he is still asleep! Hmm...what to do? Make a forgery, of course! Go around the office to the back desk. On the part of the desk directly from where the Notary is resting, tap your stylus to find a stamp and pad. Drop your release forms on the desk, drag the ink you found in the attic earlier on there as well, and tap the red button. Tada! Forged permission complete. (SAVE!!!) Ensure that you pick up the paperwork that you need, to not have to travel all the way back later. Hope the law doesn't find you as you walk back to the train station and into the train. Give Oscar the paperwork again.
Oscar tells you that he still can't leave because certain items are missing from luggage. Luckily, you have what he needs. Also, if he mentions he can't leave because he wasn't programmed to wind up the train, it's because you didn't turn the wheel lever from earlier. Go back and do that.
Explore the train if you want, but what you really need to do is make your way down the train to the room with the pedestal in it. Drop the Hans and Anna figurine there, and the Mammoth doll goes to the right on the square pad that's on the bench. The voice cylinder goes inside the bookcase type shelves towards the back of the same room. Drop it on the top shelf in the right spot. Go back to Oscar. Give him your ticket. Watch the scene and wonder why she didn't sleep in the bed...
Chapter 2. Barrockstadt: The University
Guesswork (Named so because figuring any of this out without help is nearly impossible.)
Leave the train, left off of it, and then right, right, right, right, until she makes a comment about a winding thing (you'll be outside the station, btw). Go back to the station. Oscar will call for you. Go talk to him inside the train. He'll tell you that the people of the University want to speak with you. Go get the mammoth doll, as you will need it. Leave the train, left off of it, and then left to the triple stairs. Go right. You should see a man in the back. Talk to him. He's the station master and he knows little. Go left from the man and up to the boxy thing at the end. Look at the panel to see a phone number. Your phone should automatically list it. Now go back and past the station master. Your mom will call and there will be a pointless conversation about her new boyfriend.
Keep going, down the steps on the left of the screens. You'll come out in a place with a lot of boxes. On the left is a barge. Walk up to it and have a stupid conversation with some gypsy-looking Germans. They'll tow your train for 100 dollars.
Go back and right. You'll see the station master. Go the right of him to leave the station. Across the quad and you'll get a pretty view of the elephants. Up the stairs and into the college. Right, straight, and there's a mammoth skeleton in front of you. Go right. At the end of this hallway you will see a man. Talk to him about Hans and then drag and drop the mammoth doll onto him. He'll take off with it and your phone number.
Go back a screen and left (NOT up the stairs). There's a red door at the top, but ignore that one and go left. There's another red door. Go through there, and walk to the bottom right corner. You'll see three men atop a high desk. Talk to them about Kate, Hans, Money, and Train. They'll tell you to fix something that Hans built and they'll give you money to get your train out of their station by paying those gypsies.
Now go back and through the door I told you to ignore. You'll be in a library. From where you enter, go right, and around until you see a ladder. Climb and get the inverted book on the right. It won't disappear from the shelf, but a book will be in your inventory called the Museum guide. Read to learn of a mushroom that enhances eyesight.
The Bandstand (How To Fix It)
Go back to where you gave that man the doll and then tap the bottom of the screen to find a door that leads to the lab. Go in and walk up to the station on the left. There is another voice cylinder on the middle shelf of the case you are shown.
At the back of the lab is the professor. Don't bother to talk to him. He'll tell you to go away. Go right of him and look at the end of the farthest back station. On the end is a pile of silver rubbish. Tapping on it will pick up a test tube holder. You'll need those.
Go back to the train and place the new voice cylinder under the Hans and Anna figurine. Listen. Now exit the train and go right off of it. There's a ladder in the background. Climb it twice. Drag and drop the test tube holders onto the mechanical bird. Now attempt to grasp the holders with your stylus and drag it across the nest to pick up the different looking egg. Good luck with it. It took me forever because the stylus won't properly grasp the holders and every time I attempted to slide the stylus over the screen, the holders refused to move. Keep at it. Eventually the egg will move to your inventory.
Congratulations! You just saved a nest from a Cuckoo egg. In my experience, this version of the game goes to no length to explain the cuckoo thing. The PC version does. The PC version also has much more substance.
Go back to the courtyard of the Uni (the place between the mammoths flanking the entrance, and the actual entrance (with tigers flanking it). There's a little gazebo. On the right of it is a little walkway/bridge. Tap it. She'll walk along the back and to the bridge. Examine the door on the very front.
The egg goes on the right to balance out the weight mechanism. The activation spot is very difficult to find for this, its to the left a little bit of the cup in the scale. The door will open once you spin your stylus around the wheel twice (or thirty times as I had to do).
Go in and down the ladder. Pulling the lever on the right will start the Bandstand up. Go talk to the rectors about money. (Seriously? They couldn't find a weight of some sort to open the door? They couldn't climb down the ladder and pull a lever? And she gets a hundred dollars for that? Really?)
The Barge
Go pay the gypsies. You'll get a key. Go back to where the control panel with the phone number on it was. (To the left of the entrance and Stationmaster.) Call the number and press next a lot. They'll tell you to operate the lock manually. If you had read all the text during the phone call, it told you to press 4 for local lock, then 2 to lower the water, then star ( * ) to input. So, press 4,2,*. You should hear a little click after each button and then a movie of the water lowering. Now look at the panel again and press 4,1,* to raise the water again so that the barge will move to the front of the train. Go there now (from in front of the station master go over the arched stairs and then left off of them. From there, to the right to get to the front. Go one screen past the front and see the gypsies and the barge. Talk to them and a chain will be attached and then they'll tow you along. Except, you aren't smart enough to jump on the train, so now you get to walk to where they pulled it. Haha, ten years later....
Except, once you get two screens along, your phone will ring. Great. Go back to the UNI. Go left from the mammoth skeleton in the middle of the main hall, and up those steps. Go right a screen. Tap the center of this screen (should be a red carpeted aisle surrounded by seats) and his lecture will start. Blah blah blah...mammoth people...Blah blah blah...lived off mammoths...Blah blah blah...mammoths died out and the people lived off frozen carcasses...Blah blah blah...not much else is known...Blah blah blah...a small herd of mammoths is believed to still be alive in a place called Syberia...Blah blah blah... After that (which I madly tapped the stylus on the screen to get through it), you'll be in the main hall
Go right, right, to the lab. He's at the back, so go and talk to him to get your doll back and to hear some info on Hans. Tap Mission and then tap Yangala-Cola (or whatever) and he'll say he has some mushrooms in the lab. Go to where you found the test tube holders and they will now magically be there. Get them. Leave. When you get back to the train station and see the Station master, he will stop you and gift you with a bottle of wine. Thank him and continue on to the wall, where your train sits. Get on the train and put the mammoth doll back, and place the new voice cylinder with the other. If you talk to Oscar, he'll just tell you he's completely useless and you're on your own with the train moving. Anyway. Go out of the train and go right to the other side of the tracks. If you look, there's a lever on the boxy mechanism to your left. Go and turn the lever twice. Get back on the train. Talk to Oscar. Leave the Uni. YAY! You get to go somewhere much more frustrating!
The GateKeeper
Just kidding, you don't get to leave the Uni yet! Too bad! Exit right off the train and walk up to the ticket booth. Get a ticket from...OSCAR! He'll tell you as well that you need a visa. Walk around the ticket booth to the back (you can see a path) and enter the door that's on the wall. Go up the utility stairs and then towards the bottom of the screen, across the walkway, into an observation room. Talk to the man, look in the telescope (focus it by the arrows on the right side), realize it's a tree, look on his desk, drag wine onto both wine glasses and the mushroom powder onto one (this increases eyesight if you remember). Talk to the captain, go back to the ticket booth, drag and drop the visa onto Oscar. Get on the train. Drop your ticket onto Oscar. Leave the Uni!!
Chapter 3 Komkolzgrad: The Mad Director
Hand Thief
But you won't get far. Walk right off the train and then to the front to find Oscar. He'll tell you to go find a way to wind up the train. Go left from there and keep going until you see the tower-type structure on the left. She'll climb up. You'll see a bed. Walk up to it and take the voice cylinder, the blueprint of the worker robot, and the handle. Walk back a screen and go to the right end of the bed. Insert the handle, pull the lever slowly, push the red button next. Pull the lever again to back the 'bot up. Exit.
You'll see a man running. Follow him by entering the middle red-lit doorway. It's locked. Go to the train and find Oscar in the bedroom all tied up. His hands are gone, there's shears on the floor, so pick them up and clip the bonds. Put the voice cylinder in the pedestal and learn that Hans was working for the Russians.
The Mine
Go out of the train and go the opposite direction (away from the worker automaton you used to wind up the train). If you go a few screens you'll see some boxes on the left, and a mine entrance behind those. Enter the mine. Walk down until you come to a screen with a TV hanging. From there, tap the right of the screen. You'll come to a screen with a large organ (piano-type instrument, not bodily things).
Tap the bottom of the stairs to walk over. You'll see a stopped automaton and a screwdriver. Take the screwdriver and go back to the screen with a TV. Continue on. The next screen shows waist-high U-shaped fencing. Walk around to the left and towards the bottom of the screen. You'll be a new room with some stairs in the back, a pole in the middle, and a cylinder with a triangle warning stamp on the right. Near you is a ladder. When you walk to it, there's a square piece of metal with an etching on it. Apply the screw driver to the two bolts and walk up.
Go Find Helena
There's a door on the left. Inside is a man. Kate makes some bold statements. Talk to him. He's Borodine and he's made this factory into a giant piano to accompany Helena, the world's greatest singer. He wants you to find her. After you talk, he'll lower a room that he built in tribute to her. Go look. It's down the ladder and at the back. Go all the way to the back and look in the open dresser drawer. There are a photo album and some letters. Take both. Read them. The letters are from Borodine to Helena. The album has pictures and captions of her with a Franck Malkovitch...Kate's mom's boyfriend? Call your mom. Franck will tell you that Helena retired to Aralbad. Go back to Borodine and talk to him about Aralbad and Mission.
He'll tell you to go to the Cosmodrome via monorail. It's one screen back at the right back. Get in. Go. At the new screen walk around and down to come out in big clearing with stairs in the back and a little left. Go up those, then right (remember this screen because you'll need to go left later to the FOGHORN). You'll see another set of small stairs, go up, and then another set that leads into a cylinder shape with a blue circular opening. Go in to find living quarters. The man is at the back but he's nowhere near sober. You can talk to him, but to get anywhere, you need to pick up that vodka bottle on the ground at the back. He'll go outside for some air, fall off the railing, and you'll be back in the bunker...Above where he was sitting in a cabinet. There are a letter and a key you need. The letter talks about how the Russians thought Hans was useless and they fired Boris and all his pilot buddies.
Go outside and look at the control panel. Insert the key at right silver lock. Pull the rightmost lever, and then the leftmost. Go down and around towards Boris and see a wheel by the railings. Turn it, then go back to the control panel and pull the middle lever to wake up Boris. Go back and talk to Boris about everything. Go right to the Space Compound. Go to the right and forward. Go forward again and you'll need to drop the key on the airship. Go in. On the right of the automaton is a lever. You can use the [EYE] to find it. Pull. It's jammed. Talk to Boris. He wants to see the stars.
Go to the Space compound but go left this time. There's some stairs to the right.They take up to the control room. In there, at the control panel on the right, you'll see that there's a Voralberg key already in place. Take the little square thing on the right, and go talk to Boris. Thank God he's moved closer to you. Drag the blood tester (square thing) onto him. Test his blood in the control panel by putting the square back and pulling the rightmost lever and find out he's too drunk to be of any use. Click on the square to take it back, then click where it was to test Kate's blood. Put the square back. Pull the lever and off he goes. But he threw something. Go get it by the entrance to the Space Compound. Go back past the bunker, and left to the FOGHORN. Go down the catwalk and to the end. Drop the lever Boris left you onto the mechanism and it releases an eagle to scare out all the birds from where you're about to leave. Go back to the airship, pull its lever, and it's hasta-la-vista to this place.
Chapter 4. Aralbad: Yesterday's Past
Getting In
Come down the stairs and walk screen forward to the fountain square where you receive a call from an angry and impatient Mr. Marson. Afterward, go screen left past the fountain and enter the Hotel Kronsky. Talk to the manager, Mr. Smetana, about Kate, then Mission. Mr. Smetana seems accommodating, but you're not staying. He's not so accommodating about revealing the names of current or past hotel guests, however, including Helena Romanski. Walk left away from the desk, and the screen left again. There are gates at the back but when you try them, they are locked. To the left is a shelf. On it you'll need to grab the detergent, a green bottle. Leave the hotel and go back to the fountain. Put the detergent in. Go back into the hotel and talk to Smetana. He'll rush off outside to clean up the mess you made. Go around to the back of the desk, and look at the items on the desk. There's a guest registry book and right below that is a red button. Push it and go through the gates, which are now unlocked.
Ringing the Valet
You'll be in a pool area. Go screen right and down the hallway. There you'll see another gated entrance with a seahorse on them. Go through and pick up the slip of paper on the floor. It has an access code: 0968. Go out of this room, and then tap screen left to be on the other end of the pool. Go across (screen left again) and you'll be in the lounge. There's a gated doorway with a control panel on the right of it. Punch the code 0968 in and go through the door (and then another) and out onto the pier.
Keep walking (3 screens about) until you see a gazebo. Walk-in and find Helena. Talk. She'll want to go back in and tells you to call James, her valet. Leave the gazebo (and get yelled at by Smetana) and come screen bottom to a little bell mechanism on the railing. Pull the lever, but nothing will happen so tap the bell and take it with you. Go back down the pier to the screen where you can see the hotel door but don't go in yet. Look along the (your) left side railing and see a small pole sticking up. Examine (use the [EYE] if you have to) it and place the bell there. Ring the bell again by pulling the lever. Nothing happens. Go back into the hotel.
Once you're back in the lounge, go up and you'll find the bar. Now because the pixels in this game are straight from the PC version, you probably can't tell that standing beside the bar is an automaton with a wheelchair attachment. Talk to him and he'll say he doesn't want to go outside. But Kate offers him a gas mask and he'll go. He brings Helena in, and you can talk to her by walking up into the bar. She'll talk about her glory days a little and then mention a wonderful drink that saved her voice. You have to make that drink. Good luck. No, just kidding. That's why I'm here, right?
The Blue Helena
Now I'll be honest. I have no idea how I got the phone number for the hotel in Paris. But it's in your phone (or should be if you've followed this walkthrough). You probably found it behind the front desk, but I can't promise that. Anyway, dial up the hotel on your phone and get the recipe:
Blue Helena Recipe:
1 measure of vodka
1 measure of blue curacao
1 measure of honey (hmmm, not crystallized)
a dash of lime
add ice cubes
shake
Below where Helena is sitting on the inside of the bar is a cabinet. Look at it and take the lemons and the honey, which is crystallized. It needs to be liquid. Go back to the pool by way of the entrance by the gated doors to the pier. (In other words, exit bar by walking screen right. You'll see the doors to the pier. Go past them (screen bottom left.) Go to the other side of the pool, past the SeaHorse gates, and down that hallway again. Midway you'll see a square hot tub type pool. Stop there. Behind it is a wheel. Turn. Stick the honey in the hot water. Go back to the bar. Look closely at the bar and place the lemon on the left side on the right of the first bottle. The honey goes all the way to the right underneath your inventory up arrow. The vodka you found at the Space Compound goes the left of the honey. Now push the middle white piano key at the bottom of the console. Helena drinks and gets her voice back. You'll leave Aralbad now.
Chapter 5. Komkolzgrad: Back Again
You'll get to hear Helena sing so don't tap the screen. Just watch. To be honest, Celtic Woman are way better. At the end, Helena ends up in a cage because the director is out of his mind. Sometimes I miss the games where you have a gun and just mow everybody down instead of putting up with their stupid ideas and demands. Walk up the stairs towards the cage and then look at the door on the cage. There's a padlock. Use
the shears. Ms. Impatient is free. Walk into the cage and use the screwdriver to get the hands back. Walk out of this area to talk to Helena. For no explainable reason, Kate hands over the hands and tells Helena to run.
Kate will get out another way. Damn plot holes. Walk up the mine towards the train (you know the way), and you'll find a clock attached to some TNT. In the cutscene, you run. But you don't get to see the explosion. If you try to go back you get a nice view of everything collapsed upon itself. Guess you can't go that way. But behind you and slightly right is a giant air tunnel in the wall. Crawl out. Go to the train and talk to Oscar. He'll agree to leave, but the madman's following you. Have to fix that. Go back towards the mine and look in the boxes with the yellow triangle. Hehe. Boomsticks. Take the dynamite. Walk back to the automaton that wound your train, get close, drag and drop the dynamite onto his leg. Yay. Go back to the train. Boom, and you get to leave.
Chapter 6. Aralbad: And Again (FIN)
(By the way, you may have noticed the spelling errors in the conversations while in the mine. Well, now they just get horribly worse. I guess the producers of this game were in a hurry...) Walk rear screen and get a phone call. Oh, all right. Go get the package from the hotel. Talk to Smetana and then walk past him to the left corner of the desk to look in your package and get the Mammoth Automaton. Helena now wants to see you. Go to the lounge, but get a phone call on the way. Yay! She hangs up on that jerk. Go to the bar and talk to Helena. She mentions that she was possibly in love with Hans. She tells you to go see the supply plane. Go out to the pier for a big surprise....and the most anti-climatic ending in the history of gaming...



,_con_logo__medium.png)
