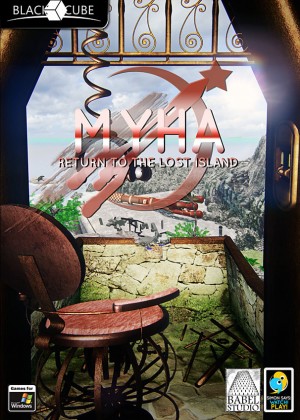
Walkthrough for Myha Return to the Lost Island
Solution based on the Beta version of Myha: some puzzles and the location of some objects may have changed. This walkthrough is not always accurate and complete but should help a lot if you're really stuck.
The location of the following objects will not be indicated with accuracy (or not indicated at all) in this walkthrough:
- location of the coloured spheres
- location of the mechanical birds
- where to find the letters, codes....
- where to unlock the different log entries (4 mission log entries, and 8 low quality / distant audio messages from Forté)
- how to obtain the Steam 100% achievements
The audio messages (log entries) are of low quality on purpose: the character is talking in your head by telepathy, but he's very tired and the reception is not good. Don't hesitate to check in the Game Options with Escape for audio help (subtitles could have been added in the latest version). Anyway the audio messages are not required to solve the puzzles, so don't worry, they were added more for the story/immersion. Take a look at them if you know the other Black Cube games (ASA, Catyph...) and want to discover more of the whole story of P. Forté and the Cubes.
I - Beginning, lost on the island
After the introduction, approach the mechanical bird near you. It holds an object in his beak but flies to the old observation tower.
Go to the tower, go up the stairs: my door is closed. At the four corners of the tower there are lanterns with symbols. Locate a drawing on the ground towards the door, an anchor with a boat wheel.
Return to the starting point of the game, in the forest, and advance to the great waterfall near a bridge. Each pillar of the bridge has a lantern with symbols on it. On the ground is the drawing of the anchor with the boat wheel. Note on a sheet of paper the orientation of this drawing, and copy the position of the lamps according to this configuration. Each lamp has 4 possible faces: black, tulip, I and U.
Return to the foot of the tower and turn the lights in the right position: rely on the orientation of the anchor design on the ground to place the faces correctly.
The following faces must be turned towards the stairs:
- left lantern: I
- lamp left bottom: U
- right lantern: tulip
- lantern right bottom: U
The door should open.
In the tower there are different things to study, but most of them are unusable for the moment. At least the different windows can be used to study the geography of the island.
On a wall there is an electrical locker. Look inside and change the position of the switch. The fuses blow and the chair becomes unusable. We'll have to fix this later.
II - Mechanical birds
Through a window, the bird is spotted with an object in its beak: it is behind a closed gate. To open the grid you have to match each symbol with a bird song. The first thing to do is to visit the island to find all the birds (knowing that the first one is behind the gate). Each is associated with a symbol corresponding to the grid.
Back in the tower, you have to turn each symbol to play different songs, and stop for each symbol at the bird song that corresponds to it according to your observations. It is difficult to transcribe the right combination here, but here is a transcript of the songs for each symbol:
- symbol 1, bird of range 1 : <<< cui ... cui... ! >> (ordinary, 2 sounds)
- symbol 2, bird of beach 2: <<< tu tutu cui ! tuuuu cuicuicuicuicui... >> (long, singing)
- symbol 3, behind the grid: (compare directly with the bird singing next to the grid)
- symbol 4, mountain gate: <<< huhii hihuuu >> (whistle)
- symbol 5, stairs leading to rocket: <<<< YAAAH ! AH! >> (aggressive)
If this does not help you, it is advisable to memorize each bird's song, or to take your own sound notes to simplify the task. This puzzle is not difficult with a little organization. ALso you can find "sound help" in the Options Menu (escape).
Once the gate is open, retrieve the remote control released by the bird. This is the remote control of the rocket.
III - The cave of the mountain
Go to see the rocket, use the remote control to the door (mouse wheel to select an object).
Inside, retrieve a red metal bar, near the locked door leading to the reactor.
It is then a question of opening the door of the mountain, overlooking caves. There is a digicode next to it, so you have to find the right combination. Go to the starting forest, and after the big waterfall you will find an old classroom. Here you can learn the symbols of Myha's language and learn to count with them. By using cubes, puzzle pieces, colours and the abacus with small rings, we can synthesize the information at our disposal. The ideal is to put the puzzle back together on paper. Some parts certainly fit together. For the others, note the possible combinations and use the colour code and the abacus. Once you understand that the green on the left is 1, and the black on the right is 10 (number of wooden bars), you can already associate new colors with new numbers. This may seem tedious, but this puzzle brings real satisfaction when you solve it by your own means, especially since learning numbers, colours and symbols will be useful several times: it is therefore an enigma not to be overlooked.
You can find Color blindness help in the Options Menu.
If it is too difficult, by sorting in ascending order, cross-checking the symbols and eliminating the double possibilities by logic, we obtain the following order:
0 white (dot), 1 green (I), 2 grey (U turned over), 3 brown (tulip), 4 yellow (square black), 5 red (star), 6 pink (tipi), 7 purple (butterfly), 8 orange (fish), 9 cyan (croissant), 10 black (man).
When we search towards the school, we find a letter that says that a child, little Bel, has strange behavior. He left something on the page.
Go to the beach, to the right after the stairs, and passing by the large stone arches you will find carved in a rock a fish. Press the eye to discover different things. In particular, we learn that Bel engraved symbols towards the door of the mountain.
Back to the mountain gate, looking more carefully if you hadn't already seen them, you will indeed find 3 symbols engraved on the digicode: fish, I, tulip. Now we know how they match in numbers: 8 1 3. Enter the code to open the door.
IV - The generator room
Inside the cave, retrieve various information in the left passage. Then use the lever to operate the mechanism of the old wooden door. The bottom board, rotten, breaks. Use the red metal bar from the inventory to replace it. Pull the lever to finally open the door.
Joining a mechanism with levers and gears: this is the control of the bridges. By using different combinations of levers, you can access 2 different places:
- a treasure chest (opposite)
- the generator room (left)
Try different combinations to find the 2 accesses. The possible orders are:
- a lever release slide (left)
- the gear lever (next to it)
- a push button to start the engine (white)
- a hand brake that locks the entire device (large lever)
Always unlock the handbrake first. Then change the position of the lever (3 positions ! Down : lower the bridge. Up : change the path)
Put the slide lock back on, otherwise, the adjustment is not taken into account and the main gear rotates in a vacuum.
Then start the engine to see the result, and remember to put the hand brake back on to stabilize the setting.
Going to the treasure chest first is the direct way. Getting some information.
Then go left into the generator room. Here you can activate and deactivate at any time different devices on the island. We will notice in passing that everything is powered by a Black Cube in the heart of the machine.
Test different combinations, knowing that there is a power limit, and if you activate too many devices the main fuse blows again.
Locate each symbol to enable/disable the devices according to your needs.
- stars: activates access to the planetarium afterward
- tower: allows you to use the observation tower chair
- circular symbol: represents the dome seen from above: dome power supply
- related points: to disable the dome force field
- box (broken lever): keeps the stasis box active no matter what happens
- gearing in a door: power supply for the mountain door
- gearing: activates the gearing of the footbridge in the cave
- box in a door: supply of the door leading to the stasis box
- flash: main fuse of the entire generator
Since we have activated access to the cave and the generator, it is no longer necessary to power these two functions. The Dome force field must be deactivated. So it should be possible to activate everything else to continue the adventure with all the necessary operational devices. If the fuses are still jumping, you can deactivate the stasis box door for the time being. The important thing right now is to power the tower, the dome, the planetarium, and disable the force field.
V - The secret of the tower
Back in the tower. Change the switch in the electrical box (to the left) to activate the chair. It will solve the tower puzzle: open the drawer requiring a password under the desk.
First, look at the map on the desk: at the top left, 3 drawings represent the code to be found: a hand, a boat and a kind of sea lion.
Then, with the chair activated, it is now possible to rotate the view 360° with the mouse. Look for the drawn objects. For example, center the hand-shaped rock in your field of vision, then get out of the chair.
Walk around the chair from the back, go out on the balcony and look towards the roof: a copper band goes around the building and you can see a whole series of signs. Normally, a metal cursor directed by the chair has stopped at one of these signs: it is the first digit of the code.
Do the same for the old boat and sea lion to get 3 signs:
- a T lying on its side
- a point with a vertical bar, 3 horizontal bars
- a point surrounded by 2 vertical bars, a horizontal bar
Before entering the combination, play a little with the signs on the drawer: we see that they are all set to a default black point, and we have already seen the black point in the classroom: it is a zero. If you scroll with a left click, you switch to a bar, then two, then three, etc.: by deduction you understand that these are numbers: 0, 1, 2, 3, etc. It is useful here to copy some of the symbols in order to obtain the numbers used by the tower researcher. Note that after 9, the ten is symbolized by a dot with a vertical bar, the vignette by a dot with two vertical bars, and so on.
Enter the combination under the desk (if you have understood the correspondence of the numbers correctly, and noted the right signs, the code translates into 7, 13, 21), and in the open drawer you will find different things useful for the rest. In particular, there is a coded object that will have to be unlocked. The word to be entered must be 5 letters long. From the messages left on the desk, it is understandable that a researcher had settled here and quickly wanted to hide his research. The code is therefore linked to the researcher: try to guess his name.
Earlier, in the cave, in the left passage (near the lever), you found a message about a madman who blocked access to his tower, and who spends his time at the swamp (where the next door requiring a code is located). We are told his name is Rolan!
Enter this name on the coded object, to unlock a Rolan letter with a password at the bottom: 8517.
VI - The mysterious stasis chamber
Go to the swamp from the beach to the second locked door (make sure to activate the power supply to this door from the generator - you can disable the power supply to the tower in exchange). Enter the code found in the tower on the digicode.
In this tunnel dug in the rock, you will pass Philip Forté's laboratory, but it is closed. Some controls can only be activated through the broken window.
By playing with the buttons you can:
- switch on the lamp (sun symbol)
- open the door at the end of the tunnel (button next to the lamp, on the left)
- send the Forté stasis capsule outside (right lever in position III, then press the button next to it)
Join the capsule that is now waiting for you outside. Inside there is a sick human being: it is P. Forté, the astronaut from your planet who disappeared the previous year, and who is waiting for your help. You will have to finish activating the stasis box: for this, see the sliding panel on the back. There is a lot of information, it is the final enigma that requires us to make a synthesis of everything that is on the island. We are still missing some information.
As you continue your adventure, make sure you find all the colored spheres that have been hidden here and there.
VII - A camera in space
In the rocket, you must have seen papers with explanations on angles. Take notes. For example, it says that d = rad(delta).D
Go into the dome with the blue roof. Retrieve letters, messages and parts of the log.
The chair is not activated properly. Look for the box with the switch (identical to the one in the tower) hidden outside the dome, and change the position button (right).
Sit in the chair: you will be able to observe space from the Ark, a spaceship that brought Forté to Myha.
From this view of space, we see a planet and moons or other planets (including Myha the little blue moon, and her green mother planet that we see in the sky while playing).
A tool displayed on the screen allows you to obtain approximate measurements.
- get the distance D from each planet or moon.
- determine the "delta" interval giving the angle of vision for each planet or moon: use the information found in the rocket. To do this, take the "a" value in the leftmost degrees, then the "a" value on the right of each sphere, and make the difference (right value - left value).
We get (it doesn't have to be precise):
- green sphere: D = 79000, delta = 11
- blue sphere: D = 83800, delta = 1.5
- yellow sphere: D = 105000, delta = 2.6
- red sphere: D = 136800, delta = 2.9
(orange and pink spheres to be determined by yourself)
It is then necessary to do the calculation as indicated on the rocket sheet: d = rad(delta).D
to determine the diameter "d" of each planet or moon.
You can use the calculator in the rocket to do this.
We get about:
- d(green) = 15,000
- d(blue) = 2,000
- d(yellow) = 5,000
- d(red) = 7,000
(d(orange) and d(pink) to be determined by yourself).
VIII - The planetarium
Then go to the planetarium, between the classroom and the rocket (if it is not already done, it must be powered by the generator). Get into the basket to access the control panel. There is a hidden message by clicking on one of the corner buttons at the bottom.
Then use the panel to recreate the map of the constellations on the ground.
- The left cursor moves the basket up and down
- the central buttons rotate in one direction or the other the different sections of the map defined by the right and bottom cursor
- the right cursor allows you to choose the section of the map: inner circle, outer circle, or at the same time middle + outer circles.
- the bottom cursor on 0 acts on the main circles. At the other positions, it allows you to rotate the small areas (the right cursor must be adjusted accordingly).
With a little practice you will restore the constellations. When everything is in place, look through the hole in each pillar. Look at which sphere is visible, and note the sign at your feet. We get:
- green sphere: a point surrounded by 2 vertical bars
- blue sphere: two horizontal bars and a point with a vertical bar
- yellow sphere: a square
- red sphere: an hourglass and a point surrounded by 2 vertical bars
As we have learned to translate these signs, we must obtain the following values:
- green = 20
- blue = 12
- yellow = 4
- red = 28
We have all the information required to solve the last puzzle.
IX - Final puzzle
Return to the Forté stasis chamber. The first table can be completed on a sheet of paper.
In the line of units (0 horizontal), we know that yellow = 4 (therefore 4 vertical).
In the tens line (10 horizontal), blue = 12 (so 2 vertical).
In the twentieths line (20 horizontal), green = 20 (therefore 0 vertical) and red = 28 (therefore 8 vertical).
Thus we obtain one symbol per color:
- green = snowflake
- blue = grass
- yellow = drop
- red = round crossed out
This allows the inventory spheres to be placed in the right place under the table.
The right part with cursors requires the use of the diameters of the planets obtained earlier. The main values on the left are, by deduction, quite high. We also know that the cross is worth 5.
We can, therefore, place the sliders in different positions:
0, 5 000, 10 000, 15 000
We know the value to use for each sphere and each color, and we have just seen to which color each symbol corresponds.
Thus we will place:
- drop (yellow) on 5 000
- round crossed out (red) on 7,000, i. e. between 5,000 and 10,000
- grass (blue) on 2,000, so between 0 and 5,000
- snowflake (green) on 15 000
Activate the box (front) and retrieve the Black Cube from the drawer. He's the one who brought you to Myha.
You have accomplished your mission by doing Forté a favor: a beam of teleportation arrives from the sky and brings you home.
Enjoy the closing video, and thank you for playing! We hope you enjoyed our small adventure!


